1. Ifihan
The Velleman K8057 is a two-channel RF remote control receiver kit designed for various control applications. This receiver features two relay contact outputs, offering both toggle and pulse functions, selectable per output. It is capable of learning unique 32-bit codes from compatible Velleman transmitters such as the K8059, VM108, and VM130T. The K8057 can store up to 31 transmitters and provides full software control without requiring hardware settings. Its code memory can be erased for security purposes, and LED indicators provide feedback on output status and functions.
2. Awọn ilana aabo
- Máa yọ agbára kúrò kí o tó ṣe àsopọ̀ tàbí kí o ṣe àtúnṣe.
- This product is a kit and requires assembly. Ensure all components are correctly installed according to the separate assembly instructions.
- Ma ṣe fi ẹrọ naa han si ọrinrin, awọn iwọn otutu pupọ, tabi imọlẹ orun taara.
- Rii daju pe fentilesonu to dara lati ṣe idiwọ igbona.
- Only use the specified power supply voltage. Voltage le ba awọn kuro.
- Jeki kuro ni arọwọto awọn ọmọde.
3. Awọn ẹya Ọja
- Two-channel RF remote control receiver with random code.
- Two relay contact outputs.
- Toggle or pulse function selectable per output.
- Pulse function with adjustable switch-off timer.
- Learns unique 32-bit codes from compatible transmitters (K8059, VM108, VM130T).
- Stores up to 31 transmitters.
- Full software control; no hardware settings required.
- Code memory can be erased for enhanced security.
- LED indicators for output status and functions.
- Special pulse mode: both outputs can be activated simultaneously by pressing two transmitter buttons.
- Suitable for various control applications including garage doors, home doors, lights, and car systems.
4. Package Awọn akoonu
The Velleman K8057 kit typically includes:
- K8057 Receiver PCB (Printed Circuit Board)
- Electronic components for assembly
- Awọn ilana apejọ
- Itọsọna olumulo (iwe yii)
Note: Transmitters (e.g., K8059, VM108, VM130T) are sold separately.
5. Eto
5.1 Apejọ
Before proceeding, ensure the K8057 kit is fully assembled according to the provided assembly instructions. Proper soldering and component placement are crucial for correct operation.
5.2 Asopọ agbara
Connect the appropriate DC power supply to the receiver's power input terminals. Refer to the assembly instructions for the exact voltage requirements and polarity. Incorrect power supply can damage the unit.
5.3 Output Wiring
Connect your desired devices (e.g., garage door opener, lights) to the two relay contact outputs. The relays provide potential-free contacts, allowing them to switch various loads. Ensure the load's voltage and current ratings do not exceed the relay specifications.
5.4 Learning Transmitters
To enable the receiver to respond to a transmitter, you must 'learn' its unique code:
- Press and hold the 'Learn' button on the K8057 receiver. An LED indicator will illuminate or flash.
- While holding the 'Learn' button, press a button on your compatible transmitter (e.g., K8059, VM108, VM130T).
- The LED on the receiver will change its state (e.g., flash rapidly, turn solid) to indicate successful learning.
- Tu awọn bọtini mejeeji silẹ.
- Repeat this process for any additional transmitters or buttons you wish to program, up to a maximum of 31 transmitters.
5.5 Setting Output Modes (Toggle/Pulse)
The K8057 allows you to configure each of its two outputs independently for either toggle or pulse operation. Consult the detailed assembly manual for specific jumper settings or software configuration steps to select the desired mode for each output. The pulse function may also have an adjustable switch-off timer.
5.6 Eriasing Memory
To erase all learned transmitter codes from the receiver's memory for security or reprogramming purposes:
- Rii daju pe olugba ti wa ni titan.
- Press and hold the 'Learn' button for an extended period (e.g., 10-15 seconds) until the LED indicator confirms the memory has been cleared (e.g., a specific flash pattern).
- Release the button. All previously learned codes are now deleted.
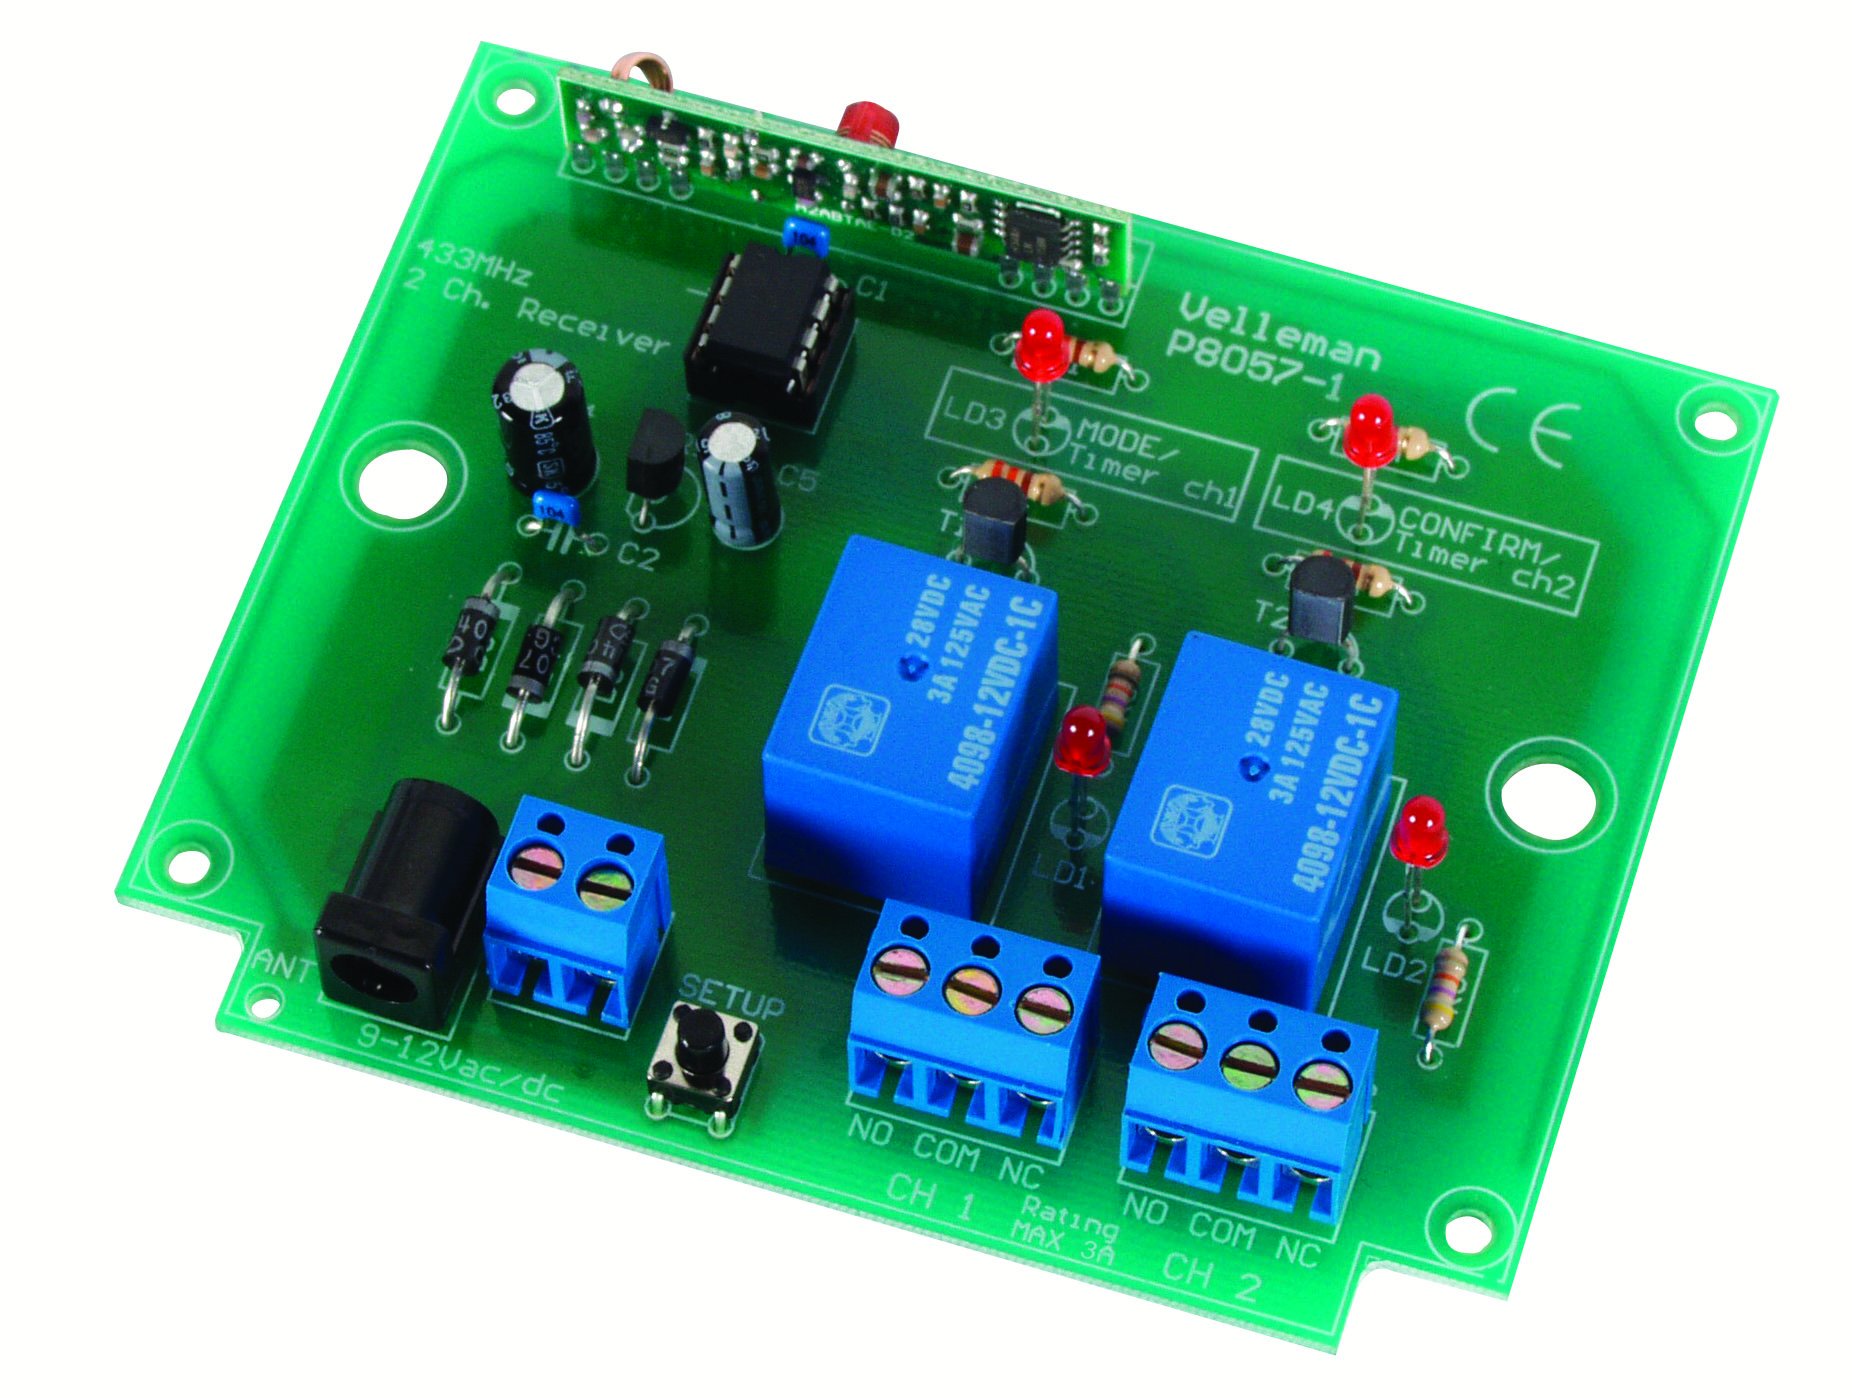
Àwòrán 1: Gbogbogbòò view of the Velleman K8057 receiver board. This image illustrates the overall layout and components of the receiver, including connection terminals and control buttons.
6. Ṣiṣẹ
Once transmitters are learned and output modes are set, operating the K8057 is straightforward:
- Ipo Yipada: Pressing the corresponding transmitter button will switch the output relay ON. Pressing it again will switch the relay OFF.
- Ipo Pulse: Pressing the corresponding transmitter button will activate the output relay for a preset duration (the switch-off timer). The relay will then automatically switch OFF.
- Special Pulse Mode: If configured, pressing both transmitter buttons simultaneously can activate both outputs in pulse mode, useful for specific applications.
The LED indicators on the receiver will provide visual feedback on the status of the outputs and any ongoing operations.
7. Itọju
- Jẹ́ kí olugba náà mọ́ tónítóní kí ó má sì sí eruku. Lo aṣọ rírọ̀ tí ó gbẹ fún fífọ nǹkan mọ́.
- Má ṣe lo àwọn ohun ìfọṣọ omi tàbí àwọn ohun èlò ìfọṣọ omi.
- Lojoojumọ, ṣayẹwo gbogbo awọn asopọ waya lati rii daju pe wọn wa ni aabo.
- Rii daju pe agbegbe iṣẹ wa laarin iwọn otutu ti a sọ ati awọn sakani ọriniinitutu.
8. Laasigbotitusita
- Receiver not responding to transmitter:
- Ensure the transmitter has fresh batteries.
- Verify the transmitter has been successfully learned by the receiver (refer to Section 5.4).
- Check the distance and any obstructions between the transmitter and receiver.
- Rii daju pe olugba ti wa ni titan.
- Outputs not activating:
- Check the wiring to the connected devices.
- Verify the output mode (toggle/pulse) is correctly set.
- Ensure the load connected to the relay is within its specified limits.
- Learning process fails:
- Ensure the transmitter is compatible with the K8057.
- Try clearing the receiver's memory and re-learning the transmitter.
- Ensure you are pressing the buttons correctly and within the specified time frame.
- Iwọn kukuru:
- Check the antenna connection on the receiver.
- Minimize sources of RF interference in the vicinity.
- Ensure the receiver is not enclosed in a metal casing that could block RF signals.
9. Awọn pato
| Olupese | Velleman |
| Nọmba awoṣe | K8057 |
| Ọja Mefa | 2.5 x 12.1 x 20 cm |
| Iwọn | 135 g |
| Nọmba ti awọn ikanni | 2 |
| Ojade Irisi | Awọn olubasọrọ Relay |
| Agbára Agbékalẹ̀ | Up to 31 transmitters |
| Awọn ibeere agbara | Refer to kit documentation for specific voltage and current details. |
| Awọn batiri To wa | Rara |
| Awọn batiri ti a beere | No (for receiver) |
10. Ibamu
The Velleman K8057 receiver is compatible with the following Velleman RF remote control transmitters:
- K8059: 2-channel RF Code Lock Remote Control
- VM108: 2-channel Random Code RF Remote Transmitter
- VM130T: 2-channel RF Remote Control Transmitter
11. Atilẹyin ọja ati Support
Fun alaye atilẹyin ọja ati atilẹyin imọ-ẹrọ, jọwọ tọka si awọn iwe aṣẹ ti a pese pẹlu rira rẹ tabi ṣabẹwo si Velleman osise webojula. Jeki ẹri rira rẹ fun eyikeyi awọn ibeere atilẹyin ọja.