
1. Ifihan
This manual provides comprehensive instructions for the installation, operation, and maintenance of your Chieftec BT-02B-U3 Mesh Mini-ITX PC Case. Please read this manual thoroughly before beginning any installation or operation to ensure proper usage and to prevent damage to the product or other components. Keep this manual for future reference.
2. Alaye Aabo
- Nigbagbogbo ge asopọ ipese agbara lati inu iṣan ogiri ṣaaju fifi sori ẹrọ tabi yiyọ awọn paati eyikeyi kuro.
- Handle all components with care to avoid electrostatic discharge (ESD) damage. Consider using an anti-static wrist strap.
- Rii daju pe fentilesonu to dara ni ayika ọran PC lati ṣe idiwọ igbona.
- Ma ṣe fi ọja han si ọrinrin tabi awọn iwọn otutu to gaju.
- Pa awọn ẹya kekere ati awọn ohun elo apoti kuro lọdọ awọn ọmọde.
3. Ọja Ipariview
The Chieftec BT-02B-U3 is a compact Mini-ITX PC case designed for standard, cost-effective components. It includes a powerful 250W SFX power supply, making it suitable for ITX motherboards with desktop CPUs. Its mesh design aids in ventilation.

Nọmba 3.1: Iwaju ati ẹgbẹ view of the Chieftec BT-02B-U3 Mesh Mini-ITX PC Case. This image displays the compact form factor, the optical drive bay, and the front panel controls including power and USB ports.

Nọmba 3.2: Oke-iwaju view of the Chieftec BT-02B-U3 PC Case. This perspective highlights the horizontal orientation, the optical drive slot, and the front panel buttons and indicators.
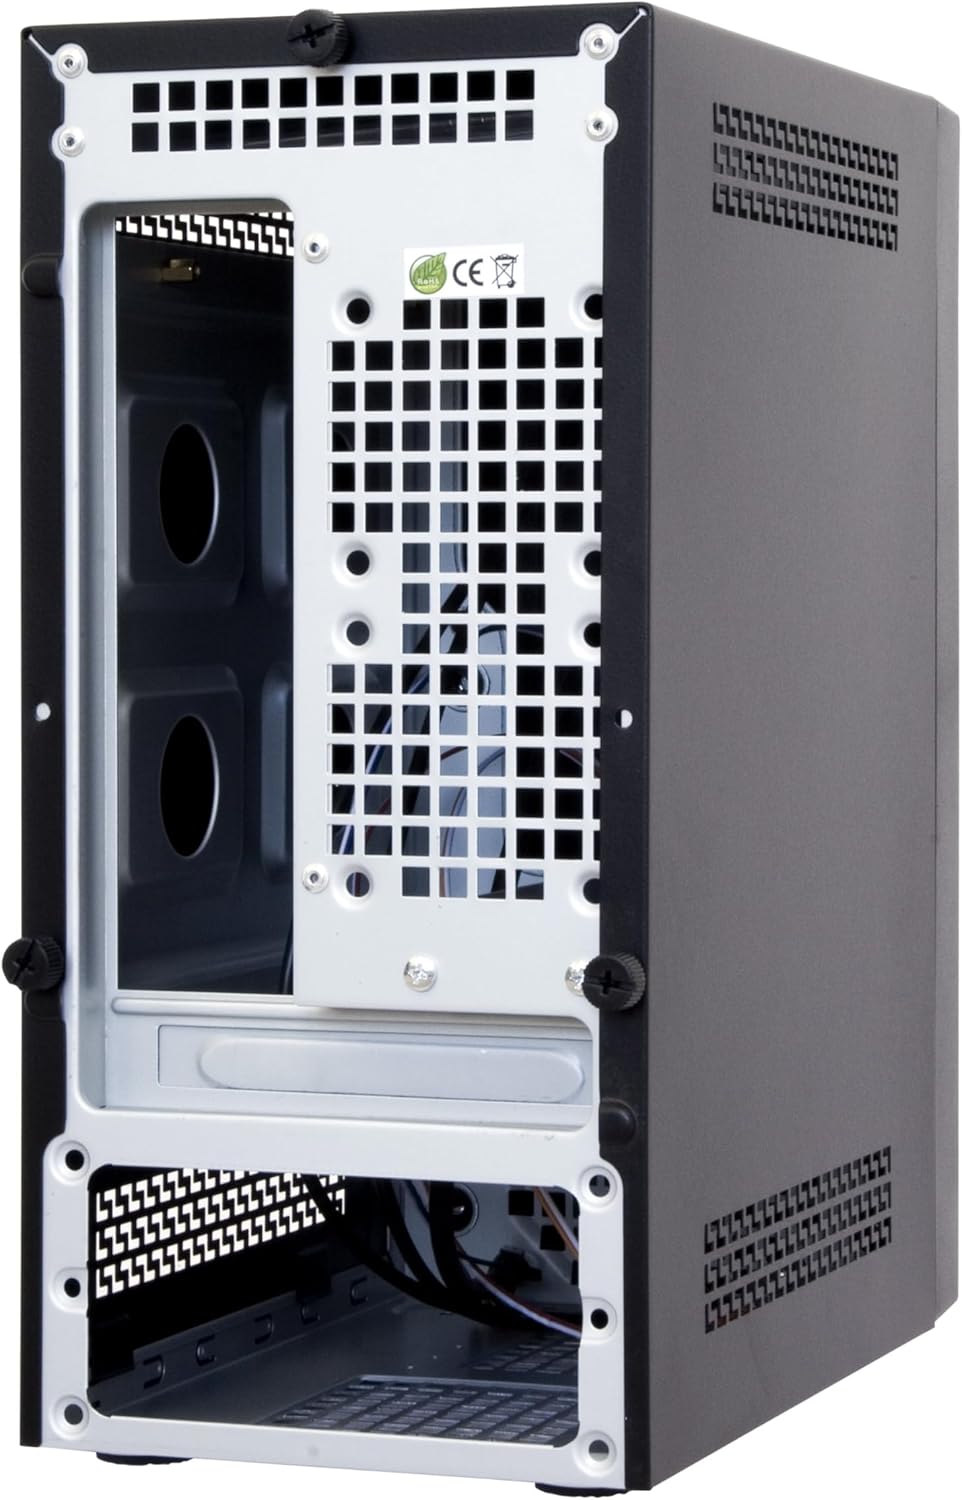
Nọmba 3.3: Rear and internal view of the Chieftec BT-02B-U3 PC Case. This image shows the internal structure, including the motherboard tray area, expansion slots, and the bottom-mounted power supply bay.
4. Eto ati fifi sori
Follow these general steps for installing components into your Chieftec BT-02B-U3 PC case. Specific component installation instructions should be referenced from their respective manuals.
- Mura Ọran naa: Remove the side panel(s) by unscrewing the thumbscrews at the rear of the case.
- Fi sori ẹrọ modaboudu: Secure your Mini-ITX motherboard onto the standoffs provided in the case. Ensure the I/O shield is properly seated.
- Fi Awọn awakọ Ibi ipamọ sori ẹrọ: Mount your 2.5-inch or 3.5-inch storage drives into the designated bays.
- Install Optical Drive (Optional): If using, install a slim optical drive into the front bay.
- So Awọn Cable Panel Iwaju: Connect the power switch, reset switch, USB ports (2x USB 2.0, 2x USB 3.0), and audio jacks to the corresponding headers on your motherboard.
- Sopọ Ipese Agbara: Connect the 24-pin ATX power connector, 4/8-pin CPU power connector, and SATA power connectors to your components. The case includes a pre-installed 250W SFX power supply.
- Iṣakoso USB: Awọn kebulu ipa-ọna daradara lati mu iṣan-afẹfẹ pọ si ati ẹwa.
- Pa Ẹjọ naa: Reattach the side panel(s) and secure them with the thumbscrews.
5. Awọn ilana Iṣiṣẹ
- Agbara Tan: Connect the power cable to the power supply and a wall outlet. Press the power button located on the front panel of the case.
- Agbara Pa: Shut down your operating system normally. The system will power off automatically. Alternatively, press and hold the power button for 4 seconds to force a shutdown (not recommended for regular use).
- Awọn Agbeegbe Nsopọ: Use the available USB ports (2x USB 2.0, 2x USB 3.0) on the front panel and the rear I/O panel of your motherboard to connect keyboards, mice, and other devices.
6. Itọju
- Ninu: Regularly clean the exterior of the case with a soft, dry cloth. For dust accumulation inside, use compressed air to gently clear vents and components. Ensure the system is powered off and unplugged before cleaning.
- Afẹfẹ: Ensure that the case's ventilation openings are not obstructed to maintain optimal airflow and cooling performance.
7. Laasigbotitusita
If you encounter issues with your PC build, consider the following general troubleshooting steps:
- Ko si Agbara:
- Check if the power cable is securely connected to both the power supply and the wall outlet.
- Ensure the power supply switch (if present) is in the 'ON' position.
- Daju pe awọn iwaju nronu agbara yipada USB ti wa ni ti tọ ti sopọ si awọn modaboudu.
- Ko si Ifihan:
- Ensure your monitor is connected to the correct video output port (either on the motherboard or a dedicated graphics card).
- Check that all internal power cables (24-pin ATX, CPU power) are firmly seated.
- Reseat RAM modules and any graphics cards.
- Ariwo Pupọ:
- Identify the source of the noise (e.g., CPU fan, case fan, PSU fan).
- Ensure no cables are obstructing fan blades.
- Clean dust from fans and heatsinks.
8. Awọn pato
| Ẹya ara ẹrọ | Ẹ̀kúnrẹ́rẹ́ |
|---|---|
| Brand | Chieftec |
| Nọmba awoṣe | BT-02B-U3 |
| Iru Irú | Mini-Tower (Mini-ITX) |
| Modaboudu Ibamu | Mini ITX |
| Ibi ti ina elekitiriki ti nwa | Integrated 250W SFX Power Supply |
| Ohun elo | Alloy Irin |
| Àwọ̀ | Dudu |
| Awọn iwọn Ọja (LxWxH) | 9.45 x 5.31 x 11.61 inches (24 x 13.5 x 29.5 cm) |
| Iwọn Nkan | 7.22 poun (3.28 kg) |
| Awọn ibudo USB 2.0 | 2 |
| Awọn ibudo USB 3.0 | 2 |
| Ọna Itutu | Afẹfẹ |
| Agbara Ipese Iṣagbesori Iru | Isalẹ Oke |
9. Atilẹyin ọja ati Support
For warranty information or technical support, please refer to the official Chieftec webaaye tabi kan si alagbata agbegbe rẹ. Jeki ẹri rira rẹ fun awọn iṣeduro atilẹyin ọja.
For further assistance, you may visit the Chieftec official webojula: www.chieftec.eu