
1. Ifihan
The D-Link DES-1210-52 is a 48-port Fast Ethernet Smart Switch designed for small to medium-sized businesses. It features 48 10/100Mbps ports, two 10/100/1000Mbps Gigabit ports, and two combo SFP Gigabit uplinks, providing flexible connectivity options. This switch offers advanced management functions, including VLANs, QoS, and security features, to enhance network performance and security. This manual provides essential information for the proper installation, configuration, and operation of your DES-1210-52 switch.
2. Package Awọn akoonu
Verify the contents of your DES-1210-52 package. If any item is missing or damaged, please contact your local D-Link reseller for assistance.
- D-Link DES-1210-52 Smart Switch
- Okun agbara
- Rack Mount Kit (two brackets and screws)
- Awọn ẹsẹ roba (fun fifi sori tabili)
- CD-ROM (containing documentation and utility software)
- Awọn ọna fifi sori Itọsọna
3. Apejuwe ti ara
The DES-1210-52 switch features a standard 1U rack-mountable design. Understanding the front and rear panel components is crucial for proper installation and operation.
3.1. Igbimọ iwaju
The front panel includes all network ports, LED indicators, and a console port for management.
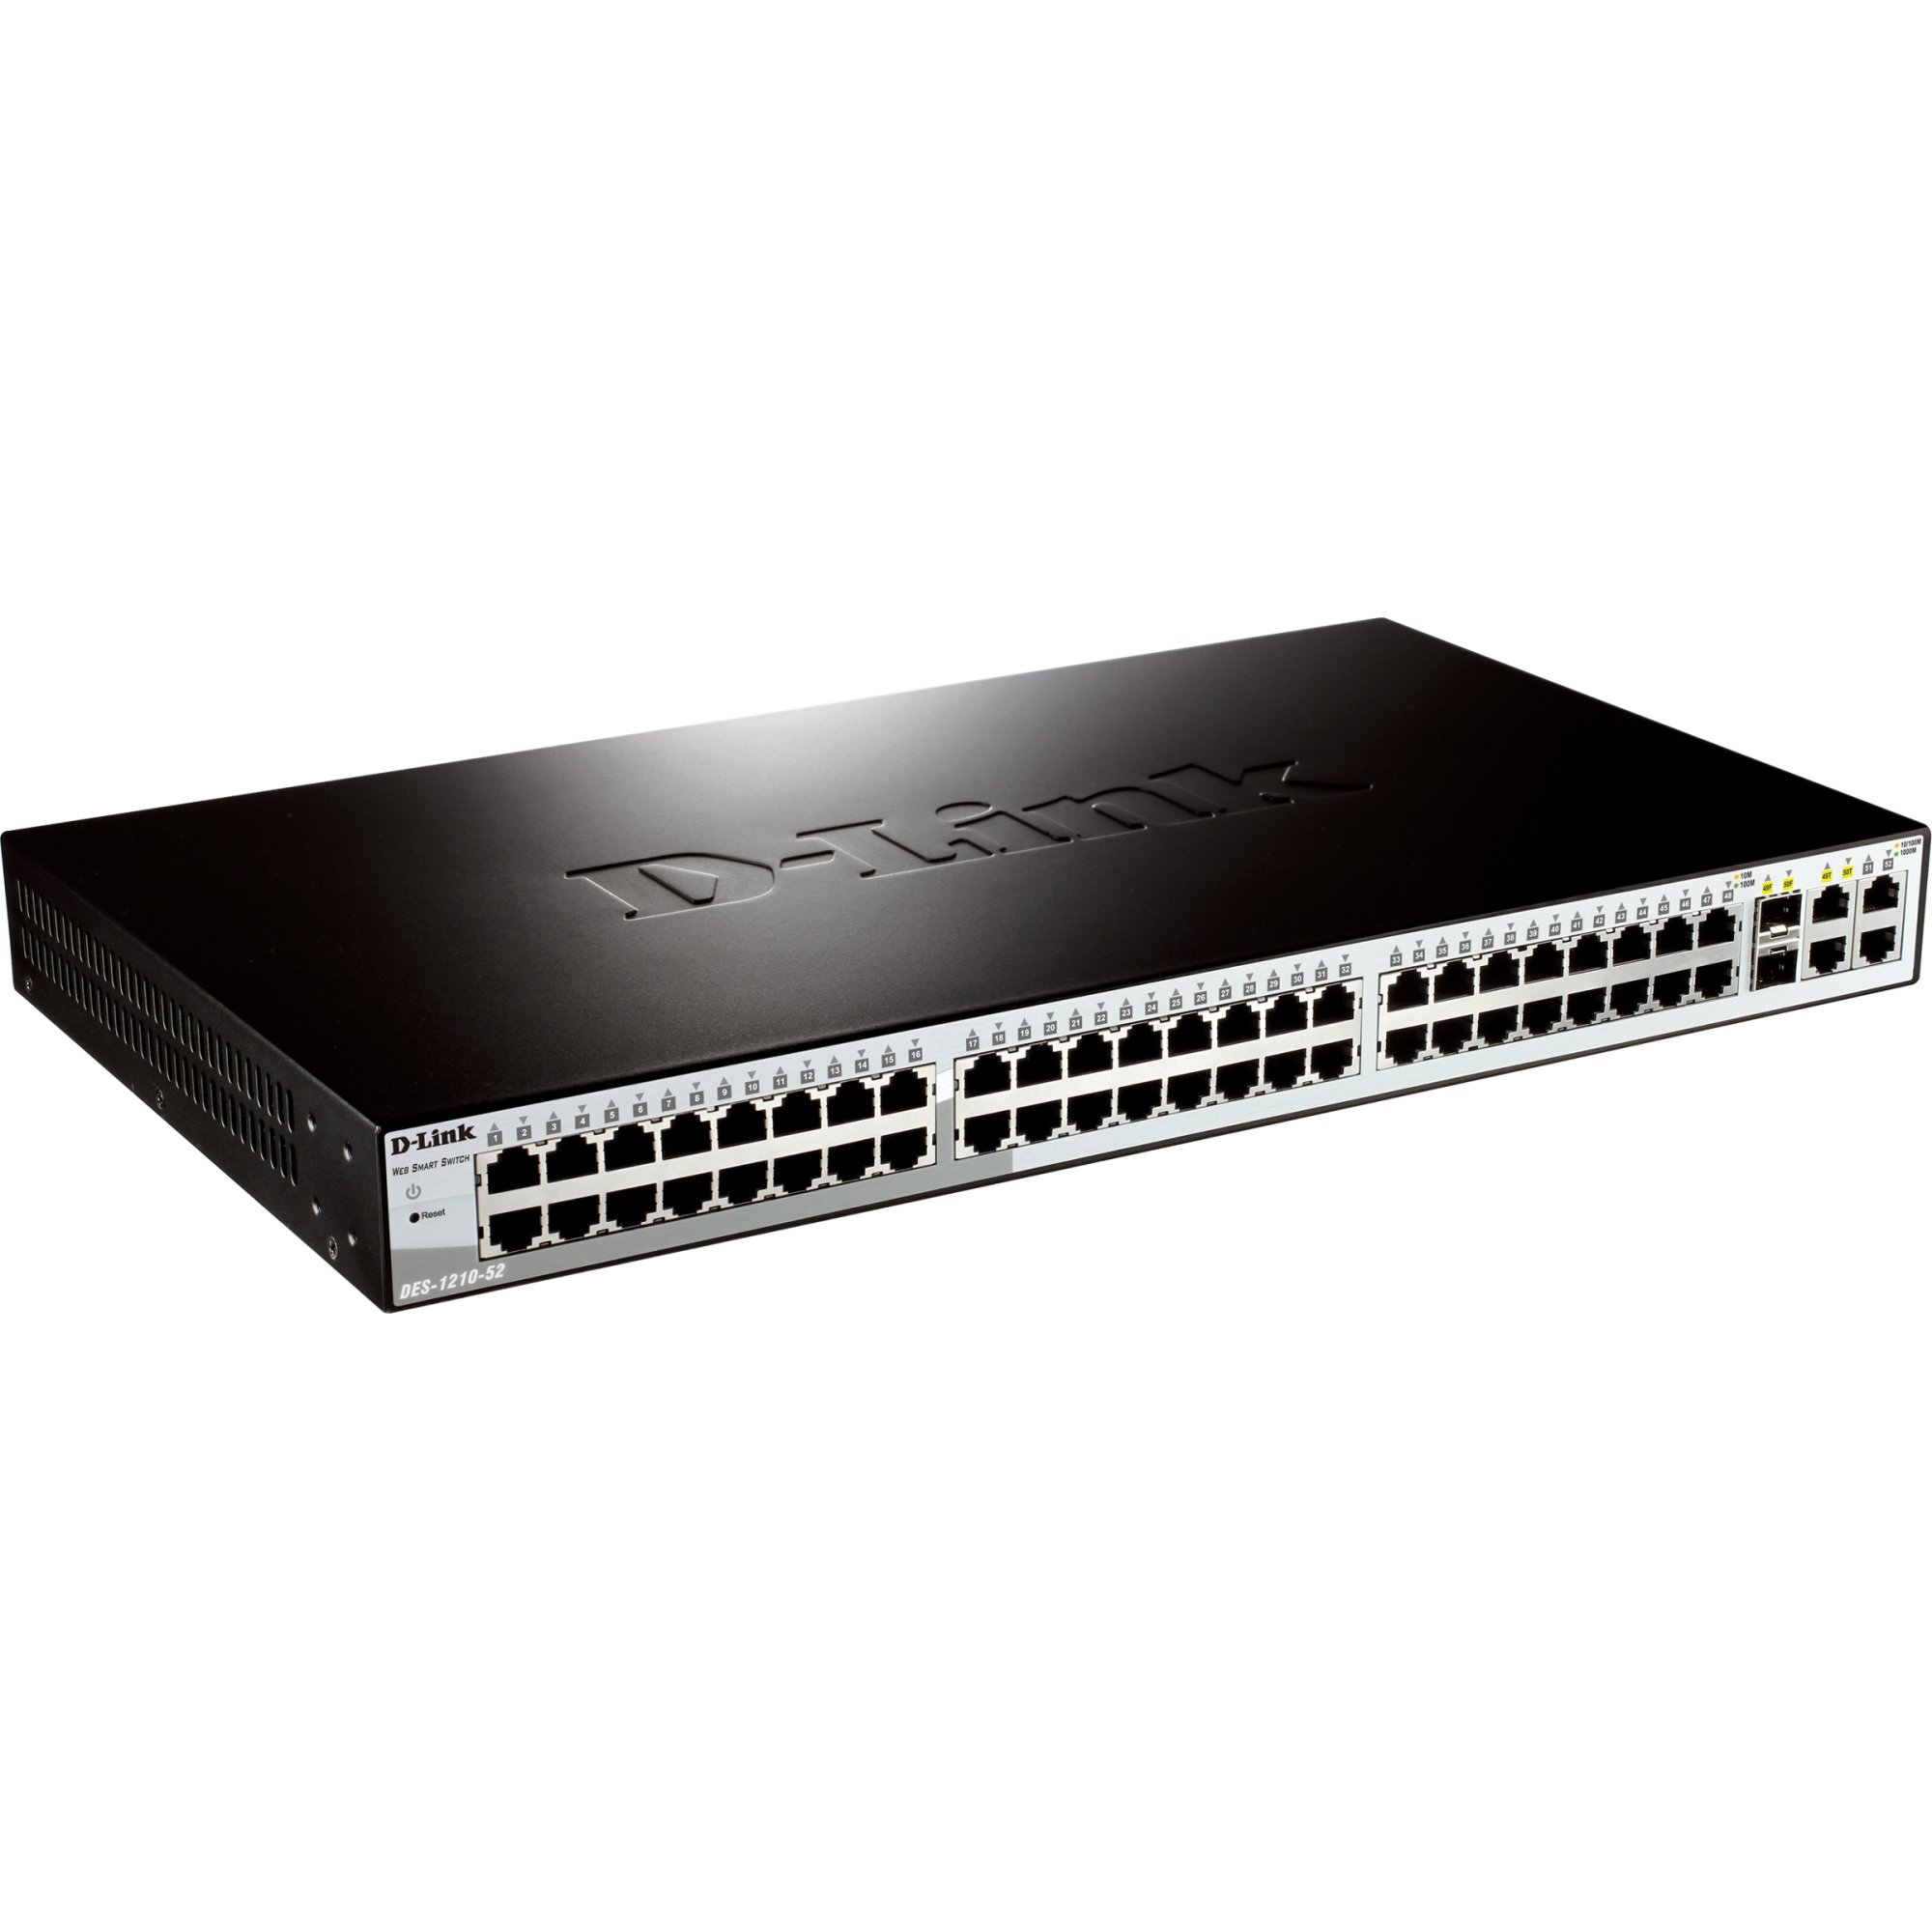
Nọmba 1: Iwaju view of the D-Link DES-1210-52 Smart Switch, showing 48 Fast Ethernet ports, 2 Gigabit Ethernet ports, and 2 SFP combo ports, along with LED indicators for power, link/activity, and speed.
- Awọn itọkasi LED: Power, Link/Act (per port), Speed (per port).
- Àwọn Ibudo 10/100BASE-TX (1-48): RJ-45 ports for Fast Ethernet connections.
- 10/100/1000BASE-T Ports (49-50): RJ-45 ports for Gigabit Ethernet connections.
- Combo SFP Ports (51-52): SFP slots that share bandwidth with Gigabit ports 49-50. When an SFP module is inserted, the corresponding Gigabit RJ-45 port is disabled.
- Ibudo Kọnsole: RJ-45 port for command-line interface (CLI) access.
3.2. Rule nronu
The rear panel contains the power input and grounding screw.
- Gbigba agbara AC: Connects to the provided AC power cord.
- Skru Ilẹ: Provides an optional connection for grounding the device.
4. Eto
This section outlines the steps for physically installing and connecting your D-Link DES-1210-52 Smart Switch.
4.1. Igbaradi Aye
- Ensure the installation site is well-ventilated and within the recommended operating temperature and humidity ranges.
- Place the switch on a sturdy, level surface or in a standard 19-inch equipment rack.
- Ensure a stable power source is available.
4.2. Fifi sori tabili
For desktop use, attach the included rubber feet to the bottom of the switch to prevent scratching and provide stability.
4.3. agbeko fifi sori
To install the switch in a standard 19-inch equipment rack:
- Attach the two rack-mounting brackets to the sides of the switch using the provided screws.
- Secure the switch in the rack using the screws provided with the rack.
4.4. Nsopọ Agbara
Connect the supplied AC power cord to the power receptacle on the rear panel of the switch and then to a suitable power outlet. The Power LED on the front panel will illuminate.
4.5. Nsopọ Awọn ẹrọ Nẹtiwọọki
Connect network devices (e.g., computers, servers, other switches) to the 10/100BASE-TX or 10/100/1000BASE-T ports using standard Ethernet cables. For fiber optic connections, insert compatible SFP transceivers into the SFP slots and connect fiber optic cables.
5. Ṣiṣẹ
The DES-1210-52 is a Smart Switch, offering various management options for configuration and monitoring.
5.1. Wiwọle akọkọ
Yipada le ti wa ni isakoso nipasẹ a Web-based GUI, a Command Line Interface (CLI) through the console port, or SNMP.
- WebIṣakoso orisun: By default, the switch obtains an IP address via DHCP. If no DHCP server is present, it will use a default IP address (refer to the Quick Installation Guide or CD-ROM documentation for the specific default IP). Connect a computer to any switch port and configure its IP address to be in the same subnet as the switch. Open a web kiri ati ki o tẹ awọn yipada ká IP adirẹsi.
- Ìṣàkóso CLI: Connect a console cable (RJ-45 to DB-9) from the switch's console port to a serial port on a computer. Use a terminal emulation program (e.g., PuTTY, Tera Term) with appropriate settings (e.g., 115200 baud, 8 data bits, no parity, 1 stop bit, no flow control).
5.2. Ipilẹ iṣeto ni
After initial access, it is recommended to:
- Change the default administrator password.
- Configure a static IP address for the switch if a DHCP server is not consistently available or preferred.
- Ṣeto akoko eto ati ọjọ.
- Save the configuration to prevent loss upon reboot.
6. Itọju
Regular maintenance ensures optimal performance and longevity of your D-Link DES-1210-52 Smart Switch.
- Awọn imudojuiwọn famuwia: Lokọọkan ṣayẹwo atilẹyin D-Link website for the latest firmware versions. Updating firmware can provide new features, performance improvements, and security patches. Follow the instructions provided with the firmware update package carefully.
- Ninu: Keep the switch free from dust and debris. Use a soft, dry cloth to clean the exterior. Ensure ventilation openings are clear. Do not use liquid or aerosol cleaners directly on the switch.
- Afẹyinti Iṣeto: Regularly back up your switch configuration to an external device. This allows for quick restoration in case of a device failure or misconfiguration.
- Abojuto Ayika: Ensure the operating environment remains within specified temperature and humidity limits to prevent overheating or moisture damage.
7. Laasigbotitusita
This section provides solutions to common issues you might encounter with your DES-1210-52 Smart Switch.
7.1. Power LED is Off
- Rí i dájú pé okùn agbára náà so mọ́ yíyí àti ibi tí agbára ń ṣiṣẹ́ dáadáa.
- Verify the power outlet is supplying power by testing it with another device.
7.2. No Link/Activity LED on a Connected Port
- Check that the Ethernet cable is properly connected at both ends.
- Rii daju pe ẹrọ ti a ti sopọ ti wa ni titan ati pe o nṣiṣẹ ni deede.
- Gbiyanju okun Ethernet ti o yatọ.
- Verify that the port on the connected device is active.
7.3. Ko le Wiwọle Web-orisun Management Interface
- Rii daju pe adiresi IP kọmputa rẹ wa ni subnet kanna bi adiresi IP ti iyipada.
- Verify the switch's IP address. If unknown, you may need to reset the switch to factory defaults (refer to the full manual for instructions, as this will erase all configurations).
- Pa eyikeyi ogiriina tabi sọfitiwia antivirus lori kọnputa rẹ fun igba diẹ lati ṣe akoso kikọlu.
- Gbiyanju lati wọle si wiwo lati oriṣiriṣi web browser or computer.
8. Awọn pato
| Ẹya ara ẹrọ | Apejuwe |
|---|---|
| Nọmba awoṣe | DES-1210-52 |
| Brand | D-Ọna asopọ |
| Nọmba ti Ports | 48 (10/100Mbps) + 2 (10/100/1000Mbps) + 2 (Combo SFP) |
| Ni wiwo Iru | RJ-45, SFP |
| Data Gbigbe Oṣuwọn | 10/100 Mbps (Fast Ethernet), 1 Gbps (Gigabit Ethernet) |
| Iwọn Nkan | 4.08 kilo |
| Awọn ẹrọ ibaramu | Ojú-iṣẹ (ati awọn ẹrọ nẹtiwọọki miiran) |
| Platform | Ko Machine Specific |
9. Atilẹyin ọja ati Support
D-Link provides a limited warranty for its products. The specific terms and conditions of the warranty may vary by region. Please refer to the warranty information included with your product or visit the official D-Link website for detailed warranty statements.
For technical support, product documentation, firmware updates, and FAQs, please visit the D-Link support portal. You can typically find support resources by searching for your product model (DES-1210-52) on the D-Link webojula.
D-Link Support Webojula: www.dlink.com/support