GraLab 300
GraLab Model 300 Timer Instruction Manual
Your comprehensive guide to operating and maintaining the GraLab Model 300 Photography and Darkroom Timer.
Ọja Pariview
The GraLab Model 300 is a versatile 60-minute electromechanical timer designed for precision timing in various applications, including photography darkrooms, laboratories, and manufacturing settings. It features a large, luminous dial for easy readability in low-light conditions and dual hands for setting both minutes and seconds. The timer includes two integrated outlets for automated control of connected devices, such as an enlarger or a safety light.
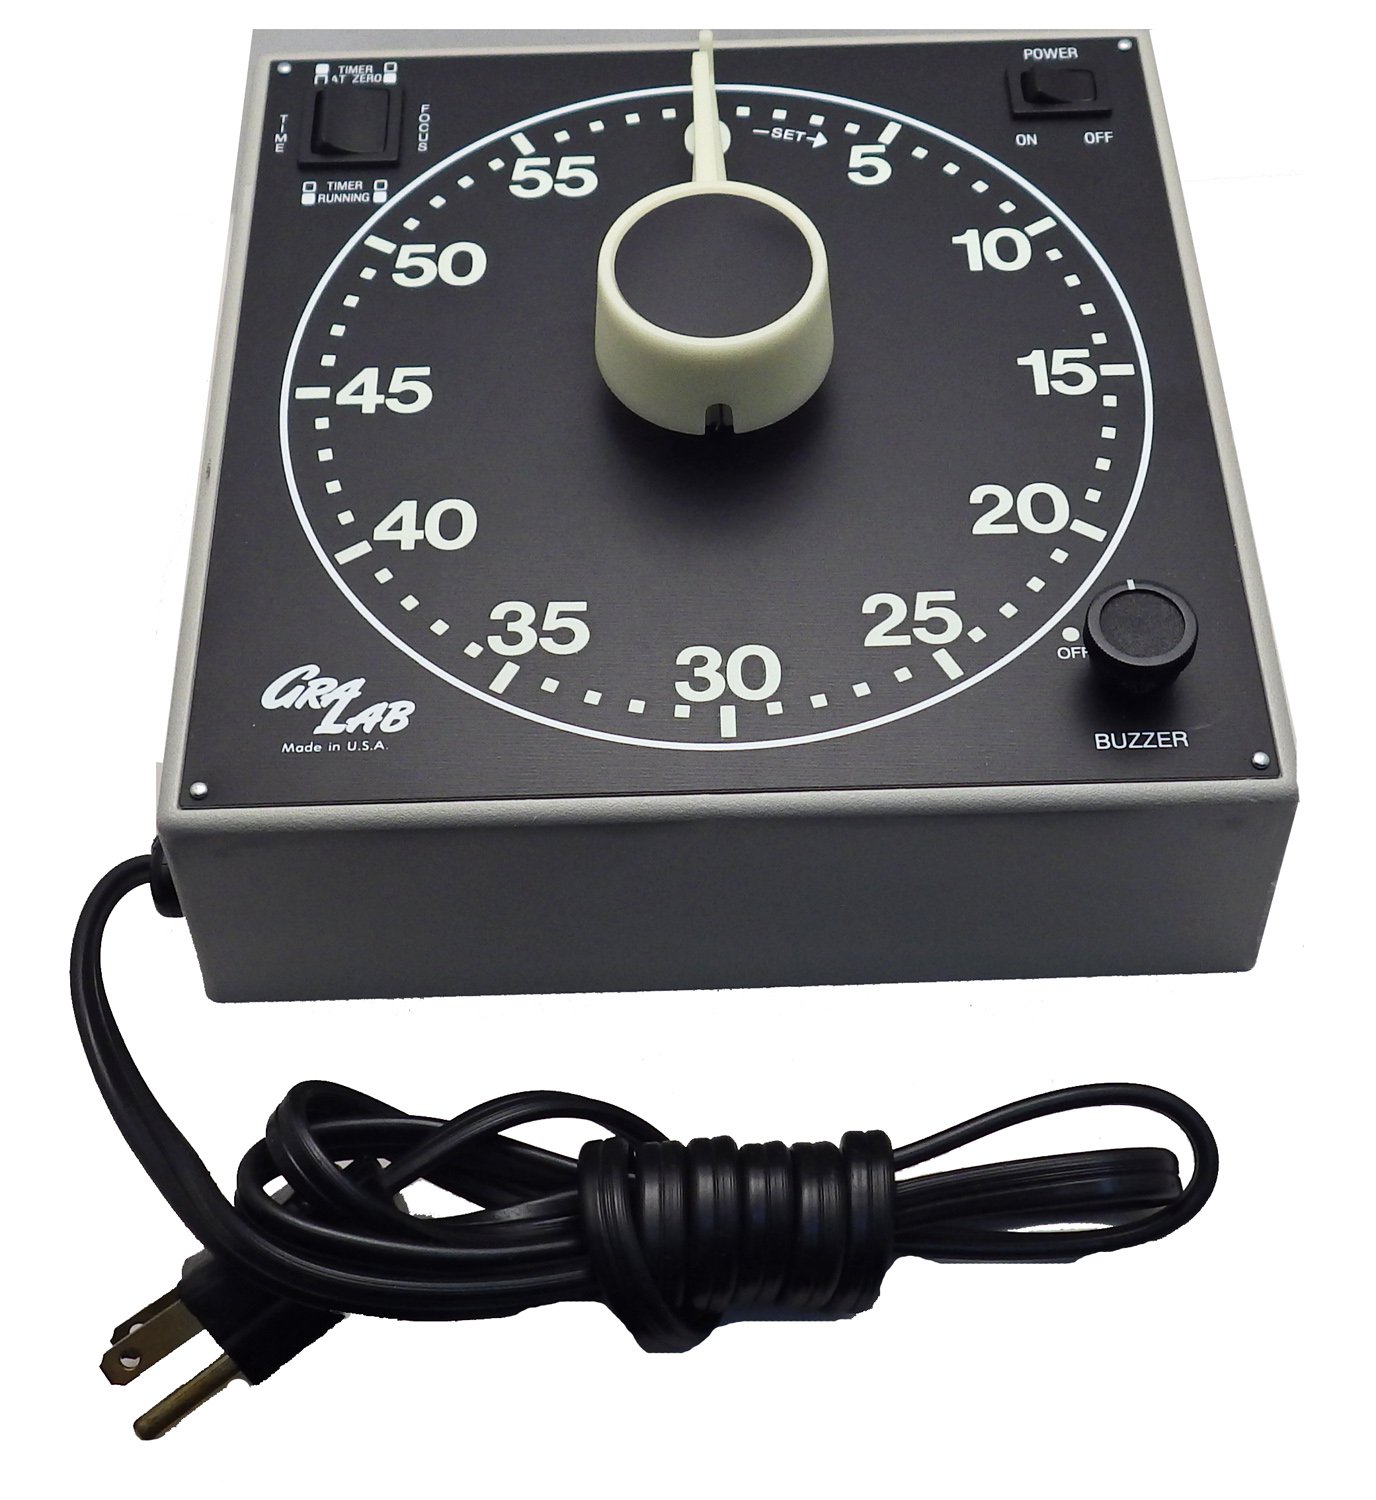
Figure 1: GraLab Model 300 Photography and Darkroom Timer. This image shows the front view of the timer, highlighting its large, easy-to-read dial with luminous numerals and hands, the central setting knob, and the power cord.
Key features include a robust nonconductive plastic case with rubber base pads for protection against impact, chemicals, moisture, and electrical shock. Its precise electric motor ensures high accuracy, and an adjustable volume alarm signals the end of the timed cycle.
Alaye Aabo
Please read and understand all safety instructions before operating the GraLab Model 300 timer. Failure to follow these instructions may result in electric shock, fire, or serious injury.
- Aabo Itanna: Ensure the timer is connected to a grounded electrical outlet with the correct voltage (100-130 VAC, 50 or 60 Hz, or 210-250 VAC, 50 Hz as specified for your model). Do not overload the outlets; the maximum capacity is 600 watts.
- Ibi: Place the timer on a stable, level surface. Avoid placing it near water or in excessively humid environments. The nonconductive case provides protection, but direct exposure to liquids should be avoided.
- Mimu: Use the recessed handle for easy gripping when moving the timer. Avoid dropping the unit.
- Itọju: Disconnect the timer from the power source before cleaning or performing any maintenance.
- Awọn ọmọde: Jeki kuro ni arọwọto awọn ọmọde. Ẹrọ yii kii ṣe nkan isere.
Ṣeto
- Ṣii silẹ: Carefully remove the GraLab Model 300 timer from its packaging. Inspect the unit for any signs of damage.
- Ibi: Choose a stable, dry location for the timer. The rubber base pads help prevent slipping and protect surfaces. For wall mounting, use the keyholes located on the back of the unit.
- Asopọ agbara: Plug the timer's power cord into a suitable grounded electrical outlet.
- Asopọmọra ẹrọ: Connect your enlarger, printer, or other timed device to one of the two outlets located on the back of the timer. Connect your safety light to the other outlet. The timer is designed to switch power between these two outlets automatically based on the timing cycle.
Awọn ilana Iṣiṣẹ
The GraLab Model 300 timer is designed for straightforward operation. Familiarize yourself with the dial and controls before use.
Ṣiṣeto Akoko naa
- The timer features a 60-minute dial with markings for both minutes and seconds.
- To set the desired time, rotate the central knob. The two hands allow for precise setting: one hand for minutes and the other for seconds.
- For film processing, you may set the timer by minutes. For enlarging, you can set it by seconds, or a combination of minutes and seconds for longer exposures.
Power and Outlet Control
- The timer has a POWER switch (ON/OFF) to control the main power to the unit.
- The two outlets on the back of the timer are designed for automatic switching. When the timer is running, power is supplied to one outlet (e.g., for an enlarger). Upon completion of the timed cycle, power automatically switches to the second outlet (e.g., for a safety light).
- Rii daju lapapọ wattage of connected devices does not exceed 600 watts.
Buzzer isẹ
- The timer is equipped with an automatic alarm buzzer that sounds at the end of the timed cycle.
- The buzzer volume is adjustable. Locate the BUZZER knob on the front panel to adjust the sound level to your preference.
Itoju
Proper care and maintenance will ensure the longevity and optimal performance of your GraLab Model 300 timer.
- Ninu: Disconnect the timer from the power source before cleaning. Use a soft, damp cloth to wipe the exterior. Do not use abrasive cleaners or solvents, as these may damage the plastic case or luminous dial.
- Ibi ipamọ: When not in use, store the timer in a clean, dry environment, away from extreme temperatures and direct sunlight.
- Ayewo: Periodically inspect the power cord for any signs of damage (fraying, cuts). If damage is found, discontinue use and contact customer support.
Laasigbotitusita
If you encounter issues with your GraLab Model 300 timer, refer to the following common problems and solutions:
| Isoro | Owun to le Fa | Ojutu |
|---|---|---|
| Timer does not power on. | Not plugged in; power switch is OFF; faulty outlet; damaged power cord. | Ensure power cord is securely plugged in. Turn POWER switch to ON. Test outlet with another device. Inspect power cord for damage. |
| Timer runs but connected device does not receive power. | Device not properly connected; device is faulty; timer outlet overloaded. | Ensure device is securely plugged into the timer's outlet. Test device by plugging it directly into a wall outlet. Verify total wattage ko koja 600W. |
| Buzzer is too quiet or too loud. | Buzzer volume not adjusted correctly. | Adjust the BUZZER knob on the front panel to the desired volume level. |
| Timer hands do not move or are inaccurate. | Internal mechanism issue; timer not reset. | Ensure the timer is properly set and started. If the issue persists, the unit may require professional servicing. Do not attempt to open the casing. |
If troubleshooting steps do not resolve the issue, please contact GraLab customer support for assistance.
Awọn pato
| Iwa | Iye |
|---|---|
| Nọmba awoṣe | 300 |
| Brand | GraLab |
| Timer Capacity | 60 Iṣẹju |
| Oju Diamita | 6.5 inches |
| Yiye | ± 0.015% |
| AC Outlet Power Rating | 600 Wattis ni 120 VAC |
| Iṣagbewọle Voltage | 100 to 130 VAC, 50 or 60 Hz; 210 to 250 VAC, 50 Hz |
| Awọn iwọn (H x W x D) | 7.5 x 7.5 x 2.5 inches |
| Iwọn | 3.0 lb |
| Ohun elo | Polycarbonate |
| Awọn iwe-ẹri | UL, ULC |
Atilẹyin ọja ati Support
GraLab products are manufactured to high standards of quality and reliability. While specific warranty details are not provided in this manual, please retain your proof of purchase for any warranty claims.
For technical support, service, or inquiries regarding your GraLab Model 300 timer, please contact GraLab customer service. Contact information can typically be found on the manufacturer's official webaaye tabi lori apoti ọja.
Olupese: GraLab
Olú: Centerville, OH, USA
For the most current support information, please visit the official GraLab webojula.
Awọn iwe aṣẹ ti o jọmọ - 300
 |
Minoston MT10W Wi-Fi Kika Aago Yipada Itọsọna olumulo Kọ ẹkọ bii o ṣe le fi sori ẹrọ ati lo Minoston MT10W Wi-Fi Kika Aago Yipada fun adaṣe ile ọlọgbọn. Itọsọna yii ni wiwa igbasilẹ app, iṣeto, ibaramu iṣakoso ohun pẹlu Amazon Alexa ati Oluranlọwọ Google, ati awọn ilana aabo pataki. |
 |
C41 Colour Development Process Guide - Brunswick Darkroom Brunswick Darkroom provides a comprehensive guide to the C41 colour development process for film photography, detailing steps, timings, equipment, and essential notes. |
 |
Omega CT40 Darkroom Timer/Controller: Instruction Manual for Photographic Darkroom Use Comprehensive instruction manual for the Omega CT40 Darkroom Timer/Controller, detailing its functions as an enlarging timer, processing timer, measuring instrument, and clock. Includes setup, operation, and maintenance guides. |
 |
Awọn iwe akiyesi Oluyaworan: Itọsọna Iṣeto Laabu Amateur Itọsọna okeerẹ si iṣeto ati ipese yàrá fọtoyiya magbowo. Iwe yii ṣe alaye awọn agbegbe pupọ, ohun elo pataki, ati awọn ilana fun idagbasoke fiimu ati ṣiṣe titẹ, pẹlu awọn ẹrọ iwoye, awọn olupilẹṣẹ, mimu kemikali, ati awọn imuposi yara dudu. |
 |
K-ZELL PARIS 3603 Jacket Size Guide Detailed size measurements for the K-ZELL PARIS 3603 jacket, including chest, front length, sleeve length, back width, and arm width for the unique size. |
 |
B&W Resin Coated Printing and Toning Guide | Brunswick Darkroom A comprehensive guide to B&W resin coated printing and toning techniques, covering chemistry preparation, workspace setup, exposure, development, and final print making. Includes materials and equipment lists. |
Ask a question about this manual
Ask about setup, troubleshooting, compatibility, parts, safety, or missing instructions. Manuals+ will review the question and use this page’s manual context to help answer it.