
1. Alaye Aabo
Read and understand all safety instructions before operating the Spyker P20-5010 Broadcast Spreader. Failure to follow these instructions may result in injury or property damage.
- Always wear appropriate personal protective equipment, such as gloves and eye protection, when handling materials and operating the spreader.
- Ensure the spreader is on a level surface before filling or making adjustments.
- Pa awọn ọmọde ati awọn ohun ọsin kuro ni agbegbe iṣẹ.
- Do not overload the hopper beyond its 50-pound capacity.
- Nu ẹ̀rọ tí ń tàn káàkiri náà dáadáa lẹ́yìn lílo kọ̀ọ̀kan láti dènà kíkó àwọn ohun èlò jọ àti ìbàjẹ́.
- Store the spreader in a dry, secure location, out of reach of children.
2. Package Awọn akoonu
Verify that all components are present before beginning assembly. If any parts are missing or damaged, contact Spyker customer support.
- Hopper Assembly (50 lb. capacity)
- Frame Assembly with Wheels
- Mu Apejọ
- Control Rod/Linkage
- Àpò Ohun Èlò (àwọn bẹ́líìtì, èso, àwọn ẹ̀rọ ìfọṣọ, àwọn pini)
- Iboju Iboju
3. Apejọ Awọn ilana
Follow these steps to assemble your Spyker P20-5010 Broadcast Spreader.
- So Akojọpọ Imudani naa: Secure the handle to the main frame using the provided bolts and nuts. Ensure all connections are tight.
- Connect the Control Linkage: Attach the solid steel linkage from the handle control to the hopper's on-off assembly. This linkage controls the material flow.
- Fi sori ẹrọ Awọn kẹkẹ: The pneumatic tires are typically pre-installed on the frame. Verify they are securely attached and properly inflated.
- Place Hopper: Position the polypropylene hopper onto the frame. Ensure it sits securely and aligns with the spreading mechanism.
- Install Screen Cover: Place the screen cover over the top of the hopper. This helps prevent large clumps from entering the spreading mechanism.

Nọmba 3.1: Angled iwaju view of the assembled Spyker P20-5010 Spreader with the screen cover in place. This image shows the hopper, handle, and pneumatic wheels.
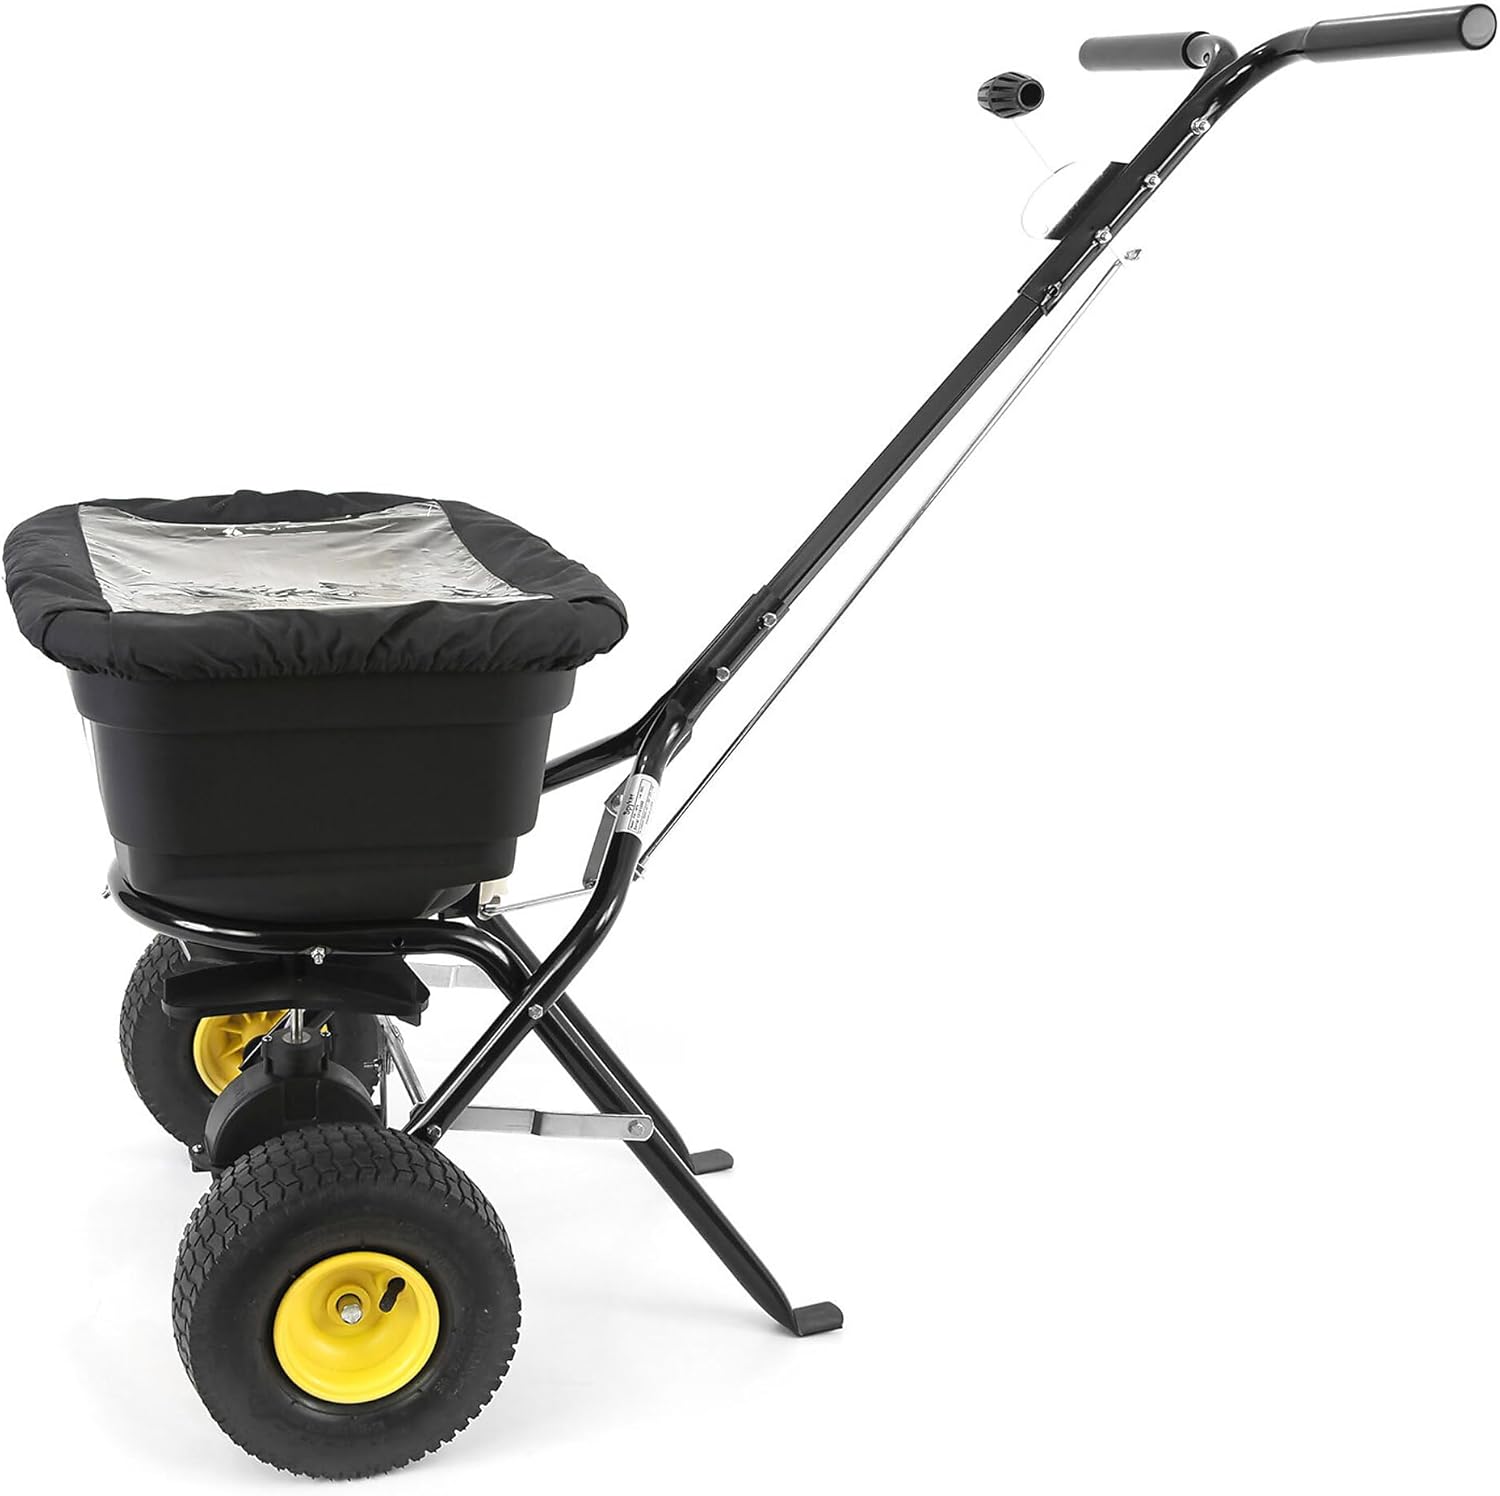
Nọmba 3.2: Apa view of the Spyker P20-5010 Spreader, illustrating the extended handle and the overall structure of the unit.
4. Awọn ilana Iṣiṣẹ
Proper operation ensures efficient and uniform material application.
4.1 Àgbáye Hopper
- Ensure the flow control lever is in the PAA position before filling.
- Place the spreader on a level surface.
- Carefully pour the desired material (fertilizer, seed, ice melt) into the hopper. Do not exceed the 50-pound capacity.
- Ensure the screen cover is in place to prevent large debris from clogging the mechanism.
4.2 Adjusting Spread Settings
The Spyker Dial offers 90 settings for precise calibration. Refer to the material manufacturer's recommendations or a Spyker calibration chart for the appropriate setting for your specific material.
- Locate the Spyker Dial on the handle or near the hopper.
- Adjust the dial to the recommended setting for your material.
- Test the spread pattern and adjust as necessary to achieve desired coverage.
4.3 Spreading Material
- Begin walking at a consistent pace before engaging the flow control lever to the ON ipo.
- Maintain a steady walking speed for uniform application.
- When turning or stopping, move the flow control lever to the PAA position to prevent over-application in one area. The positive on/off linkage ensures immediate material cutoff.
- Overlap each pass slightly to ensure complete coverage without gaps.

Nọmba 4.1: A person operating the Spyker P20-5010 Spreader on a lawn, demonstrating the spreading action of material from the hopper.
5. Itọju
Regular maintenance extends the life and performance of your spreader.
- Ninu: After each use, empty any remaining material from the hopper. Rinse the hopper and spreading mechanism with water. Allow all parts to dry completely before storage.
- Lubrication: Periodically apply a light lubricant (e.g., pump oil) to moving parts, such as the axle, gears, and the gate control mechanism. This ensures smooth operation and prevents corrosion. The fully enclosed gearbox requires minimal maintenance but should be checked for any signs of wear.
- Ibi ipamọ: Tọ́jú ẹ̀rọ tí a fi ń tàn káàkiri sí ibi gbígbẹ tí a bò mọ́lẹ̀ láti dáàbò bò ó kúrò lọ́wọ́ àwọn ojú ọjọ́.
- Titẹ Taya: Check the pressure of the pneumatic tires periodically and inflate to the recommended PSI as indicated on the tire sidewall.
6. Laasigbotitusita
Address common issues that may arise during operation.
- Uneven Spread Pattern:
- Ensure the spreader is clean and free of material buildup around the spinner and gate.
- Verify the calibration setting is appropriate for the material being used.
- Maintain a consistent walking speed.
- Check for any obstructions or damage to the spinner or internal components.
- Material Not Flowing:
- Confirm the flow control lever is in the ON ipo.
- Check for clogs in the hopper opening or spreading mechanism.
- Ensure the material is dry and free of clumps. Break up any large clumps.
- Difficulty Pushing Spreader:
- Ṣayẹwo titẹ taya.
- Ensure the wheels and axle are free of debris and lubricated.
- Avoid overloading the hopper.
7. Awọn pato
| Ẹya ara ẹrọ | Ẹ̀kúnrẹ́rẹ́ |
|---|---|
| Nọmba awoṣe | P20-5010 |
| Agbara | 50 iwon |
| Ohun elo Hopper | Polypropylene tó lágbára |
| Ohun elo fireemu | Powder Bo Irin |
| Taya | Large Fully Pneumatic |
| Apoti jia | Fully Enclosed Aluminum Gears |
| Iṣakoso sisan | Positive On/Off with Solid Steel Linkage |
| Ọja Mefa | 24 x 28 x 24 inches |
| Iwọn Nkan | 30 iwon |
8. Atilẹyin ọja ati Support
For warranty information, please refer to the warranty card included with your product or visit the official Spyker website. For technical support, replacement parts, or further assistance, contact Spyker customer service directly.
Olupese: Spyker