
Brilliant 35832/56
BRILLIANT Luca 4-Flame Spot Tube Light
Awoṣe: 35832/56
Ọrọ Iṣaaju
This manual provides essential information for the safe and efficient installation, operation, and maintenance of your BRILLIANT Luca 4-Flame Spot Tube Light. Please read these instructions carefully before installation and retain them for future reference.
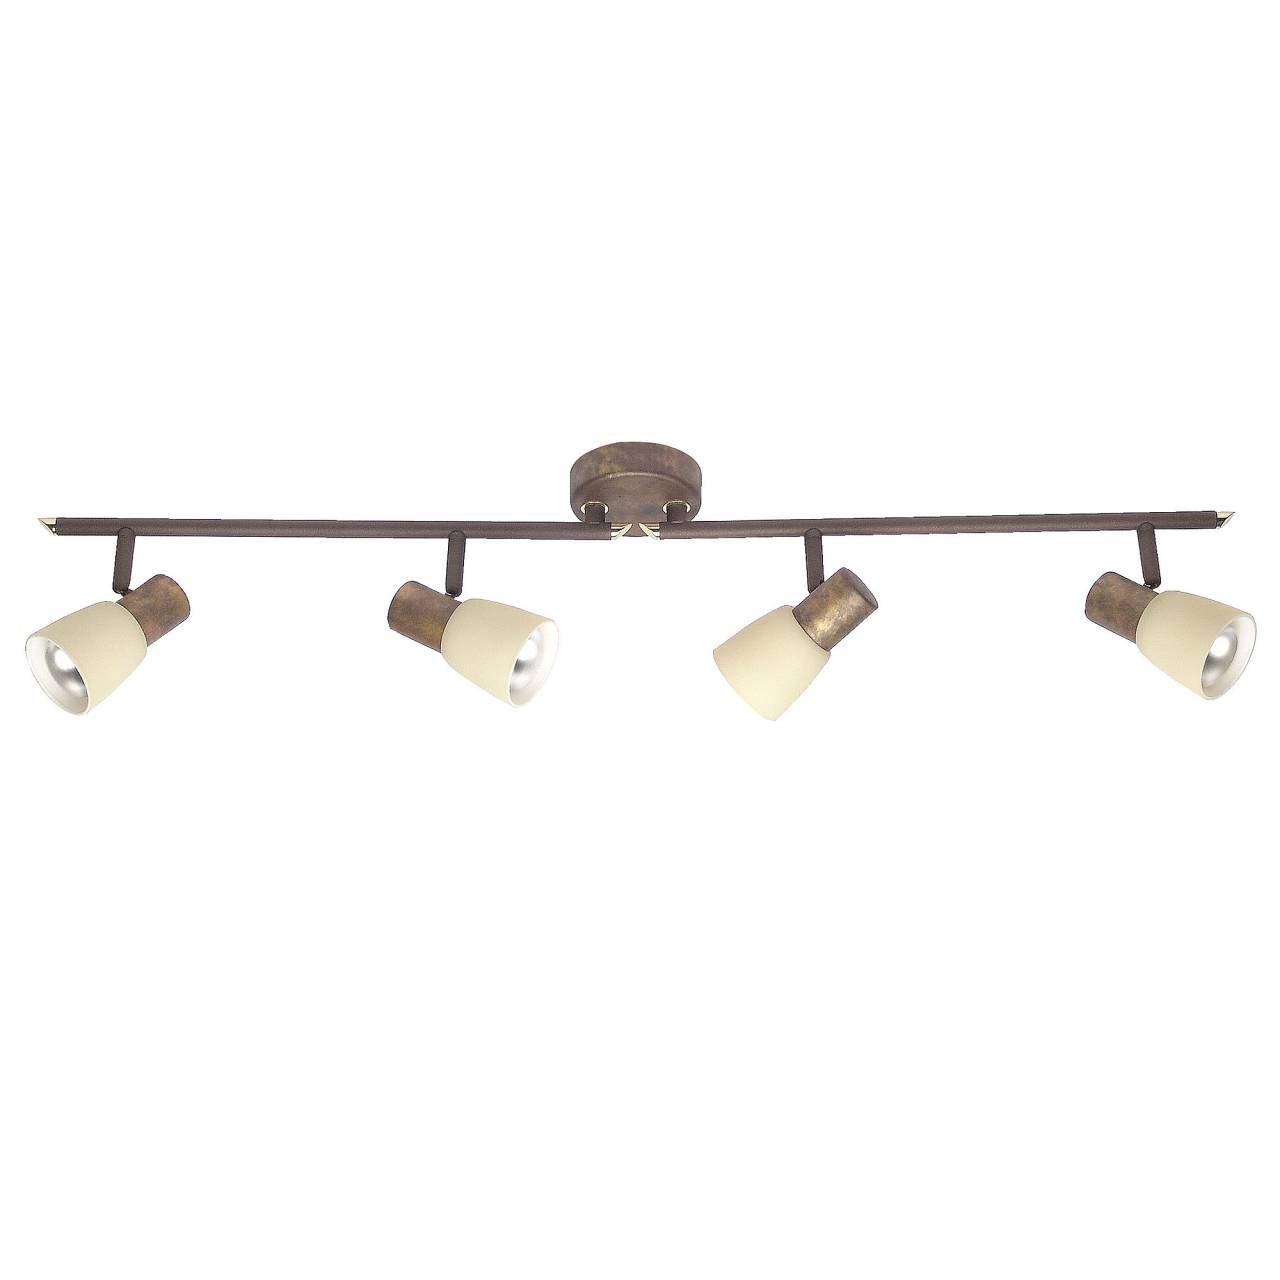
Image 1: The BRILLIANT Luca 4-Flame Spot Tube Light. This image displays the complete light fixture, featuring a long, brown metal bar with four individual spot heads. Each spot head is adjustable and includes a beige glass shade, designed to direct light. The central mounting plate is also visible.
Awọn Itọsọna Aabo
- Máa yọ agbára kúrò ní ibi tí a ti ń fi fọ́ọ̀sì tàbí ẹ̀rọ ìfọ́mọ́ra ṣe pàtàkì kí o tó fi sori ẹ̀rọ, àtúnṣe, tàbí kí o tó rọ́pò gílóòbù.
- Installation should be performed by a qualified electrician or competent person.
- Rii daju wipe awọn iṣagbesori dada le ni atilẹyin awọn àdánù ti awọn imuduro.
- Maṣe kọja wat ti o pọjutage specified for the bulbs (40W per bulb).
- Ọja yii jẹ apẹrẹ fun lilo inu ile nikan (iwọn IP20). Ma ṣe fi han si ọrinrin tabi awọn iwọn otutu to gaju.
- Allow bulbs to cool before touching or replacing them.
- Jeki awọn ohun elo apoti kuro ni arọwọto awọn ọmọde.
Package Awọn akoonu
Daju pe gbogbo awọn paati wa ṣaaju ki o to bẹrẹ fifi sori:
- 1x BRILLIANT Luca 4-Flame Spot Tube Light fixture
- Mounting material (screws, wall plugs, etc.)
- Ilana itọnisọna
Note: Light bulbs (E14, R50 reflector type, max 40W) are not included and must be purchased separately. LED bulbs are compatible.
Awọn pato
| Brand | O wuyi |
| Nọmba awoṣe | 35832/56 |
| Awọn iwọn (L x W x H) | 85 x 23.2 x 23.2 cm |
| Iwọn | 1.22 kg |
| Ohun elo | Irin, Gilasi |
| Àwọ̀ | Brown (fixture), Beige (shade) |
| Nọmba ti Isusu | 4 |
| Boolubu Socket Iru | E14 |
| Max Wattage fun Bulb | 40 Wattis |
| Voltage | 240 Volts |
| IP Rating | IP20 (Lilo inu ile nikan) |
| Pataki Awọn ẹya ara ẹrọ | Dimmable (with appropriate bulbs and external dimmer), Adjustable Spot Heads |
| Iru fifi sori ẹrọ | Oke Oke |
Eto ati fifi sori
Pataki: Before starting installation, ensure the power supply is switched off at the main circuit breaker to prevent electric shock.
- Mura Ilẹ Iṣagbesori: Choose a suitable location on your ceiling or wall. Ensure the surface is clean, dry, and structurally sound to support the light fixture.
- Samisi Awọn aaye Liluho: Hold the mounting bracket of the fixture against the desired installation spot. Use a pencil to mark the positions for drilling holes.
- Awọn iho iho: Drill holes at the marked positions using an appropriate drill bit for your ceiling/wall material. Insert the provided wall plugs into the drilled holes.
- Akọmọ Iṣagbesori to ni aabo: So àkọlé ìsopọ̀ mọ́ àjà/ògiri nípa lílo àwọn skru tí a pèsè. Rí i dájú pé ó ní ààbò tó lágbára.
- Asopọmọra itanna: Connect the household electrical wires to the terminal block on the fixture. Follow standard wiring color codes (e.g., Live to Live, Neutral to Neutral, Earth to Earth). Ensure all connections are secure.
- So Iduro mọ akọmọ: Carefully align the light fixture with the secured mounting bracket and attach it using the remaining screws or fastening mechanism.
- Fi sori ẹrọ Isusu: Insert four E14 R50 reflector bulbs (not included) into the lamp holders. Do not exceed 40 Watts per bulb. LED bulbs are recommended for energy efficiency.
- Pada Agbara pada: Ni kete ti fifi sori ẹrọ ti pari ati pe gbogbo awọn asopọ wa ni aabo, mu pada agbara pada ni fifọ Circuit akọkọ.
Kan si alagbawo ina mọnamọna ti o pe ti o ko ba ni idaniloju nipa eyikeyi apakan ti ilana fifi sori ẹrọ.
Awọn ilana Iṣiṣẹ
- Titan -an/Pa a: Operate the light using your standard wall switch.
- Adjusting Spot Heads: The individual spot heads are pivotable and the arms are rotatable. Gently adjust each spot head and arm to direct the light to your desired area.
- Iṣẹ Dimming: If you are using dimmable E14 bulbs and have an external dimmer switch installed, you can adjust the light intensity by operating the dimmer. Ensure your bulbs are compatible with your dimmer type.
Itoju
- Ninu: Disconnect power before cleaning. Wipe the fixture with a soft, dry cloth. Do not use abrasive cleaners or solvents, as these can damage the finish.
- Rirọpo Boolubu:
- Ensure the light is switched off and has cooled down completely.
- Carefully unscrew the old E14 bulb from its socket.
- Screw in a new E14 R50 reflector bulb, ensuring it is no more than 40 Watts.
- Mu agbara pada ki o ṣe idanwo ina.
- Awọn iṣayẹwo deede: Periodically check all connections and mounting screws to ensure they remain tight and secure.
Laasigbotitusita
| Isoro | Owun to le Fa | Ojutu |
|---|---|---|
| Imọlẹ ko tan. |
|
|
| Ina flickers. |
|
|
| Dimming does not work. |
|
|
If problems persist, contact customer support or a qualified electrician.
Atilẹyin ọja ati Support
Information regarding warranty and spare parts availability is not provided in the product details. For support, please refer to the retailer or manufacturer's official webojula.
Olupese: O wuyi
Ask a question about this manual
Ask about setup, troubleshooting, compatibility, parts, safety, or missing instructions. Manuals+ will review the question and use this page’s manual context to help answer it.