1. Ifihan
This manual provides essential instructions for the installation, operation, and maintenance of your Phonocar 4/634 ISO Car Radio Cable. This cable is designed to facilitate the connection of an aftermarket car radio to specific vehicle models, ensuring proper power supply and signal transmission, including resolving issues with radio memory retention.
The Phonocar 4/634 cable features an ISO standard connector and an integrated power inverter, making it compatible with:
- Citroën C3 models (from 2005 onwards)
- Peugeot 206 models (from 2004 to 2005)
- Audi models (up to 2007)
Please read these instructions carefully before proceeding with installation to ensure correct usage and optimal performance.
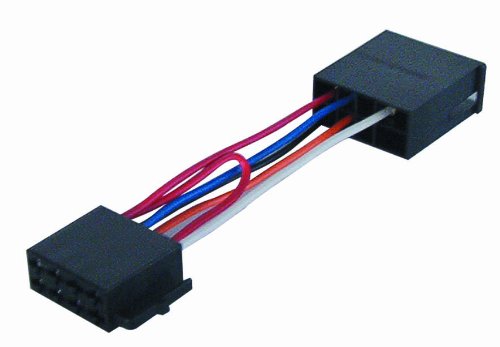
Aworan 1.1: The Phonocar 4/634 ISO Car Radio Cable. This image shows the cable with its various colored wires and ISO connectors, designed for connecting an aftermarket car radio to a vehicle's wiring harness.
2. Eto ati fifi sori
Installation of the Phonocar 4/634 cable requires basic knowledge of car audio wiring. If you are unsure about any steps, it is recommended to seek professional assistance.
2.1 Awọn iṣọra aabo
- Always disconnect the vehicle's negative battery terminal before starting any electrical work to prevent short circuits and damage.
- Rí i dájú pé iná ọkọ̀ náà ti pa.
- Lo awọn irinṣẹ ti o yẹ ki o si wọ awọn gilaasi aabo.
2.2 fifi sori Igbesẹ
- Remove the Existing Car Radio: Carefully remove the original car radio from its dashboard slot. This usually involves removing trim panels and unscrewing mounting brackets. Refer to your vehicle's specific service manual for detailed instructions on radio removal.
- Locate Vehicle Wiring Harness: Once the original radio is removed, locate the vehicle's factory wiring harness connector.
- Connect the Phonocar 4/634 Cable:
- Connect one end of the Phonocar 4/634 ISO cable to the vehicle's factory wiring harness. The ISO connectors are designed to fit only one way.
- Connect the other end of the Phonocar 4/634 ISO cable to the aftermarket car radio's ISO input.
The integrated power inverter within the cable is designed to correctly manage the power supply, often addressing issues where aftermarket radios fail to retain settings or memory after the ignition is turned off.
- Test the Connections: Before fully reassembling the dashboard, reconnect the vehicle's negative battery terminal. Turn on the ignition and test the car radio's functionality:
- Verify that the radio powers on and off with the ignition.
- Check that radio stations and other settings are retained after turning the ignition off and on again.
- Test audio output from all speakers.
- Secure the Radio and Reassemble: Once all functions are verified, carefully secure the new car radio in its slot and reassemble any removed trim panels. Ensure no wires are pinched or exposed.
3. Awọn ilana Iṣiṣẹ
The Phonocar 4/634 cable is an adapter and does not have operational controls itself. Its function is to ensure proper electrical connection between your vehicle and the aftermarket car radio. Once installed correctly, the car radio should operate as intended, retaining its settings and memory.
Refer to your aftermarket car radio's instruction manual for specific operating procedures, including tuning, volume control, and feature usage.
4. Itọju
The Phonocar 4/634 ISO Car Radio Cable is designed for long-term reliability and requires minimal maintenance. To ensure its longevity:
- Jeki Gbẹgbẹ: Ensure the cable and its connections are kept dry and free from moisture.
- Yago fun Bibajẹ Ti ara: Do not bend, crimp, or stretch the cable excessively during or after installation. Ensure it is routed in a way that prevents it from being pinched by dashboard components.
- Awọn iṣayẹwo deede: If you experience any issues with your car radio's power or memory retention, a visual inspection of the cable connections for looseness or corrosion may be beneficial.
5. Laasigbotitusita
If you encounter issues after installing the Phonocar 4/634 cable, refer to the following troubleshooting guide:
| Isoro | Owun to le Fa | Ojutu |
|---|---|---|
| Car radio does not retain memory (e.g., radio stations, settings reset after ignition off). | Incorrect constant power (12V) or switched accessory power connection. The vehicle's wiring may differ from standard ISO. |
|
| Car radio does not power on. | No power supply to the radio. Loose connection, blown fuse, or incorrect wiring. |
|
| Central locking system affected after installation. | Interference or incorrect wiring affecting vehicle's body control module. |
|
If these steps do not resolve the issue, please contact customer support or a qualified car audio technician.
6. Awọn pato
| Ẹya ara ẹrọ | Ẹ̀kúnrẹ́rẹ́ |
|---|---|
| Brand | Fonocar |
| Nọmba awoṣe | 04634 |
| Ọja Iru | Car Radio ISO Cable with Power Inverter |
| Asopọmọra Iru | ISO |
| Iṣeduro Lilo | Car Radio Installation |
| Ibamu | Citroën C3 (>05), Peugeot 206 (04>05), Audi (>07) |
| Awọn iwọn (LxWxH) | 250 x 110 x 50 mm (approximate packaging dimensions) |
| Àwọ̀ | Multicolor (referring to wiring) |
| Olupese Apá Number | 04634 |
7. Atilẹyin ọja ati Support
7.1 Olupese ká atilẹyin ọja
The Phonocar 4/634 ISO Car Radio Cable comes with a 1-odun olupese ká atilẹyin ọja. This warranty covers defects in materials and workmanship under normal use. It does not cover damage resulting from improper installation, accident, abuse, misuse, or unauthorized modification.
Jọwọ ṣe idaduro ẹri rira rẹ fun awọn iṣeduro atilẹyin ọja.
7.2 Onibara Support
For technical assistance, warranty claims, or further inquiries regarding your Phonocar 4/634 cable, please contact your retailer or the official Phonocar customer support channels. Contact information can typically be found on the product packaging or the manufacturer's official webojula.
Nigbati o ba kan si atilẹyin, jọwọ ni nọmba awoṣe ọja rẹ (04634) ati ẹri rira ni imurasilẹ wa.


