
Drayton 07 25 006
Drayton TRV4 Thermostatic Valve Head User Manual
Awoṣe: 07 25 006
Ọrọ Iṣaaju
The Drayton TRV4 Thermostatic Radiator Valve head is designed to provide efficient and precise control over your central heating system. Rated 'A' for efficiency by the European Valve Manufacturers Association, it contributes to energy savings and reduced heating bills. This manual provides essential information for the installation, operation, and maintenance of your TRV4 valve head.
Key Awọn ẹya ara ẹrọ
- Drayton TRV4 Head Only
- Chrome & White Finish
- Rated 'A' for efficiency
Fifi sori ẹrọ
The Drayton TRV4 valve head is designed for straightforward replacement of existing thermostatic radiator valve heads. Ensure your heating system is off and cooled down before beginning installation.
- Before removing the old head or installing the new one, twist the temperature setting of the TRV4 head to its highest setting (typically '5' or 'MAX'). This retracts the internal mechanism, preventing damage to the valve's pin during installation.
- Carefully unscrew the chrome collar at the base of the old thermostatic valve head to remove it from the radiator valve body.
- Align the new Drayton TRV4 head with the valve body. Ensure the internal pin of the valve body is not obstructed.
- Screw the chrome collar of the new TRV4 head onto the valve body until it is hand-tight. Do not overtighten.
- Once installed, you can adjust the temperature setting to your desired level.

Image: Drayton TRV4 Thermostatic Valve Head installed on a white radiator, demonstrating its appearance in a typical home heating setup.
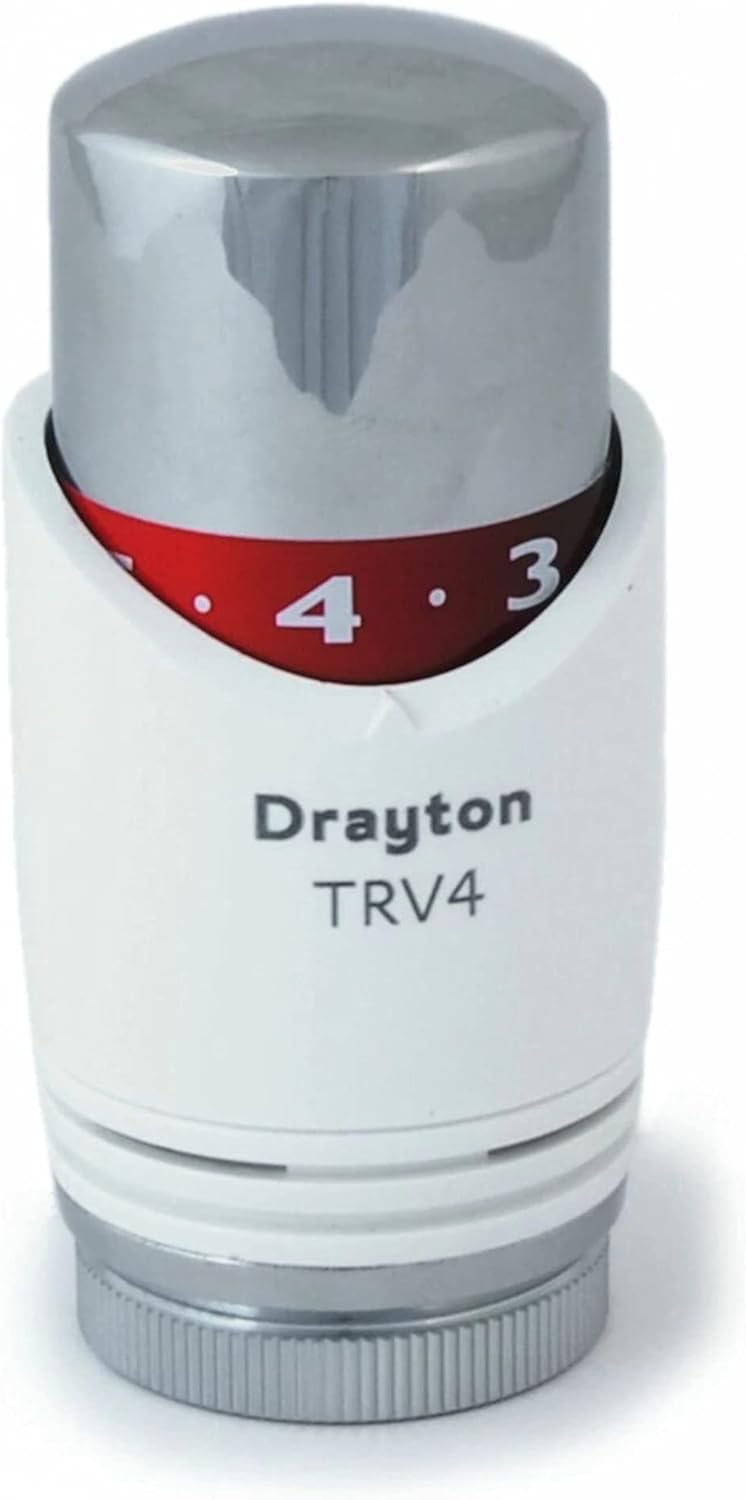
Aworan: Iwaju view of the Drayton TRV4 Thermostatic Valve Head, highlighting the chrome and white finish and the visible temperature scale.
Awọn ilana Iṣiṣẹ
The Drayton TRV4 allows you to control the temperature of individual rooms by regulating the hot water flow to the radiator. The head features numbered settings for precise temperature control.
- Atunṣe iwọn otutu: Rotate the head to align the desired number with the indicator mark. Higher numbers correspond to warmer temperatures. The valve has a tactile detent function for each setting, allowing you to feel the position without looking.
- Idaabobo otutu: Some models may include a snowflake or asterisk symbol (*), which typically represents a frost protection setting. When set to this position, the valve will open if the room temperature drops to approximately 5-7°C, preventing pipes from freezing.
- Lilo Agbara: To maximize energy efficiency, set the TRV4 to a comfortable temperature for each room and avoid overheating. Close doors to rooms with lower temperature settings to prevent heat loss from warmer areas.
Itoju
Regular maintenance ensures the longevity and optimal performance of your TRV4 valve head.
- Ninu: Wipe the valve head with a soft, damp asọ. Yago fun abrasive ose tabi olomi ti o le ba awọn ipari.
- Gland Seal Inspection: Periodically inspect the gland seal of the radiator valve body (the part the TRV head screws onto). If the TRV head fails due to plastic degradation, it is often caused by central heating water seeping past a worn gland seal. It is highly recommended to replace the gland seal when replacing the TRV head, and to inspect it annually.
- Ṣayẹwo akoko: Before the heating season begins, ensure all TRV heads move freely through their full range of settings. If a head feels stiff, gently rotate it back and forth a few times to free the internal mechanism.
Laasigbotitusita
| Isoro | Owun to le Fa | Ojutu |
|---|---|---|
| Radiator not heating up or staying cold. | TRV head stuck in closed position, or valve pin is stuck. | Remove the TRV head and gently press the small pin in the center of the valve body. It should move freely. If stuck, try to free it by gently tapping or lubricating. Ensure the TRV head is set to a high number. |
| Radiator is always hot, regardless of TRV setting. | TRV head not properly seated, or valve pin is stuck open. | Ensure the TRV head is securely screwed onto the valve body. Check the valve pin as described above; it might be stuck in the open position. |
| Ṣiṣu casing of the TRV head is cracking or breaking. | Age, fatigue, or damage from impact (e.g., being knocked by furniture). May also be due to water seepage from a faulty gland seal. | Replace the TRV head. Consider replacing the gland seal on the valve body simultaneously to prevent future issues. |
Awọn pato
| Iwa | Ẹ̀kúnrẹ́rẹ́ |
|---|---|
| Brand | Drayton |
| Nọmba awoṣe | 07 25 006 |
| Nọmba apakan | 07 25 006 |
| Ohun elo | Irin |
| Iwọn Nkan | 140 g |
| Package Mefa | 8.2 x 5.2 x 5 cm |
| Ipari ode | Chrome |
| Àtọwọdá Iru | Ẹrọ ti a fi agbara mu |
| Ijẹrisi | WEEE |
| Ti beere awọn batiri? | Rara |
Atilẹyin
For further assistance or technical support regarding your Drayton TRV4 Thermostatic Valve Head, please contact Drayton directly:
- Customer Care & Sales: 0333 6000 622
- Oluranlowo lati tun nkan se: 0333 7000 622
- Webojula: www.draytoncontrols.co.uk
- Imeeli: client.care@draytoncontrols.co.uk

Image: Drayton TRV4 Classic product packaging, displaying contact details for customer care, sales, and technical support.
Ask a question about this manual
Ask about setup, troubleshooting, compatibility, parts, safety, or missing instructions. Manuals+ will review the question and use this page’s manual context to help answer it.