
1. Ifihan
This manual provides detailed instructions for the assembly, operation, and maintenance of your Sharkoon VS4-W Series ATX/MicroATX Mid-Tower PC Case, model SHA-VS4-WBK. Please read this manual thoroughly before beginning installation to ensure proper setup and to maximize the lifespan of your product.
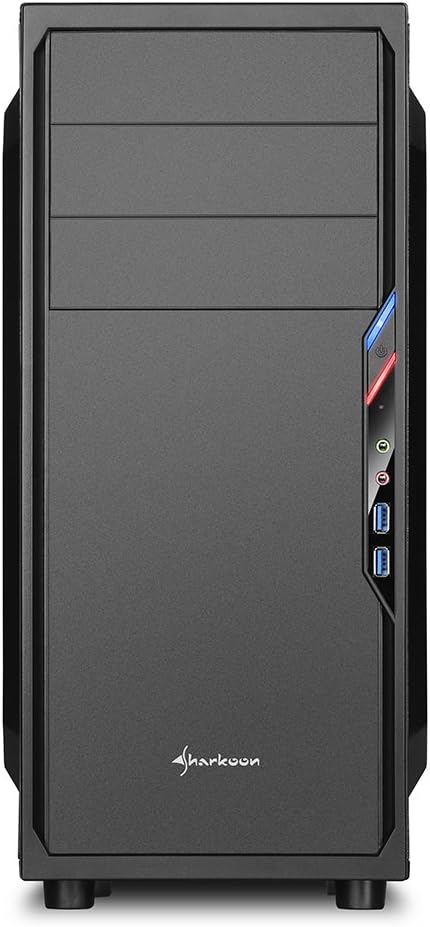
The Sharkoon VS4-W Series is designed for users seeking a cost-effective and functional PC case. It features a full-black aesthetic with an acrylic side window panel, offering a clear view of your internal components. The case supports ATX and Micro-ATX motherboards and provides ample space for various components, including multiple storage drives and long graphics cards.
2. Ọja Ipariview
2.1. Key Awọn ẹya ara ẹrọ
- Acrylic side window panel for component visibility.
- Full-black interior and exterior design.
- Support for ATX and Micro-ATX motherboards.
- Three 5.25-inch drive bays, two with tool-less mechanisms.
- Seven drive bays for storage: three 3.5-inch and four 2.5-inch.
- Generous expansion card space, up to 385mm with 2.5-inch cage removed.
- Cable management space behind the motherboard tray due to a bulged side panel design.
- Ṣe atilẹyin fun awọn itutu CPU titi di 160mm ni giga.
- Front I/O panel with 2x USB 3.0 and 2x USB 2.0 ports, plus HD Audio.
- Pre-installed 120mm front fan and 120mm blue LED rear fan.
2.2. Idanimọ paati



3. Eto ati fifi sori
3.1. Ngbaradi Ọran naa
- Unpack the PC case and remove all packaging materials.
- Gbe ọran naa sori iduro, dada alapin.
- Yọ awọn panẹli ẹgbẹ kuro nipa ṣi awọn skru atanpako ni ẹhin apoti naa.
3.2. Modaboudu fifi sori
- Fi ààbò I/O tí a pèsè pẹ̀lú motherboard rẹ sínú ibi tí a gé ní ẹ̀yìn àpótí náà.
- Ensure standoffs are correctly aligned for your ATX or Micro-ATX motherboard. Install additional standoffs if necessary.
- Carefully place the motherboard into the case, aligning it with the standoffs and I/O shield.
- Oluso modaboudu pẹlu skru.
3.3. Fifi sori Ipese Agbara
- Mount the power supply unit (PSU) in the designated area at the bottom rear of the case.
- Ṣe aabo PSU pẹlu awọn skru lati ẹhin ọran naa.
- Route necessary power cables through the cable management cutouts.
3.4. wakọ sori
- 5.25-inch Drives: For tool-less bays, slide the drive in until it clicks into place. For other bays, secure with screws.
- 3.5-inch Drives: Slide the 3.5-inch drives into the designated bays and secure them.
- 2.5-inch Drives: Mount 2.5-inch SSDs/HDDs onto the dedicated mounting points.
3.5. Fifi sori Kaadi Imugboroosi
- Yọ awọn ideri iho PCI pataki kuro ni ẹhin apoti naa.
- Insert your graphics card or other expansion cards into the appropriate PCI-E slots on the motherboard.
- Secure the cards with screws. For longer graphics cards, the 2.5-inch drive cage can be removed to provide up to 385mm of space.
3.6. Iṣakoso USB
Utilize the space behind the motherboard tray and the various cable routing holes to organize cables. This improves airflow and aesthetics.
4. Awọn ilana Iṣiṣẹ
Once all components are installed and connected, replace the side panels and secure them with the thumbscrews. Connect your peripherals (monitor, keyboard, mouse, etc.) to the motherboard's I/O ports. Connect the power cable to the PSU and a wall outlet. Press the power button on the front panel to start your system.
5. Itọju
5.1. Ninu
- Regularly clean dust filters (if present) to maintain optimal airflow.
- Use compressed air to remove dust from internal components and fans.
- Nu ita apoti naa pẹlu asọ rirọ, damp asọ. Yago fun abrasive ose.
5.2. Fan Itọju
Ensure fans are free from obstructions and spinning correctly. If a fan becomes noisy or stops working, consider replacing it to maintain proper cooling.
6. Laasigbotitusita
6.1. Ètò náà kò ṣiṣẹ́ dáadáa
- Check all power connections, including the PSU to the wall, and internal connections to the motherboard and components.
- Rí i dájú pé okùn bọ́tìnì agbára láti inú àpótí náà so mọ́ orí iwájú páìnì modaboudu náà dáadáa.
- Rí i dájú pé switi PSU wà ní ipò 'ON'.
6.2. Poor Airflow/Overheating
- Clean any dust filters and internal components.
- Ensure fans are operating correctly and oriented for optimal airflow (intake/exhaust).
- Mu iṣakoso okun waya dara si lati dinku awọn idena si ategun afẹfẹ.
6.3. Front Panel USB/Audio Not Working
- Verify that the front panel USB and HD Audio cables are securely connected to the corresponding headers on your motherboard.
7. Awọn pato
| Orukọ awoṣe | VS4-W Series |
| Nọmba awoṣe Ọja | SHA-VS4-WBK |
| Iru Irú | Ile-iṣọ Mid |
| Ohun elo | Irin, Ṣiṣu, Akiriliki |
| Àwọ̀ | Dudu |
| Modaboudu Ibamu | ATX, Micro-ATX |
| 5.25 "Wakọ Bays | 3 (2 with tool-less mechanism) |
| 3.5" Internal Drive Bays | 3 |
| 2.5 "Wakọ Bays | 4 |
| PCI Imugboroosi Iho | 7 |
| O pọju. Graphics Kaadi Ipari | 310mm (385mm with 2.5" cage removed) |
| O pọju. Sipiyu kula Giga | 160mm |
| O pọju. PSU Ipari | 260mm |
| Iwaju Awọn Ibudo I / O | 2x USB 3.0, 2x USB 2.0, HD Audio (Mic/Headphone) |
| Awọn onijakidijagan ti a ti fi sii tẹlẹ | Front: 1x 120mm, Rear: 1x 120mm Blue LED |
| Ọna Itutu | Itutu afẹfẹ |
| Awọn iwọn Ọja (L x W x H) | 44.5 x 20 x 43 cm |
| Iwọn Nkan | 3.5 kg |
8. Atilẹyin ọja ati Support
For warranty information and technical support, please refer to the official Sharkoon webaaye tabi kan si alagbata agbegbe rẹ. Jeki ẹri rira rẹ fun awọn iṣeduro atilẹyin ọja.
Official Sharkoon Webojula: www.sharkoon.com