
1. Ifihan
This manual provides detailed instructions for installing, configuring, and maintaining your GIGABYTE GA-B150M-D3H Micro ATX motherboard. The GA-B150M-D3H is designed to support 6th Generation Intel Core Processors and features Dual Channel DDR4 memory, PCIe Gen3 x4 M.2 connector, SATA Express, and 8-channel HD audio with Audio Noise Guard.
Please read this manual thoroughly before beginning installation to ensure proper setup and operation.
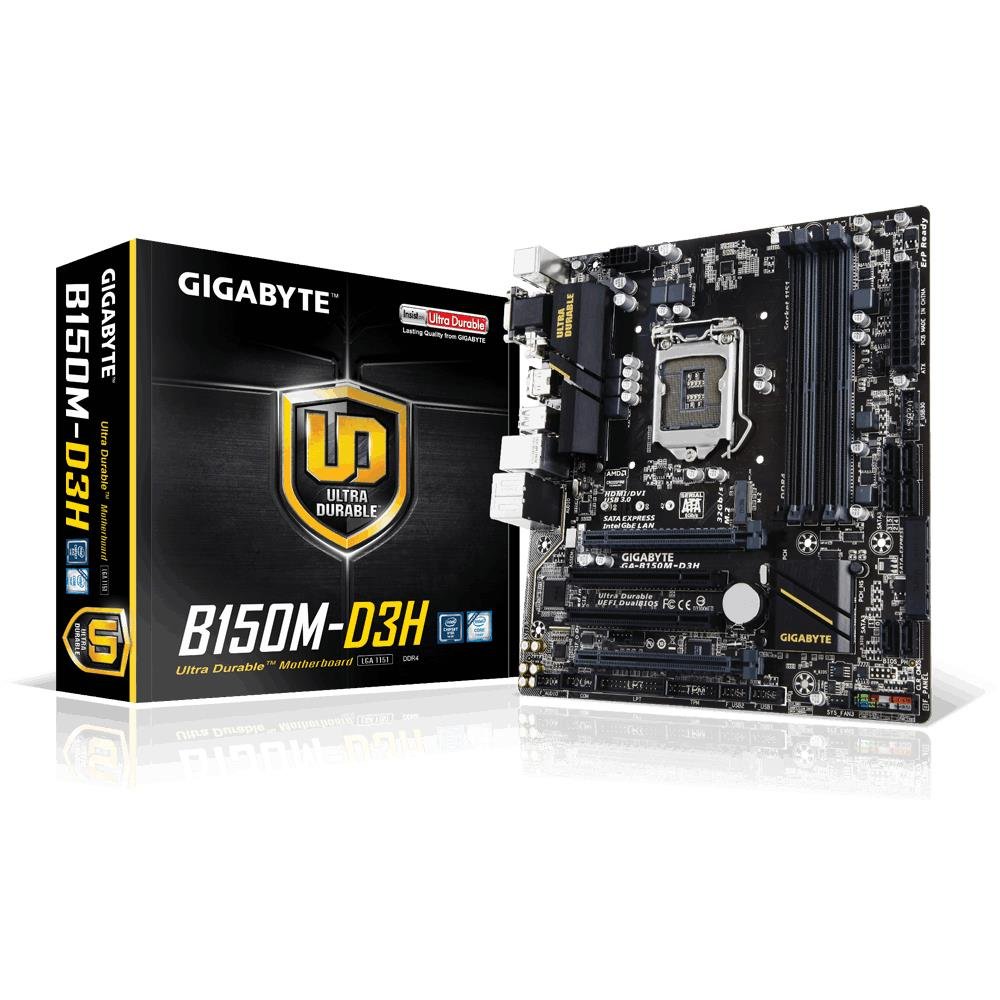
Image 1.1: GIGABYTE GA-B150M-D3H Micro ATX Motherboard. This image displays the overall layout of the motherboard, highlighting its compact Micro ATX form factor and various component slots.
2. Alaye Aabo
Ṣe akiyesi awọn iṣọra aabo wọnyi lati yago fun ibajẹ si modaboudu ati ipalara si ara rẹ:
- Máa yọ okùn agbára kúrò nínú ihò ògiri kí o tó fi ọwọ́ kan èyíkéyìí lára àwọn ohun èlò náà.
- Wọ okun ọwọ-atako-aimi tabi fi ọwọ kan ohun elo irin ti o wa lori ilẹ nigbagbogbo lati fi ina aimi silẹ.
- Mu modaboudu nipasẹ awọn egbegbe rẹ lati yago fun fifọwọkan awọn paati ifura.
- Pa modaboudu kuro lati ọrinrin ati awọn iwọn otutu to gaju.
- Rii daju pe fentilesonu to dara laarin ọran kọnputa lati ṣe idiwọ igbona.
3. Package Awọn akoonu
Daju pe gbogbo awọn ohun kan wa ninu package modaboudu rẹ:
- GIGABYTE GA-B150M-D3H Motherboard
- Itọsọna olumulo
- I / O Shield
- SATA Cables
- CD/DVD awakọ
Note: Contents may vary slightly depending on region or revision.
4. Modaboudu Layout
Familiarize yourself with the various components and connectors on the GA-B150M-D3H motherboard.
Image 4.1: GIGABYTE GA-B150M-D3H Motherboard Layout. This image provides a visual reference for the location of key components such as the CPU socket, DIMM slots, PCIe slots, SATA ports, and M.2 connector.
Awọn eroja pataki:
- Socket CPU LGA 1151: For 6th Generation Intel Core Processors.
- DDR4 DIMM Slots (4): Supports Dual Channel DDR4 memory up to 2133 MHz.
- PCIe Iho: Includes PCIe Gen3 x16 for graphics cards and PCIe x1 slots for expansion.
- M.2 Connector: Supports PCIe NVMe & SATA SSDs with up to 32Gb/s data transfer.
- SATA Express Connector: For up to 16Gb/s data transfer.
- SATA 6Gb/s Awọn ibudo: Fún sísopọ̀ àwọn ẹ̀rọ ìpamọ́ SATA ìbílẹ̀.
- Asopọ Agbara ATX PIN 24-PIN: Ifiwọle agbara akọkọ.
- 8-Pin ATX 12V Power Connector: CPU power input.
- Awọn akọle Iwaju Panel: For power button, reset button, LED indicators, and USB ports.
- Awọn Asopọ Olohun: 8-channel HD Audio with high quality capacitors and Audio Noise Guard.
5. Eto ati fifi sori
Tẹle awọn igbesẹ wọnyi fun fifi sori ẹrọ to dara ti modaboudu ati awọn paati rẹ.
5.1. Fifi Sipiyu
- Wa iho LGA 1151 Sipiyu.
- Ṣii lefa iho Sipiyu ki o gbe awo fifuye naa.
- Farabalẹ ṣe deede Sipiyu pẹlu iho, aridaju onigun mẹta goolu lori Sipiyu baamu onigun mẹta lori iho naa. Ma ṣe fi agbara mu Sipiyu sinu iho.
- Isalẹ awọn fifuye awo ati ki o oluso o pẹlu awọn lefa.
5.2. Fifi Sipiyu kula
Refer to your CPU cooler's instruction manual for specific installation steps. Ensure thermal paste is applied correctly between the CPU and cooler base.
5.3. Fifi sori ẹrọ Iranti (Ramu)
- Ṣii awọn agekuru ni opin mejeeji ti awọn iho DDR4 DIMM.
- Parapọ iranti module pẹlu iho, aridaju ogbontarigi lori module ibaamu awọn bọtini ni Iho.
- Tẹ mọlẹ ṣinṣin lori awọn opin mejeeji ti module iranti titi awọn agekuru yoo fi rọ si aaye.
- For dual-channel performance, install memory modules in matching colored slots (e.g., DIMM1 and DIMM2).
5.4. Fifi Awọn Kaadi Imugboroosi sii
- Remove the metal bracket from the desired PCIe slot on your computer case.
- Align the expansion card with the PCIe slot and press down firmly until it is seated correctly.
- Fi skru so kaadi naa mọ apoti kọmputa naa.
5.5. Àwọn Ẹ̀rọ Ìpamọ́ Tó Sopọ̀
- Awọn ẹrọ SATA: Connect one end of the SATA data cable to a SATA 6Gb/s port on the motherboard and the other end to your hard drive or SSD. Connect the SATA power cable from your power supply to the device.
- M.2 SSD: Insert the M.2 SSD into the M.2 slot at an angle, then gently push it down and secure it with the provided screw.
- SATA Express: If using a SATA Express device, connect it to the designated SATA Express connector.
5.6. Nsopọ Front Panel Connectors
Connect the cables from your computer case's front panel (power button, reset button, HDD LED, power LED, front USB, front audio) to the corresponding headers on the motherboard. Refer to the motherboard layout diagram for exact locations and pin assignments.
5.7. Nsopọ Agbara Ipese
- Connect the 24-pin ATX main power connector from your power supply to the 24-pin power socket on the motherboard.
- Connect the 8-pin ATX 12V CPU power connector to the 8-pin socket near the CPU.
- Rii daju pe gbogbo awọn asopọ agbara wa ni aabo.
6. Awọn ilana Iṣiṣẹ
6.1. Bata akọkọ
After assembling all components, connect your monitor, keyboard, and mouse. Power on the system. The system should display the GIGABYTE splash screen and then enter the BIOS/UEFI setup or attempt to boot from a connected storage device.
6.2. Eto BIOS / UEFI
Lati tẹ BIOS/UEFI setup, tẹ awọn DEL key repeatedly during the boot process when the GIGABYTE logo appears. Here you can configure system settings, boot order, and monitor hardware status. The GA-B150M-D3H features GIGABYTE UEFI Dual BIOS for enhanced reliability.
6.3. Fifi sori awakọ
After installing your operating system, install the necessary drivers for the motherboard components. These can be found on the included driver CD/DVD or downloaded from the official GIGABYTE website. Key drivers include chipset, audio (Realtek ALC892 codec), LAN, and any integrated graphics drivers.
6.4. Fifi sori ẹrọ System
Insert your operating system installation media (USB drive or DVD) and configure the boot order in the BIOS/UEFI to boot from it. Follow the on-screen instructions to install your preferred operating system (e.g., Windows 8.1, Windows 10).
7. Itọju
7.1. Ninu
Regularly clean the interior of your computer case to prevent dust buildup, which can lead to overheating. Use compressed air to remove dust from fans, heatsinks, and motherboard components. Ensure the system is powered off and unplugged before cleaning.
7.2. Awọn imudojuiwọn BIOS
GIGABYTE periodically releases BIOS updates to improve system stability, compatibility, and performance. Visit the official GIGABYTE website for your motherboard model (GA-B150M-D3H) to check for the latest BIOS version and follow the provided instructions for updating. Exercise caution during BIOS updates, as an interruption can render the motherboard inoperable.
8. Laasigbotitusita
Abala yii n ṣalaye awọn ọran ti o wọpọ ti o le ba pade.
8.1. Ko si Agbara / Eto Ko Tan-an
- Ṣàyẹ̀wò bóyá a so agbára náà pọ̀ mọ́ modaboudu (àwọn asopọ̀ pin 24 àti pin 8).
- Rii daju pe iyipada ipese agbara wa ni ipo ON.
- Rí i dájú pé okùn bọ́tìnì agbára iwájú wà ní ìsopọ̀ dáadáa pẹ̀lú àkọlé modaboudu náà.
- Ṣe idanwo ipese agbara pẹlu eto miiran tabi oluyẹwo ipese agbara.
8.2. Ko si Abajade Ifihan
- Ensure the monitor is connected to the correct graphics output (either integrated graphics on the motherboard or a dedicated graphics card).
- Tun awọn eya kaadi ati iranti modulu.
- Try booting with only one memory module installed.
- Ṣàyẹ̀wò bóyá a ti tan monitor náà kí o sì ṣètò rẹ̀ sí orísun ìtẹ̀wọlé tó tọ́.
8.3. System aisedeede / ipadanu
- Ṣàyẹ̀wò iwọn otutu CPU àti GPU láti rí i dájú pé wọ́n wà láàrín àwọn ààlà ìṣiṣẹ́ tó dájú.
- Verify that all drivers are installed and up to date.
- Ṣiṣe awọn irinṣẹ idanimọ iranti lati ṣayẹwo fun Ramu ti ko tọ.
- Ensure the power supply provides sufficient and stable power to all components.
9. Awọn pato
Detailed technical specifications for the GIGABYTE GA-B150M-D3H motherboard:
| Ẹya ara ẹrọ | Sipesifikesonu |
|---|---|
| Orukọ awoṣe | GA-B150M-D3H |
| Fọọmù ifosiwewe | Micro ATX (24.4cm x 22.5cm) |
| Sipiyu Socket | LGA 1151 |
| Awọn isise ibaramu | 6th Generation Intel Core Processors |
| Chipset | Intel B150 Express Chipset |
| Imọ-ẹrọ Iranti | DDR4 |
| Iho iranti | 4 x DDR4 DIMM sockets (Dual Channel) |
| Maks Memory Agbara | 16 GB |
| Iyara aago iranti | 2133 MHz |
| PCIe Awọn ibiti | 1 x PCI Express x16, 1 x Total PCIe Ports |
| Awọn atọkun ipamọ | PCIe Gen3 x4 M.2, SATA Express, SATA 6Gb/s |
| Kodẹki ohun | Realtek ALC892 codec, 8-channel HD Audio |
| Awọn ibudo USB | Total 8 USB Ports (including USB 2.0) |
| Asopọ Agbara Akọkọ | ATX 24-Pin |
| Sipiyu Power Asopọmọra | 8-Pin ATX 12V |
| Oto Awọn ẹya ara ẹrọ | GIGABYTE UEFI Dual BIOS, Audio Noise Guard with LED Trace Path Lighting, App Center (Easy Tune, Cloud Station) |
10. Atilẹyin ọja ati Support
For warranty information, please refer to the warranty card included in your product package or visit the official GIGABYTE webojula. Awọn ofin atilẹyin ọja le yatọ nipasẹ agbegbe.
For technical support, driver downloads, BIOS updates, and further product information, please visit the GIGABYTE official support webojula:
https://www.gigabyte.com/Support
When contacting support, please have your motherboard model (GA-B150M-D3H) and serial number ready.