
1. Ifihan
This manual provides comprehensive instructions for the setup, installation, operation, maintenance, and troubleshooting of your Antec VSK2000-U3 Micro-ATX Desktop Case. Please read this manual thoroughly before beginning installation to ensure proper assembly and optimal performance.
Video 1: Computer Case Display. This video provides a visual overview of a computer case, demonstrating its external features and design.
2. Key Awọn ẹya ara ẹrọ
The Antec VSK2000-U3 Micro-ATX Desktop Case is designed for efficient and compact PC builds. Key features include:
- Motherboard Support: Up to Micro-ATX
- Cooling: 1 x 92 mm temperature-controlled fan included
- Power Supply Unit (PSU) Support: TFX form factor
- Drive Bays: Supports up to 1 x 5.25” ODD, 1 x 3.5" HDD & 1 x 2.5" SSD
- Imugboroosi Iho: 4

olusin 1: Iwaju view of the Antec VSK2000-U3 case, highlighting the front panel I/O and optical drive bay.
3. Eto ati fifi sori
Follow these steps to install your components into the Antec VSK2000-U3 case. Ensure all power is disconnected before handling internal components.
3.1. Ngbaradi Ọran naa
- Yọ Awọn Paneli ẹgbẹ kuro: Carefully remove the side panels of the case to access the interior.
- Fi I/O Shield sori ẹrọ: Install the I/O shield provided with your motherboard into the rear opening of the case.

olusin 2: Apa view of the Antec VSK2000-U3 case with the side panel removed, showing the internal layout.
3.2. Modaboudu fifi sori
- Align Motherboard: Carefully align your Micro-ATX motherboard with the standoffs inside the case.
- Modaboudu to ni aabo: Use the provided screws to secure the motherboard to the standoffs.
3.3. Fifi sori Ipese Agbara
- Ipo PSU: Install your TFX form factor power supply into its designated bay.
- PSU ti o ni aabo: Secure the power supply with screws from the rear of the case.
- So awọn okun agbara pọ: Route and connect the necessary power cables to your motherboard and other components.

olusin 3: Ẹyìn view of the Antec VSK2000-U3 case, showing the I/O shield area, expansion slots, and PSU mounting.
3.4. Drive Installation (ODD, HDD, SSD)
- Optical Drive (ODD): Install your 5.25" optical drive into the front bay. The case features a tool-less ODD housing system.
- Hard Disk Drive (HDD): Install your 3.5" HDD into the designated bay. The case features a tool-less HDD housing system.
- Solid State Drive (SSD): Install your 2.5" SSD into the designated bay.
- Connect Drives: So data SATA ati awọn okun agbara pọ mọ gbogbo awọn awakọ ti a fi sori ẹrọ.
3.5. Fifi sori Kaadi Imugboroosi
- Yọ Awọn ideri Iho kuro: Yọ awọn ideri aaye imugboroosi pataki kuro ni ẹhin apoti naa.
- Install Card: Insert your expansion card (e.g., graphics card) into the appropriate PCI-E slot on the motherboard.
- Kaadi to ni aabo: Secure the expansion card with a screw.
3.6. Iwaju Panel Awọn isopọ
Connect the front panel cables (USB 3.0, audio, power switch, reset switch, LED indicators) to the corresponding headers on your motherboard. Refer to your motherboard manual for specific header locations.
3.7. Iṣakoso USB
Route cables neatly to improve airflow and aesthetics. Use cable ties or the case's cable management features to secure cables away from moving parts and airflow paths.
3.8. Video Tutorials for Installation
Video 2: Detailed Installation Tutorial. This video demonstrates the step-by-step process of installing components into a computer case, including the motherboard, power supply, and drives.
Video 3: Micro ATX PC Case Installation. This video illustrates the assembly process for a Micro ATX PC case, covering component placement and cable routing.
4. Awọn ilana Iṣiṣẹ
Once all components are securely installed and connected, replace the side panels. Connect your monitor, keyboard, mouse, and other peripherals to the appropriate ports on the rear I/O panel and front panel. Connect the power cable to the power supply and a wall outlet, then press the power button on the front of the case to start your system.
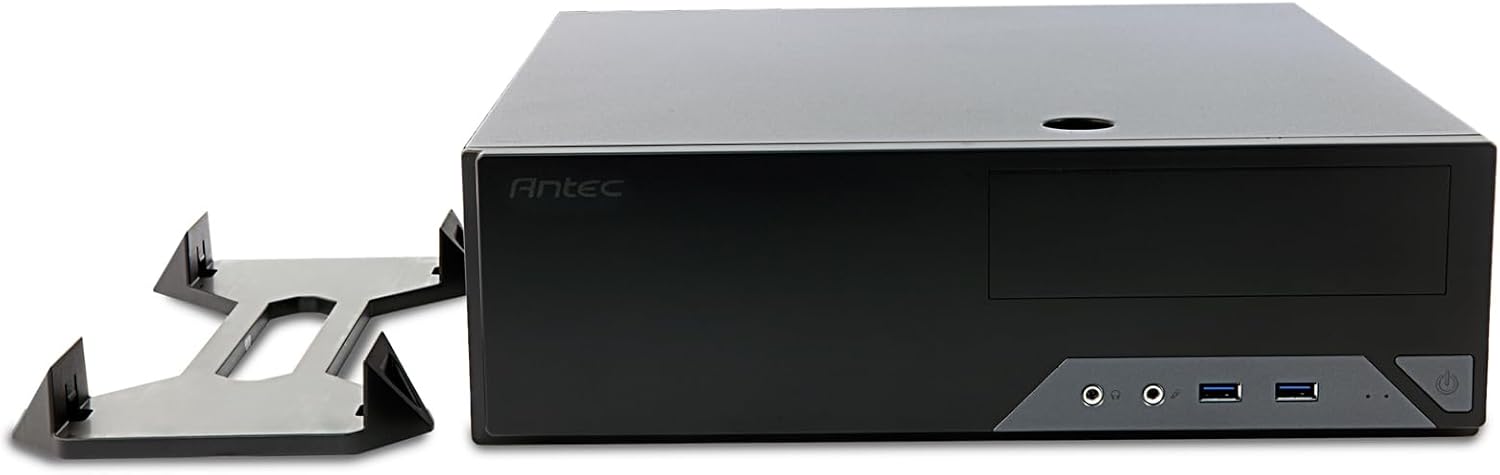
Figure 4: The Antec VSK2000-U3 case shown in a horizontal orientation with its included stand, demonstrating versatile placement options.
5. Itọju
Itọju deedee ṣe iranlọwọ lati rii daju pe PC rẹ yoo pẹ to ati pe o ṣiṣẹ daradara.
- Pipa eruku: Periodically clean dust from the case interior, fans, and air vents using compressed air or a soft brush. Ensure the system is powered off and unplugged before cleaning.
- Iṣakoso USB: Check cable routing periodically to ensure no cables are obstructing airflow or fan operation.
- Ṣayẹwo Olufẹ: Ensure the included 92mm temperature-controlled fan and any other installed fans are operating correctly and free from obstructions.
6. Laasigbotitusita
Tí o bá ní ìṣòro pẹ̀lú ìkọ́lé PC rẹ, ronú nípa àwọn ìgbésẹ̀ tí ó wọ́pọ̀ láti yanjú ìṣòro wọ̀nyí:
- Ko si Agbara:
- Verify the power cable is securely connected to the PSU and wall outlet.
- Rii daju pe iyipada PSU wa ni ipo 'ON'.
- Check all internal power connections (24-pin ATX, 8-pin CPU, GPU power, drive power).
- Confirm front panel power switch cable is correctly connected to the motherboard.
- Ko si Ifihan:
- Ensure the monitor is connected to the correct graphics output (dedicated GPU or motherboard integrated graphics).
- Tun awọn eya kaadi ati Ramu modulu.
- Ariwo Pupọ:
- Identify the source of the noise (fan, HDD).
- Clean dust from fans.
- Ensure no cables are touching fan blades.
7. Awọn pato
| Ẹya ara ẹrọ | Ẹ̀kúnrẹ́rẹ́ |
|---|---|
| Brand | Antec |
| jara | VSK2000-U3 |
| Orukọ awoṣe | VSK2000-U3 |
| Modaboudu Ibamu | Micro ATX |
| Iru Irú | Mid Tower (Slim Desktop) |
| Awọn iwọn (LxWxH) | 18.6 x 15.9 x 7 inches |
| Iwọn Nkan | 5.28 iwon |
| Àwọ̀ | Dudu |
| Ohun elo | Painted/Coated Metal (Likely Steel Or Aluminum With Plastic Components) |
| Agbara Ipese Iṣagbesori Iru | Rear Mount (TFX form factor) |
| Ọna Itutu | Air (1 x 92 mm temperature-controlled fan included) |
| Fan Iwon | 92 millimeters |
| Wakọ Bays | 1 x 5.25” ODD, 1 x 3.5" HDD, 1 x 2.5" SSD |
| Imugboroosi Iho | 4 |
8. Atilẹyin ọja ati Support
The Antec VSK2000-U3 Micro-ATX Desktop Case comes with a 2-odun atilẹyin ọja. For technical support, warranty claims, or additional product information, please visit the official Antec webojula tabi kan si wọn onibara iṣẹ Eka. Jeki ẹri rira rẹ fun ijẹrisi atilẹyin ọja.
Fun iranlọwọ siwaju sii, jọwọ tọka si Ile itaja Antec.