
EACHINE TX526
EACHINE TX526 5.8G 40CH AV Wireless FPV Transmitter User Manual
Awoṣe: TX526
Ọrọ Iṣaaju
This manual provides comprehensive instructions for the proper setup, operation, and maintenance of your EACHINE TX526 5.8G 40CH AV Wireless FPV Transmitter. Please read this manual thoroughly before using the device to ensure safe and optimal performance.
Ọja Pariview
Package Awọn akoonu
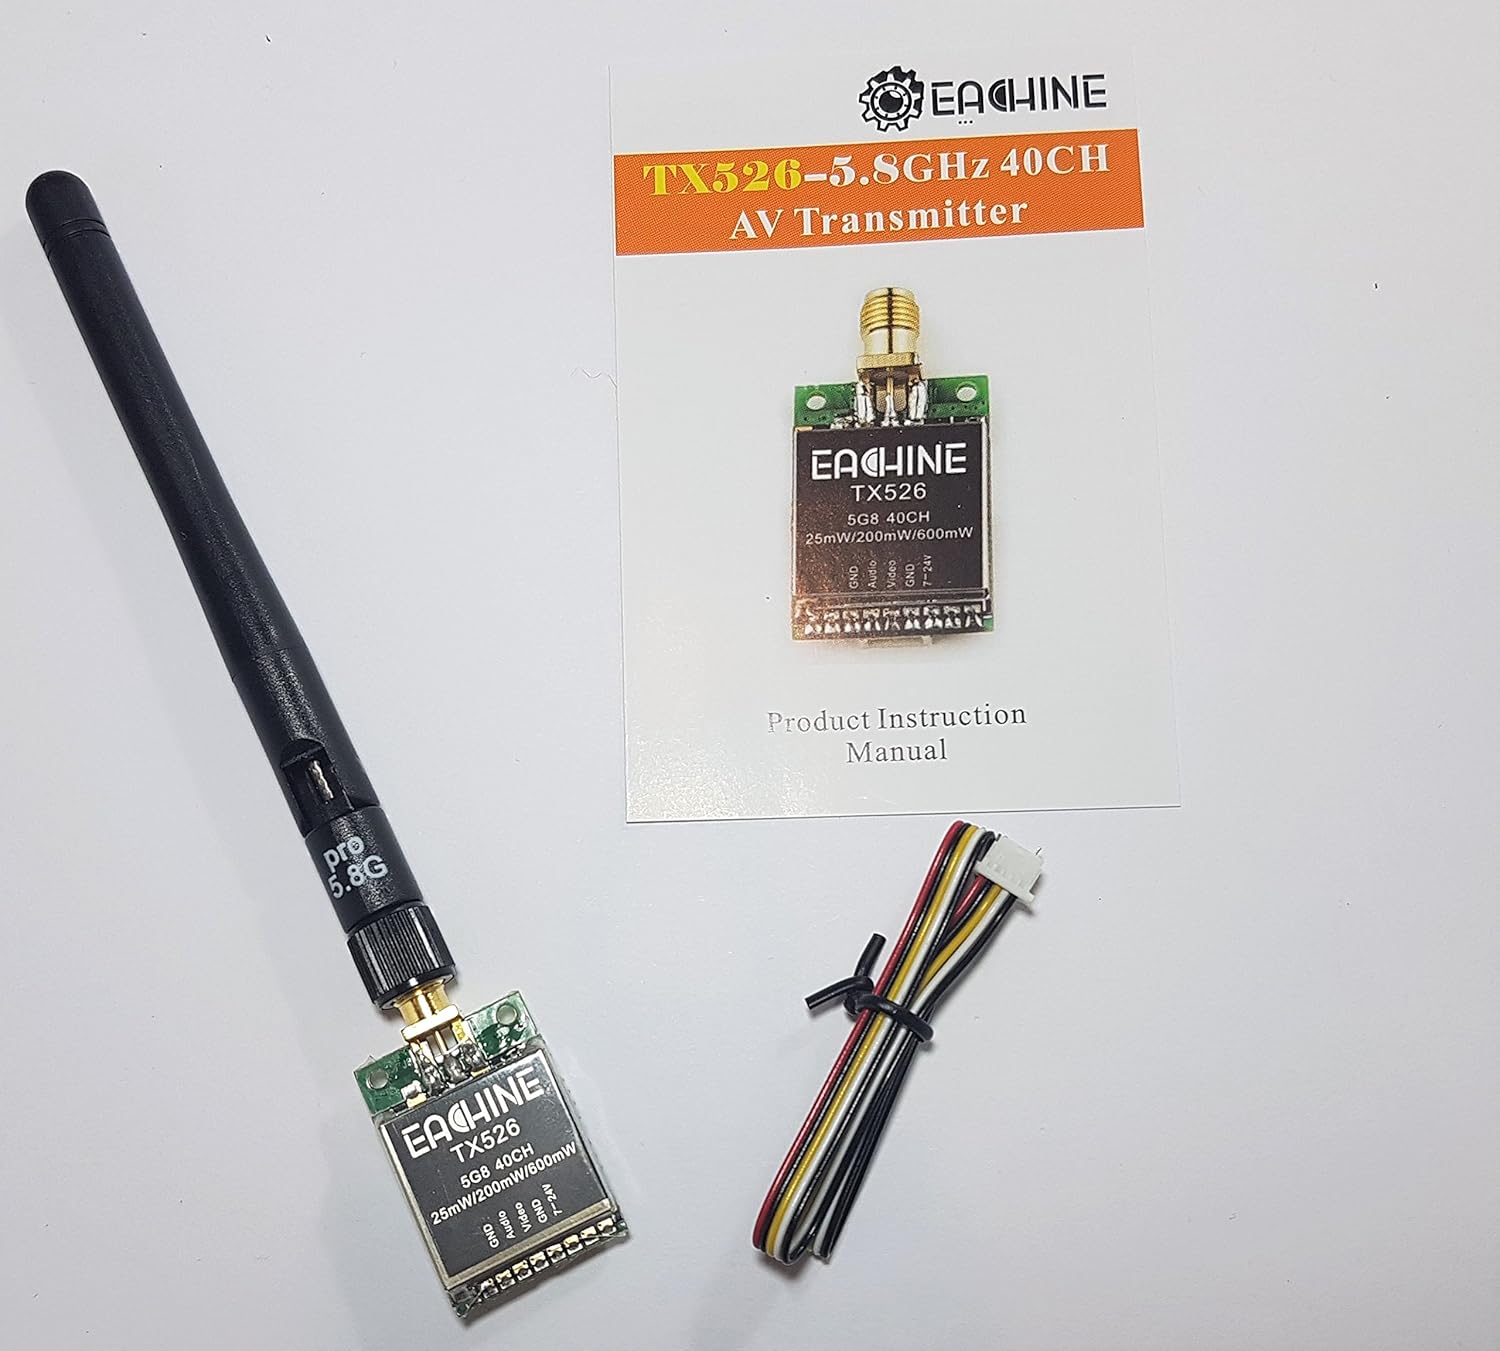
Image: The EACHINE TX526 FPV Transmitter, a detachable antenna, a multi-wire connection cable, and the product instruction manual are included in the package.
- EACHINE TX526 FPV Transmitter
- RP-SMA Female Antenna
- Multi-wire Connection Cable
- Ọja Ilana Afowoyi
Key Awọn ẹya ara ẹrọ

Image: The product packaging lists key features of the TX526 transmitter.
- 40CH Raceband support
- Super mini size for compact installations
- Button control for easy channel and power adjustment
- One screen display for clear status indication
- High stability for reliable video transmission
- Switchable power output: 25mW / 200mW / 600mW
Ṣeto
Idanimọ paati

Aworan: A alaye view of the TX526 transmitter's connection pads, labeled GND, Audio, Video, GND, and 7-24V.

Image: The reverse side of the TX526 transmitter, showing the digital LED display and the control button.
Aworan onirin
Connect the supplied multi-wire cable to the transmitter's pin header according to the following pinout:
| Pin | Išẹ | Apejuwe |
|---|---|---|
| 1 | GND | Asopọ ilẹ |
| 2 | Ohun | Audio input from camera/microphone (if applicable) |
| 3 | Fidio | Iwọle fidio lati kamẹra FPV |
| 4 | GND | Asopọ ilẹ |
| 5 | 7-24V | Power input (DC 7V to 24V) |
Ensure correct polarity when connecting power. Incorrect wiring can damage the transmitter.
Asopọmọra eriali

Image: The TX526 transmitter with its antenna securely attached and the power/signal cable connected.
Carefully screw the supplied RP-SMA antenna onto the transmitter's antenna connector. Ensure it is finger-tight to prevent signal loss. Never power on the transmitter without an antenna connected, as this can permanently damage the device.
Awọn ilana Iṣiṣẹ
Agbara Lori
Once all connections are secure, apply power (7-24V DC) to the transmitter. The LED display will illuminate, indicating the current channel and band.
Changing Channels and Bands
The TX526 features a single button for controlling channel and band selection.
- Tẹ kukuru: A short press of the button will cycle through the channels (1-8) within the current band. The LED display will update to show the new channel number.
- Tẹ gigun (awọn aaya 2-3): A long press of the button will cycle through the available frequency bands (A, B, E, F, R). The LED display will show the band letter (e.g., 'A', 'b', 'E', 'F', 'r') for a moment before returning to the channel number.
Refer to the frequency table below for specific frequencies per channel and band.
Changing Power Output
The TX526 allows switching between 25mW, 200mW, and 600mW output power. The method for changing power output is typically a very long press or a specific button combination. (Note: Specific button sequence for power output change is not detailed in provided images. Refer to the physical manual for precise instructions.)
Higher power output provides greater range but consumes more battery and generates more heat. Always ensure adequate airflow around the transmitter, especially at higher power settings.
Itoju
- Keep the transmitter clean and free from dust and debris. Use a soft, dry cloth for cleaning.
- Avoid exposing the transmitter to extreme temperatures, humidity, or direct sunlight.
- Ensure all connections (antenna, power, video) are secure before each use.
- Regularly inspect the antenna for damage. A damaged antenna can significantly reduce performance.
- Do not attempt to open the transmitter casing, as this may void the warranty and cause damage.
Laasigbotitusita
Ko si Video ifihan agbara
- Check all wiring connections, especially power and video input.
- Ensure the antenna is securely connected to the transmitter.
- Verify that your FPV receiver is on the same frequency and band as the transmitter.
- Confirm that the FPV camera is powered and functioning correctly.
- Check the power output setting; a very low setting might result in poor range.
Poor Video Quality / Static
- Ensure there are no obstructions between the transmitter and receiver.
- Check for interference from other 5.8GHz devices or strong Wi-Fi signals.
- Verify that both transmitter and receiver antennas are correctly oriented (e.g., vertical polarization).
- Ronú nípa ìbísíasing the power output of the transmitter if range is an issue.
- Inspect antennas for damage or bends.
Transmitter Overheating
- Ensure adequate airflow around the transmitter, especially when operating at 600mW.
- Avoid enclosing the transmitter in tight spaces without ventilation.
- Jẹrisi igbewọle voltage is within the specified 7-24V range.
Awọn pato
| Ẹya ara ẹrọ | Ẹ̀kúnrẹ́rẹ́ |
|---|---|
| Awoṣe | EACHINE TX526 |
| Igbohunsafẹfẹ | 5.8GHz |
| Awọn ikanni | 40CH (Raceband compatible) |
| Ijade agbara | 25mW / 200mW / 600mW (Switchable) |
| Iṣagbewọle Voltage | DC 7V - 24V |
| Asopọ Eriali | RP-SMA Obirin |
| Awọn iwọn | Isunmọ 11.7 x 7.4 x 2.5 cm (Awọn iwọn idii) |
| Iwọn | Nǹkan bí 45 g (Ìwọ̀n Ohun kan) |
Akiyesi: Awọn pato jẹ koko ọrọ si iyipada laisi akiyesi iṣaaju.
Atilẹyin ọja ati Support
For warranty information, technical support, or further inquiries, please visit the official EACHINE webojula tabi kan si alagbata rẹ.
Osise Webojula: http://www.eachine.com
Ask a question about this manual
Ask about setup, troubleshooting, compatibility, parts, safety, or missing instructions. Manuals+ will review the question and use this page’s manual context to help answer it.