
1. Ifihan
Thank you for choosing the Dinuy Helios TI URA R00 Wireless Doorbell Receiver. This manual provides essential information for the safe and efficient installation, operation, and maintenance of your device. Please read these instructions carefully before installation and retain them for future reference.
2. Alaye Aabo
- Ewu Itanna: This device operates on 230V AC mains power. Installation must be performed by a qualified electrician or competent person in accordance with local electrical codes and regulations.
- Ge Agbara: Always disconnect the main power supply at the circuit breaker before attempting any installation, wiring, or maintenance.
- Lilo inu ile Nikan: This receiver is designed for indoor use in dry locations. Do not expose it to moisture, rain, or extreme temperatures.
- Afẹfẹ: Ensure adequate ventilation around the unit to prevent overheating. Do not cover the receiver.
- Ninu: Use a dry, soft cloth for cleaning. Do not use liquid cleaners or aerosols.
3. Package Awọn akoonu
Jọwọ ṣayẹwo awọn akoonu package lati rii daju pe gbogbo awọn ohun kan wa:
- Dinuy Helios TI URA R00 Wireless Doorbell Receiver Unit
- Ohun elo iṣagbesori (skru, awọn pilogi ogiri)
- Ilana Afowoyi (iwe yii)
4. Ọja Ipariview
The Dinuy Helios TI URA R00 is a sleek, wall-mountable wireless receiver designed to alert you when a compatible wireless doorbell push button is activated. It integrates seamlessly into various home or office environments.
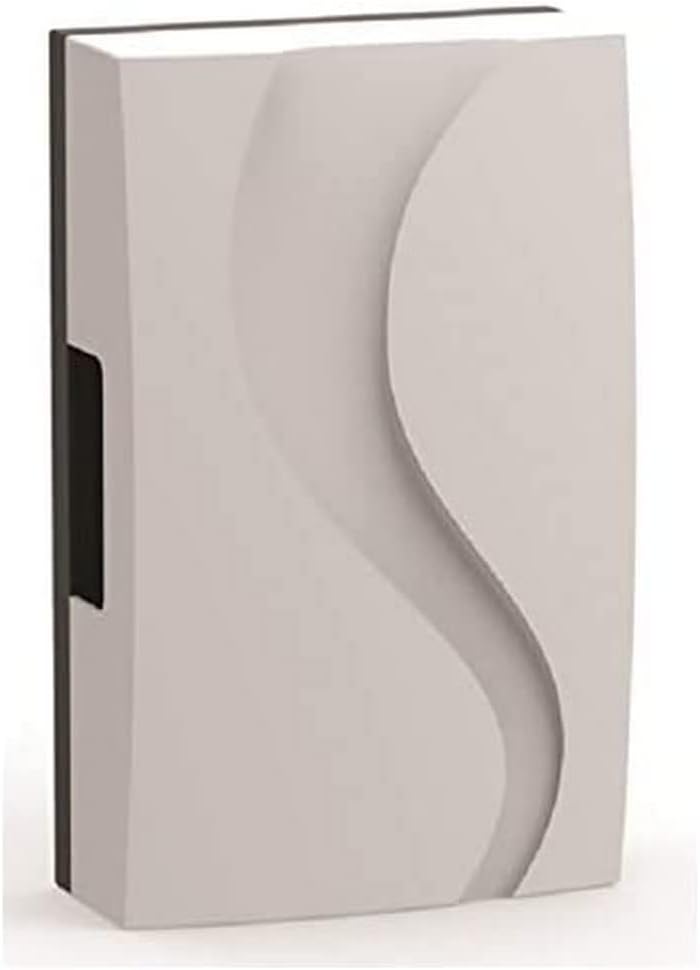
Nọmba 1: Dinuy Helios TI URA R00 Wireless Doorbell Receiver. This image displays the compact, rectangular wireless receiver unit. Its front panel features a subtle, wave-like embossed design, providing a modern aesthetic. A small black section is visible on the left side, likely for wiring or mounting.
5. Eto ati fifi sori
Pataki: Ensure the main power supply is disconnected before proceeding with installation.
5.1 Fifi sori ẹrọ olugba naa
- Choose a suitable indoor location for the receiver, ideally centrally located within your property for optimal wireless signal reception from the doorbell push button.
- Mark the desired mounting points on the wall using the receiver as a template.
- Lu awọn ihò ni awọn aaye ti a samisi ki o si fi awọn pulọọgi ogiri ti a pese sii.
- Secure the receiver to the wall using the provided screws.
5.2 Wiring the Receiver (230V Mains Connection)
The Dinuy Helios TI URA R00 receiver requires a permanent 230V AC mains power supply.
- With the power disconnected, carefully open the receiver casing to access the wiring terminals. Refer to the internal diagram if available.
- Connect the Live (L) wire from your 230V mains supply to the terminal marked 'L'.
- Connect the Neutral (N) wire from your 230V mains supply to the terminal marked 'N'.
- Rii daju pe gbogbo awọn asopọ wa ni aabo ati idabobo daradara.
- Close the receiver casing ni aabo.
5.3 Pairing with a Wireless Push Button
After wiring, restore power to the receiver. Follow these steps to pair it with your wireless doorbell push button (transmitter):
- Put the receiver into pairing mode. This usually involves pressing and holding a specific button on the receiver for a few seconds until an indicator light flashes or a sound is emitted. (Consult your specific doorbell push button manual for its pairing procedure if different).
- Within the pairing window (typically 10-30 seconds), press the button on your wireless doorbell transmitter.
- The receiver should emit a confirmation sound or flash its indicator light to confirm successful pairing.
- Test the connection by pressing the doorbell push button. The receiver should chime.
6. Awọn ilana Iṣiṣẹ
Once installed and paired, the Dinuy Helios TI URA R00 receiver operates automatically:
- When the paired wireless doorbell push button is pressed, the receiver will sound the selected melody.
- Aṣayan Aladun: If your receiver supports multiple melodies, there will typically be a button (often marked with a music note or 'M') to cycle through available chimes. Press this button to select your preferred melody.
- Atunse iwọn didun: If your receiver has volume control, a dedicated button (often marked with '+' and '-' or a speaker icon) will allow you to adjust the sound level.
7. Itọju
- Ninu: To clean the receiver, wipe the exterior with a soft, dry cloth. Do not use abrasive cleaners, solvents, or wet cloths, as these can damage the unit or cause electrical hazards.
- Ko si Awọn apakan Iṣẹ Olumulo: The Dinuy Helios TI URA R00 receiver contains no user-serviceable parts. Do not attempt to open or repair the unit yourself. Refer all servicing to qualified personnel.
8. Laasigbotitusita
| Isoro | Owun to le Fa | Ojutu |
|---|---|---|
| Receiver does not chime. | Kò sí agbára sí olùgbà. Receiver not paired with push button. Batiri bọtini titẹ ti ku. Jade ti alailowaya ibiti o. | Check 230V mains connection and circuit breaker. Ṣe ilana isopọmọ (Apakan 5.3). Replace battery in the wireless push button transmitter. Move receiver closer to the push button or eliminate obstructions. |
| Intermittent chiming or poor signal. | Ìdènà aláìlókùn. Low battery in push button. Obstructions between receiver and push button. | Relocate receiver or push button away from large metal objects or other wireless devices. Replace battery in the wireless push button transmitter. Ensure clear line of sight or reduce distance. |
| Receiver indicator light not working. | Ko si agbara. Ẹyọ ti ko tọ. | Ṣayẹwo ipese agbara. Kan si atilẹyin alabara. |
9. Awọn pato
- Brand: Dinuy
- Awoṣe: Helios TI URA R00
- Ibi ti ina elekitiriki ti nwa: 230V AC
- Awọn iwọn (isunmọ): 17.4 x 11.1 x 5.5 cm (Length x Width x Depth)
- Ìwọ̀n (isunmọ́): 250 giramu
- Fifi sori: Odi-agesin
- Igbohunsafẹfẹ Ṣiṣẹ: (Specific frequency not provided, typically 433MHz or 868MHz for wireless doorbells)
10. Atilẹyin ọja ati Support
Dinuy products are manufactured to high-quality standards. This product is covered by a manufacturer's warranty against defects in materials and workmanship. The specific terms and duration of the warranty may vary by region. Please retain your proof of purchase for warranty claims.
For technical support, troubleshooting assistance beyond this manual, or warranty inquiries, please contact your local Dinuy distributor or visit the official Dinuy webojula fun alaye olubasọrọ.


