1. Ifihan
The Bionik Tetra Power is a compact charging dock designed for Nintendo Switch Joy-Con controllers. It allows for simultaneous charging of up to four Joy-Con controllers, providing a convenient and organized charging solution. This manual provides essential information for the proper setup, operation, and maintenance of your Tetra Power charging dock.

Image 1.1: Bionik Tetra Power Charging Dock in its retail packaging. The packaging highlights its ability to charge four Joy-Con controllers and its compatibility with Nintendo Switch.
Awọn ẹya pataki:
- Apẹrẹ Iwapọ: Unique cross formation allows simultaneous charging of up to four Joy-Con controllers without occupying excessive space.
- Iṣakoso okun USB ti a ṣepọ: Features a built-in system for adjusting and storing the charging cable, promoting a tidy setup.
- LED Charge Status Indicators: Provides clear visual feedback on the charging status of each connected Joy-Con controller.
- Iṣọkan Ẹwa: Designed to complement the visual style of the Nintendo Switch console.
2. Awọn ilana iṣeto
- Yọ Ẹrọ naa kuro: Carefully remove the Bionik Tetra Power charging dock from its packaging.
- Sopọ si Agbara: The charging dock features a built-in USB cable. Connect this USB cable to an available USB port on your Nintendo Switch dock or to a compatible USB power adapter (not included).

Image 2.1: The Bionik Tetra Power charging dock viewed from the side, showing its integrated USB cable for power connection.
- Iṣakoso USB: Utilize the built-in cable management system located at the base of the dock to adjust the cable length and store any excess, ensuring a neat setup.
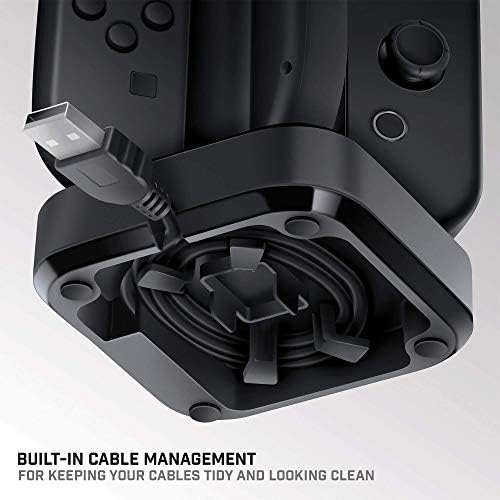
Image 2.2: The underside of the Tetra Power dock, illustrating the integrated cable management system for organizing the USB cable.
- Ibi: Place the charging dock on a stable, flat surface near your Nintendo Switch console for convenient access.
3. Awọn ilana Iṣiṣẹ
Charging Joy-Con Controllers:
- Ensure the Tetra Power charging dock is connected to a power source.
- Align a Joy-Con controller with one of the four charging slots on the dock. Gently slide the Joy-Con downwards until it clicks into place and makes contact with the charging pins.
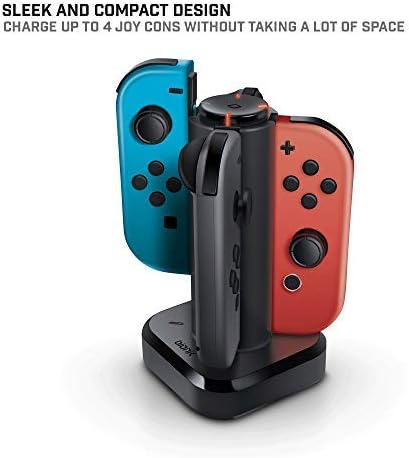
Image 3.1: The Tetra Power charging dock with two Nintendo Switch Joy-Con controllers inserted into their respective charging slots.
- Repeat for additional Joy-Con controllers, up to a maximum of four.
LED Charge Status Indicators:
Each charging slot is equipped with an LED indicator to display the charging status of the connected Joy-Con controller:
- LED pupa: Indicates that the Joy-Con controller is currently charging.
- Green Green: Indicates that the Joy-Con controller is fully charged.
- Ko si LED: Indicates no Joy-Con is connected or the dock is not receiving power.
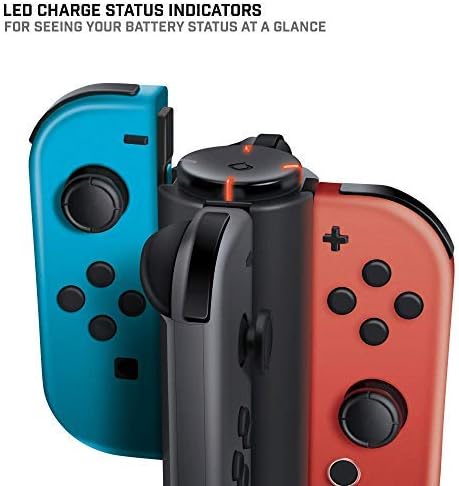
Aworan 3.2: A sunmọ-soke view of the LED charge status indicators on the Tetra Power dock, showing the illuminated status lights.
4. Itọju
- Ninu: Disconnect the charging dock from its power source before cleaning. Use a soft, dry cloth to wipe the exterior surfaces. Avoid using abrasive cleaners, solvents, or harsh chemicals.
- Ibi ipamọ: Tí o kò bá lò ó fún ìgbà pípẹ́, tọ́jú ibi ìgbafẹ́ sí ibi tí ó tutù tí ó sì gbẹ, tí kò sí ìmọ́lẹ̀ oòrùn tààrà àti ooru tó le koko.
- Mimu: Mu ẹrọ naa pẹlu itọju. Yago fun sisọ silẹ tabi tẹriba si awọn ipa ti o lagbara, eyiti o le ba awọn paati inu jẹ.
5. Laasigbotitusita
- Joy-Con not charging:
- Ensure the charging dock is properly connected to a powered USB port.
- Verify that the Joy-Con controller is correctly seated in the charging slot and making full contact with the charging pins.
- Check if the USB cable is securely connected to both the dock and the power source.
- Try connecting the dock to a different USB port or power adapter.
- Atọka LED ko tan ina:
- Confirm the charging dock is receiving power.
- Ensure a Joy-Con controller is properly inserted into the slot.
- If the Joy-Con is fully charged, the LED will be green. If no Joy-Con is present, the LED will be off.
6. Awọn pato
| Nọmba awoṣe | BNK-9019 |
| Brand | Bionik |
| Ọja Mefa | 6.1 x 4.1 x 3.9 inches |
| Iwọn Nkan | 6.4 iwon |
| Awọn ẹrọ ibaramu | Àwọn Olùdarí Nintendo Yipada Joy-Con |
| Asopọmọra Iru | Mini USB (integrated cable) |
| Iṣagbewọle Voltage | 5.4 Volts |
| Ampigba | 5 Amps |
| Lapapọ Awọn ibudo USB | 4 (for Joy-Cons) |
| Pataki Ẹya | Fast Charging, LED Charge Status Indicators, Cable Management |
7. Atilẹyin ọja ati Support
Bionik products are manufactured with quality and reliability in mind. For specific warranty information, product support, or to register your product, please visit the official Bionik webojula tabi kan si wọn onibara iṣẹ taara. Tọju iwe-ẹri rira rẹ bi ẹri rira fun eyikeyi awọn ibeere atilẹyin ọja.
Olupese: Bionik
Webojula: bionikgaming.com

Image 7.1: The back of the Tetra Power retail box, displaying multilingual features, specifications, and manufacturer contact details including the webojula.