
1. Ifihan
This manual provides essential information for the proper installation, operation, and maintenance of your Gladiator Premium 12V 140A Alternator. This alternator is designed to meet or exceed OEM specifications for various John Deere Marine engines and Ag-Chem Sprayer models.
Awọn ohun elo ibaramu:
- John Deere Marine Engines: 6081AFM01 (8.1L), 6081AFM75 (8.1L), 6125AFM01 (12.5L), 6125AFM75 (12.5L), 6125SFM75 (12.5L)
- Ag-Chem Sprayer 6103 TERRAGATOR (1998-2004)
- John Deere 3510 (8.1L, 1998-2000)
2. Alaye Aabo
Always prioritize safety when working with electrical components and machinery. Failure to follow these safety guidelines may result in personal injury or damage to equipment.
- Ge batiri kuro: Before beginning any work, always disconnect the negative (-) battery cable first, followed by the positive (+) cable.
- Wọ Ohun elo Idaabobo: Lo awọn ohun elo aabo ti ara ẹni ti o yẹ, pẹlu awọn gilaasi aabo ati awọn ibọwọ.
- Yago fun Awọn Yiyi Kukuru: Ensure no tools or metal objects come into contact with battery terminals or electrical connections simultaneously.
- Fifi sori Ọjọgbọn: Ti o ko ba ni idaniloju nipa igbesẹ eyikeyi, kan si onimọ-ẹrọ ti o peye.
- Afẹfẹ: Ensure adequate ventilation when working with batteries, as they can produce explosive gases.
3. Ọja Ipariview
The Gladiator Premium Alternator is a high-quality replacement unit designed for reliable performance. It features an internal regulator and internal fan for efficient operation, and comes with an 8-groove pulley.
Awọn ẹya pataki:
- 12 Folti, 140 Amp jade
- Internal Regulator and Internal Fan
- Clockwise (CW) Rotation
- Equipped with an 8-Groove Pulley
- Meets or exceeds OEM specifications
Awọn aworan ọja:
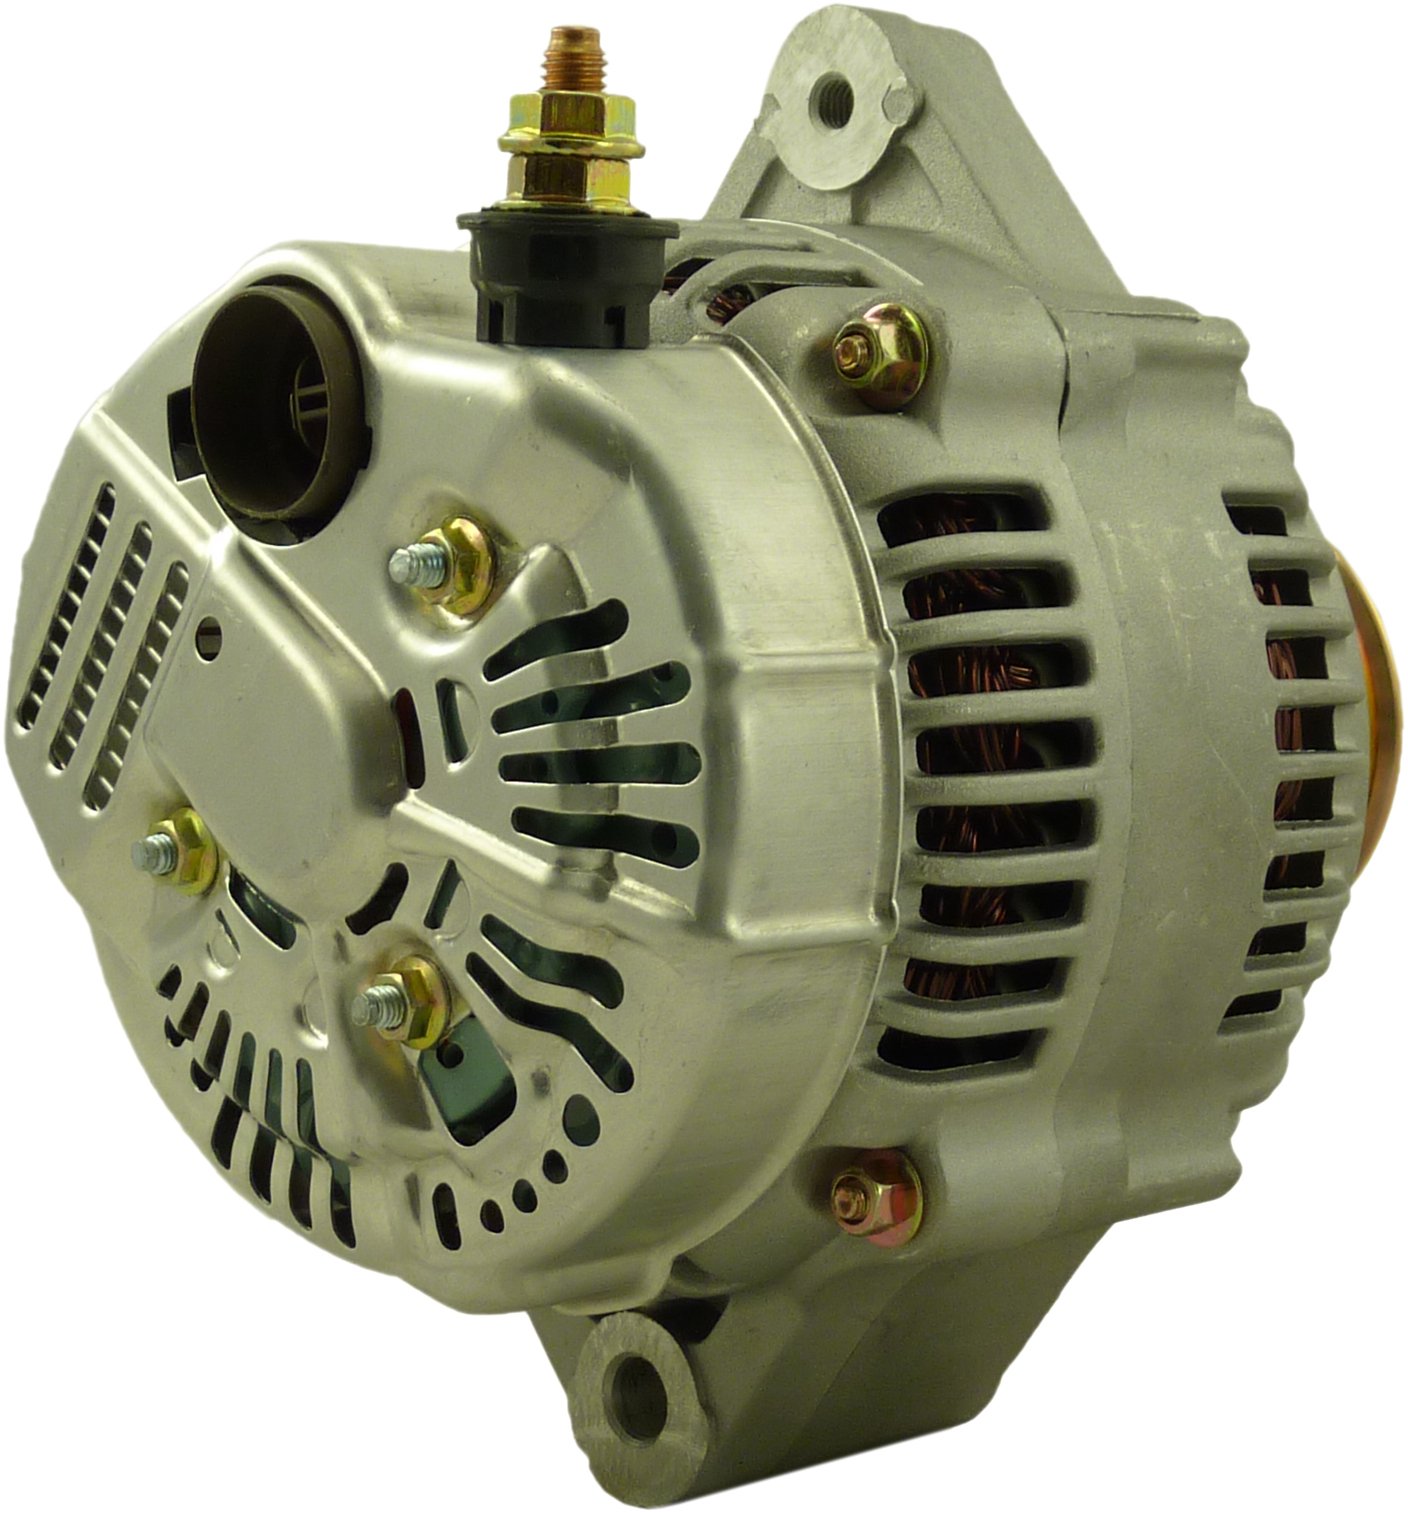
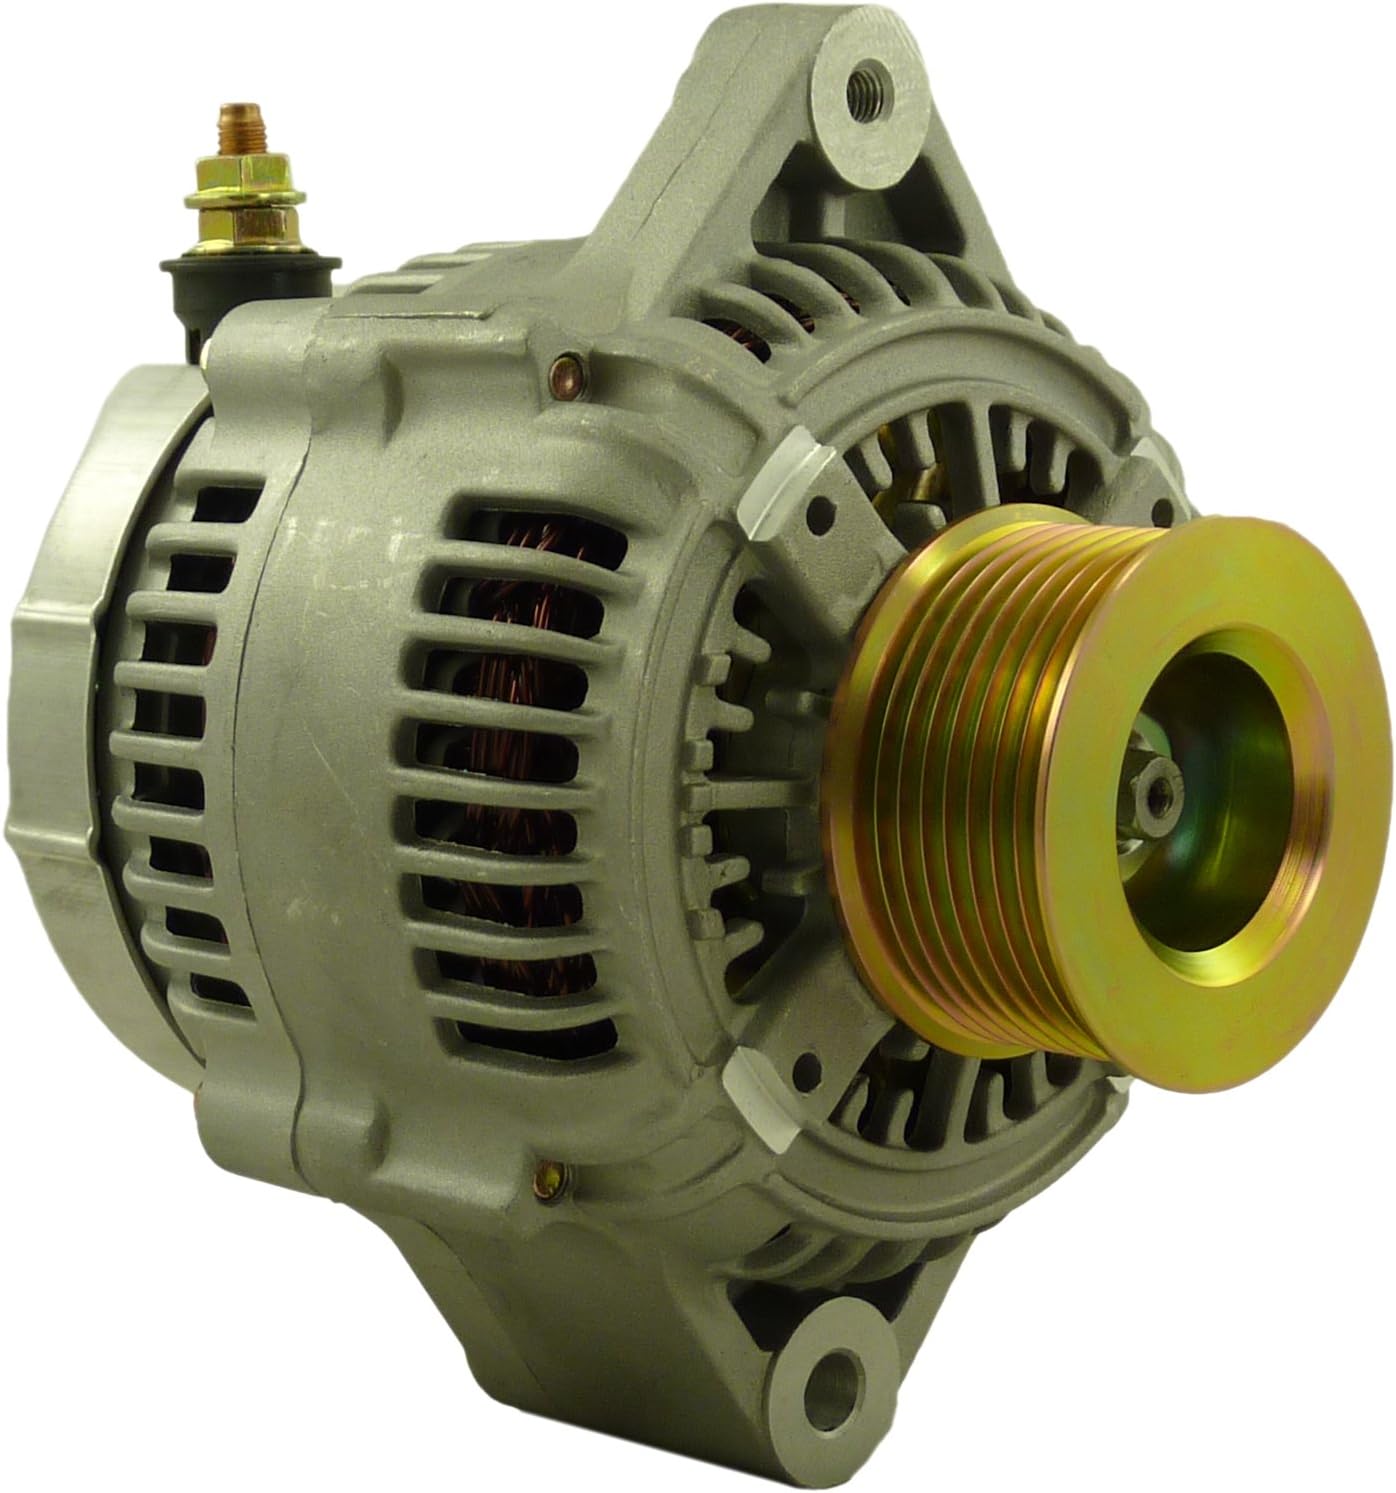


4. Eto ati fifi sori
Proper installation is crucial for the alternator's performance and longevity. Refer to your vehicle's specific service manual for detailed instructions, as procedures may vary.
Awọn iṣayẹwo fifi sori ẹrọ tẹlẹ:
- Ensure the new alternator matches the specifications and mounting configuration of the original unit.
- Inspect the drive belt for wear or damage. Replace if necessary.
- Check battery condition. A weak or faulty battery can stress a new alternator.
- Clean all electrical connections and mounting surfaces.
Awọn Igbesẹ fifi sori ẹrọ (Gbogbogbo):
- Ge batiri kuro: Disconnect the negative (-) battery cable first, then the positive (+) cable.
- Remove Drive Belt: Loosen the tensioner and remove the serpentine or V-belt from the alternator pulley.
- Ge Asopọmọra: Carefully disconnect all electrical connections from the old alternator (main output wire, regulator wires). Note their positions for reinstallation.
- Remove Old Alternator: Unbolt the old alternator from its mounting brackets and remove it from the engine compartment.
- Install New Alternator: Position the new Gladiator alternator into the mounting brackets. Install and tighten the mounting bolts to the manufacturer's specified torque.
- Asopọmọra Waya: Reconnect all electrical wires to the new alternator. Ensure connections are clean and secure.
- Install Drive Belt: Route the drive belt correctly around all pulleys. Adjust the tensioner to achieve the proper belt tension according to your vehicle's specifications.
- Batiri Atunso: Reconnect the positive (+) battery cable first, then the negative (-) cable.
5. Awọn ilana Iṣiṣẹ
After installation, perform the following checks before operating the vehicle:
- Ibẹrẹ Ibẹrẹ: Start the engine and observe the dashboard warning lights. The battery or charging system warning light should turn off shortly after the engine starts.
- Voltage Ṣayẹwo: With the engine running, use a voltmeter to check the battery voltage. It should typically read between 13.8V and 14.8V, indicating proper charging.
- Gbọ Ariwo: Listen for any unusual noises (e.g., squealing, grinding) that might indicate an issue with the belt or alternator.
During normal operation, the alternator continuously charges the battery and powers the vehicle's electrical systems. If the charging system warning light illuminates during operation, refer to the troubleshooting section.
6. Itọju
Regular maintenance helps ensure the longevity and optimal performance of your alternator.
- Ayẹwo igbanu: Periodically inspect the drive belt for cracks, fraying, or excessive wear. Ensure it has the correct tension. A loose belt can cause insufficient charging, while an overly tight belt can damage alternator bearings.
- Awọn isopọ onirin: Check all electrical connections to the alternator for corrosion or looseness. Clean and tighten as needed.
- Mimọ: Keep the alternator free from excessive dirt, oil, and debris, which can impede cooling and affect performance.
- Ilera Batiri: Ensure your battery is in good condition. A failing battery can overwork the alternator.
7. Laasigbotitusita
If you experience issues with your charging system, consider the following common problems and solutions:
| Aisan | Owun to le Fa | Ojutu |
|---|---|---|
| Battery/Charge Warning Light On | Loose or worn drive belt, faulty wiring connection, failing alternator, faulty battery. | Check belt tension and condition. Inspect all wiring. Test alternator output and battery health. |
| Batiri Kekere Voltage / Slow Cranking | Alternator not charging, excessive electrical load, faulty battery. | Check alternator output. Reduce electrical load. Test and charge/replace battery. |
| Unusual Noise (Squealing, Grinding) | Loose or worn drive belt, worn alternator bearings. | Inspect and adjust/replace drive belt. If noise persists, alternator may require replacement. |
| Overcharging (High Voltage) | Faulty internal voltage eleto. | Alternator requires replacement. |
If troubleshooting steps do not resolve the issue, it is recommended to have the charging system professionally diagnosed.
8. Awọn pato
| Sipesifikesonu | Iye |
|---|---|
| Voltage | 12V |
| Ampigba | 140A |
| Olutọju Iru | Ti abẹnu |
| Fan Iru | Ti abẹnu |
| Pulley Type | 8-Groove |
| Yiyi | Loju aago (CW) |
| Ọja Mefa | 7.3 x 8 x 6 inches |
| Iwọn Nkan | 13 iwon |
| Olupese | Gladiator |
| ASIN | B078MNDGZF |
9. atilẹyin ọja Information
This Gladiator Premium Alternator comes with a Atilẹyin ọja Ọdun kan from the date of purchase. This warranty covers defects in materials and workmanship under normal use. Please retain your proof of purchase for warranty claims. The warranty does not cover damage due to improper installation, misuse, neglect, accident, or unauthorized modifications.
10. Atilẹyin
For technical assistance, warranty claims, or further inquiries, please contact your retailer or the manufacturer directly. When contacting support, please have your product model numbers and purchase information readily available.