
1. Ifihan
This manual provides detailed instructions for the safe and effective operation of your BENNING CM 12 True RMS Digital Power Clamp Multimeter. Please read this manual thoroughly before using the device and keep it for future reference. The BENNING CM 12 is designed for demanding measurement tasks in industrial and commercial environments, offering precise measurements of AC, AC+DC True RMS, inrush current, and more, with data logging and Bluetooth connectivity.
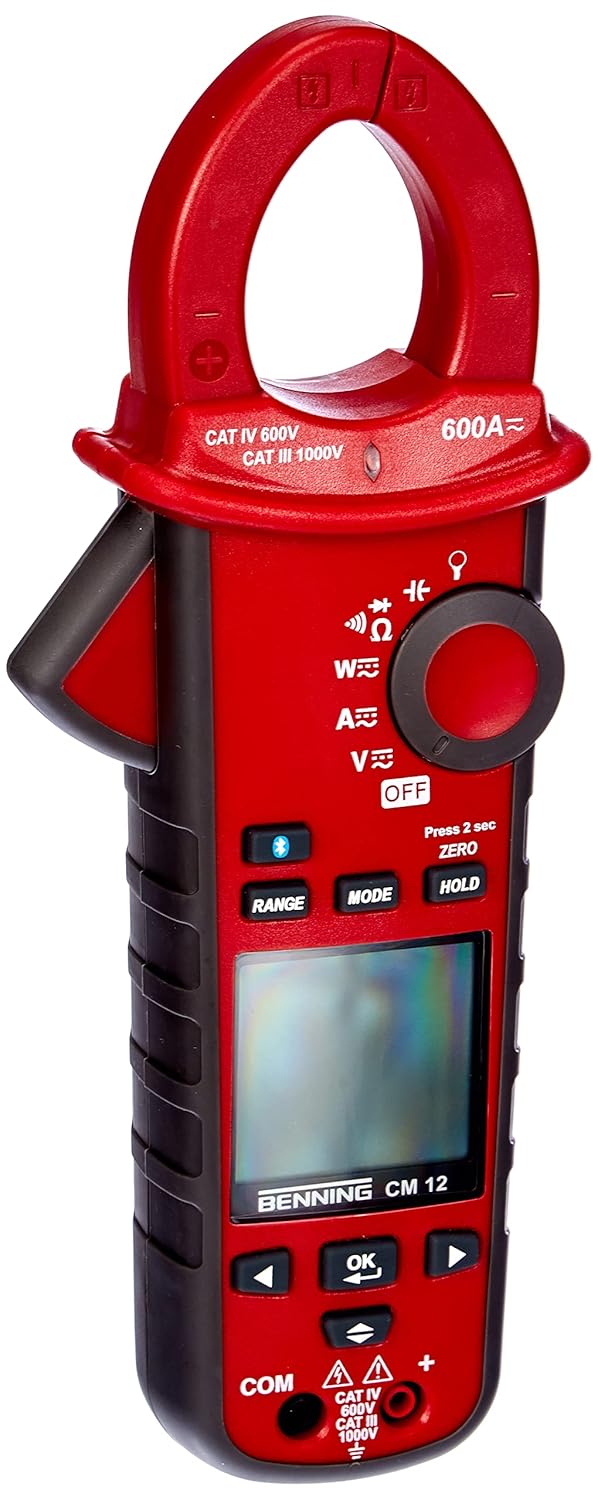
Nọmba 1: The Benning CM 12 True RMS Digital Power Clamp Multimeter. This image displays the main unit with its red casing, clamp jaw, display screen, and control buttons.
2. Alaye Aabo
Máa kíyèsí àwọn ìlànà ààbò wọ̀nyí nígbà gbogbo láti dènà ìpalára àti ìbàjẹ́ sí ohun èlò náà:
- Ma ṣe lo mita naa ti o ba han pe o bajẹ tabi ti idabobo ti o wa lori awọn itọsọna idanwo ba ni ipalara.
- Rí i dájú pé a yan iṣẹ́ àti ìwọ̀n tó yẹ kí a tó ṣe àwọn ìwọ̀n.
- Maṣe kọja awọn ifilelẹ titẹ sii ti o pọju fun iṣẹ eyikeyi.
- Lo iṣọra nigbati o ba n ṣiṣẹ pẹlu voltagÀwọn wọ̀nyí lókè 30V AC RMS, 42V tente oke, tàbí 60V DC, nítorí pé wọ́n ń fa ewu ìjayà.
- Nigbagbogbo ge asopọ agbara si awọn Circuit ki o si mu gbogbo ga-voltagàwọn capacitors kí wọ́n tó ṣe àwọn ìdánwò resistance, continuity, diode, tàbí capacitance.
- Tẹle awọn koodu aabo agbegbe ati ti orilẹ-ede.
3. Ọja irinše
The BENNING CM 12 package includes the following items:
- BENNING CM 12 Digital Power Clamp Multimeter
- Awọn itọsọna Idanwo (Pupa ati Dudu)
- Awọn Batiri AAA (6 ninu)
- Ọran gbigbe
- Afowoyi Olumulo (iwe-ipamọ yii)
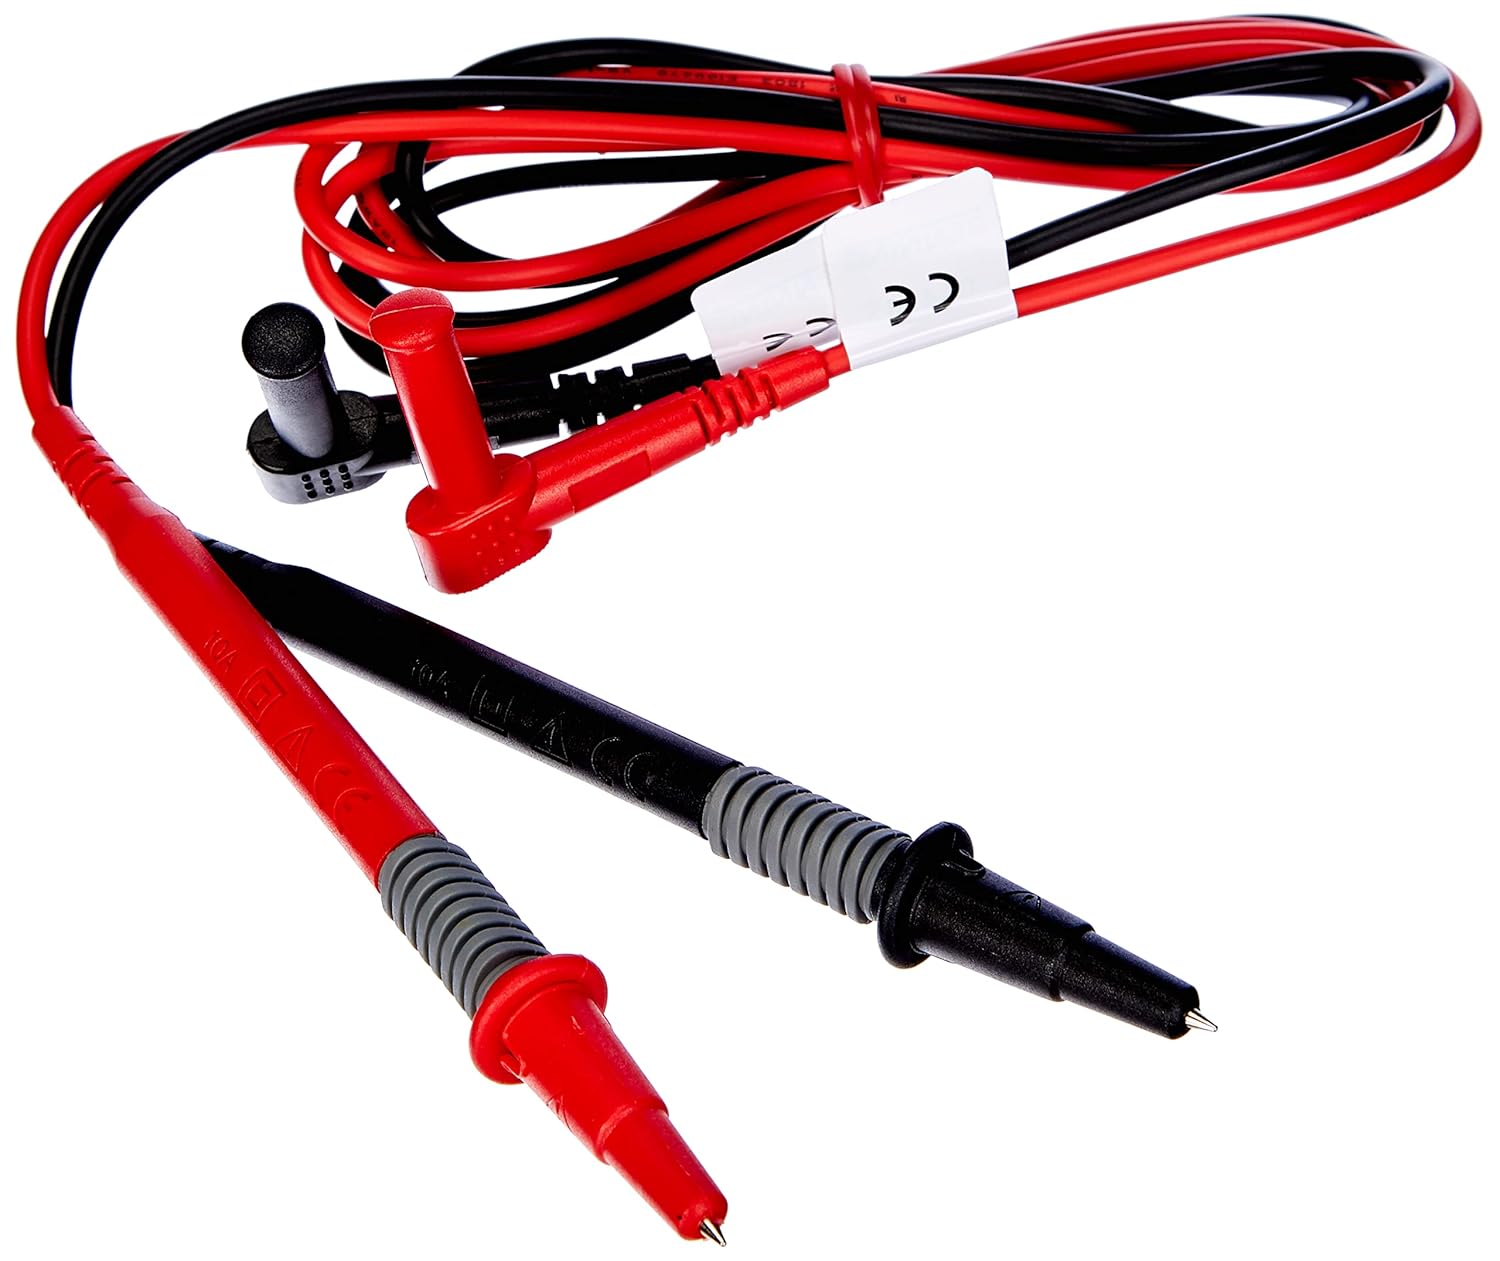
Nọmba 2: Red and black test leads. These leads are used for voltage, resistance, continuity, and other measurements.

Nọmba 3: Six AAA batteries. These batteries power the Benning CM 12 multimeter.

Nọmba 4: Black carrying case. This case provides protection and portability for the multimeter and its accessories.
4. Eto
4.1. Fifi sori batiri
- Wa ideri iyẹwu batiri ni ẹhin ẹrọ naa.
- Lo screwdriver lati ṣii yara batiri naa.
- Insert six (6) AAA batteries, ensuring correct polarity as indicated inside the compartment.
- Rọpo ideri kompaktimenti batiri ki o ni aabo pẹlu dabaru.
4.2. Agbara akọkọ Lori
Turn the rotary switch to any measurement function (e.g., V~ for AC Voltage) to power on the device. The display will illuminate, indicating the device is ready for use.
5. Awọn ilana Iṣiṣẹ
The BENNING CM 12 offers a variety of measurement functions. Select the desired function using the rotary switch.
5.1. Ìwọ̀n Ìṣàn AC/DC (Cl)amp Iṣẹ́)
- Turn the rotary switch to the 'A~' (AC Current) or 'A=' (DC Current) position.
- Tẹ clamp ìfàsẹ́yìn láti ṣí ẹ̀rẹ̀kẹ́.
- So adarí kan ṣoṣo mọ́ cl náàamp àgbọ̀n. Rí i dájú pé àgbọ̀n náà ti sé pátápátá.
- Ka iye lọwọlọwọ lori ifihan naa.
- For AC+DC True RMS measurements, ensure the appropriate mode is selected if available via the MODE button.
5.2. Ofurufutage Wiwọn (AC/DC)
- Insert the red test lead into the 'VΩ' input jack and the black test lead into the 'COM' input jack.
- Turn the rotary switch to 'V~' (AC Voltage) tàbí 'V=' (Ìdìpọ̀ DCtagati).
- So awọn itọsọna idanwo ni afiwe si Circuit tabi paati labẹ idanwo.
- Ka voltage iye lori ifihan.
5.3. Resistance and Continuity Measurement
- Rí i dájú pé agbára ìṣiṣẹ́ náà ti dínkù kí o tó wọn.
- Insert test leads as for voltage wiwọn.
- Turn the rotary switch to 'Ω' (Resistance/Continuity).
- So awọn itọsọna idanwo kọja paati naa.
- For continuity, the meter will beep if resistance is below approximately 30Ω - 100Ω.
5.4. Diode igbeyewo
- Rí i dájú pé ẹ̀rọ náà kò ní agbára púpọ̀.
- Insert test leads as for voltage wiwọn.
- Turn the rotary switch to the 'Diode' symbol.
- So okun pupa mọ anode ati okun dudu mọ katode ti diode naa.tage drop (approx. 0.8V) will be displayed. Reverse the leads for an open circuit reading.
5.5. Ìwọ̀n Ìṣirò Inrush
This function measures the initial surge of current when a device (e.g., motor, lamp) is first turned on.
- Turn the rotary switch to the 'A~' position.
- Press the 'INRUSH' button (if dedicated) or activate via 'MODE' button.
- Clamp the meter around the power conductor of the device.
- Turn on the device to measure the inrush current.
5.6. Power Measurement (W) and Power Factor
The BENNING CM 12 can simultaneously detect current (A) and voltage (V) to calculate active power (W) and power factor in AC/DC networks.
- Turn the rotary switch to the 'W' (Power) position.
- Connect the test leads for voltage measurement and clamp the jaw around the current conductor.
- The display will show active power (W) and power factor.
5.7. Data Logger Function (LOG) and Bluetooth Interface
The device features a data logger capable of storing 10,000 readings with a sampling rate from 1 second to 10 minutes. It also includes a Bluetooth interface for data connection to smartphones or tablets via the "BENNING MM-CM Link" app.
- Download and install the "BENNING MM-CM Link" app from your device's app store (iOS and Android compatible).
- Activate Bluetooth on your smartphone/tablet and on the BENNING CM 12 (refer to the device's specific button for Bluetooth activation, usually a dedicated button or a long press of 'MODE').
- Pair the device with the app.
- Use the app to configure logging parameters (sampling rate, start/stop logging) and to view/export recorded data.
5.8. Low-Pass Filter (HFR)
The HFR (High-Frequency Rejection) low-pass filter is used for accurate measurements on clocked motor drives or other noisy environments by filtering out high-frequency interference.
- Activate the HFR filter via a dedicated button or by pressing the 'MODE' button in relevant measurement functions (e.g., AC Voltage or Current).
- The display will typically show an indicator when the filter is active.
5.9. Total Harmonic Distortion (THD) Measurement
The THD function assesses network quality by measuring the total harmonic distortion of voltage or current waveforms.
- Select the THD function using the rotary switch or 'MODE' button in AC Voltage/Current modes.
- Connect the meter as appropriate for voltage tabi wiwọn lọwọlọwọ.
- The display will show the THD value.
5.10. Two-Pole Rotary Field Testing
This function is used to determine the phase sequence in three-phase systems.
- Turn the rotary switch to the 'Rotary Field' symbol (if dedicated) or select via 'MODE' button in a relevant AC voltagiṣẹ e.
- Connect the test leads to two phases of the three-phase system.
- The display will indicate the phase sequence (e.g., L1-L2, L2-L3).
6. Itọju
6.1. Ninu
Pa ọran naa pẹlu ipolowoamp Aṣọ àti ọṣẹ ìfọṣọ díẹ̀. Má ṣe lo àwọn ohun ìfọṣọ tàbí àwọn ohun tí ó ń yọ́ omi. Rí i dájú pé ẹ̀rọ náà ti pa, ó sì ti yọ kúrò nínú àwọn ẹ̀rọ ìṣiṣẹ́ kí o tó sọ ọ́ di mímọ́.
6.2. Batiri Rirọpo
When the low battery indicator appears on the display, replace the batteries as described in Section 4.1. Remove batteries if the device will not be used for an extended period to prevent leakage.
6.3. Ibi ipamọ
Store the multimeter in its carrying case in a cool, dry environment, away from direct sunlight and extreme temperatures. Remove batteries for long-term storage.
7. Laasigbotitusita
| Isoro | Owun to le Fa | Ojutu |
|---|---|---|
| Mita ko ni agbara lori. | Awọn batiri ti o ku tabi ti ko tọ ti fi sori ẹrọ. | Ṣayẹwo polarity batiri; ropo awọn batiri. |
| A kò fi kíkà tàbí "OL" (Overload) hàn. | Incorrect range selected, open circuit, or measurement exceeds range. | Select appropriate range, check circuit connections, ensure measurement is within device limits. |
| Awọn kika ti ko pe. | Poor test lead connection, external interference, or low battery. | Ensure secure connections, move away from strong electromagnetic fields, replace batteries. |
| Awọn oran asopọ Bluetooth. | Bluetooth not activated on device/phone, app issues, or out of range. | Ensure Bluetooth is on for both devices, restart app, move closer to the meter. |
8. Awọn pato
| Ẹya ara ẹrọ | Ẹ̀kúnrẹ́rẹ́ |
|---|---|
| Nọmba awoṣe | CM 12 |
| Orisi wiwọn | True RMS (AC, AC+DC) |
| Inrush Lọwọlọwọ | Bẹẹni |
| Fifuye Profile Gbigbasilẹ | Yes (single-phase and three-phase) |
| Wiwọn Agbara | Active Power (W), Power Factor |
| Igbeyewo Ilọsiwaju | 30 Ω - 100 Ω |
| Idanwo Diode | 0.8 V |
| Rotary Field Testing | Ọpa-meji |
| Kekere-Pass Ajọ | HFR (High-Frequency Rejection) |
| Harmonic Measurement | THD (Ipapọ ti irẹpọ) |
| Logger Data | 10,000 readings, 1s - 10min sampoṣuwọn ling |
| Ni wiwo | Bluetooth (iOS and Android app "BENNING MM-CM Link") |
| Orisun agbara | Awọn batiri AAA 6 (pẹlu) |
| Ọja Mefa | 11.42 x 5.12 x 2.76 inches |
| Iwọn Nkan | 1.3 iwon (590 Giramu) |
| Olupese | Benning |

Nọmba 5: Onisẹpo view of the Benning CM 12 Multimeter, indicating its approximate height of 11 inches (27 cm).
9. atilẹyin ọja Information
BENNING products are manufactured to high-quality standards. For specific warranty terms and conditions, please refer to the warranty card included with your product or visit the official BENNING webojula. Jeki ẹri rira rẹ fun awọn iṣeduro atilẹyin ọja.
10. Onibara Support
If you encounter any issues or have questions regarding your BENNING CM 12, please contact BENNING customer support. You can find contact information on the official BENNING webojula tabi nipasẹ agbegbe rẹ olupin.
- Webojula: www.benning.de (Jọwọ ṣayẹwo fun agbegbe rẹ webaaye)
- Imeeli: Tọkasi awọn website for specific contact emails.
- Foonu: Tọkasi awọn website for specific contact numbers.