
1. Ifihan
This instruction manual provides essential information for the installation, operation, and maintenance of the Hikvision DS-7604NI-K1/4P 4-Channel 4K PoE Network Video Recorder (NVR). Please read this manual thoroughly before using the product to ensure correct and safe operation. Keep this manual for future reference.
2. Alaye Aabo
Ṣe akiyesi awọn iṣọra ailewu wọnyi lati yago fun ipalara tabi ibajẹ si ẹrọ naa:
- Ibi ti ina elekitiriki ti nwa: Lo adapter agbara ti a sọ fun ẹrọ yii nikan. Rii daju pe agbara naa ti pọ si.tage is stable and meets the device's requirements.
- Afẹfẹ: Má ṣe dí àwọn ihò afẹ́fẹ́. Rí i dájú pé afẹ́fẹ́ afẹ́fẹ́ tó yẹ kí ó má baà gbóná jù.
- Ayika: Avoid exposing the device to extreme temperatures, humidity, dust, or corrosive environments. Do not place heavy objects on the device.
- Fifi sori: Install the device on a stable surface. Avoid strong vibrations or impacts.
- Ṣiṣẹ: Ma ṣe gbiyanju lati tunto tabi yi ẹrọ naa pada. Tọkasi gbogbo iṣẹ si oṣiṣẹ oṣiṣẹ.
3. Ọja Ipariview
The Hikvision DS-7604NI-K1/4P is a 4-channel Network Video Recorder designed for surveillance systems. It supports up to 4K resolution for live view, recording, and playback, and features Power-over-Ethernet (PoE) interfaces for direct connection and power supply to compatible IP cameras.
3.1 Package Awọn akoonu
- Hikvision DS-7604NI-K1/4P NVR Unit
- Adapter agbara
- Asin USB
- Àwọn skru fún fífi HDD sí
- Quick Bẹrẹ Itọsọna
3.2 Igbimọ iwaju
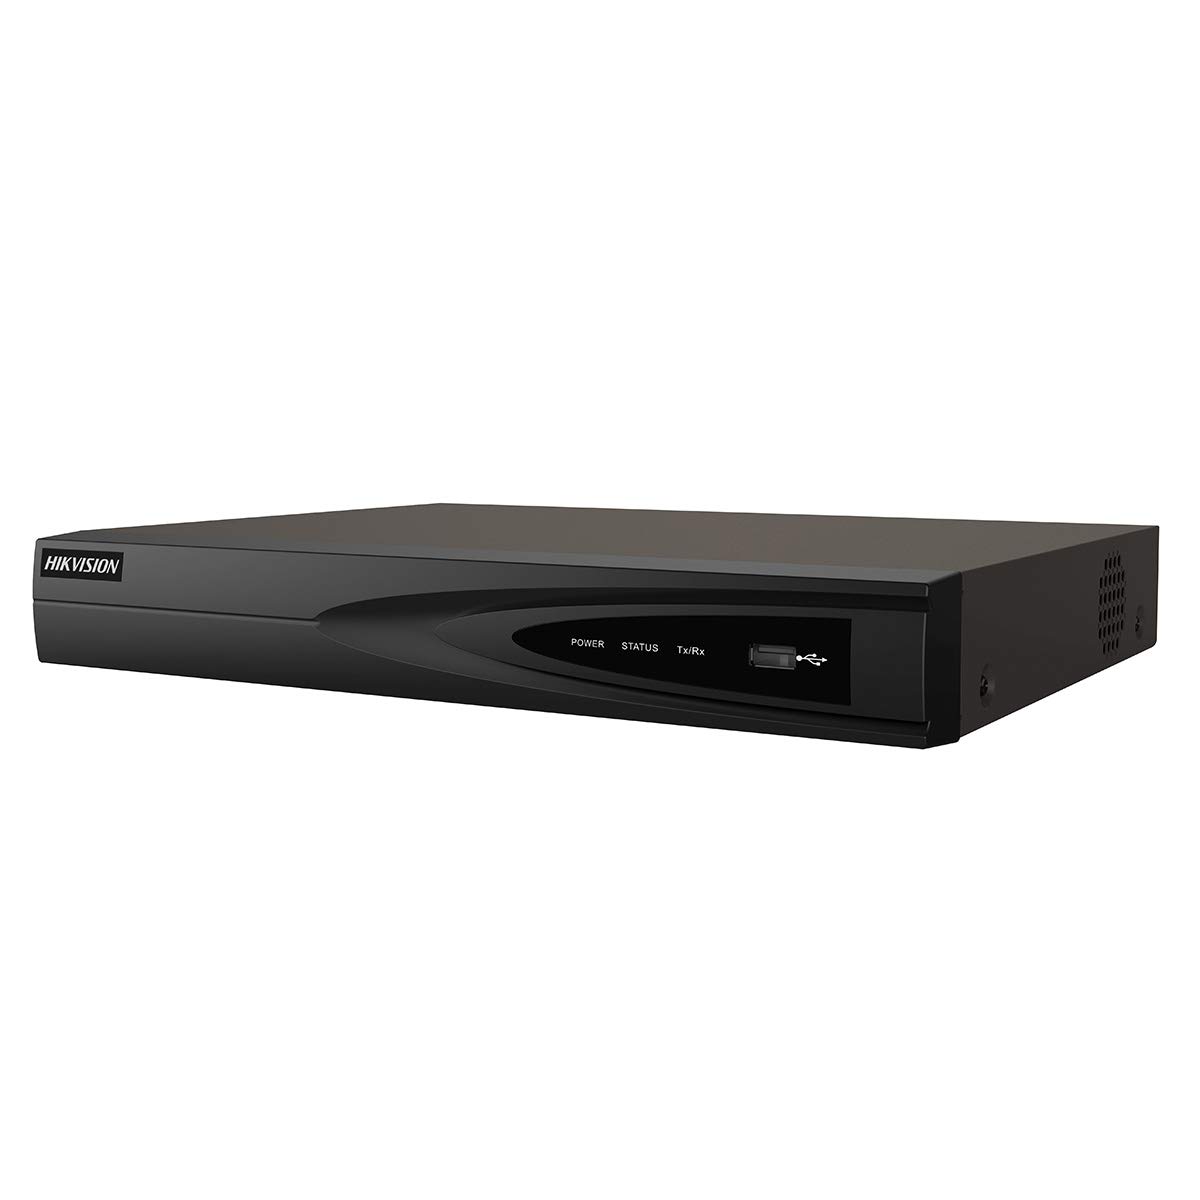
Aworan 1: Iwaju view of the Hikvision DS-7604NI-K1/4P NVR. This image displays the front panel of the NVR, typically featuring status indicator lights and a USB port for peripheral connections.
3.3 ru Panel
Panel ẹhin pẹlu ọpọlọpọ awọn ebute oko oju omi fun isopọmọ:
- PoE Ports (x4): For connecting IP cameras and providing power.
- Ibudo LAN: For network connection to a router or switch.
- Ijade HDMI: For connecting to a monitor or TV for high-definition video output.
- Ijade VGA: For connecting to a monitor for video output.
- USB Ports (x2 total, typically one front, one rear): For mouse, USB drive, or other peripherals.
- Iṣawọle Olohun (RCA): For connecting an external audio source.
- Iṣagbewọle agbara: Fun sisopọ ohun ti nmu badọgba agbara.
4. Eto
4.1 Fifi sori Dirafu lile (Aṣayan)
The NVR supports one internal SATA hard drive for video storage (up to 6 TB). If a hard drive is not pre-installed, follow these steps:
- Unscrew and remove the NVR's top cover.
- So okun data SATA ati okun agbara pọ si dirafu lile.
- Align the hard drive with the mounting holes and secure it with the provided screws.
- Replace the NVR's top cover and secure it with screws.
4.2 Nsopọ Peripherals
- Atẹle: So atẹle kan pọ si NVR's HDMI tabi ibudo o wu VGA.
- Asin: So asin USB pọ si ibudo USB lori NVR.
- Nẹtiwọọki: So ibudo LAN NVR pọ mọ olulana tabi oluyipada nẹtiwọọki rẹ nipa lilo okun Ethernet kan.
- Awọn kamẹra: Connect IP cameras to the NVR's PoE ports. The NVR will automatically power and detect compatible Hikvision PoE cameras.
4.3 Agbara Lori ati Iṣeto ni ibẹrẹ
- Connect the power adapter to the NVR's power input and then to a power outlet.
- NVR yoo ṣiṣẹ laifọwọyi.
- Upon first boot, the NVR will guide you through an initialization wizard. Follow the on-screen prompts to set up a strong password, network settings, and hard drive formatting (if applicable).
- Ensure the hard drive is formatted before recording can begin.
5. Isẹ
5.1 Live View
After initial setup, the NVR will display the live video feed from connected cameras on the monitor. You can switch between single-camera view ati olona-kamẹra akoj view nípa lílo àwọn ìṣàkóso lórí ìbòjú tàbí àsin.
5.2 Gbigbasilẹ
NVR n ṣe atilẹyin fun ọpọlọpọ awọn ipo gbigbasilẹ:
- Igbasilẹ Gbigbawọle: Ṣe igbasilẹ fidio nigbagbogbo.
- Gbigba Iwari išipopada: Àwọn ìgbàsílẹ̀ nìkan ni a bá rí ìṣípo nínú kámẹ́rà view.
- Gbigbasilẹ Eto: Awọn igbasilẹ ti o da lori iṣeto ti a ti sọ tẹlẹ.
Configure recording settings via the NVR's menu interface (typically accessible by right-clicking on the live view screen and selecting 'Menu').
5.3 Sisisẹsẹhin
Lati tunview foo ti o ti gbasilẹtage:
- Access the 'Playback' menu from the NVR's main interface.
- Yan kamẹra(s) ti o fẹ ati ibiti ọjọ/akoko.
- Lo awọn iṣakoso ṣiṣiṣẹsẹhin (mu ṣiṣẹ, da duro, yiyara siwaju, pada sẹhin) lati lọ kiri nipasẹ footage.
5.4 Latọna wiwọle
Fun latọna jijin viewing and management, download the Hik-Connect app on your mobile device or use the Hik-Connect web portal. The NVR must be connected to the internet, and you will need to register the device with your Hik-Connect account. Refer to the Hik-Connect documentation for detailed instructions.
6. Itọju
6.1 famuwia imudojuiwọn
Lojoojumọ ṣayẹwo Hikvision osise webAaye fun awọn imudojuiwọn famuwia. Ṣiṣe imudojuiwọn famuwia le mu iṣẹ ṣiṣe dara si, ṣafikun awọn ẹya tuntun, ati mu aabo pọ si. Tẹle awọn ilana ti a pese pẹlu package imudojuiwọn famuwia pẹlu iṣọra.
6.2 Lile wakọ Management
Regularly check the health status of your hard drive through the NVR's menu. If the hard drive shows errors or is nearing its end of life, consider replacing it to prevent data loss. You may also need to format the hard drive periodically, which will erase all recorded data.
6.3 Ninu
Clean the exterior of the NVR with a soft, dry cloth. Do not use liquid cleaners or aerosols. Ensure ventilation openings are free from dust and debris.
7. Laasigbotitusita
| Isoro | Owun to le Fa | Ojutu |
|---|---|---|
| Ko si ifihan fidio lori atẹle | Loose cable connection, incorrect input source on monitor, NVR not powered on. | Check HDMI/VGA cable connections. Ensure monitor is set to correct input. Verify NVR power. |
| Ko si aworan kamẹra | Camera not powered, network issue, camera not added/activated. | Check PoE cable connection. Ensure camera is powered. Verify camera IP address and add it to the NVR. |
| Cannot record video | No hard drive, hard drive not formatted, hard drive full, recording schedule not set. | Install and format a hard drive. Check hard drive status. Configure recording schedule. |
| Wiwọle latọna jijin ko ṣiṣẹ | NVR not connected to internet, incorrect network settings, Hik-Connect account issue. | Verify NVR network connection. Check network settings (IP, DNS). Ensure NVR is added to Hik-Connect. |
8. Awọn pato
| Ẹya ara ẹrọ | Sipesifikesonu |
|---|---|
| Nọmba awoṣe | DS-7604NI-K1/4P |
| Brand | Hikvision |
| Asopọmọra Technology | Àjọlò |
| Awọn ẹrọ ibaramu | Kamẹra |
| Awọn iwọn Ọja (L x W x H) | 8.5 x 29.8 x 42.1 cm |
| Agbara Ibi ipamọ Iranti | 6 TB |
| Lile Disk Iwon | 6 TB |
| Nọmba ti awọn ikanni | 4 |
| Iwọn Nkan | 2.2 iwon |
| Digital Video Media Format | Disiki lile |
| Input Audio | RCA |
| Lapapọ Awọn ibudo USB | 2 |
| Iṣawọle fidio | VGA, HDMI |
| Iwọn Ẹka | 1.0 Iṣiro |
| Olupese | Hikvision |
| Nọmba Idanimọ Iṣowo Agbaye | 06954273652883 |
| Nọmba apakan | KNVRDS7604NI-K1/4P |
9. Atilẹyin ọja ati Support
For warranty information, technical support, and service inquiries, please refer to the official Hikvision webAaye ayelujara tabi kan si oniṣowo Hikvision ti a fun ni aṣẹ rẹ. Pa iwe-ẹri rira rẹ mọ gẹgẹbi ẹri rira fun awọn ẹtọ atilẹyin ọja.
Awọn orisun Ayelujara: Visit the official Hikvision support page for FAQs, downloads, and contact information.