
1. Ifihan
This instruction manual provides important information for the safe installation, operation, and maintenance of your SEBSON IP44 recessed spotlights. Please read this manual thoroughly before installation and keep it for future reference.
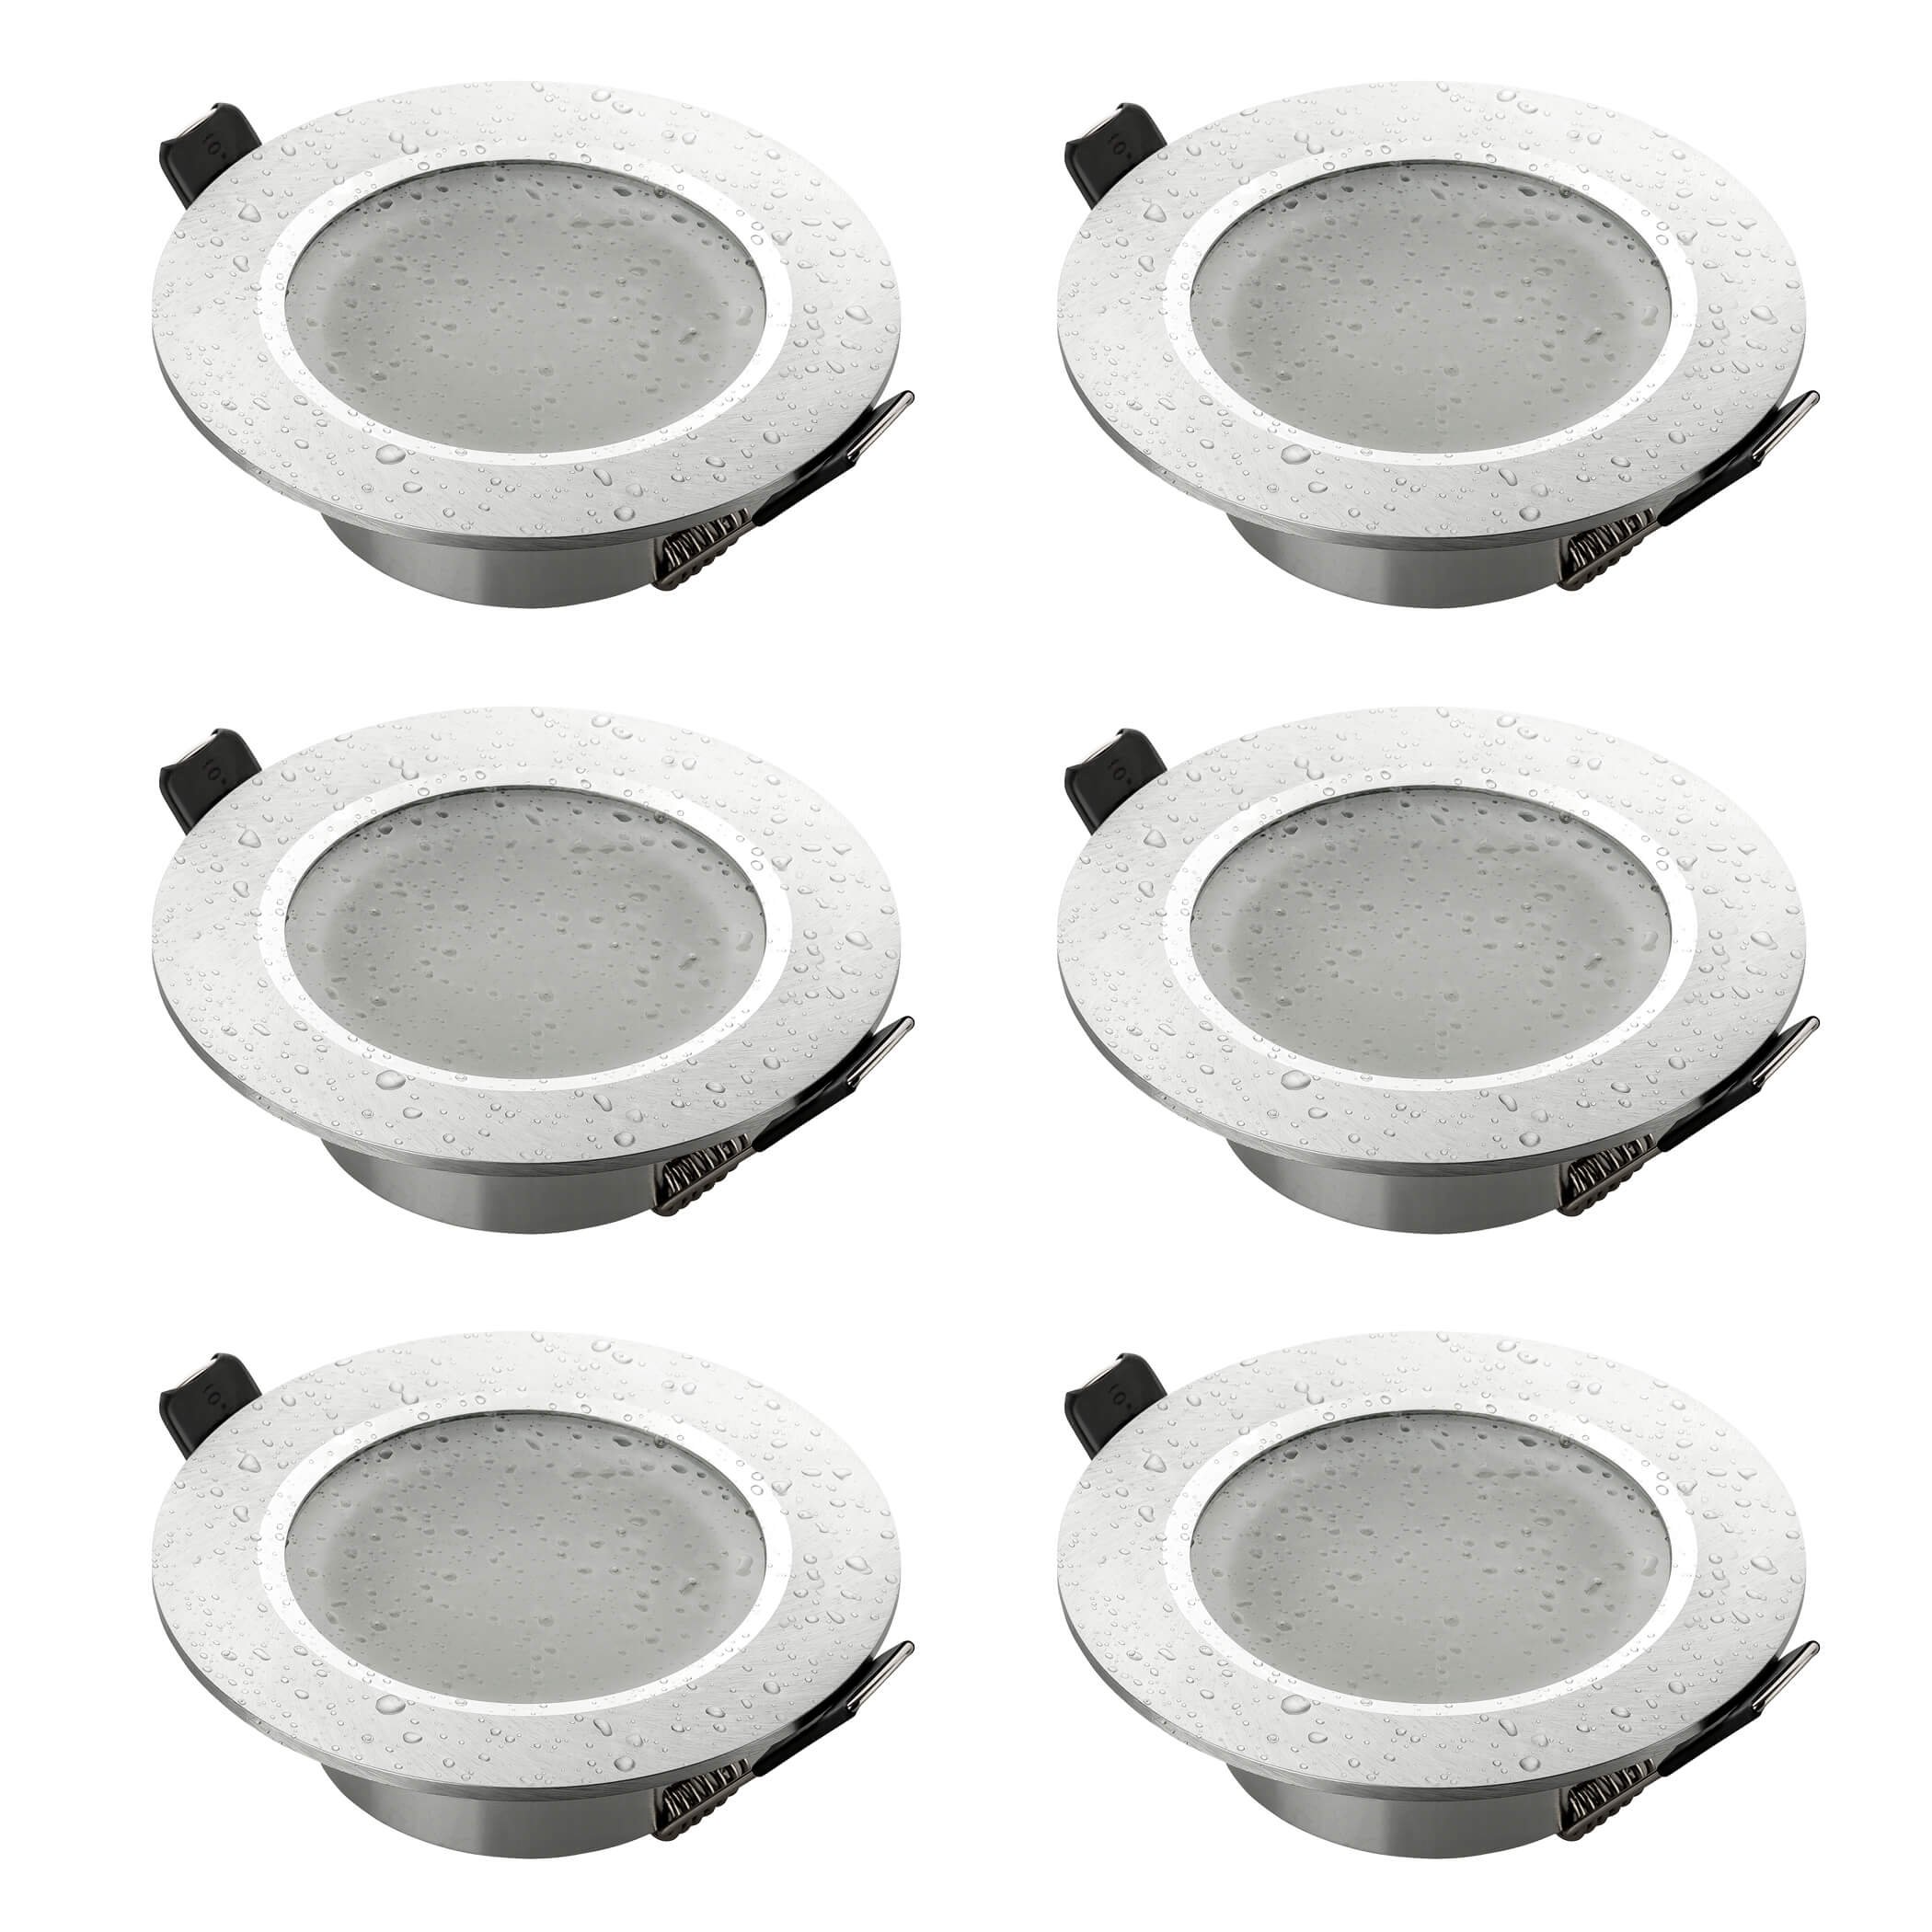
Aworan 1: Angled view of the SEBSON IP44 recessed spotlight.
2. Awọn ilana aabo
- Aabo Itanna: Installation must be performed by a qualified electrician in accordance with local wiring regulations. Ensure the main power supply is switched off before installation or maintenance.
- Voltage: This product operates at 230 Volts.
- Idiwon IP44: These spotlights are IP44 rated, making them suitable for damp environments like bathrooms and kitchens. However, they are not suitable for direct water immersion.
- Ibamu Boolubu: Use only GU10 LED or halogen bulbs with a maximum power of 50 Watts. Ensure bulbs are fully cooled before handling.
- Ooru: Luminaires can become hot during operation. Avoid touching the spotlight or bulb immediately after use.
- Afẹfẹ: Ensure adequate ventilation around the recessed fixture to prevent overheating.

Image 2: The IP44 rating ensures protection against splashing water, making it suitable for damp awọn agbegbe.
3. Package Awọn akoonu
Apo naa pẹlu:
- 6x SEBSON Recessed Spotlight Mounting Frames (Type 14, Brushed Aluminum)
- 6x GU10 Ceramic Sockets
- Note: GU10 LED or halogen bulbs are not included and must be purchased separately.
4. Awọn pato
| Brand: | SEBSON |
| Nọmba awoṣe: | 6_X_ES_T14_1044C_SILVER |
| Ohun elo: | Aluminiomu |
| Àwọ̀: | Fadaka |
| Pari: | Fẹlẹ |
| Apẹrẹ: | Yika |
| Awọn iwọn Ọja (L x W x H): | 9 x 9 x 2.9 cm |
| Opin Iho fifi sori: | 70 mm (min. 67 mm, max. 83 mm) |
| Iwọn IP: | IP44 (Imudaniloju Asesejade) |
| Voltage: | 230 folti AC |
| Irú Bọ́ọ̀bù Ìbáramu: | GU10 (LED or Halogen, max 50W) |
| Awọn Lilo Pataki: | Indoor, Bathroom adapted |
| Ìwọ̀n Nkan: | 456 g (for the set of 6) |
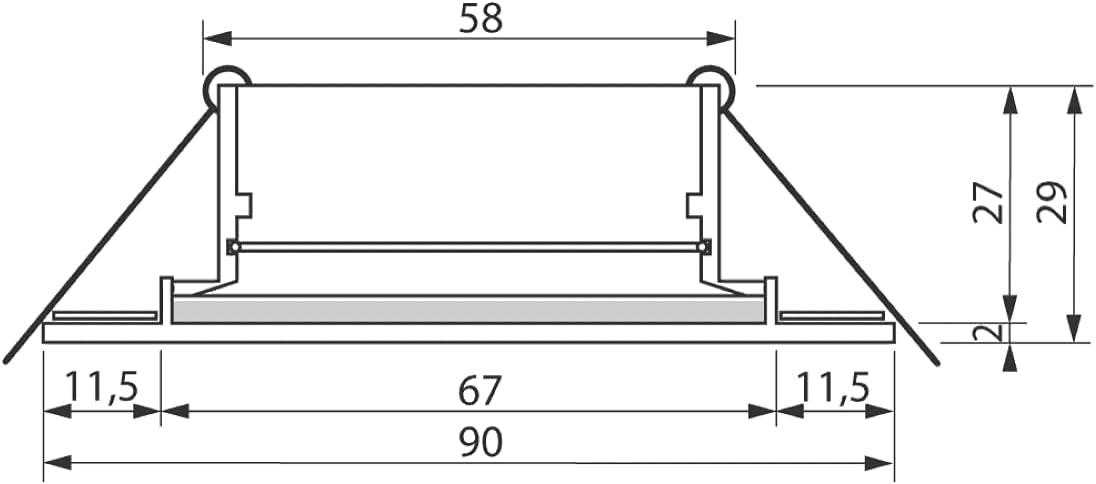
Image 3: Dimensional drawing of the recessed spotlight (dimensions in mm).
5. Awọn ilana fifi sori ẹrọ
Ṣaaju ki o to bẹrẹ: Ensure the power supply to the circuit is switched off at the main breaker. Always consult a qualified electrician if you are unsure about any steps.
- Prepare the Ceiling Hole: Using a suitable hole saw, cut a circular hole in the ceiling with a diameter of 70 mm. The acceptable range is 67 mm to 83 mm.
Image 4: Step 1 - Cutting the installation hole.
- Asopọmọra Waya: Connect the GU10 ceramic socket to the main electrical wiring. Ensure correct polarity (Live, Neutral, Earth) and secure connections using appropriate terminal blocks.
Image 5: Step 2 - Connecting the electrical wires to the GU10 socket.
- Fi Bọlubu sii: Carefully insert a GU10 bulb into the ceramic socket. Twist clockwise to secure.
Image 6: Step 3 - Inserting the GU10 bulb.
- Attach Socket to Frame: Secure the GU10 socket with the bulb into the mounting frame.
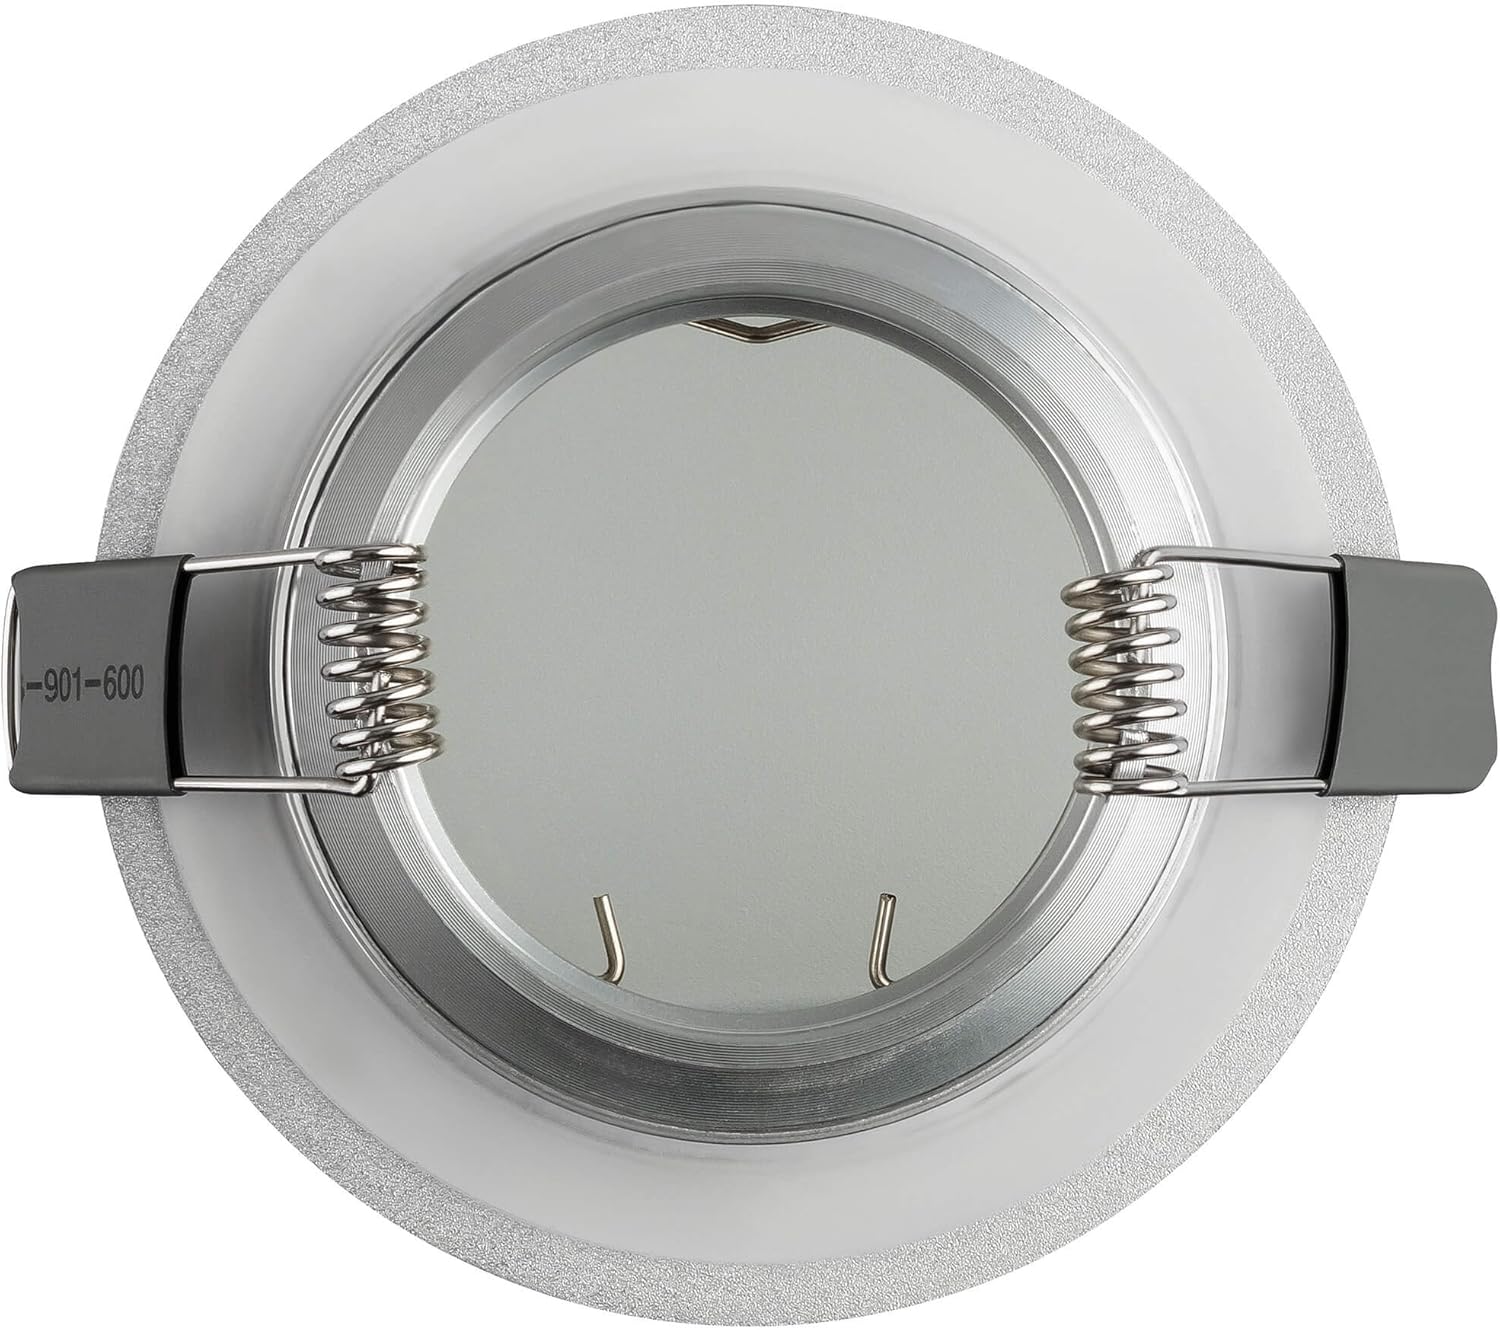
Aworan 7: Ẹyin view of the mounting frame, showing spring clips.

Aworan 8: Ẹyin view of the mounting frame with the GU10 socket in place.
- Insert Fixture into Ceiling: Fold the spring clips on the sides of the mounting frame upwards and insert the entire fixture into the prepared ceiling hole. The springs will hold the fixture securely in place.

Image 9: Step 4 - Inserting the fixture into the ceiling.
- Ṣe aabo Ohun elo naa: Ensure the fixture is flush with the ceiling surface. The spring clips will automatically secure it.
Image 10: Step 5 - Fixture secured in the ceiling.
- Install Frosted Glass (if applicable): If your model includes a separate frosted glass cover, carefully place it into the frame.
Image 11: Step 6 - Inserting the frosted glass cover.
- Apejọ ipari: Rii daju pe gbogbo awọn paati wa ni aabo ni aye.
Image 12: Step 7 - Final assembly of the spotlight.
6. Awọn ilana Iṣiṣẹ
Once installed and the power supply is restored, the spotlights can be operated via a standard wall switch connected to the circuit. There are no specific operating controls on the fixture itself.
- Titan -an/Pa a: Use the connected wall switch to turn the lights on or off.
- Rirọpo Boolubu: To replace a bulb, ensure the power is off and the bulb has cooled. Gently twist the old GU10 bulb counter-clockwise to remove, then insert a new GU10 bulb and twist clockwise to secure.
7. Itọju
- Ninu: Yọ agbara kuro ki o to nu. Fi ohun elo naa nu pẹlu asọ, gbigbẹ tabi die-die.amp asọ. Ma ṣe lo abrasive ose tabi epo.
- Ayewo: Máa ṣe àyẹ̀wò ẹ̀rọ náà lẹ́ẹ̀kọ̀ọ̀kan fún àwọn àmì ìbàjẹ́ tàbí àwọn ìsopọ̀ tí ó bàjẹ́. Tí a bá rí ìṣòro kankan, yọ agbára kúrò kí o sì bá onímọ̀ iná mànàmáná tó mọ̀ nípa rẹ̀ sọ̀rọ̀.
8. Laasigbotitusita
| Isoro | Owun to le Fa | Ojutu |
|---|---|---|
| Imọlẹ ko tan. |
|
|
| Ina flickers. |
|
|
| Ohun èlò náà gbóná gan-an. |
|
|
9. Atilẹyin ọja ati Support
Specific warranty information for this product is not provided in the available data. For support or warranty inquiries, please contact your retailer or the manufacturer directly using the contact information provided on their official webojula.
Information regarding spare parts availability and software updates is not available for this product.