
1. Ifihan
The GameMax Mirage 120mm PC Cooling Fan is designed to provide efficient cooling for computer components while offering customizable RGB lighting. This fan features a dual-ring Rainbow LED design, a hydraulic bearing for quiet operation, and a 7-blade fan structure. It is compatible with 5V addressable 3-pin Aura Sync systems, allowing for synchronized lighting effects with compatible motherboards or controllers.

Aworan 1.1: Iwaju view of the GameMax Mirage fan with active Rainbow LED lighting.
2. Alaye Aabo
- Rii daju pe ẹrọ kọmputa rẹ ti wa ni pipa ati yọọ kuro lati inu iṣan ogiri ṣaaju fifi sori ẹrọ tabi itọju.
- Handle components with care to avoid damage from static electricity. Consider using an anti-static wrist strap.
- Má ṣe fipá mú àwọn asopọ̀. Rí i dájú pé o tọ́ sí ọ̀nà tó tọ́ kí o tó so àwọn okùn náà pọ̀.
- Jẹ́ kí afẹ́fẹ́ náà jìnnà sí omi àti ọ̀rinrin tó pọ̀ jù.
- Do not attempt to disassemble the fan unit beyond what is described in this manual.
3. Package Awọn akoonu
Daju pe gbogbo awọn nkan wa ninu apo rẹ:
- 1 x GameMax Mirage 120mm PC Cooling Fan
- 4 x Iṣagbesori skru
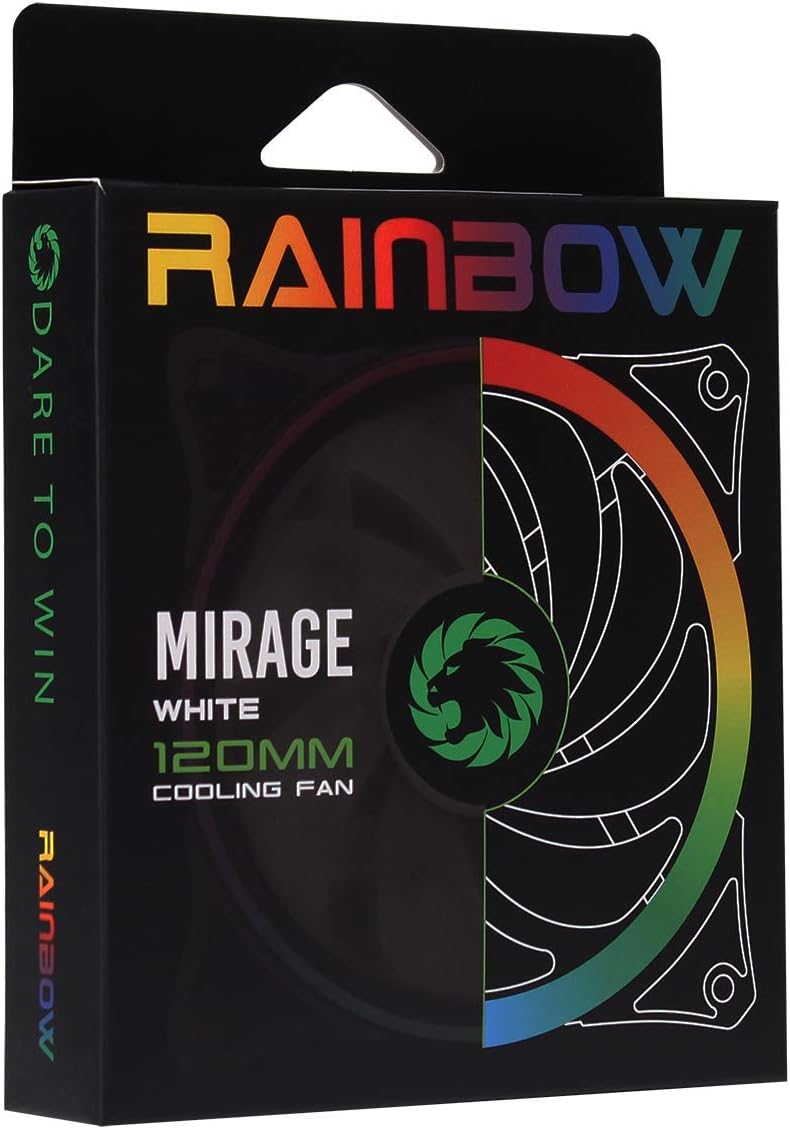
Image 3.1: Retail packaging for the GameMax Mirage fan.
4. Eto ati fifi sori
Follow these steps to install your GameMax Mirage 120mm PC Cooling Fan:
- Mura Eto Rẹ: Power off your computer and unplug it from the power outlet. Open your computer case to access the fan mounting locations.
- Gbe Fan naa: Position the fan in your desired location (e.g., case front, rear, top, or radiator). Ensure the airflow direction is correct for your cooling setup. Use the four included mounting screws to secure the fan to the chassis or radiator. The fan features rubber pads on the corners to help reduce vibration.
- So Agbara Afẹ́fẹ́ pọ̀: Locate the 3-pin power connector on the fan cable. Connect this cable to an available 3-pin fan header on your motherboard or a fan controller.
- Connect RGB Lighting: Locate the 5V addressable 3-pin Aura connector on the fan cable. Connect this to a compatible 5V ARGB header on your motherboard (often labeled 'VDG' or 'ARGB') or an external RGB controller/hub. Warning: Do not connect this to a 12V RGB header, as it will damage the LEDs.

Image 4.1: The 3-pin power connector (top) and 5V addressable 3-pin Aura connector (bottom).
The fan cables are braided for improved aesthetics and durability, helping to keep your build neat and tidy.
5. Awọn ilana Iṣiṣẹ
Once installed, the GameMax Mirage fan operates as follows:
- Iṣakoso Iyara Fan: The fan speed is controlled via the 3-pin power connector. If connected to a motherboard fan header, the speed can typically be adjusted through your motherboard's BIOS/UEFI settings or dedicated software.
- Iṣakoso Imọlẹ RGB: The Rainbow LED lighting is controlled via the 5V addressable 3-pin Aura connector.
- If connected to a compatible motherboard (e.g., ASUS Aura Sync, MSI Mystic Light, Gigabyte RGB Fusion, ASRock Polychrome Sync), you can use the motherboard's software to customize lighting effects, colors, and synchronization with other ARGB components.
- If connected to an external RGB hub/controller, refer to the instructions provided with your specific hub/controller for lighting customization options.

Aworan 5.1: Angled view of the GameMax Mirage fan showcasing its dual-ring Rainbow LED lighting.
6. Itọju
Regular maintenance helps ensure optimal performance and longevity of your cooling fan:
- Pipa eruku: Periodically inspect the fan blades and frame for dust accumulation. Use compressed air or a soft brush to gently remove dust. Ensure the fan is powered off and unplugged before cleaning.
- Ayẹwo USB: Occasionally check the power and RGB cables for any signs of wear or damage.
7. Laasigbotitusita
- Olufẹ Ko Yiyi:
- Ensure the 3-pin power connector is securely plugged into a functional fan header on the motherboard or controller.
- Check motherboard BIOS/UEFI settings to ensure the fan header is enabled and configured correctly.
- Àwọn LED tí kò tan ìmọ́lẹ̀ tàbí tí kò tọ́:
- Verify the 5V addressable 3-pin Aura connector is securely connected to a compatible 5V ARGB header (not 12V RGB).
- Ensure your motherboard's RGB software or external controller is properly installed and configured.
- If using a splitter or hub, ensure it is powered and functioning correctly.
- Ariwo Pupọ:
- Ṣàyẹ̀wò bóyá okùn tàbí ìdènà kan lè dí àwọn abẹ́ afẹ́fẹ́ lọ́wọ́.
- Ensure the fan is securely mounted and the rubber pads are properly seated to absorb vibrations.
- Dust accumulation can cause imbalance and noise; clean the fan as described in the Maintenance section.
8. Awọn pato
| Ẹya ara ẹrọ | Sipesifikesonu |
|---|---|
| Awoṣe | MIRAGEWHITE FINS |
| Fan Iwon | 120mm x 120mm x 25mm (0.98 x 4.72 x 4.72 inches) |
| Ti nso Iru | Eefun ti nso |
| Fan Awọn abẹfẹlẹ | 7 Awọn abẹfẹlẹ |
| LED Iru | Addressable Rainbow LED (Dual-Ring) |
| Fan Power Asopọmọra | 3-Pin |
| RGB Asopọmọra | 5V Addressable 3-Pin Aura Connector |
| Awọn ọna Voltage | 5 Volts (for RGB) / 12 Volts (for fan motor, typical for 3-pin) |
| Oṣuwọn Wattage | 3 Wattis |
| Iyara Yiyipo ti o pọju | 1800 RPM |
| Ariwo Ipele | Isunmọ 25 dB(A) |
| Ohun elo | Rubber (for vibration dampipari) |

Aworan 8.1: Pada view of the GameMax Mirage fan, displaying the product label with model and electrical specifications.
9. Atilẹyin ọja ati Support
For warranty information and technical support, please refer to the official GAMEMAX webojula tabi kan si alagbata rẹ. Jeki ẹri rira rẹ fun awọn iṣeduro atilẹyin ọja.