Tacklife PES01A
Ìwé Ìtọ́sọ́nà Olùlò Tacklife PES01A Circular Rin
Model: PES01A
1. Ifihan
Thank you for choosing the Tacklife PES01A Circular Saw. This powerful and versatile tool is designed for efficient and precise cutting of various materials, including wood and plastic. Featuring a robust 1500W motor, laser guide, and adjustable cutting capabilities, it is an ideal tool for both professional and DIY projects. Please read this manual thoroughly before operation to ensure safe and effective use of your new circular saw.

Figure 1.1: Tacklife PES01A Circular Saw overview.
2. Gbogbogbo Abo ilana
Máa tẹ̀lé àwọn ìlànà ààbò pàtàkì nígbà gbogbo nígbà tí o bá ń lo àwọn irinṣẹ́ iná mànàmáná láti dín ewu iná, ìkọlù iná mànàmáná, àti ìpalára ara ẹni kù. Pa ìwé ìtọ́ni yìí mọ́ fún ìtọ́kasí ọjọ́ iwájú.
2.1. Aabo Agbegbe Iṣẹ
- Jẹ ki agbegbe iṣẹ jẹ mimọ ati itanna daradara. Awọn agbegbe idamu tabi awọn agbegbe dudu n pe awọn ijamba.
- Ma ṣe ṣiṣẹ awọn irinṣẹ agbara ni awọn bugbamu bugbamu, gẹgẹbi niwaju awọn olomi ina, gaasi, tabi eruku. Awọn irinṣẹ agbara ṣẹda awọn ina ti o le tan eruku tabi eefin.
- Pa awọn ọmọde ati awọn alafojusi kuro lakoko ti o nṣiṣẹ ohun elo agbara kan. Awọn idamu le fa ki o padanu iṣakoso.
2.2. Aabo Itanna
- Awọn pilogi irinṣẹ agbara gbọdọ baramu iṣan. Maṣe yi plug naa pada ni ọna eyikeyi.
- Yago fun olubasọrọ ara pẹlu ilẹ tabi ilẹ roboto, gẹgẹ bi awọn paipu, imooru, awọn sakani, ati firiji. Ewu ti o pọ si ti mọnamọna ina mọnamọna ti ara rẹ ba wa ni ilẹ tabi ti ilẹ.
- Ma ṣe fi awọn irinṣẹ agbara han si ojo tabi awọn ipo tutu. Omi ti nwọle ọpa agbara yoo mu eewu ti mọnamọna mọnamọna pọ si.
- Maṣe ṣe ilokulo okun naa. Maṣe lo okun fun gbigbe, fifa tabi yọọ ohun elo agbara. Jeki okun kuro lati ooru, epo, eti to mu, tabi awọn ẹya gbigbe.
2.3. Aabo ti ara ẹni
- Nigbagbogbo wọ aabo oju. Lo awọn gilaasi aabo tabi awọn gilaasi.
- Wọ aabo igbọran nigbati o nṣiṣẹ ọpa fun awọn akoko ti o gbooro sii.
- Mura daradara. Maṣe wọ aṣọ ti ko ni tabi ohun ọṣọ. Pa irun ati aṣọ rẹ kuro lati awọn ẹya gbigbe.
- Duro ni iṣọra, wo ohun ti o n ṣe, ati lo ọgbọn ti o wọpọ nigbati o nṣiṣẹ ohun elo agbara kan.
- Use safety clamps or a vise to secure the workpiece. This is safer than using your hand and it frees both hands to operate the tool.
2.4. Circular Saw Specific Safety
- Pa ọwọ kuro ni agbegbe gige ati abẹfẹlẹ. Jeki ọwọ keji rẹ si imudani iranlọwọ, tabi ile moto. Ti ọwọ mejeeji ba di ayùn, wọn ko le ge wọn nipasẹ abẹfẹlẹ.
- Ma ṣe de abẹlẹ iṣẹ iṣẹ naa. Oluso ko le dabobo o lati abẹfẹlẹ ni isalẹ awọn workpiece.
- Satunṣe awọn Ige ijinle si awọn sisanra ti awọn workpiece. Kere ju ehin kikun ti abẹfẹlẹ yẹ ki o han ni isalẹ iṣẹ iṣẹ.
- Maṣe mu ohun elo ṣiṣẹ ni ọwọ rẹ tabi kọja ẹsẹ rẹ nigba gige. Ṣe aabo ohun elo iṣẹ si pẹpẹ iduroṣinṣin.
- Di ohun elo agbara mu nipasẹ awọn aaye didan ti o ya sọtọ nigbati o ba n ṣiṣẹ nibiti ẹya ẹrọ gige le kan si okun waya ti o farapamọ tabi okun tirẹ.
- Always ensure the lower guard is closed before placing the saw down.
3. Irinše ati Awọn ẹya ara ẹrọ
Familiarize yourself with the parts of your Tacklife PES01A Circular Saw before operation.

Àwòrán 3.1: Àwọn ohun pàtàkì ti gígì yíká.
- 1. Mọto ti o lagbara: Ensures good heat dissipation.
- 2. Yiyipada lesa: Activates the laser guide.
- 3. 3M Power Cord & Cable Tie: Convenient for storage and use.
- 4. Iyipada Aabo Meji: Requires pressing both buttons to start, preventing accidental injury.
- 5. Rubberized Handle: For comfortable and secure grip.
- 6. Support Handle: Provides additional control.
- 7. Aluminum Alloy Cover: Durable housing.
- 8. Iron Base Plate: Sturdy base for cutting.
- 9. Iron Blade Guard: Protects the blade.
Awọn ẹya ara ẹrọ to wa:

Figure 3.2: Standard accessories included with the saw.
- 1 x Tacklife PES01A Circular Saw
- 1 x 185mm 24-Tooth TCT Blade (for wood/plastic)
- 1 x 185mm 40-Tooth TCT Blade (for wood/plastic)
- 1 x Hex Wrench (for blade changes)
- 1 x Parallel Guide Ruler
- 1 x Dust Port Adapter (35mm diameter)
- 1 x Itọsọna olumulo
- 1 x Kaadi atilẹyin ọja
4. Eto ati Apejọ
4.1. Blade Installation/Removal
- Ensure the saw is unplugged from the power source before attempting any blade changes.
- Tẹ mọlẹ bọtini titiipa spindle.
- Using the hex wrench, loosen the blade bolt by turning it counter-clockwise.
- Gbé abẹ́ ìsàlẹ̀ náà sókè kí o sì yọ abẹ́ àtijọ́ náà kúrò pẹ̀lú ìṣọ́ra.
- Place the new blade onto the spindle, ensuring the teeth are pointing in the direction of the arrow on the saw's guard.
- Replace the blade bolt and tighten it securely with the hex wrench while holding the spindle lock button.
- Release the spindle lock and check that the blade rotates freely and the guard moves smoothly.
4.2. Attaching the Parallel Guide Ruler
The parallel guide ruler helps achieve straight cuts parallel to the edge of the workpiece.
- Fi abẹ́rẹ́ ìtọ́sọ́nà náà sínú ihò tí ó wà ní iwájú àwo ìpìlẹ̀ gígún náà.
- Ṣàtúnṣe olùṣàkóso sí ìwọ̀n ìgé tí a fẹ́.
- Di skru titiipa naa mu lati so oluso naa mọ ni ipo rẹ.
4.3. Connecting Dust Extraction
For a cleaner work environment, connect a vacuum cleaner to the dust port.
- Attach the 35mm dust port adapter to the dust outlet on the saw.
- Connect your vacuum cleaner hose to the adapter.
5. Awọn ilana Iṣiṣẹ
5.1. Siṣàtúnṣe Ige Ijinle
The cutting depth can be adjusted to match the thickness of your material. The maximum cutting depth at 90° is 65mm (2.5 inches).

Figure 5.1: Adjusting cutting depth for straight and bevel cuts.
- Loosen the depth adjustment lever located at the rear of the saw.
- Raise or lower the base plate to the desired cutting depth. Ensure only a small portion of the blade teeth extends below the workpiece.
- Mu lefa tolesese ijinle ṣinṣin.
5.2. Adjusting Bevel Angle (Miter Cut)
The saw can make bevel cuts up to 45°. The maximum cutting depth at 45° is 45mm (1.8 inches).
- Loosen the bevel adjustment knob/lever at the front of the saw.
- Tilt the base plate to the desired angle (0° to 45°).
- Tighten the bevel adjustment knob/lever securely.
5.3. Lilo Itọsọna Lesa
The integrated laser guide provides a visual line for precise cutting.

Figure 5.2: The laser guide assists in making straight cuts.
- Locate the laser switch on the saw.
- Flip the switch to turn the laser on. A red laser line will project onto your workpiece, indicating the cutting path.
- Align the laser line with your marked cut line on the material.
- Turn off the laser when not in use to conserve battery (if applicable) or prevent accidental activation.
5.4. Ṣiṣe Ge
Nigbagbogbo rii daju awọn workpiece ni labeabo clamped ṣaaju gige.

Figure 5.3: Cutting a wooden board with the circular saw.

Figure 5.4: Cutting a plastic sheet with the circular saw.
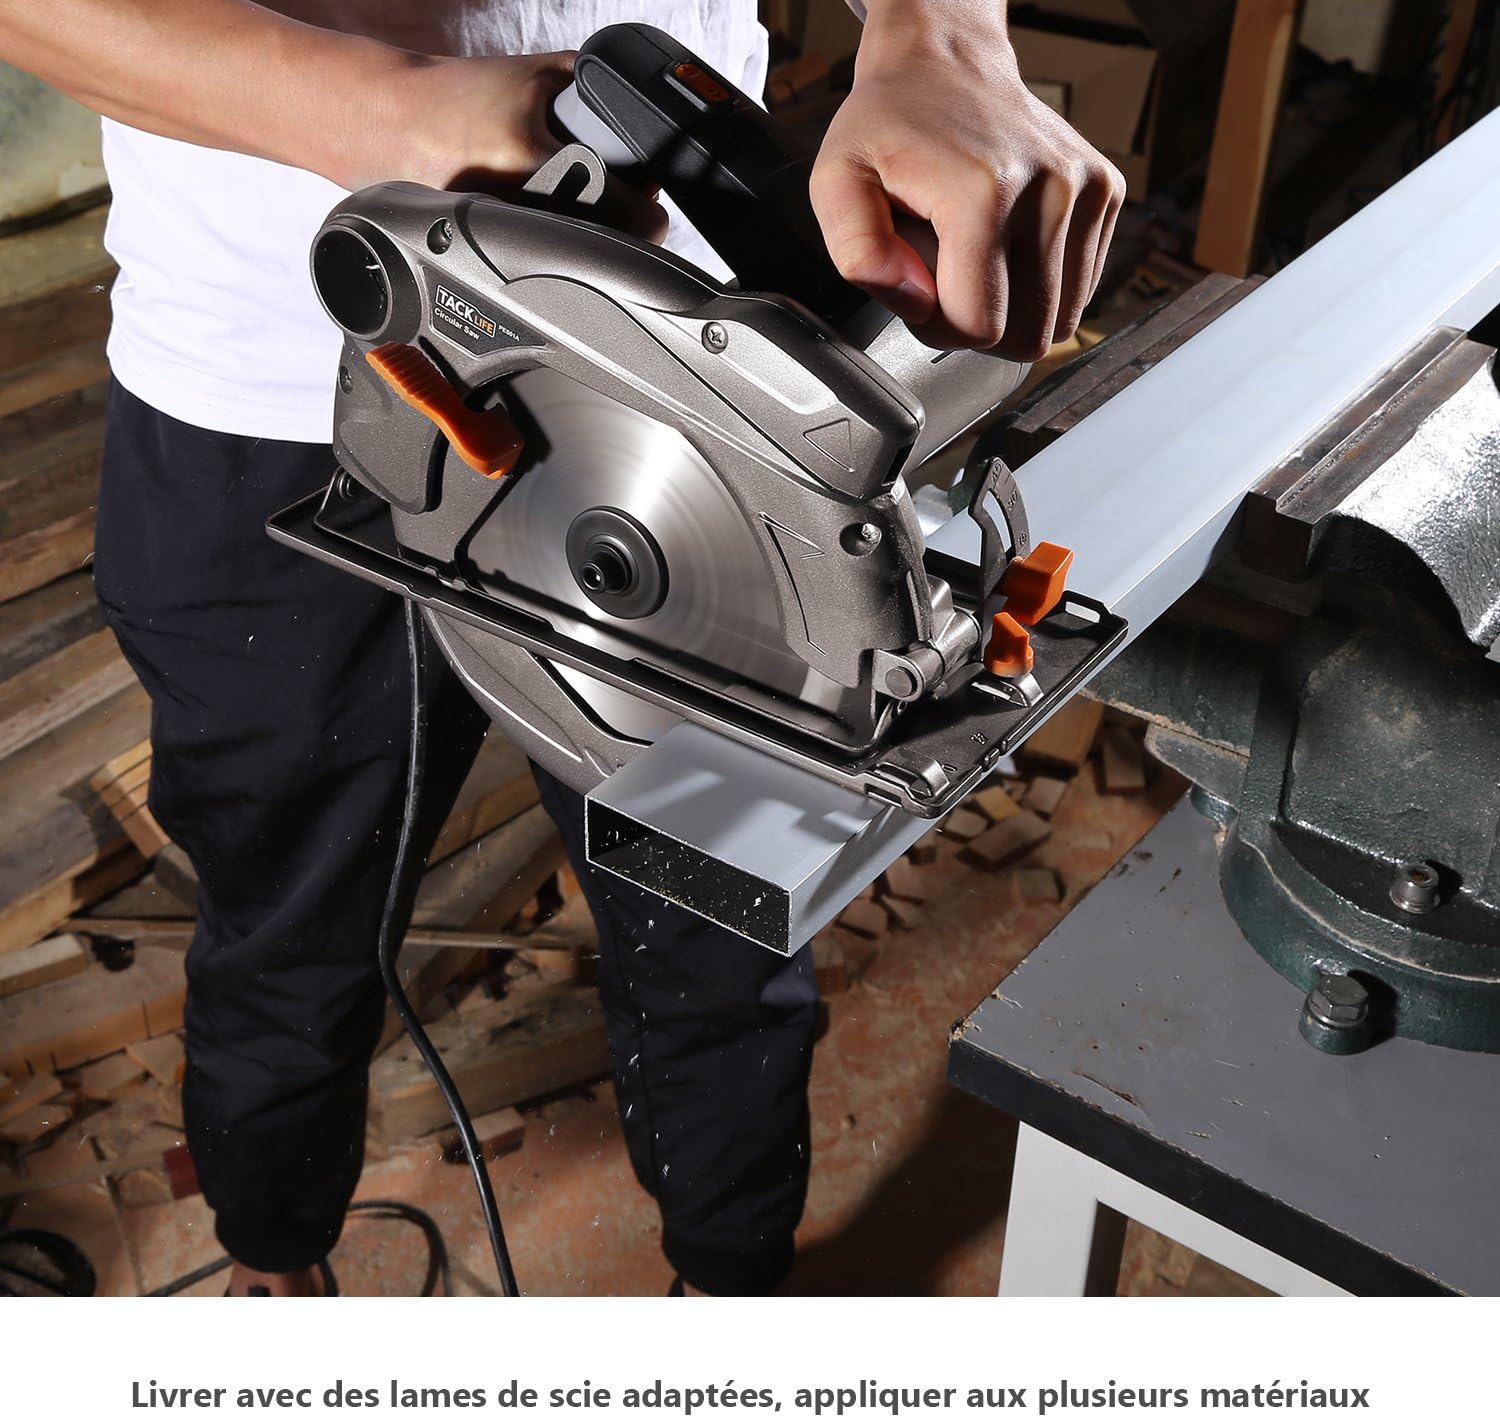
Figure 5.5: Cutting a metal profile with the circular saw (ensure appropriate blade is used).
- So gígún náà mọ́ ibi tí agbára iná ti lè tàn.
- Hold the saw firmly with both hands, ensuring a stable grip on the main and auxiliary handles.
- To start the saw, press the double safety switch (requires pressing both buttons simultaneously for safety).
- Gba abẹfẹlẹ laaye lati de iyara ni kikun ṣaaju ki o to bẹrẹ gige naa.
- Guide the saw smoothly and steadily along your marked line. Do not force the saw; let the blade do the work.
- Maintain a consistent feed rate.
- Ni kete ti gige naa ti pari, tu okunfa naa silẹ ki o jẹ ki abẹfẹlẹ naa duro patapata ṣaaju ki o to gbe riran naa lati ibi iṣẹ.
- Unplug the saw after use.
6. Itọju
Itọju deede ṣe idaniloju igbesi aye gigun ati iṣẹ ailewu ti wiwa ipin rẹ.
6.1. Ninu
- Nigbagbogbo yọọ awọn ri ṣaaju ki o to nu.
- Use a soft brush or compressed air to remove dust and debris from the motor vents and blade guard.
- Wipe down the exterior of the saw with a damp asọ. Maṣe lo awọn kẹmika ti o lewu tabi awọn afọmọ abrasive.
- Keep the base plate clean to ensure smooth gliding over the workpiece.
6.2. Abojuto abẹfẹlẹ
- Inspect blades regularly for dullness, cracks, or missing teeth. Replace damaged blades immediately.
- Clean resin and pitch buildup from blades using a suitable blade cleaner.
- Store blades properly to prevent damage and corrosion.
6.3. Ibi ipamọ
- Tọ́jú gígé náà sí ibi gbígbẹ tí ó sì ní ààbò tí àwọn ọmọdé kò lè tẹ̀ ẹ́ lọ́wọ́.
- Dáàbò bo okùn agbára náà kúrò lọ́wọ́ ìbàjẹ́ nígbà ìfipamọ́.
7. Laasigbotitusita
Abala yii n ṣalaye awọn ọran ti o wọpọ ti o le ba pade pẹlu wiwa ipin rẹ.
| Isoro | Owun to le Fa | Ojutu |
|---|---|---|
| Rin ko bẹrẹ. | No power supply; Safety switch not engaged; Faulty power cord. | Check power outlet and circuit breaker; Ensure both safety switch buttons are pressed; Inspect power cord for damage. |
| Blade not cutting smoothly or burning wood. | Dull or dirty blade; Incorrect blade for material; Overfeeding the saw. | Replace or clean blade; Use appropriate blade for the material; Reduce feed rate. |
| Gbigbọn ti o pọju. | Loose blade; Damaged blade; Worn bearings. | Tighten blade bolt; Replace blade; Contact customer support if bearings are suspected. |
| Laser guide not working. | Laser switch off; Laser lens dirty; Laser module faulty. | Turn on laser switch; Clean laser lens; Contact customer support. |
| Eruku gbigba ko dara. | Dust port clogged; Vacuum not powerful enough; Hose not properly connected. | Clear dust port; Use a more powerful vacuum; Ensure hose is securely attached. |
8. Imọ ni pato
| Ẹya ara ẹrọ | Sipesifikesonu |
|---|---|
| Awoṣe | PES01A |
| Agbara Input | 1500 W |
| Voltage | 230 Volts |
| Ko si-Fifuye Iyara | 4700 RPM |
| Blade Opin | 185 mm (7-1/4 inches) |
| O pọju. Ijinle Ige (90°) | 65 mm (2.5 inches) |
| O pọju. Ijinle Ige (45°) | 45 mm (1.8 inches) |
| Agbara Bevel | 0° -45° |
| Iwọn | 4.9 kg (10.8 lbs) |
| Lesa Itọsọna | Bẹẹni |
| Eruku Port opin | 35 mm |
9. Atilẹyin ọja ati Support
Tacklife products are manufactured to high-quality standards and are warranted against defects in materials and workmanship. Please refer to the included warranty card for specific terms and conditions, including the warranty period and registration process.
Olusin 9.1: Example of included warranty card.
Atilẹyin Onibara:
For technical assistance, troubleshooting, or warranty claims, please contact Tacklife customer support. Contact information can typically be found on the warranty card or the official Tacklife webojula.
- Webojula: www.tacklife.com (Jọ̀wọ́ ṣàyẹ̀wò òṣìṣẹ́ ìjọba website for the most up-to-date contact information.)
- Imeeli: Refer to your warranty card or product packaging.
When contacting support, please have your product model (PES01A) and purchase date ready.
Ask a question about this manual
Ask about setup, troubleshooting, compatibility, parts, safety, or missing instructions. Manuals+ will review the question and use this page’s manual context to help answer it.