BESDER BES-MH03
BESDER Home Security IP Camera User Manual
Model: BES-MH03
1. Ifihan
Thank you for choosing the BESDER Home Security IP Camera. This wireless smart WiFi camera is designed to provide reliable surveillance, audio recording, and baby monitoring capabilities with high-definition video. This manual will guide you through the setup, operation, and maintenance of your new device to ensure optimal performance and security.
2. Alaye Aabo
- Ensure the camera is powered by the correct voltage (DC 5V) as specified.
- Do not expose the camera to water or moisture. It is designed for indoor use only.
- Yẹra fún gbígbé kámẹ́rà sí ibi tí oòrùn tààrà tàbí nítòsí àwọn orísun ooru.
- Má ṣe gbìyànjú láti tú káàrá náà tàbí láti tún ṣe fúnra rẹ. Pe àwọn òṣìṣẹ́ tó mọ̀ nípa rẹ̀ fún iṣẹ́ náà.
- Jeki kamẹra ati awọn ẹya ẹrọ rẹ kuro ni arọwọto awọn ọmọde.
- Use only the provided power adapter and cable to prevent damage.
3. Package Awọn akoonu
Jọwọ ṣayẹwo package lati rii daju pe gbogbo awọn nkan wa ati ni ipo to dara:
- BESDER Home Security IP Camera
- Okun Agbara USB
- Adapter Agbara (DC 5V)
- Iṣagbesori skru ati Wall Plugs
- Afowoyi Olumulo (iwe-ipamọ yii)

Image showing the BESDER IP Camera along with its accessories: a USB power cable, a power adapter, and a packet of mounting screws.
4. Ọja Ipariview
Familiarize yourself with the main components of your BESDER IP Camera:
- Lẹnsi kamẹra: Ya fidio footage.
- Awọn LED infurarẹẹdi: For night vision.
- Gbohungbohun: Fun igbewọle ohun.
- Agbọrọsọ: Fun ibaraẹnisọrọ ohun afetigbọ ọna meji.
- Iho kaadi SD: Fún ìfipamọ́ fídíò agbègbè (ó lè ṣe àtìlẹ́yìn títí dé 64GB).
- Power Interface (DC 5V): Sopọ si ohun ti nmu badọgba agbara.
- Bọtini atunto: A lo lati mu awọn eto ile-iṣẹ pada.

Diagram illustrating the side view of the BESDER IP Camera, highlighting the SD Card slot, Power interface (DC 5V), and Reset button.
5. Eto
5.1. Agbara Lori
- Connect the USB power cable to the camera's power interface.
- Pulọọgi ohun ti nmu badọgba agbara sinu iṣan itanna boṣewa.
- The camera will power on, and its indicator light will begin to flash, indicating it's ready for setup.
5.2. App Installation (iCSee)
The BESDER IP Camera uses the iCSee application for remote monitoring and control.
- Download the iCSee app from your mobile device's app store (App Store for iOS or Google Play Store for Android).
Ṣe igbasilẹ fun iOS | Ṣe igbasilẹ fun Android - Forukọsilẹ iroyin titun tabi wọle ti o ba ti ni ọkan tẹlẹ.
5.3. Asopọ Wi-Fi
Follow these steps to connect your camera to your home Wi-Fi network:
- Open the iCSee app and tap the "+" icon to add a new device.
- Select "Add My Device" or "Add Camera".
- Choose the "Wi-Fi Camera" option.
- Follow the on-screen prompts to enter your Wi-Fi network name (SSID) and password. Ensure your phone is connected to a 2.4GHz Wi-Fi network, as the camera may not support 5GHz.
- The app will generate a QR code. Position your phone's screen in front of the camera lens (approx. 15-20 cm away) until you hear a confirmation sound from the camera.
- Once connected, the camera's indicator light will turn solid blue. You can now name your camera and start monitoring.
5.4. Iṣagbesori
A le gbe kamẹra naa si ori ilẹ ti o tẹẹrẹ tabi so o mọ ogiri tabi aja.
- Yan ipo ti o yẹ pẹlu aaye mimọ kan view and within Wi-Fi range.
- If mounting, use the provided mounting screws and wall plugs to secure the camera base.
- Adjust the camera's angle as needed within the app after mounting.
6. Ṣiṣẹ
6.1. Gbe View
Access real-time video feed from your camera through the iCSee app.
- Open the iCSee app and select your camera from the device list.
- The live video feed will appear. You can pan and tilt the camera remotely using the controls in the app.

Screenshot of a multi-camera monitoring interface, likely from the iCSee application, displaying live feeds from multiple cameras and recording controls.
6.2. Gbigbasilẹ ati Ibi ipamọ
The camera supports local storage via a MicroSD card.
- Insert a MicroSD card (up to 64GB, Class 10 recommended) into the SD card slot.
- In the iCSee app settings, navigate to "Storage Settings" to format the SD card and configure recording modes (e.g., continuous, motion-triggered).
- Foo ti o gbasilẹtage le jẹ viewed and downloaded directly from the app.
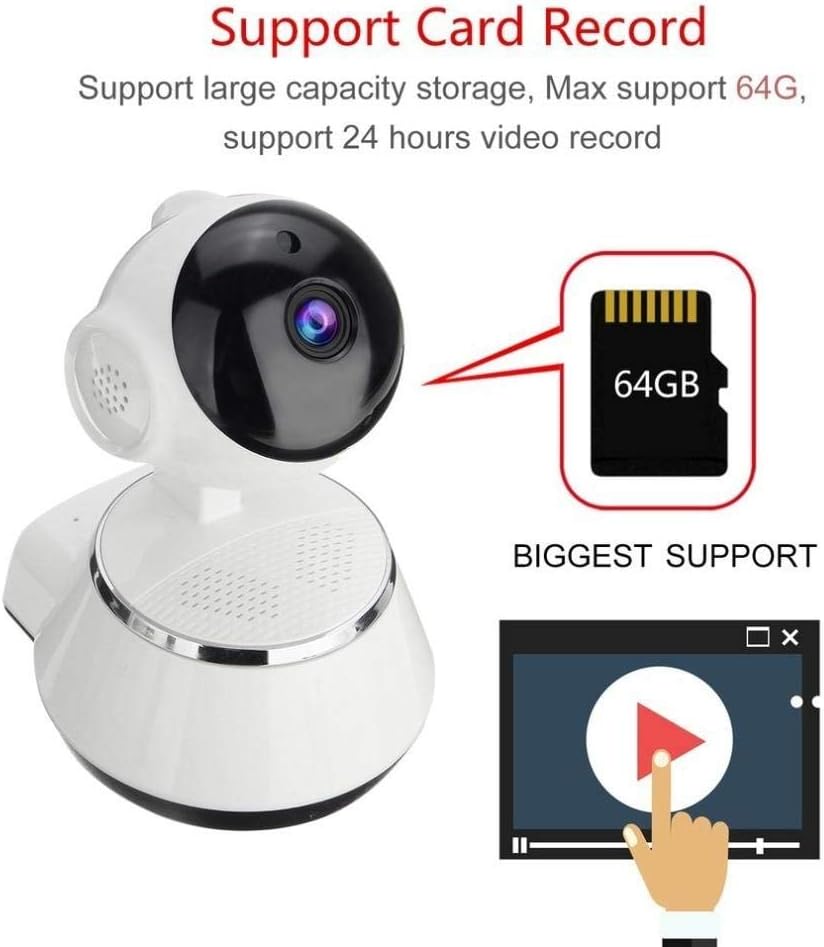
Image demonstrating the camera's support for large capacity storage, specifically showing a 64GB MicroSD card, indicating support for 24-hour video recording.
6.3. išipopada erin
Receive alerts when motion is detected in the camera's field of view.
- Enable "Motion Detection" in the camera settings within the iCSee app.
- Adjust sensitivity levels and set up notification preferences (e.g., push notifications, email alerts).
6.4. Night Iran
Kámẹ́rà náà máa ń yípadà sí ìran alẹ́ láìsí ìmọ́lẹ̀.
- Infrared LEDs provide clear black-and-white video up to 10 meters in complete darkness.
- No manual intervention is required for night vision activation.

Comparison image displayed on a smartphone screen, showing the difference between daytime and nighttime monitoring views, highlighting the infrared night vision capability.
6.5. Audio-Ona Meji
Communicate through the camera using the built-in microphone and speaker.
- Lakoko ti o wa ni ifiwe view, tap the microphone icon in the iCSee app to speak through the camera.
- Tẹ àmì agbọ́hùnsọ̀ láti gbọ́ ohùn láti inú àyíká kámẹ́rà náà.
6.6. Latọna wiwọle
Monitor your property from anywhere with an internet connection.
- As long as your camera is connected to Wi-Fi and your phone has internet access, you can view live feeds and manage settings remotely via the iCSee app.
7. Itọju
- Ninu: Lo asọ ti o rọ, ti o gbẹ lati nu lẹnsi kamẹra ati ara. Maṣe lo awọn olutọpa olomi tabi awọn aerosols.
- Awọn imudojuiwọn famuwia: Regularly check for firmware updates through the iCSee app to ensure your camera has the latest features and security patches.
- Iṣakoso Kaadi SD: Periodically back up important recordings and format the SD card to maintain optimal performance.
- Ibi ipamọ: When not in use for extended periods, store the camera in a cool, dry place away from direct sunlight.
8. Laasigbotitusita
| Isoro | Owun to le Fa / Solusan |
|---|---|
| Kamẹra ko ṣiṣẹ | Ensure the power adapter is securely connected to both the camera and the power outlet. Try a different outlet. |
| Ko le sopọ si Wi-Fi | Check if your Wi-Fi network is 2.4GHz. Ensure the Wi-Fi password is correct. Move the camera closer to the router. Reset the camera and try again. |
| Gbe view is blurry or dark | Clean the camera lens. Check lighting conditions. Ensure night vision is functioning correctly in low light. |
| Kaadi SD ko gbasilẹ | Ensure the SD card is inserted correctly and formatted in the app. Check if the card is full or corrupted. Try a different SD card. |
| Ko si ohun afetigbọ tabi didara ohun ti ko dara | Ṣàyẹ̀wò ètò gbohùngbohùn àti agbọ́hùnsọ nínú àpù náà. Rí i dájú pé kò sí ìdènà kankan tó ń dí gbohùngbohùn tàbí agbọ́hùnsọwọ́ náà lọ́wọ́. |
| Kamẹra nigbagbogbo ge asopọ | Weak Wi-Fi signal. Move the camera closer to the router or consider a Wi-Fi extender. Reduce network congestion. |
9. Awọn pato
| Ẹya ara ẹrọ | Ẹ̀kúnrẹ́rẹ́ |
|---|---|
| Nọmba awoṣe | BES-MH03 |
| Asopọmọra Technology | Ailokun (Wi-Fi) |
| Iṣeduro Lilo | Baby Monitoring, Home Security |
| Pataki Awọn ẹya ara ẹrọ | Motion Sensor, Night Vision (Infrared distance 10m) |
| Fọọmù ifosiwewe | Dome |
| Wattage | 3 watt |
| Atilẹyin ipamọ | Kaadi MicroSD (O pọju 64GB) |
| Ohun | Two-way audio (Audio Record) |
10. Atilẹyin ọja ati Support
BESDER products are manufactured to high-quality standards. For warranty information, please refer to the terms and conditions provided at the point of purchase or contact your retailer. For technical support or further assistance, please refer to the support section within the iCSee application or visit the official BESDER webaaye (ti o ba wa).