
1. Ifihan
This manual provides essential instructions for the proper installation and care of your Carxtc Single DIN Radio Dash Install Kit. This kit is specifically designed to facilitate the integration of an aftermarket single DIN car stereo into the dashboard of compatible Audi TT models, ensuring a clean and secure fit.
2. Ọja Ipariview
The Carxtc Single DIN Radio Dash Install Kit serves as a mounting solution and aesthetic faceplate, enabling the seamless installation of a single DIN aftermarket car radio. It is engineered to match the interior contours of your vehicle, providing a factory-like appearance for your new audio system.
2.1. Ibamu
- Audi TT: 2000, 2001, 2002, 2003, 2004, 2005, 2006
2.2. Ohun elo Kit
This kit typically includes a dash bezel faceplate and necessary mounting hardware for a single DIN stereo. Specific components may vary slightly based on manufacturing updates.
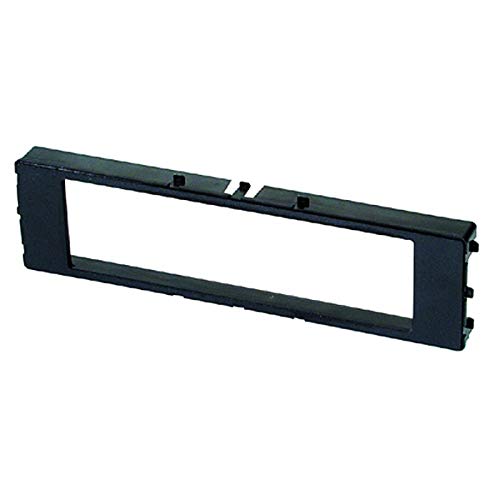
Image showing the Carxtc Single DIN Radio Dash Install Kit, which includes the dash bezel faceplate designed for integrating an aftermarket single DIN radio into the Audi TT dashboard.
3. Eto ati fifi sori
Pataki: Professional installation is highly recommended. Always disconnect the vehicle's battery before beginning any electrical work. Refer to your vehicle's service manual for specific dashboard disassembly instructions.
3.1. Awọn Irinṣẹ Ti a beere (Aṣoju)
- Awọn irinṣẹ yiyọ nronu
- Screwdrivers (Phillips ati flathead)
- Wire strippers/crimpers (if wiring harness is not plug-and-play)
- Itanna teepu tabi ooru isunki ọpọn
3.2. Awọn Igbesẹ Fifi sori ẹrọ (Itọsọna Gbogbogbo)
- Ṣeto Ọkọ naa: Park the vehicle on a level surface and engage the parking brake. Disconnect the negative terminal of the vehicle's battery to prevent electrical shorts.
- Yọ Redio Factory kuro: Carefully remove the existing factory radio and any surrounding trim panels. Use appropriate panel removal tools to avoid damaging the dashboard.
- Ge Asopọmọra: Disconnect all wiring harnesses and antenna cables from the factory radio.
- Assemble New Radio: Attach the aftermarket single DIN radio to the Carxtc dash kit's mounting brackets. Ensure it is securely fastened according to the radio's instructions.
- Asopọmọra Waya: Connect the aftermarket radio's wiring harness to the vehicle's wiring harness using an appropriate adapter (typically sold separately). Connect the antenna cable.
- Iṣe idanwo: Before fully reassembling, temporarily connect the battery and test the new radio's functionality (power, audio, balance, fader, radio reception).
- Install Dash Kit: Carefully slide the assembled radio and dash kit into the dashboard opening. Secure the dash kit using the vehicle's factory mounting points or screws provided with the kit.
- Tun Dasibodu jọ: Reinstall any removed trim panels and secure them.
- Batiri Atunso: Tun so ebute odi ti batiri ọkọ naa.
4. Àwọn Ìrònú Lílò
This dash kit provides a secure and aesthetically pleasing mount for your aftermarket single DIN radio. Ensure that the radio is properly seated and all connections are secure to prevent rattling or intermittent issues.
Note on Radio Fitment: Some aftermarket radios, particularly those imported directly from certain regions, may have slight variations in dimensions that could affect fitment. Always verify the dimensions of your aftermarket radio against standard single DIN specifications before installation to avoid potential fitment problems.
5. Itọju
The Carxtc dash kit requires minimal maintenance to retain its appearance and functionality.
- Ninu: Lo asọ, damp cloth to gently wipe down the dash kit's surface. Avoid abrasive cleaners, harsh chemicals, or solvents that could damage the finish.
- Ayewo: Periodically check that the radio and dash kit remain securely mounted. Tighten any loose screws if necessary to prevent vibrations or movement.
Do not attempt to modify the dash kit, as this may compromise its structural integrity, fitment, and overall appearance.
6. Laasigbotitusita
6.1. Radio Not Powering On After Installation
- Ṣayẹwo Isopọ Batiri: Ensure the vehicle's battery is properly reconnected and terminals are tight.
- Ṣayẹwo Wiring: Verify all wiring harness connections are secure and correctly matched (power, ground, accessory, illumination).
- Ṣayẹwo Fuses: Inspect the vehicle's fuse box and the aftermarket radio's inline fuse for any blown fuses. Replace if necessary.
6.2. Poor Radio Reception
- Asopọmọra Antenna: Ensure the antenna cable is securely connected to the aftermarket radio.
- Adaparọ Eriali: If an antenna adapter was used, ensure it is correctly installed and functioning. Some vehicles require a powered antenna adapter.
6.3. Dash Kit Does Not Fit Properly
- Jẹrisi Ibamu: Double-check that the dash kit is indeed designed for your specific Audi TT model year (2000-2006).
- Radio Dimensions: Confirm that your aftermarket radio adheres to standard single DIN dimensions. Non-standard radios may not fit perfectly.
- Awọn idilọwọ: Ensure no wires, cables, or other components are obstructing the dash kit from seating correctly within the dashboard opening.
7. Awọn pato
| Ẹya ara ẹrọ | Ẹ̀kúnrẹ́rẹ́ |
|---|---|
| Ọja Iru | Single DIN Radio Dash Install Kit |
| Ibamu | Audi TT (2000-2006) |
| Ohun elo | Durable Automotive Grade Plastic |
| Iwọn Nkan | 4 iwon |
| ASIN | B07VBXL63P |
| Ọjọ Akọkọ Wa | Oṣu Keje 15, Ọdun 2019 |
Akiyesi: Awọn alaye ni o wa labẹ iyipada laisi akiyesi.