Ọrọ Iṣaaju
Thank you for choosing the Rebel RB-1060 Cordless Air Compressor. This portable and versatile device is designed for convenient inflation of various items, including vehicle tires (cars, motorcycles, bicycles), sports balls, and swimming aids. Its compact design and powerful Li-ion battery make it an ideal tool for use at home or on the go. Please read this manual thoroughly before operation to ensure safe and efficient use of your compressor.

Image: The Rebel RB-1060 Cordless Air Compressor, showing its compact, handheld design with a battery attached at the base and a digital display on top.
Awọn Itọsọna Aabo
Always observe basic safety precautions when using electrical appliances to reduce the risk of fire, electric shock, and personal injury. Keep this manual for future reference.
- Ka Gbogbo Awọn Ilana: Familiarize yourself with the operation and limitations of the compressor.
- Jeki Agbegbe Iṣẹ mọ: Awọn agbegbe ti o kunju n pe awọn ijamba.
- Yago fun Awọn Ayika Ewu: Maṣe lo konpireso ni damp tabi awọn ipo tutu, tabi fi han si ojo.
- Pa awọn ọmọde kuro: Ma ṣe gba awọn ọmọde laaye lati ṣiṣẹ konpireso.
- Store Idle Tools: When not in use, store the compressor in a dry, high, or locked-up place, out of reach of children.
- Lo Irinṣẹ Ọtun: Do not force the compressor or attachments to do a job for which they were not designed.
- Imura daradara: Maṣe wọ aṣọ alaimuṣinṣin tabi ohun -ọṣọ. Ni irun gigun.
- Ṣetọju Awọn irinṣẹ Pẹlu Itọju: Keep the compressor clean for best and safest performance. Follow instructions for lubricating and changing accessories.
- Ṣayẹwo fun Awọn ẹya ti o bajẹ: Before further use, carefully check the compressor for any damaged parts.
- Do Not Over-Inflate: Always check the recommended pressure for the item you are inflating to avoid over-inflation and potential damage or injury.
- Aabo Batiri: Use only the specified battery and charger. Do not expose the battery to extreme temperatures or disassemble it.
Package Awọn akoonu
Rii daju pe gbogbo awọn nkan wa ninu package:
- Rebel RB-1060 Cordless Air Compressor Unit
- Batiri Li-ion (20V)
- AC Charger for Battery
- Bicycle Tire Adapter
- Sports Needle (for balls)
- Adapter Universal
- Itọsọna olumulo

Image: The flexible inflation hose with a quick-connect chuck, alongside various adapters including a sports needle and a universal adapter.
Ọja Pariview
Familiarize yourself with the main components and controls of your Rebel RB-1060 air compressor.
- Ẹka akọkọ: The handheld body containing the motor and controls.
- Ibudo Afikún-owo: Where the hose connects.
- Ifihan LCD: Shows current pressure, target pressure, and battery status.
- Awọn bọtini Iṣakoso:
- Bọtini agbara: Lati tan-an/pa a kuro.
- '+' Bọtini: To increase target pressure.
- '-' Bọtini: To decrease target pressure.
- Pack batiri: Detachable 20V Li-ion battery.
- Okun Ifowopamọ: Flexible hose for connecting to items.
- Awọn ifikọra: Bicycle tire adapter, sports needle, universal adapter.
- Ibi ipamọ Adapter: Integrated storage slots for adapters on the unit base.
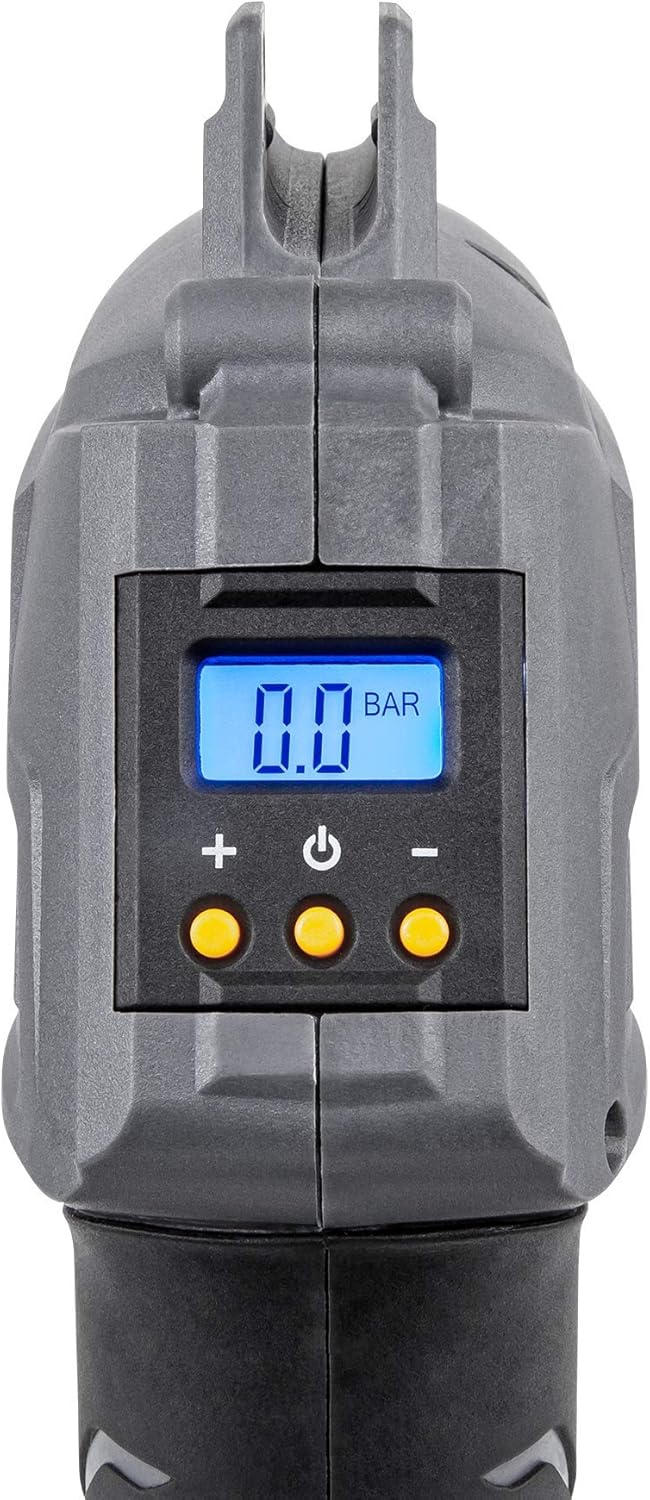
Aworan: A sunmọ-soke view of the compressor's digital LCD display, showing "0.0 BAR" and the '+', power, and '-' control buttons below it.
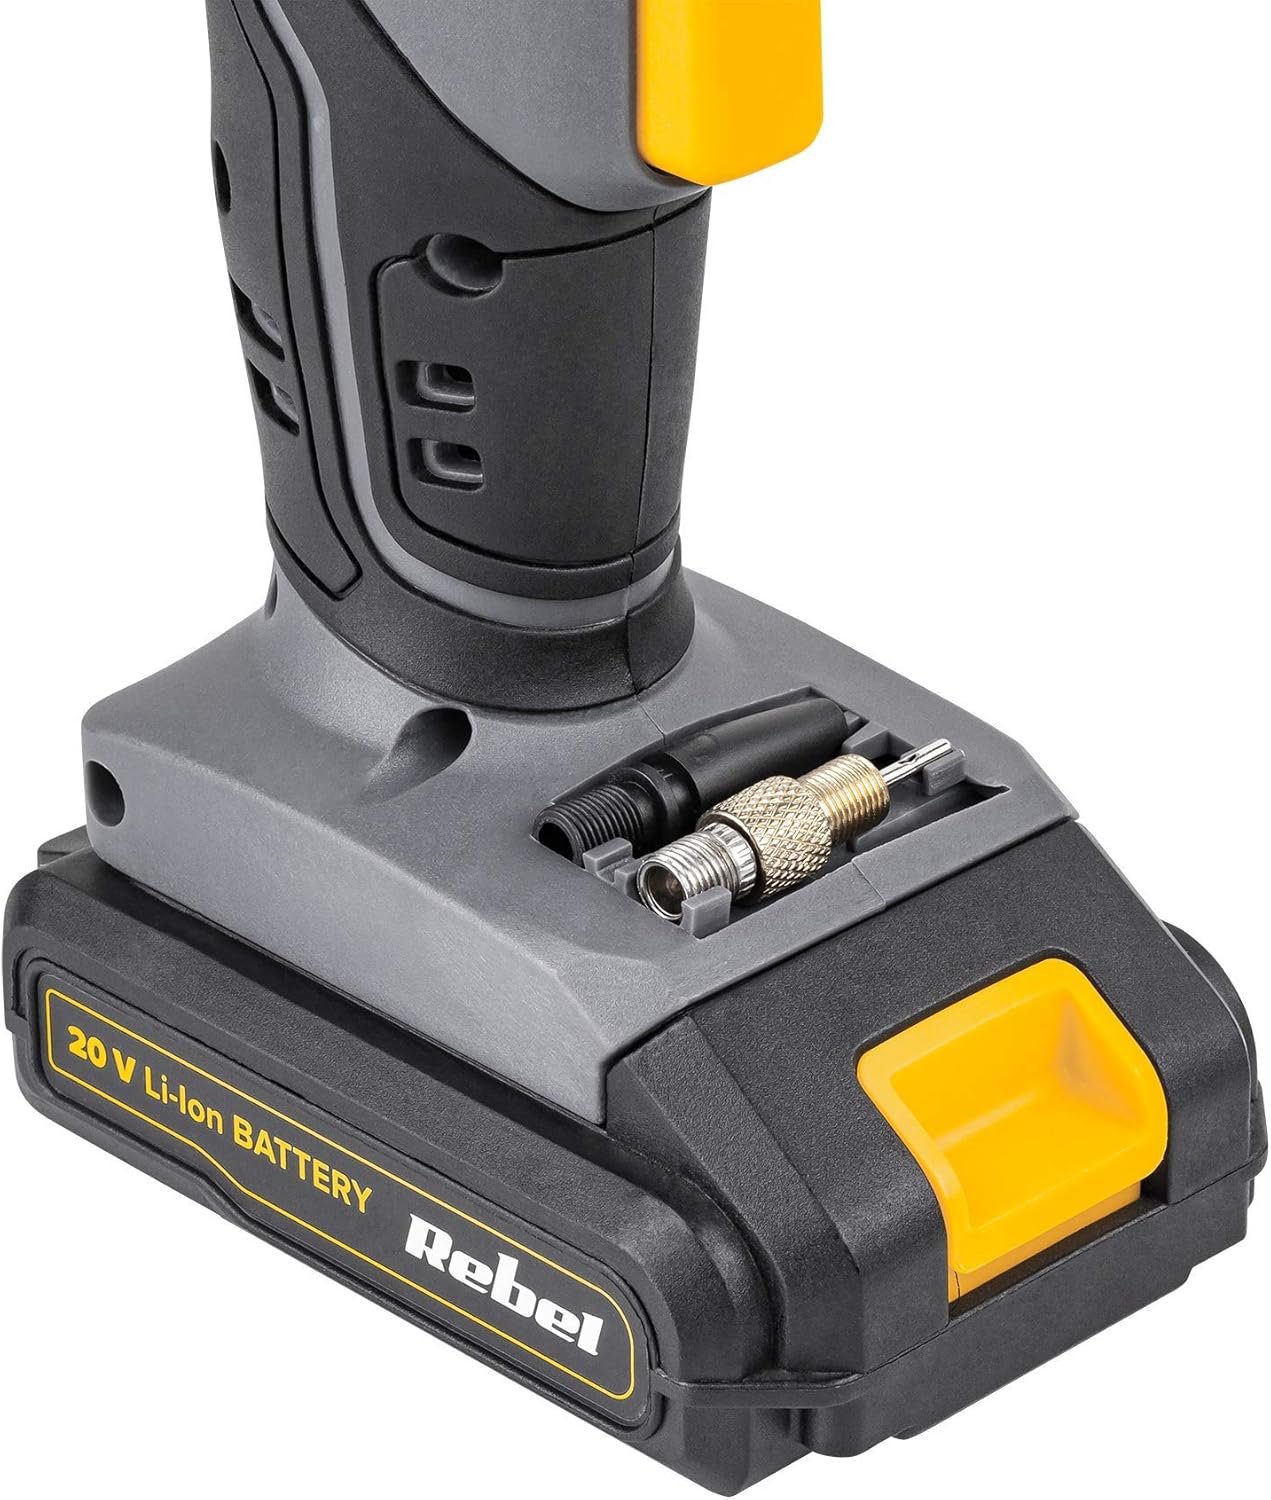
Aworan: A alaye view of the base of the air compressor, showing integrated storage compartments for various inflation adapters.
Ṣeto
1. Ngba agbara si Batiri naa
Before first use, fully charge the Li-ion battery. Connect the AC charger to a power outlet and then to the battery pack. The charger indicator light will show the charging status (e.g., red for charging, green for fully charged). Charging time may vary.

Image: The Rebel 20V Li-ion battery pack placed on its dedicated AC charger, with an indicator light visible.
2. So Batiri naa pọ mọ
Once charged, slide the battery pack onto the base of the compressor unit until it clicks securely into place.
3. Connecting the Inflation Hose and Adapters
Screw the inflation hose securely into the inflation port on the front of the compressor. Select the appropriate adapter for the item you wish to inflate and attach it to the end of the hose.
- For car/motorcycle tires: Use the standard Schrader valve connector on the hose.
- For bicycle tires: Use the bicycle tire adapter if needed (Presta valve).
- For sports balls: Use the sports needle.
- For swimming aids/inflatables: Use the universal adapter.
Awọn ilana Iṣiṣẹ
1. Agbara Lori
Press the power button (usually the middle button) to turn on the compressor. The LCD display will illuminate and show the current pressure (if connected) or '0.0 BAR' (or PSI, depending on unit setting).
2. Setting Target Pressure
Use the '+' and '-' buttons to set your desired target pressure. Refer to the item's manufacturer recommendations for correct pressure levels. The display will show the target pressure as you adjust it.
3. Nsopọ si Nkan
Connect the appropriate adapter and hose to the item you wish to inflate. Ensure a secure connection to prevent air leakage.

Image: A person using the Rebel RB-1060 compressor to inflate a bicycle tire, demonstrating the practical application of the device.

Image: A person using the Rebel RB-1060 compressor to inflate a soccer ball, highlighting its use with sports equipment.
4. Bibẹrẹ Inflation
Once the target pressure is set and the hose is connected, press the power button again to start the inflation process. The compressor will automatically stop when the target pressure is reached.
5. Monitoring Pressure
The LCD display will show the real-time pressure during inflation. You can monitor the progress and ensure the item is not over-inflated.
6. Agbara Paa
After inflation, disconnect the hose from the item and then from the compressor. Press and hold the power button to turn off the unit. Remove the battery if storing for an extended period.
Itoju
- Ninu: Wipe the compressor body with a soft, damp cloth. Do not use harsh chemicals or abrasive cleaners. Ensure no water enters the internal components.
- Ibi ipamọ: Store the compressor and its accessories in a dry, clean place, away from direct sunlight and extreme temperatures.
- Itọju Batiri: For optimal battery life, charge the battery fully before storage and recharge it every 3-6 months if not in regular use. Do not store the battery in a completely discharged state.
- Okun ati awọn Adaptọ: Inspect the inflation hose and adapters regularly for any signs of wear or damage. Replace if necessary to ensure proper sealing and performance.
Laasigbotitusita
| Isoro | Owun to le Fa | Ojutu |
|---|---|---|
| Compressor ko ni tan. | Battery not charged or not properly attached. | Ensure battery is fully charged and securely attached to the unit. |
| Compressor nṣiṣẹ ṣugbọn kii ṣe afẹfẹ. | Hose or adapter not securely connected; Leak in hose/adapter; Item valve blocked. | Check all connections for tightness. Inspect hose and adapters for damage. Ensure the item's valve is clear. |
| Kika titẹ ti ko pe. | Poor connection to item; Sensor malfunction. | Ensure a tight connection. If problem persists, contact customer support. |
| Compressor ma duro laipẹ. | Target pressure reached; Overheating; Low battery. | Check target pressure setting. Allow unit to cool down if hot. Recharge battery. |
Awọn pato
| Ẹya ara ẹrọ | Ẹ̀kúnrẹ́rẹ́ |
|---|---|
| Nọmba awoṣe | RB-1060 |
| Brand | ÌṢÒTÌ |
| Orisun agbara | Agbara Batiri (Li-ion) |
| Voltage | 20V (Nominal, 21 Volts max) |
| Iwọn titẹ to pọju | 7 igi |
| Batiri Iru | 1 Lithium-ion (pẹlu) |
| Iwọn Nkan | 1.7 kilo |
| Package Mefa | 26.6 x 24.7 x 8.6 cm |
| Ipele Ohun | 834 Decibels (Note: This value appears unusually high and may be a data error. Typical portable compressors operate between 70-90 dB.) |
| Agbara | 15 Litres (Note: This likely refers to air displacement or volume handled, not a tank capacity as this is a direct inflator.) |
Atilẹyin ọja ati Support
For warranty information or technical support, please refer to the documentation provided with your purchase or contact the retailer where the product was acquired. Keep your proof of purchase for any warranty claims.