
1. Ifihan
Thank you for choosing the Wiltec 900W Drywall Sander Model 61857. This powerful and versatile tool is designed for efficient sanding of walls, ceilings, and edges, making it ideal for renovation and construction projects. Its integrated vacuum function ensures a cleaner working environment by directly collecting sanding dust. Please read this manual thoroughly before operating the device to ensure safe and optimal performance.
2. Awọn ilana aabo
Nigbagbogbo ṣe akiyesi awọn iṣọra aabo ipilẹ nigba lilo awọn irinṣẹ itanna lati dinku eewu ina, mọnamọna, ati ipalara ti ara ẹni.
- Ka gbogbo awọn ilana: Mọ ararẹ pẹlu awọn iṣakoso ati lilo to dara ti ọpa naa.
- Wọ ohun elo aabo ara ẹni ti o yẹ (PPE): Always wear safety glasses, a dust mask, and hearing protection. Gloves are recommended.
- Rii daju agbegbe iṣẹ ailewu: Keep the work area clean, well-lit, and free from obstructions. Do not operate in explosive atmospheres, such as in the presence of flammable liquids, gases, or dust.
- Aabo itanna: Rii daju pe ipese agbara ibaamu voltage specified on the tool. Do not expose power tools to rain or wet conditions. Avoid body contact with earthed or grounded surfaces.
- Iṣẹ iṣẹ to ni aabo: Always secure the material being sanded to prevent movement during operation.
- Yago fun ibẹrẹ lairotẹlẹ: Rii daju pe iyipada wa ni ipo pipa ṣaaju ki o to pulọọgi sinu ọpa.
- Maintain the tool: Jẹ́ kí àwọn irinṣẹ́ gígé mú kí ó mọ́ tónítóní kí ó lè ṣiṣẹ́ dáadáa kí ó sì ní ààbò. Tẹ̀lé àwọn ìlànà fún fífi òróró sí i àti yíyí àwọn ohun èlò mìíràn padà.
- Ge asopọ agbara: Always disconnect the plug from the power source before making any adjustments, changing accessories, or storing the tool.
- Maṣe de ọdọ: Ṣe itọju ẹsẹ to dara ati iwọntunwọnsi ni gbogbo igba.
- Ṣayẹwo fun awọn ẹya ti o bajẹ: Before further use, carefully check the tool for any damage. Ensure all guards and other parts are in working order.
3. Package Awọn akoonu
Lẹhin ṣiṣi silẹ, jọwọ rii daju pe gbogbo awọn paati wa ati pe ko bajẹ:
- Wiltec 900W Drywall Sander (Model 61857)
- 6 x Sanding Discs (various grits)
- 2 x Erogba gbọnnu
- 1 x Suction Hose (2 meters long)
- Àpò eruku 1 x
- 1 x Connection Adapter
- 1 x Allen Key

Figure 1: Wiltec Drywall Sander with included accessories (dust bag, hose, sanding discs).
4. Eto
Follow these steps to prepare your drywall sander for use:
- So Ọwọ Iranlọwọ mọ: Secure the auxiliary handle to the designated mounting point on the sander body. Use the provided Allen key to tighten it firmly.
- Connect the Suction Hose: Attach one end of the 2-meter suction hose to the dust extraction port on the sander. Ensure a snug fit.
- Attach the Dust Bag: Connect the other end of the suction hose to the dust bag. The integrated vacuum system will direct sanding debris into this bag.
- Install a Sanding Disc: The sander uses a 180mm sanding pad. Align the holes on the sanding disc with the holes on the sanding pad and press firmly to secure it via the hook-and-loop fastening system.

Figure 2: Sander with sanding pad and replacement discs.

Figure 3: Sander with dust extraction hose attached.
5. Awọn ilana Iṣiṣẹ
Operating the Wiltec drywall sander is straightforward. Always ensure you are wearing appropriate PPE before starting.
- Asopọ agbara: So sander naa sinu ibudo agbara 230V ti o yẹ.
- Iyara Ṣatunṣe: The sander features five adjustable speed levels, ranging from 1400 to 2700 revolutions per minute (rpm). Use the speed control switch to select the desired speed. The integrated display will show the selected speed. Start with a lower speed for delicate work or softer materials and increase as needed for more aggressive sanding.
- Bibẹrẹ Sander: Press the power switch to turn on the sander.
- Ọna Iyanrin: Apply gentle, even pressure to the surface. Move the sander in smooth, overlapping circular motions. Avoid pressing too hard, as this can reduce efficiency and damage the surface or the sanding disc. The integrated vacuum function will automatically collect dust as you sand.
- Working on Walls and Ceilings: The ergonomic design and auxiliary handle allow for comfortable operation on both vertical and overhead surfaces. The integrated light helps illuminate the work area for better visibility.
- Duro Sander: Release the power switch to turn off the sander. Wait for the sanding pad to come to a complete stop before setting the tool down.

Figure 4: Sander in operation on a wall, showing the integrated light.
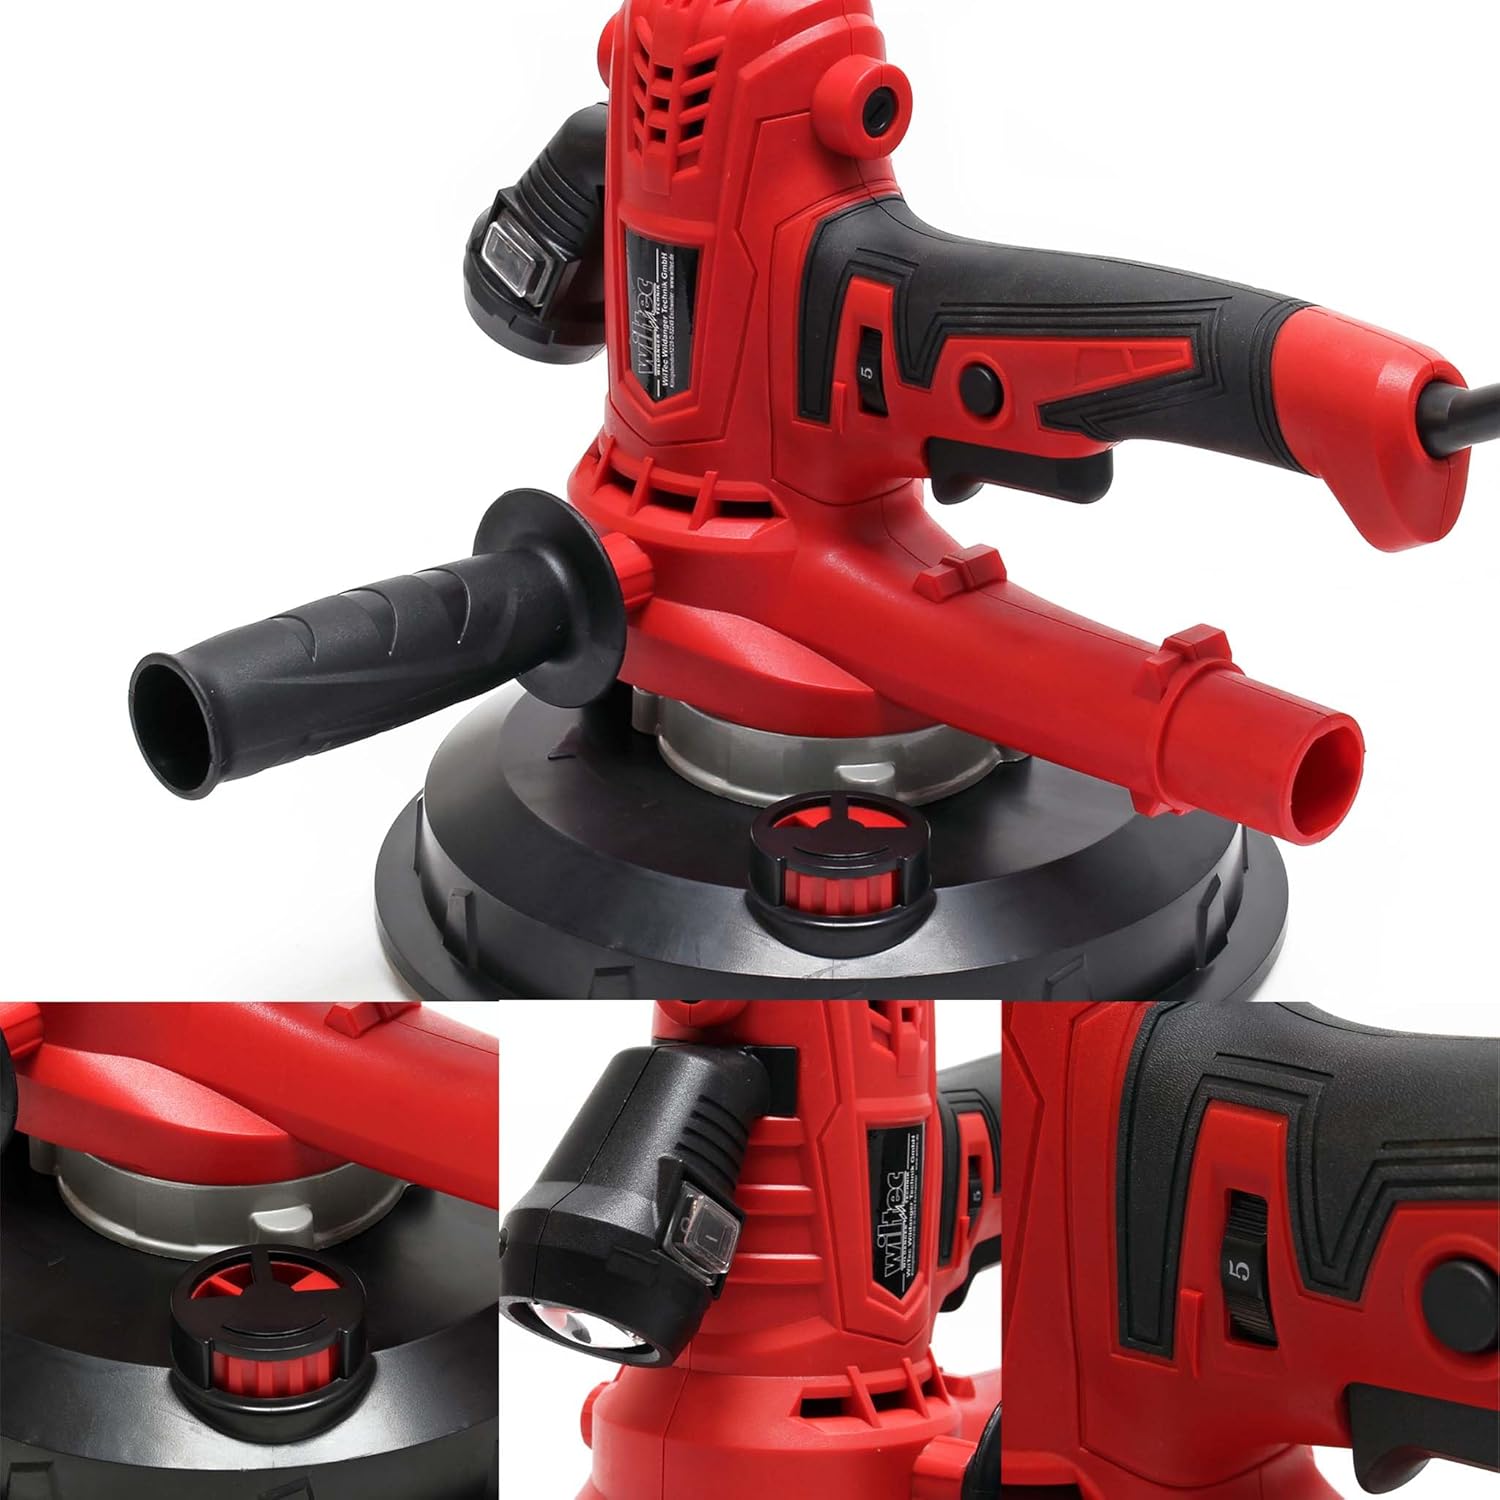
Figure 5: Close-up of the speed control and integrated light.
6. Itọju
Regular maintenance ensures the longevity and optimal performance of your Wiltec drywall sander.
- Ninu: After each use, disconnect the power and clean the tool with a dry cloth. Remove any dust or debris from the ventilation slots to prevent overheating. Do not use water or chemical cleaners.
- Rirọpo Disiki Iyanrin: When a sanding disc becomes worn or clogged, peel it off the hook-and-loop pad and replace it with a new one. Ensure the new disc is correctly aligned.
- Dust Bag Maintenance: Regularly empty the dust bag to maintain effective dust collection. A full dust bag will reduce the efficiency of the vacuum system. Clean the dust bag periodically to remove fine dust particles.
- Rirọpo Fẹlẹ Erogba: The sander includes two spare carbon brushes. If the motor performance decreases or sparks become visible, the carbon brushes may need replacement. Consult a qualified technician or refer to specific instructions for your model for safe replacement. Always disconnect power before attempting this.
- Ibi ipamọ: Store the sander in a dry, secure place, out of reach of children.
7. Laasigbotitusita
If you encounter issues with your drywall sander, refer to the following common problems and solutions:
| Isoro | Owun to le Fa | Ojutu |
|---|---|---|
| Sander ko bẹrẹ | No power supply; Faulty power switch; Worn carbon brushes | Check power connection; Test power outlet; Replace carbon brushes (refer to Section 6) |
| Ko dara sanding išẹ | Worn or incorrect sanding disc; Insufficient pressure; Too low speed setting | Replace sanding disc; Apply even, moderate pressure; Increase speed setting |
| Eruku pupọ ni agbegbe iṣẹ | Dust bag full or improperly attached; Suction hose clogged or detached; Damaged dust seal | Empty and reattach dust bag; Clear hose obstruction; Check hose connections; Inspect and replace dust seal if necessary |
| Motor overheating | Blocked ventilation slots; Continuous heavy load | Clean ventilation slots; Allow tool to cool down; Reduce load during operation |
If the problem persists after attempting these solutions, please contact Wiltec customer support.
8. Awọn pato
| Ẹya ara ẹrọ | Sipesifikesonu |
|---|---|
| Nọmba awoṣe | 61857 |
| Agbara | 900 W |
| Voltage | 230 Volts |
| O pọju. Iyara Yiyi | 2700 rpm |
| Awọn ipele Iyara | 5 |
| Sanding Pad Opin | 180 mm |
| Orisun agbara | Okun Itanna |
| Iwọn Nkan | 3.04 kilo |
| Package Mefa | 30.4 x 30.3 x 27.6 cm |
9. Atilẹyin ọja ati Support
Wiltec products are manufactured to high-quality standards. For warranty information, please refer to the documentation provided at the time of purchase or visit the official Wiltec website. For technical support, spare parts, or service inquiries, please contact Wiltec customer service directly. Ensure you have your model number (61857) and purchase details available when contacting support.