Ematic EMP-720
Ematic LED Projector (EMP-720)
Afowoyi Itọsọna olumulo
1. Ifihan
O ṣeun fun riraasing the Ematic LED Projector. This manual provides essential information for setting up, operating, and maintaining your projector to ensure optimal performance and longevity. Please read this manual thoroughly before using the product and retain it for future reference.
2. Alaye Aabo
Láti dènà iná tàbí ìkọlù iná mànàmáná, má ṣe fi ohun èlò yìí sí òjò tàbí ọ̀rinrin. Láti yẹra fún ìkọlù iná mànàmáná, má ṣe ṣí àpótí náà. Àwọn òṣìṣẹ́ tó tóótun nìkan ni kí o tọ́ka sí iṣẹ́ ìtọ́jú náà.
- Ma wo taara sinu pirojekito lẹnsi nigbati awọn lamp wa lori.
- Rii daju pe fentilesonu to dara ni ayika pirojekito. Ma ṣe dina awọn ṣiṣi atẹgun.
- Lo oluyipada agbara nikan ti a pese pẹlu pirojekito.
- Keep the projector away from water or any liquids.
- Do not place the projector on an unstable surface.
- Yọ pirojekito kuro ninu ina nigba iji manamana tabi nigba ti a ko ba lo o fun igba pipẹ.
3. Package Awọn akoonu
- Ematic LED Projector
- Isakoṣo latọna jijin
- Adapter agbara
- Itọsọna olumulo
- AV Cable (if included)
4. Ọja Ipariview
4.1 Iwaju View
olusin 4.1: Iwaju view of the Ematic LED Projector, highlighting the projection lens.
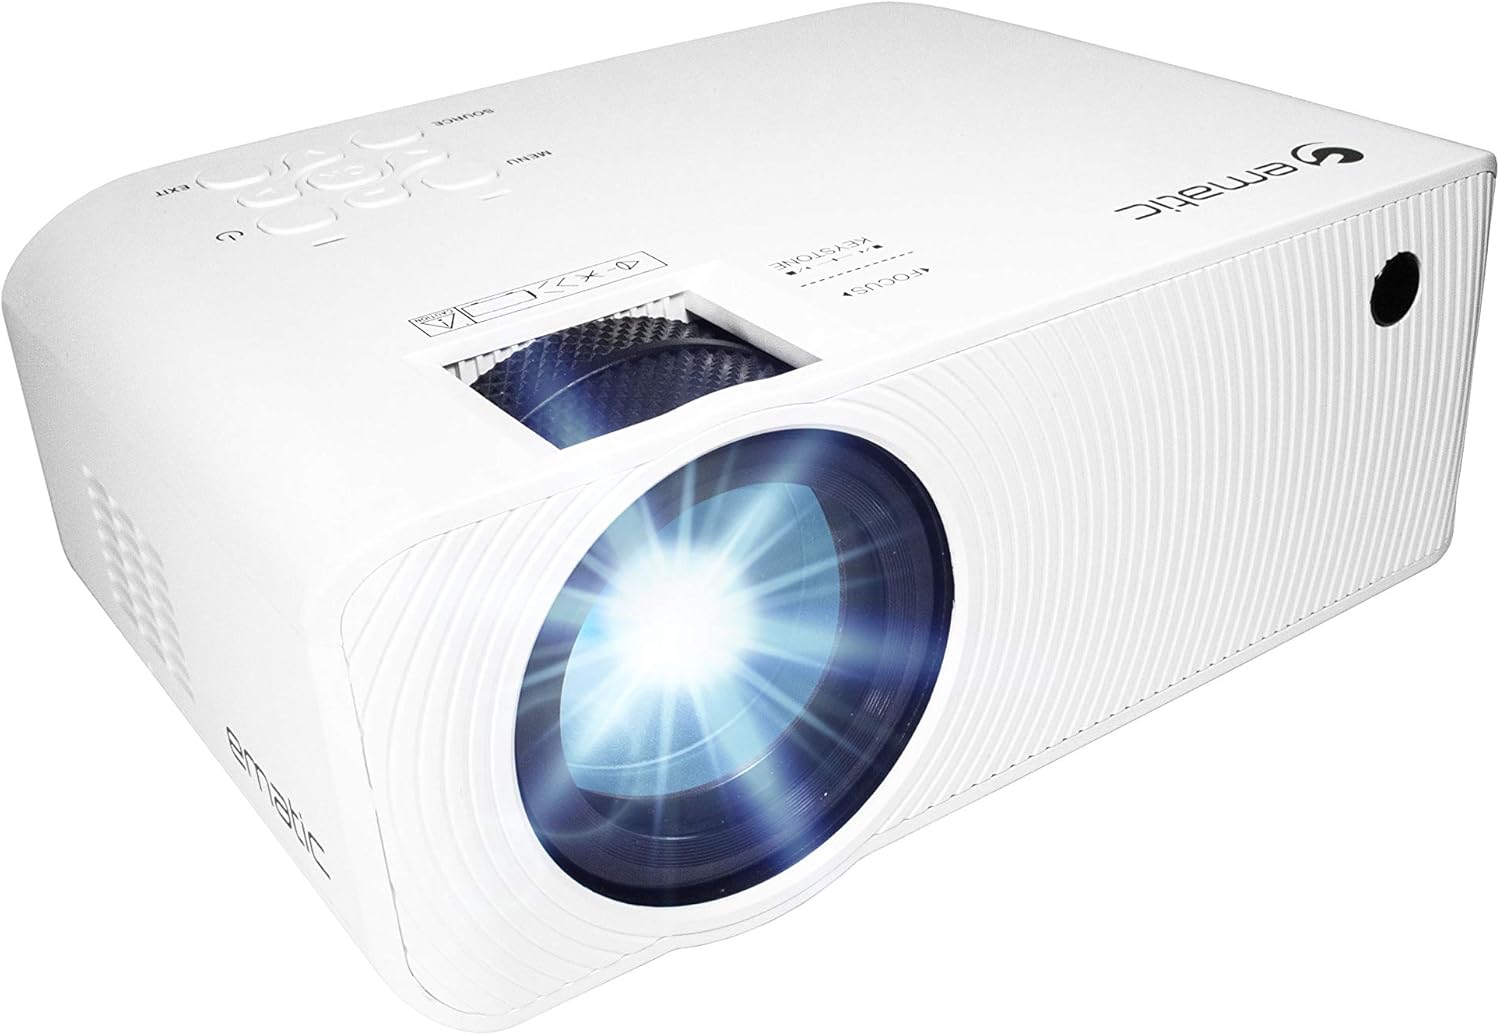
4.2 oke View ati Awọn iṣakoso

olusin 4.2: Top view of the projector showing the control panel (Menu, Source, Exit, Navigation buttons) and the Focus and Keystone correction dials. A remote control is also visible.
- Idojukọ Oruka: Ó ń ṣe àtúnṣe sí kedere àwòrán.
- Atunse okuta bọtini: Ó ń ṣe àtúnṣe ìyípadà àwòrán trapezoidal.
- Ibi iwaju alabujuto: Buttons for Menu, Source selection, Exit, and navigation.
4.3 Ẹ̀yìn àti Ẹ̀gbẹ́ Views pẹlu Awọn Ibudo

Figure 4.3: Rear panel of the projector displaying the connectivity options: AUX audio output, AV input, MicroSD card slot, two HDMI inputs, USB port, and DC power input.

olusin 4.4: Apa view of the projector, highlighting the VGA input port and the infrared (IR) receiver for the remote control.
- AUX: 3.5mm audio output for external speakers or headphones.
- TI: Fídíò àkójọpọ̀ àti ìtẹ̀sí ohùn sítíréò.
- MicroSD: Slot for MicroSD memory cards.
- HDMI 1 / HDMI 2: High-Definition Multimedia Interface inputs for digital audio/video.
- USB: USB port for media playback from USB drives.
- DC NINU: Power input for the projector.
- VGA: Video Graphics Array input for computer connection.
5. Eto
- Ibi: Gbé ẹ̀rọ ìfihàn náà sí orí ilẹ̀ tí ó dúró ṣinṣin, tí ó tẹ́jú. Rí i dájú pé àyè tó wà ní àyíká ẹ̀rọ ìfihàn náà fún afẹ́fẹ́. viewing, position the projector perpendicular to the projection screen or wall.
- Asopọ agbara: Connect the supplied power adapter to the DC IN port on the projector and then plug the adapter into a power outlet.
- Agbara Ibẹrẹ Tan: Press the power button on the projector or the remote control to turn on the unit. The power indicator light will illuminate.
- Atunṣe idojukọ: Once the projector is on, rotate the Focus Ring (refer to Figure 4.2) until the projected image is clear and sharp.
- Atunse okuta bọtini: If the image appears trapezoidal (wider at the top or bottom), adjust the Keystone Correction dial (refer to Figure 4.2) until the image is rectangular.
6. Awọn ilana Iṣiṣẹ
- Titan/Pa: Press the power button on the projector or remote control. Press again to turn off.
- Aṣayan Orisun Iṣawọle: Press the "Source" button on the projector or remote control to cycle through available input sources (HDMI 1, HDMI 2, AV, VGA, USB, MicroSD). Select the desired input.
- Lilọ kiri akojọ aṣayan: Press the "Menu" button to access the projector's settings. Use the navigation buttons on the projector or remote to browse options and the "OK" button to confirm selections.
- Media Playback (USB/MicroSD): Insert a USB drive or MicroSD card into the respective port. Select "USB" or "MicroSD" as the input source. The projector will display a file browser. Navigate to your desired media file (video, photo, music, text) and press "OK" to play.
- Ijade ohun: The projector has built-in speakers (refer to Figure 6.1). For external audio, connect headphones or external speakers to the AUX port (3.5mm audio jack).

Figure 6.1: Projector highlighting its built-in speaker functionality.
7. Asopọmọra
The Ematic LED Projector offers multiple connection options to various devices, ensuring versatility for your entertainment and presentation needs.

Figure 7.1: Multimedia device compatibility chart for the projector.

Olusin 7.2: Examples of projector connections to a laptop and smartphone, highlighting supported input types.
- HDMI: Connect Blu-ray players, game consoles (PS4, Xbox), streaming devices (Amazon Fire TV Stick, Chromecast), laptops, and other HDMI-enabled devices.
- USB: Mu awọn media ṣiṣẹ files (videos, photos, music) directly from USB flash drives.
- MicroSD: Mu awọn media ṣiṣẹ files directly from MicroSD memory cards.
- TI: Connect older devices like DVD players or VCRs using the included AV cable.
- VGA: Connect desktop computers or older laptops.
- Audio Out (AUX): Connect external speakers or headphones for enhanced audio experience.
8. Itọju
- Fifọ lẹnsi: Lo aṣọ rirọ, tí kò ní àwọ̀ tí a ṣe pàtó fún àwọn lẹ́nsì ojú láti fi fọ lẹ́nsì àwòjìji náà pẹ̀lú ìrọ̀rùn. Má ṣe lo àwọn ohun ìfọmọ́ra tàbí agbára púpọ̀ jù.
- Yiyọ eruku kuro: Regularly clean the ventilation grilles with a soft brush or compressed air to prevent dust buildup, which can affect performance and lifespan.
- Ode Ninu: Nu ìta projector náà pẹ̀lú ohun rírọrùn, damp asọ. Yẹra fun lilo awọn kẹmika lile.
- Ibi ipamọ: When not in use for extended periods, store the projector in a cool, dry place, ideally in its original packaging or a protective case, to prevent dust accumulation and damage.
9. Laasigbotitusita
| Isoro | Owun to le Fa | Ojutu |
|---|---|---|
| Ko si aworan akanṣe | No power; Incorrect input source; Cable not connected properly. | Check power connection; Select correct input source; Reconnect cables securely. |
| Aworan jẹ blurry | A kò ṣe àtúnṣe ìfojúsùn; Ẹ̀rọ ìfihàn náà jìnnà jù/sunmọ́ ìbòjú. | Adjust the Focus Ring; Adjust projection distance. |
| Aworan jẹ trapezoidal | Keystone not adjusted; Projector not level. | Adjust the Keystone Correction dial; Ensure projector is on a flat surface. |
| Ko si ohun | Volume too low; Muted; External speakers not connected or off. | Increase volume; Unmute; Check external speaker connection and power. |
| Isakoṣo latọna jijin ko ṣiṣẹ | Batteries dead; Obstruction between remote and IR receiver. | Replace batteries; Remove obstructions; Point remote directly at the projector's IR receiver. |
10. Awọn pato
| Ẹya ara ẹrọ | Ẹ̀kúnrẹ́rẹ́ |
|---|---|
| Brand | Ematic |
| Awoṣe | EMP-720 (Generic) |
| Ipinnu Ifihan | 1280 x 720 (Abínibí) |
| Asopọmọra Technology | HDMI, USB, AV, VGA, MicroSD, AUX |
| Pataki Ẹya | Portable, Built-in Speakers |
| Iwọn Nkan | 3.5 iwon |
| Ọja Mefa | 13.85 x 5 x 8.8 inches |
| Lamp Igbesi aye | Titi di awọn wakati 20,000 (Ipo deede) |
11. Atilẹyin ọja ati Support
Fun alaye atilẹyin ọja ati atilẹyin imọ-ẹrọ, jọwọ tọka si kaadi atilẹyin ọja ti o wa pẹlu ọja rẹ tabi ṣabẹwo si Ematic osise webojula. Jeki ẹri rira rẹ fun awọn iṣeduro atilẹyin ọja.
Ematic Customer Support: www.ematic.us/support (Eksampìjápọ)
Ask a question about this manual
Ask about setup, troubleshooting, compatibility, parts, safety, or missing instructions. Manuals+ will review the question and use this page’s manual context to help answer it.