1. Ifihan
This manual provides essential information for the safe assembly, operation, maintenance, and troubleshooting of your Powerhorse Horizontal/Vertical Electric Log Splitter. Please read and understand all instructions before operating the equipment. Proper use and maintenance will ensure optimal performance and extend the lifespan of your log splitter.

Image 1.1: The Powerhorse Electric Log Splitter in its horizontal configuration.
2. Alaye Aabo pataki
Operating a log splitter can be hazardous if proper safety precautions are not followed. Always prioritize safety to prevent injury or damage to property.
- Ohun elo Idaabobo Ti ara ẹni (PPE): Always wear safety glasses, heavy-duty gloves, and steel-toed boots. Hearing protection is recommended.
- Aabo Itanna: Ensure the log splitter is connected to a properly grounded 120V, 15 Amp circuit. Use an appropriate gauge extension cord if necessary, rated for outdoor use and the amperage of the unit. Do not operate in wet conditions.
- Agbegbe Iṣẹ: Operate on a firm, level surface. Keep the work area clear of bystanders, children, and pets. Maintain a safe distance from the splitting wedge.
- Ìmúlò Àkọsílẹ̀: Only split logs that fit within the specified dimensions (up to 20.5 inches long and 12 inches in diameter). Do not attempt to split logs containing nails, wire, or other foreign objects.
- Isẹ: Never place hands or feet near the splitting wedge or ram during operation. Always use both hands to operate the controls.
- Iduroṣinṣin: Ensure the log splitter is stable before operation, especially when switching between horizontal and vertical positions.
3. Irinše ati Awọn ẹya ara ẹrọ
Familiarize yourself with the main components of your log splitter:
- Mọto ina: A powerful 15 Amp, 120V, 2300 Watt, 60Hz, 3 HP copper-wire electric motor drives the hydraulic system.
- Hydraulic Cylinder and Wedge: Generates 8 tons of splitting force. The wedge is designed to efficiently split logs.
- Log Cradle: Catches split wood, reducing the need for bending and stooping.
- Ọkọ Iṣakoso: Activates the hydraulic ram for splitting.
- Awọn kẹkẹ: 6-inch wheels provide portability for moving the unit.
- Pivoting Design: Allows quick and easy conversion between horizontal and vertical splitting positions.

Image 3.1: The electric motor and control panel, emphasizing the 15 Amp, 120V electric operation.

Image 3.2: The integrated log cradle designed to catch split wood.
4. Apejọ Awọn ilana
While the log splitter is designed for straightforward assembly, careful attention to detail is crucial. Refer to the included assembly diagram for visual guidance.
- Ṣii silẹ: Ni ifarabalẹ yọ gbogbo awọn paati kuro ninu apoti. Ṣayẹwo fun eyikeyi bibajẹ sowo.
- Fifi sori ẹrọ kẹkẹ: Attach the 6-inch wheels to the axle using the provided hardware. Ensure they are securely fastened.
- Handle/Support Leg Attachment: Secure any auxiliary handles or support legs as indicated in the diagram.
- Hydraulic Control Valve: Verify the orientation of the hydraulic control valve. If it appears inverted for shipping, carefully re-orient it to the correct operating position as shown in the manual's diagrams.
- Ṣayẹwo omi: Before first use, check the hydraulic fluid level. Add hydraulic fluid if necessary, ensuring it meets the manufacturer's specifications.

Image 4.1: The 6-inch wheels, contributing to the unit's portability.
5. Awọn ilana Iṣiṣẹ
This log splitter offers both horizontal and vertical splitting capabilities. Always ensure the unit is stable and on a level surface before operation.
5.1. Selecting Operating Position (Horizontal/Vertical)
The pivoting design allows for easy conversion:
- Ensure the log splitter is unplugged and the ram is fully retracted.
- Locate the locking pins or levers that secure the splitting beam.
- Release the locking mechanism and carefully pivot the beam to the desired horizontal or vertical position.
- Securely re-engage all locking pins or levers. Verify the beam is firmly locked in place before proceeding.

Image 5.1: The log splitter demonstrating its versatile horizontal and vertical splitting capabilities.

Image 5.2: The log splitter configured for vertical splitting, ideal for heavier logs.
5.2. Splitting Logs
- Igbaradi: Place the log splitter on a firm, level surface. Ensure the power cord is safely routed and plugged into a suitable outlet.
- Ibi Ifipamọ:
- Ipo petele: Place the log firmly against the end plate, centered under the wedge.
- Ipo inaro: Roll or slide the log onto the base plate, ensuring it is stable and centered under the wedge. This mode is particularly useful for large, heavy logs that are difficult to lift.
- Isẹ: With both hands, simultaneously engage the control levers/buttons to activate the hydraulic ram. The wedge will advance and split the log.
- Iyọkuro: Once the log is split, release the controls to retract the wedge. The log cradle will help contain the split pieces.
- Tun: Reposition the log or place a new log for subsequent splitting.
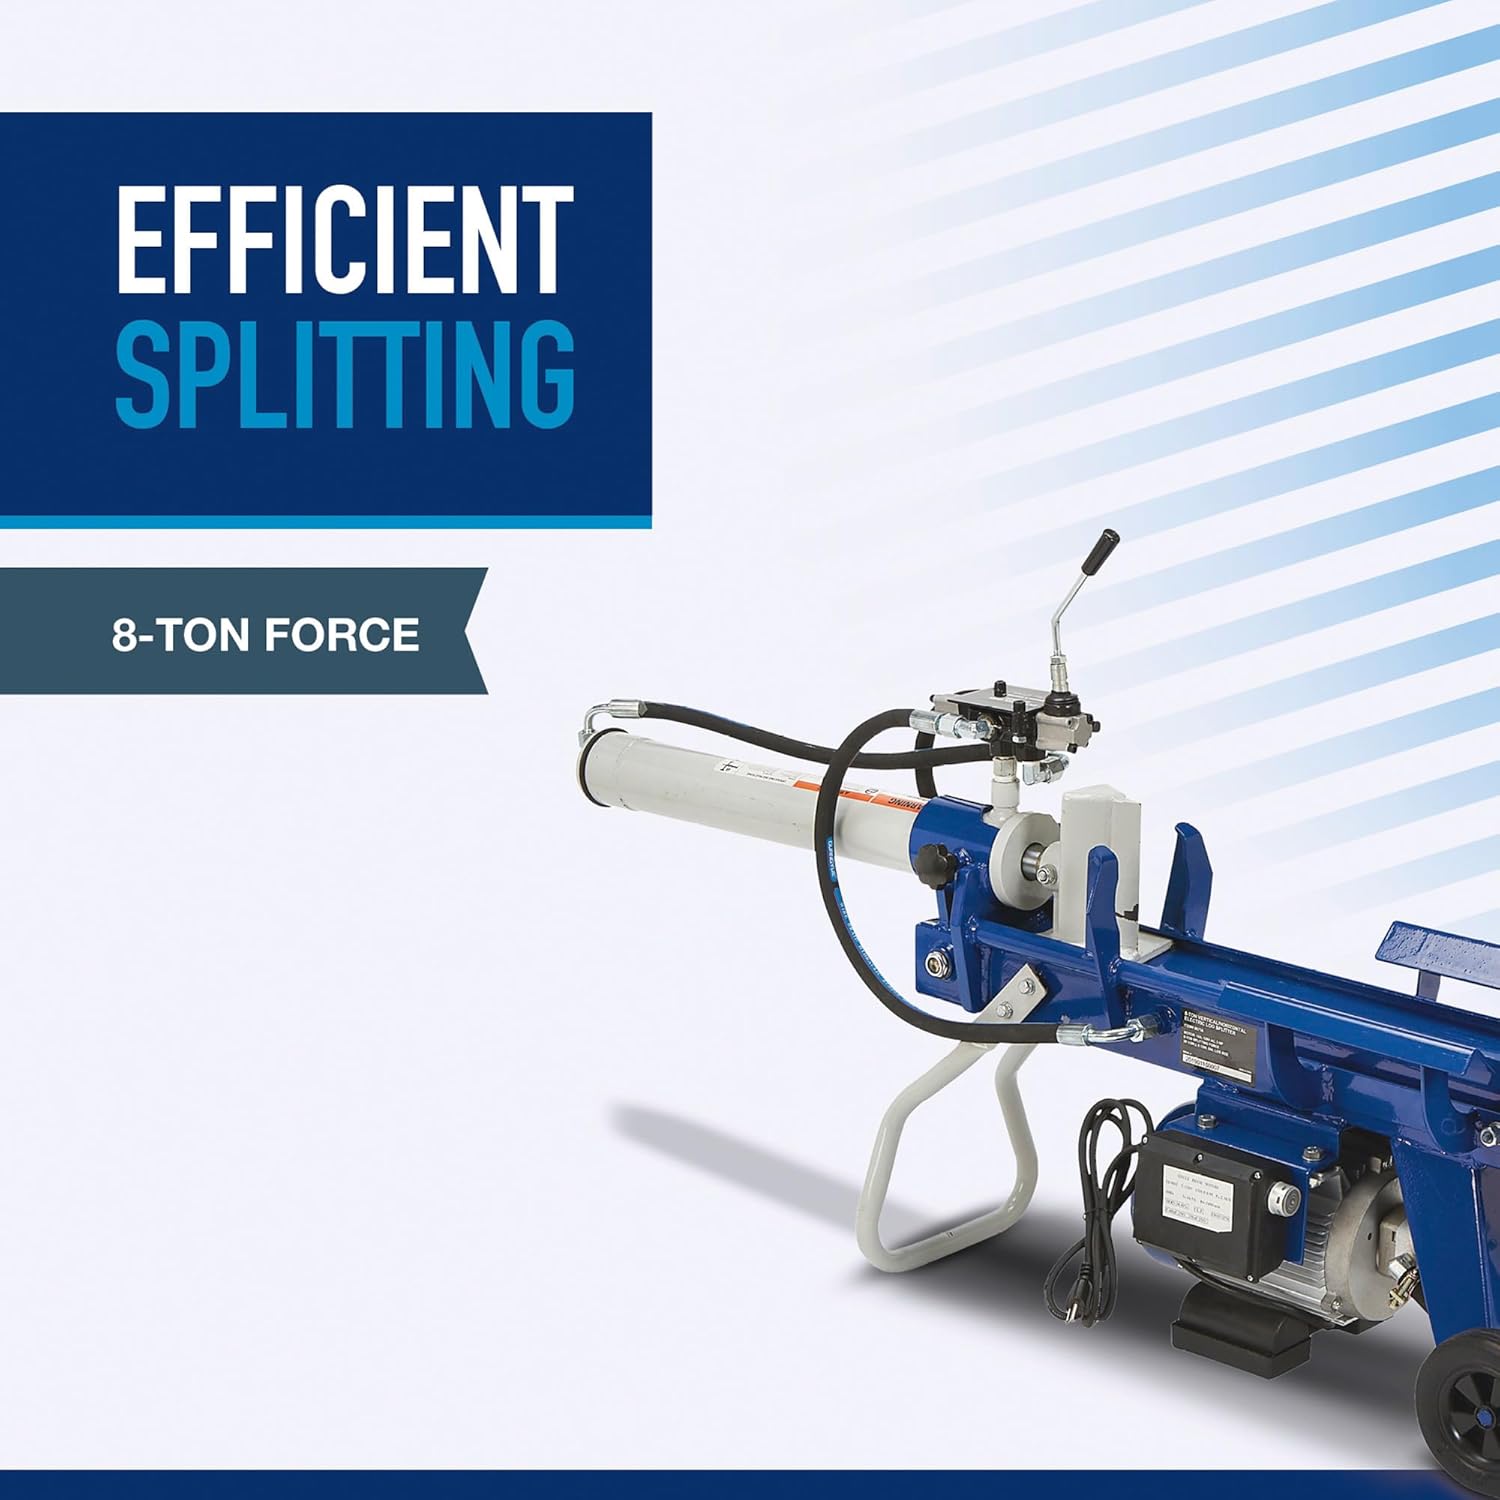
Image 5.3: The log splitter applying 8 tons of force to split a log.
6. Itọju
Regular maintenance ensures the longevity and safe operation of your log splitter.
- Omi Hydraulic: Check hydraulic fluid levels periodically. Refer to the manufacturer's recommendations for the correct type of fluid and replacement schedule.
- Ninu: Keep the log splitter clean, especially the ram and wedge area, to prevent debris buildup.
- Awọn ayewo: Regularly inspect all bolts, nuts, and hydraulic hoses for tightness and signs of wear or damage. Replace any worn or damaged parts immediately.
- Awọn ohun elo itanna: Ensure the power cord and motor housing are free from damage.
- Ibi ipamọ: Store the log splitter in a dry, protected area when not in use.
7. Laasigbotitusita
If you encounter issues with your log splitter, consult the following table for common problems and solutions.
| Isoro | Owun to le Fa | Ojutu |
|---|---|---|
| Mọto ko bẹrẹ | No power, tripped circuit breaker, faulty switch | Check power connection, reset breaker, contact service if switch is faulty. |
| Ram does not extend/retract | Low hydraulic fluid, air in system, control valve issue | Check fluid level, bleed air from system (refer to full manual), verify control valve orientation. |
| Reduced splitting force | Low hydraulic fluid, worn pump, motor overload | Check fluid, ensure logs are within capacity, contact service for pump/motor issues. |
| Unit unstable in horizontal mode | Improper setup, uneven surface | Ensure all support legs are deployed, operate on a level surface. |
| Wheels difficult to maneuver | Small wheel size, rough terrain | Use on smooth surfaces or use a hand truck for transport over rough terrain. |
8. Imọ ni pato
| Sipesifikesonu | Iye |
|---|---|
| Yapa Force | 8 Toonu |
| Mọto | 15 Amp, 120V, 2300 Watt, 60Hz, 3 HP Electric |
| Max Wọle Ipari | 20.5 inches |
| Max Log opin | 12 inches |
| Silinda Opin | 2.75 inches (inner) |
| Wedge Dimensions | 3.2ninu. x2.7 ninu. x 6in. |
| Ọja Mefa | 56 x 11 x 30 inches |
| Iwọn Nkan | 169.4 iwon |
| Olupese | Ẹṣin agbara |
9. Atilẹyin ọja ati Onibara Support
For warranty information, please refer to the documentation included with your purchase or visit the official Powerhorse website. For technical assistance, parts, or service inquiries, please contact Powerhorse customer support directly. Keep your purchase receipt and model number (B08173BL67) readily available when contacting support.
O le wa alaye olubasọrọ ni igbagbogbo lori olupese webaaye tabi laarin apoti ọja.