Ọrọ Iṣaaju
This manual provides detailed instructions for the setup, operation, maintenance, and troubleshooting of your DPVR KNEWKEY RYMEK Typewriter Style Mechanical Keyboard. This keyboard offers both wired and wireless connectivity, multi-device pairing, and a distinctive retro design with dynamic LED backlighting.
Package Awọn akoonu
- DPVR KNEWKEY RYMEK Mechanical Keyboard
- Okun Ngba agbara USB
- Ilana Afowoyi (iwe yii)
Ṣeto
1. Ngba agbara si Keyboard
Before initial use, fully charge the keyboard. Connect the provided USB charging cable to one of the two Micro-USB charging ports on the keyboard and to a power source (e.g., computer USB port or USB wall adapter). The keyboard features a built-in 1200mAh Lithium battery. A full charge provides approximately one week of usage, or 8 hours with full backlighting enabled.

Aworan: Isunmọ view of the keyboard's indicator lights and function keys, highlighting the charging port area.
2. Asopọ onirin (USB)
To use the keyboard in wired mode, connect the USB charging cable from the keyboard to an available USB port on your computer. The keyboard will automatically be recognized by your operating system.
3. Wireless Bluetooth Connection
The RYMEK keyboard supports pairing with up to three devices simultaneously and switching between them. Follow these steps to pair a device:
- Rii daju pe keyboard ti wa ni titan.
- Tẹ mọlẹ Fn key along with one of the Bluetooth channel keys (BT1, BT2, tabi BT3) fún ìṣẹ́jú-àáyá 3-5 títí tí ìmọ́lẹ̀ àmì tó báramu yóò fi tàn kánkán. Èyí fi hàn pé keyboard wà ní ipò ìsopọ̀.
- On your device (smartphone, tablet, or computer), navigate to its Bluetooth settings.
- Wa fun available devices and select "RYMEK Keyboard" (or similar) from the list.
- Once connected, the indicator light for the selected Bluetooth channel will stop flashing and remain solid.
To switch between paired devices, simply press the Fn key along with the desired Bluetooth channel key (BT1, BT2, tabi BT3) once. The keyboard will connect to the previously paired device on that channel.
4. Integrated Tablet Stand
The keyboard features an integrated stand designed to hold tablets and smartphones, providing an ergonomic setup for typing. Simply place your device into the stand slot.

Aworan: Angled view of the DPVR KNEWKEY RYMEK keyboard, highlighting its retro design and the integrated tablet stand.
Awọn ilana Iṣiṣẹ
1. Agbara Tan / Paa
Locate the power switch on the keyboard to turn it on or off. Ensure the keyboard is on for both wired and wireless operation.
2. Iṣakoso Backlight
The keyboard features dynamic LED backlighting with RGB support. Use the dedicated backlight control keys or key combinations (often involving the Fn key) to adjust brightness, change lighting patterns, or turn the backlight on/off. Refer to the keycap legends for specific functions.

Aworan: Isunmọ view of the backlit mechanical keys, demonstrating the blue LED illumination.
3. Awọn iṣẹ bọtini
The keyboard features 83 keys, including standard alphanumeric keys, function keys, and special keys. The scroll knob typically controls volume or backlight intensity, depending on the active mode. The mechanical blue switches provide a tactile and audible typing experience.
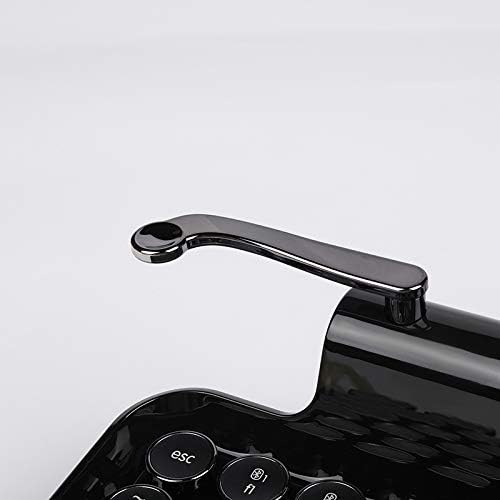
Image: Close-up of the versatile scroll knob on the keyboard.
4. Ibamu
The keyboard is compatible with Windows, macOS, iOS, and Android operating systems. Ensure your device's Bluetooth is enabled and properly configured for connection.
Itoju
1. Ninu
To clean the keyboard, use a soft, dry, lint-free cloth. For stubborn dirt, a slightly damp cloth with mild soap can be used, ensuring no liquid enters the keyboard. Avoid abrasive cleaners or solvents. The main body is made of ABS (Piano Lacquer) and keycaps are PC & ABS.
2. Itọju batiri
To prolong battery life, avoid fully discharging the keyboard frequently. If storing the keyboard for an extended period, charge it to approximately 50% before storage and recharge every few months.
Laasigbotitusita
- Keyboard ko sopọ nipasẹ Bluetooth: Ensure the keyboard is in pairing mode (indicator light flashing). Check your device's Bluetooth settings to ensure it's enabled and searching for devices. Try forgetting the device on your system and re-pairing.
- Awọn bọtini ko dahun: Check if the keyboard is powered on and properly connected (wired or wireless). If wireless, ensure the battery is charged. Try restarting the keyboard and your connected device.
- Imọlẹ ẹhin ko ṣiṣẹ: Ensure the backlight is enabled and brightness is adjusted using the dedicated keys. Check battery level, as low battery might disable backlighting.
- Batiri ko gba agbara: Verify the USB cable is securely connected to both the keyboard and the power source. Try a different USB port or cable.
- Tablet stand stability: While designed for tablets and smartphones, very large or heavy devices may affect stability. Ensure the device is centered.
Awọn pato
| Brand | DPVR |
| Awoṣe | RYMEK |
| Asopọmọra | Bluetooth (Alailowaya), USB (Onífóònù) |
| Awọn ẹrọ ibaramu | Àwọn fóònù alágbèéká, Tábìlẹ́ẹ̀tì, Kọ̀mpútà |
| Awọn ọna System Support | Windows, macOS, iOS, Android |
| Nọmba bọtini | 83 Awọn bọtini |
| Yipada Iru | Blue Mechanical Yipada |
| Imọlẹ ẹhin | Dynamic LED, RGB Support |
| Batiri Iru | Litiumu 1200mAh |
| Battery Life (Wireless) | Approx. 1 Week (standard use), 8 Hours (full light on) |
| Gbigba agbara Ports | Two Micro-USB |
| Awọn ohun elo | Main Body: ABS (Piano Lacquer); Keycaps: PC & ABS |
| Awọn iwọn (L x W x H) | 14.17" x 7.48" x 2.76" (36cm x 19cm x 7cm ní nǹkan bí) |
| Iwọn | 1.52 kg (isunmọ.) |
Atilẹyin ọja
This product comes with a manufacturer's 1-year warranty from the date of purchase. Please retain your proof of purchase for warranty claims. The warranty covers manufacturing defects but does not cover damage caused by misuse, accidents, or unauthorized modifications.
Atilẹyin
For further assistance, technical support, or warranty inquiries, please contact the manufacturer or your retailer. Refer to the product packaging or the manufacturer's official webojula fun alaye olubasọrọ.