1. Awọn Ilana Aabo pataki
Jọwọ ka gbogbo awọn ilana fara ṣaaju fifi sori ẹrọ ati lo. Jeki iwe afọwọkọ yii fun itọkasi ọjọ iwaju.
Gbogbogbo Abo
- Rí i dájú pé a ti ge ina agbara kuro ṣaaju fifi sori ẹrọ, itọju, tabi mimọ.
- Ohun elo yii kii ṣe ipinnu fun lilo nipasẹ awọn eniyan (pẹlu awọn ọmọde) pẹlu idinku ti ara, imọlara tabi awọn agbara ọpọlọ, tabi aini iriri ati imọ, ayafi ti wọn ba ti fun wọn ni abojuto tabi itọnisọna nipa lilo ohun elo nipasẹ eniyan ti o ni iduro fun aabo wọn.
- Awọn ọmọde yẹ ki o wa ni abojuto lati rii daju pe wọn ko ṣere pẹlu ohun elo naa.
Itanna Aabo
- All electrical connections must be made by a qualified electrician and conform to local codes and regulations.
- Rii daju voltage and frequency of your power supply match the specifications of the fan.
- The fan must be properly grounded to prevent electric shock.
Fifi sori Aabo
- Mount the fan to a ceiling structure capable of supporting a minimum of 15 kg (33 lbs).
- Ensure there is adequate clearance between the fan blades and any obstacles (walls, furniture) and the floor. A minimum distance of 2.3 meters (7.5 feet) from the floor to the blades is recommended.
- Do not install the fan in a location where it can be easily reached by children or pets.
2. Ọja Ipariview
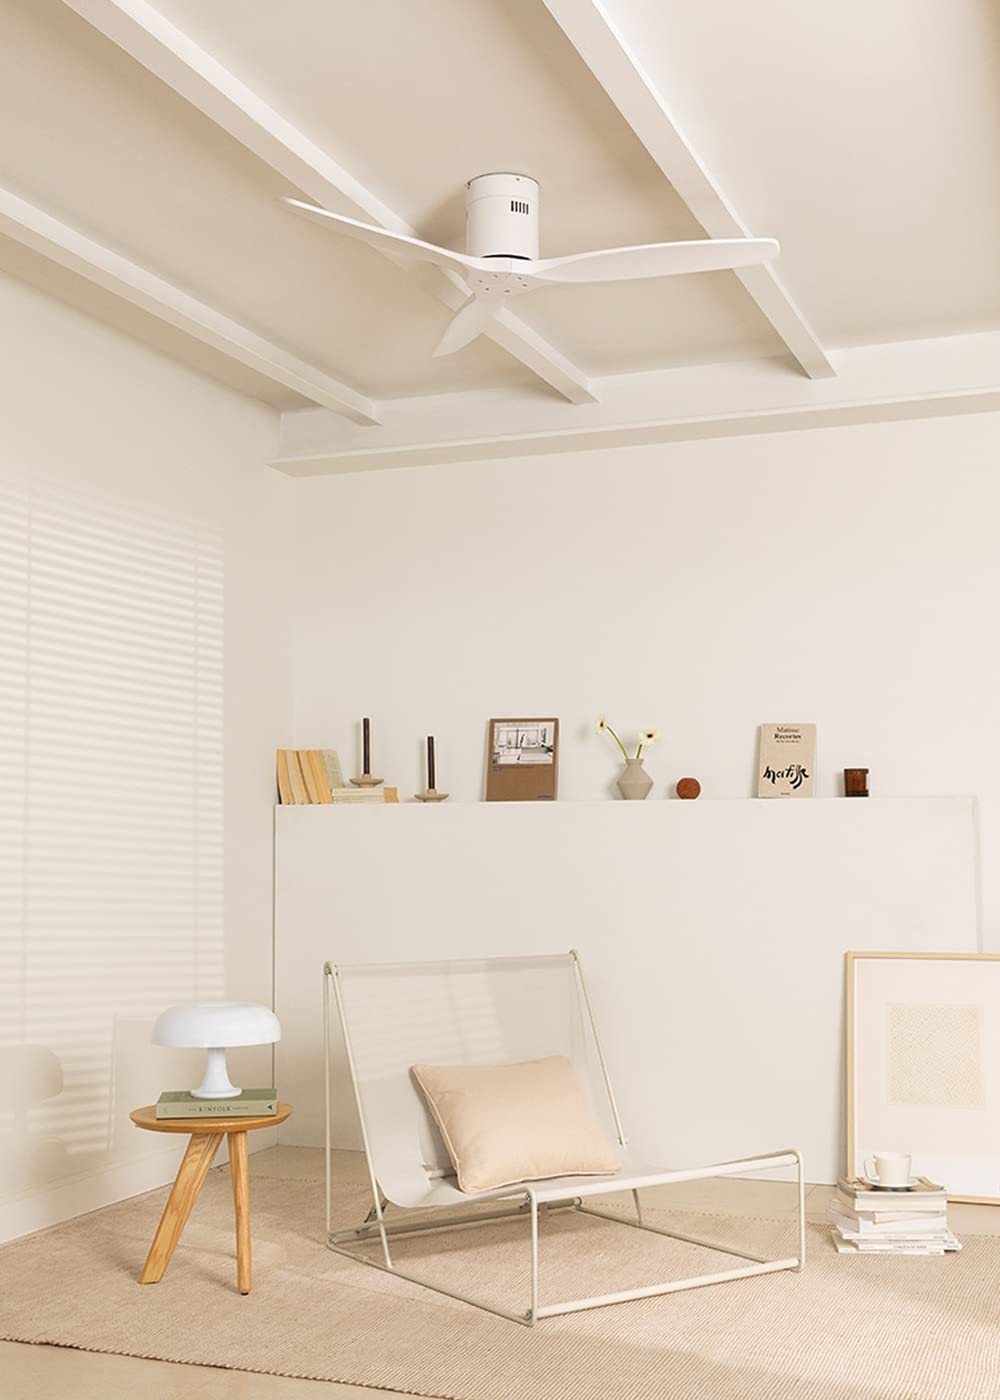
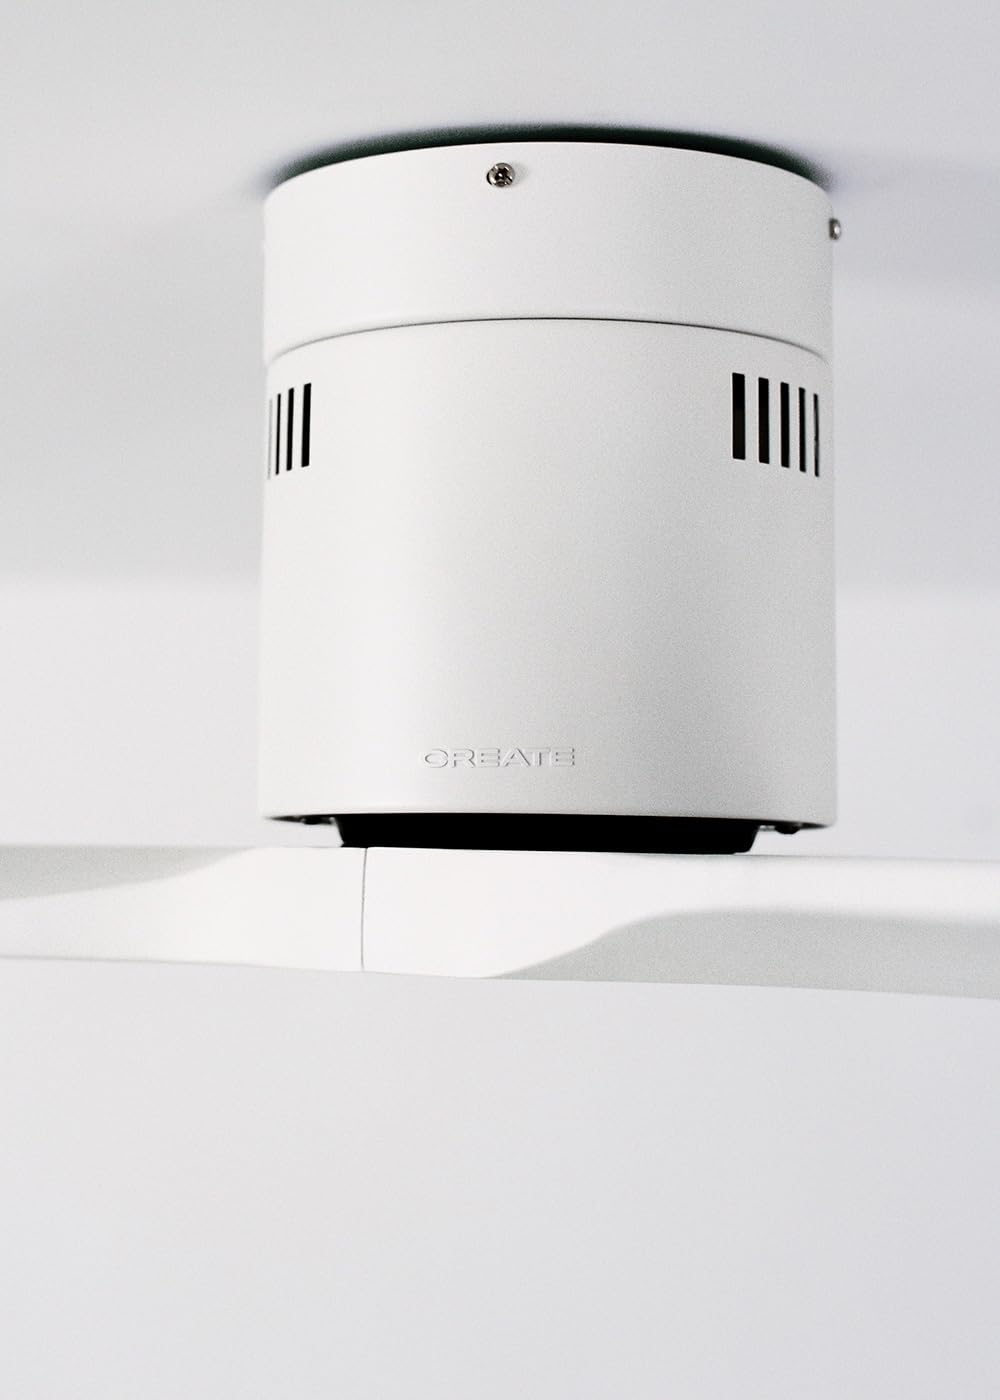
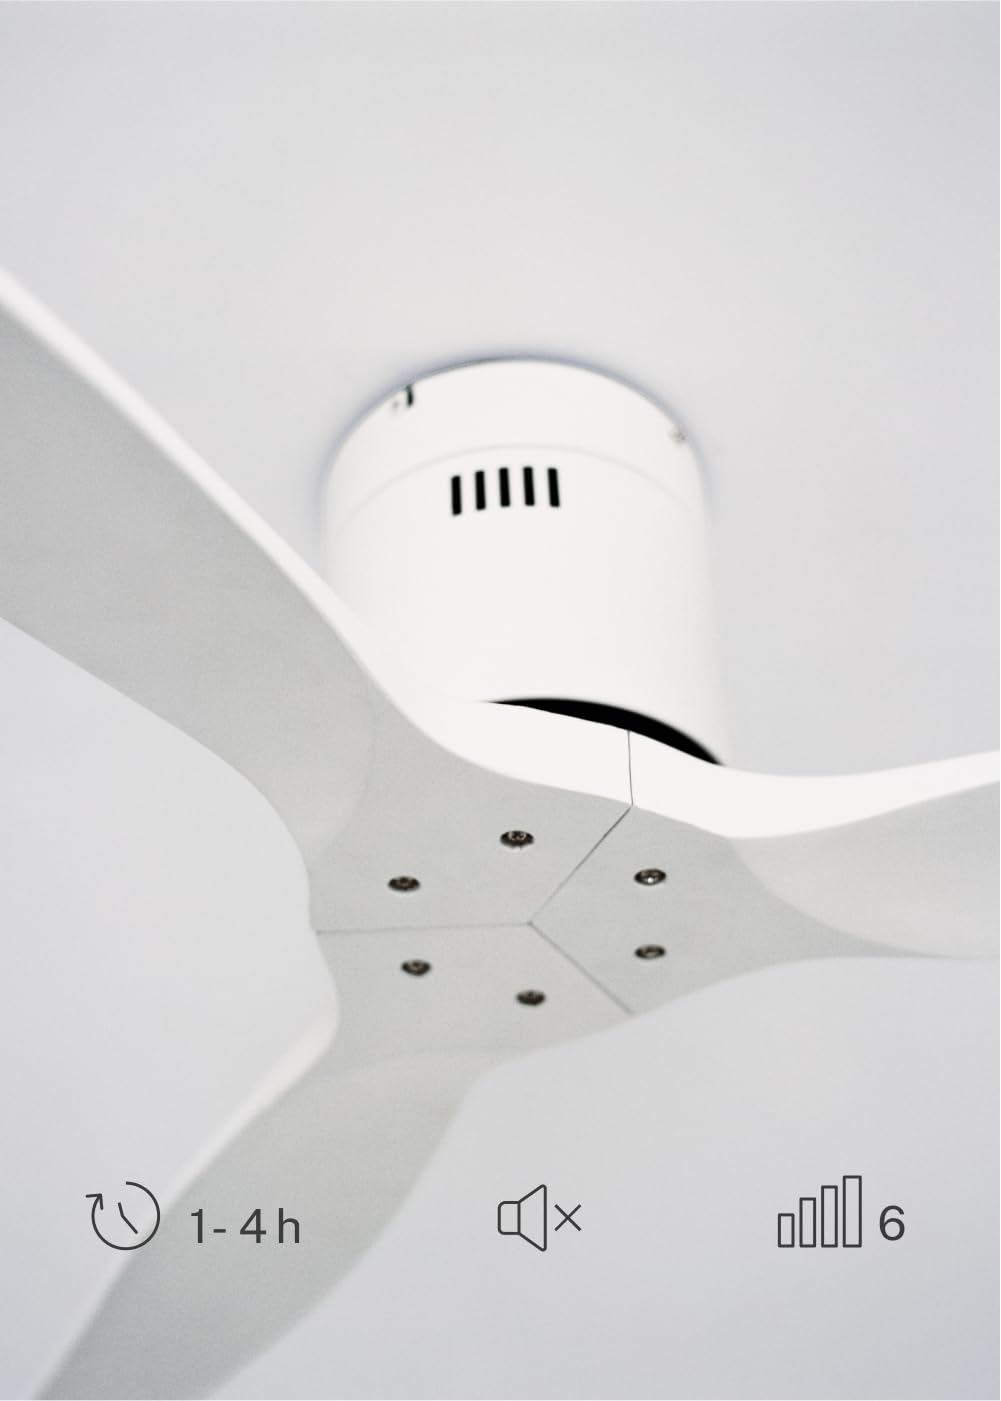
The CREATE WINDCALM DC Ceiling Fan is designed for efficient and quiet air circulation in various indoor spaces. It features a durable aluminum body, a silent DC motor, and three lightweight blades, ensuring minimal noise operation. The fan offers 6 adjustable speeds and a programmable timer for convenience.

3. Imọ ni pato
| Ẹya ara ẹrọ | Sipesifikesonu |
|---|---|
| Brand | ṢẸDA |
| Nọmba awoṣe | 43479_88375 |
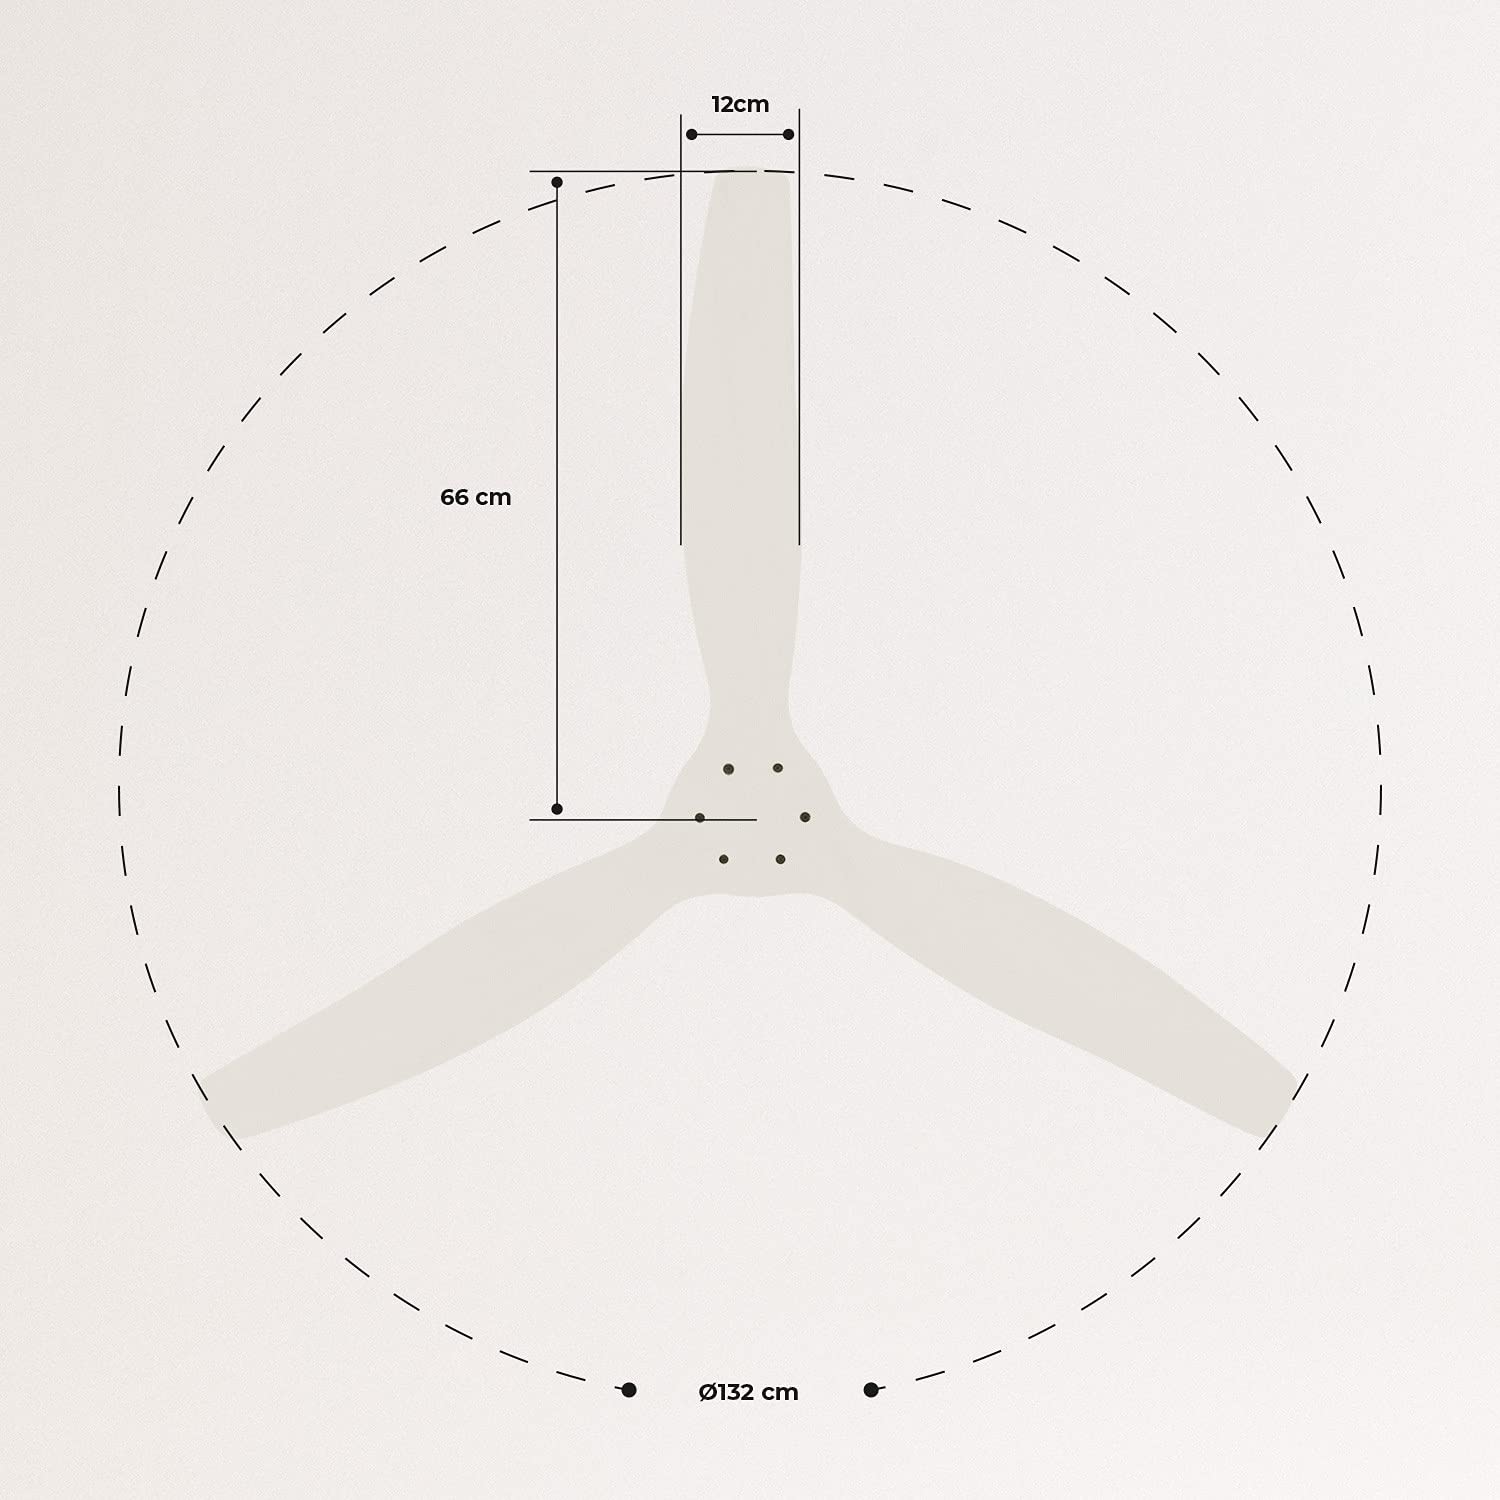
| Awọn iwọn (L x W x H) | 132 x 132 x 29 cm |
| Iwọn | 6.38 kg |
| Fan Design | Aja Fan |
| Orisun agbara | Cable ina |
| Pataki Ẹya | High Speed, Silent DC Motor, Timer, Summer/Winter Function |
| Iṣeduro Lilo | Afẹfẹ |
| Yara Iru | Living Room (suitable for 13m² to 25m² rooms) |
| Àwọ̀ | White Blades |

4. Itọsọna fifi sori ẹrọ
Proper installation is crucial for the safe and efficient operation of your ceiling fan. It is highly recommended that installation be performed by a qualified electrician.
Awọn sọwedowo fifi sori ẹrọ tẹlẹ
- Yọ gbogbo awọn eroja kuro ki o si jẹrisi ni ibamu si akojọ iṣakojọpọ naa.
- Ensure the ceiling joist or support structure is strong enough to hold the fan's weight.
- Turn off power at the main circuit breaker before starting any electrical work.
Iṣagbesori Fan
- Secure the mounting bracket to the ceiling outlet box using appropriate screws and washers.
- Fi ìṣọ́ra gbé àkójọpọ̀ mọ́tò afẹ́fẹ́ náà sókè kí o sì so ó mọ́ àkọlé ìfìkọ́lé náà.
Awọn isopọ onirin
Connect the electrical wires according to the wiring diagram provided in the separate detailed installation manual (not included in this general overview). Ensure all connections are secure and insulated.
Asomọ Blades
Attach the fan blades to the motor hub using the provided screws. Ensure all screws are tightened securely.

5. Awọn ilana Iṣiṣẹ
Your CREATE WINDCALM DC Ceiling Fan comes with a remote control for convenient operation of all its functions.
Awọn iṣẹ iṣakoso latọna jijin
Isakoṣo latọna jijin gba ọ laaye lati:
- Titan/Apapa: Tan-an tabi pa afẹfẹ naa.
- Titunṣe Iyara: Select from 6 different fan speeds to control airflow intensity.
- Eto Aago: Program the fan to automatically turn off after 1, 2, or 4 hours.
- Ooru/Ipo Igba otutu: Change the direction of blade rotation to optimize air circulation for different seasons.
Ooru Ipo
In summer mode, the fan blades rotate counter-clockwise, pushing air downwards. This creates a cooling breeze effect, helping to dissipate heat and refresh the room.

Igba otutu Ipo
In winter mode, the fan blades rotate clockwise, drawing air upwards. This helps to circulate warm air that accumulates near the ceiling, distributing it evenly throughout the room and improving heating efficiency.
6. Itọju ati Itọju
Itọju deede ṣe idaniloju igbesi aye gigun ati iṣẹ ti o dara julọ ti olufẹ aja rẹ.
Ninu
- Pa a agbara nigbagbogbo si awọn àìpẹ ni Circuit fifọ ṣaaju ki o to nu.
- Lo asọ, damp Aṣọ láti nu àwọn abẹ́ afẹ́fẹ́ àti ilé ìtọ́jú mọ́tò. Má ṣe lo àwọn ohun ìfọmọ́ tàbí àwọn ohun èlò ìfọ́mọ́, nítorí wọ́n lè ba ìparí rẹ̀ jẹ́.
- Ensure the fan is completely dry before restoring power.
Awọn sọwedowo deede
- Periodically check all screws and fasteners on the mounting bracket and blade attachments to ensure they are secure. Tighten if necessary.
- Listen for any unusual noises during operation, which may indicate a loose part or an issue with the motor.
7. Laasigbotitusita
If you encounter any issues with your fan, refer to the following common problems and their solutions:
| Isoro | Owun to le Fa | Ojutu |
|---|---|---|
| Fan ko ni tan-an | Ko si ipese agbara Loose onirin asopọ Isakoṣo latọna jijin batiri kekere | Ṣayẹwo Circuit fifọ ati odi yipada Verify all wiring connections are secure (consult electrician) Rọpo awọn batiri isakoṣo latọna jijin |
| Afẹ́fẹ́ máa ń pariwo púpọ̀ jù | Loose screws on blades or mounting Ti tẹ abẹfẹlẹ Motor oro | Mu gbogbo awọn skru Check blades for damage and replace if necessary Kan si atilẹyin alabara |
| Isakoṣo latọna jijin ko ṣiṣẹ | Batiri ti dinku Idilọwọ laarin latọna jijin ati olugba A ko so ẹrọ latọna jijin pọ mọ ara wọn (ti o ba wulo) | Rọpo awọn batiri Rii daju pe ila oju ti o han Refer to detailed manual for pairing instructions |
| Fan wobbles | Loose iṣagbesori akọmọ Awọn abẹfẹlẹ ti ko ni iwọntunwọnsi | Ensure mounting bracket is securely fastened Check blade balance and use balancing kit if needed |
8. Atilẹyin ọja ati Support
For warranty information, technical support, or replacement parts, please contact CREATE customer service. Keep your purchase receipt as proof of purchase.
You can find more information and contact details on the official CREATE webojula: www.create-store.com