
1. Ifihan
The RICHMETERS RM098 is a compact, auto-ranging digital multimeter designed for accurate measurement of various electrical parameters. It is an ideal tool for professionals in laboratories and factories, as well as for hobbyists and general household use. This manual provides essential information for safe and effective operation of your device.
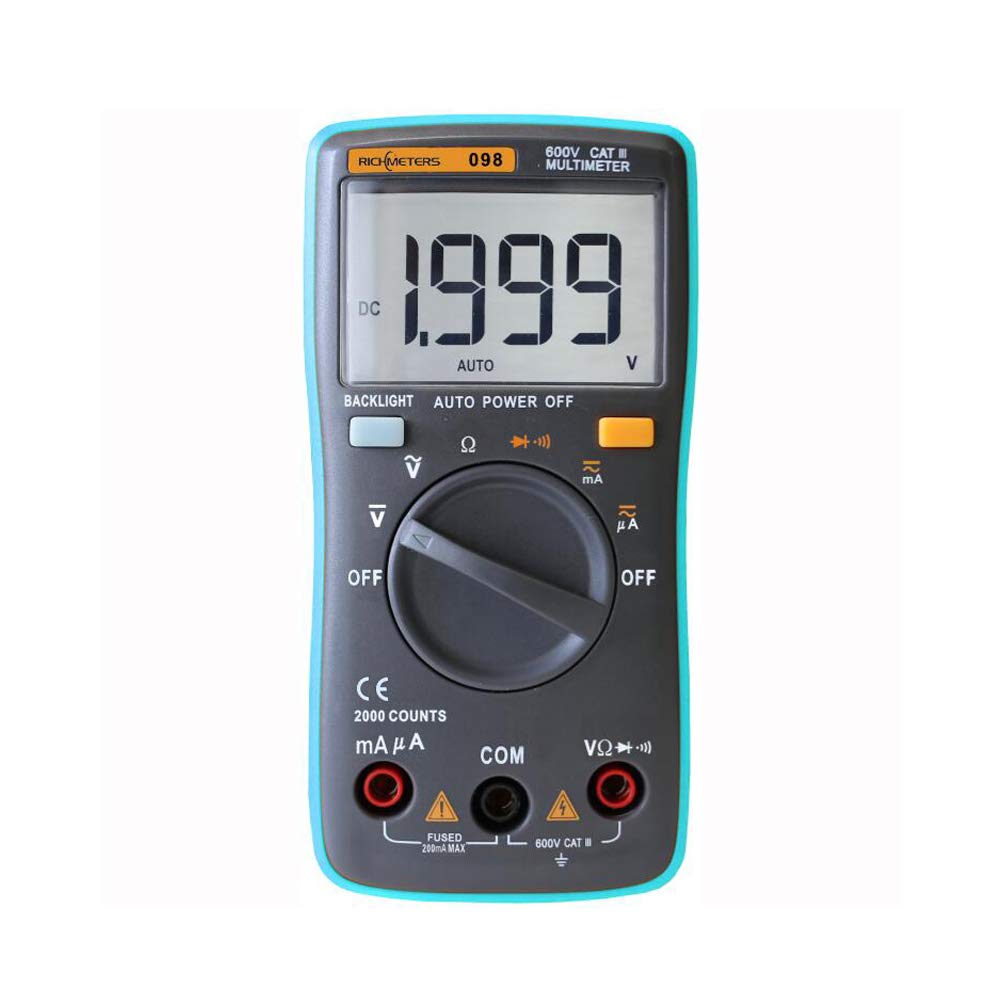
Figure 1: The RICHMETERS RM098 Digital Multimeter, showcasing its compact design and clear LCD display.
2. Alaye Aabo
To ensure safe operation and avoid personal injury or damage to the multimeter, please read and follow all safety instructions carefully.
- Rí i dájú pé multimeter náà wà ní iṣẹ́ àti ìwọ̀n tó yẹ kí o tó ṣe àwọn ìwọ̀n.
- Do not apply more than 600V DC between the test leads and ground. Exceeding this limit can cause severe damage to the device and pose a safety risk.
- Never use the multimeter if it appears damaged or if the test leads are compromised.
- Ṣọra pupọ nigbati o ba n ṣiṣẹ pẹlu voltages loke 30V AC RMS, 42V tente oke, tabi 60V DC. Awọn wọnyi ni voltages duro a mọnamọna ewu.
- Rọpo awọn batiri ni kiakia nigbati ifihan batiri kekere ba han lati rii daju pe o peye awọn kika.
- Rii daju pe ideri batiri ti wa ni pipade ni aabo ṣaaju ṣiṣe.
- Má ṣe lo multimeter ní àyíká gáàsì, èéfín, tàbí eruku.
3. Ọja Ipariview
3.1. Awọn irinše
The RM098 multimeter features a clear LCD display, a rotary function switch, and multiple input jacks for test leads.

olusin 2: Iwaju view of the RM098 Multimeter, showing the display, rotary switch, and function buttons. The integrated kickstand allows for convenient hands-free operation.
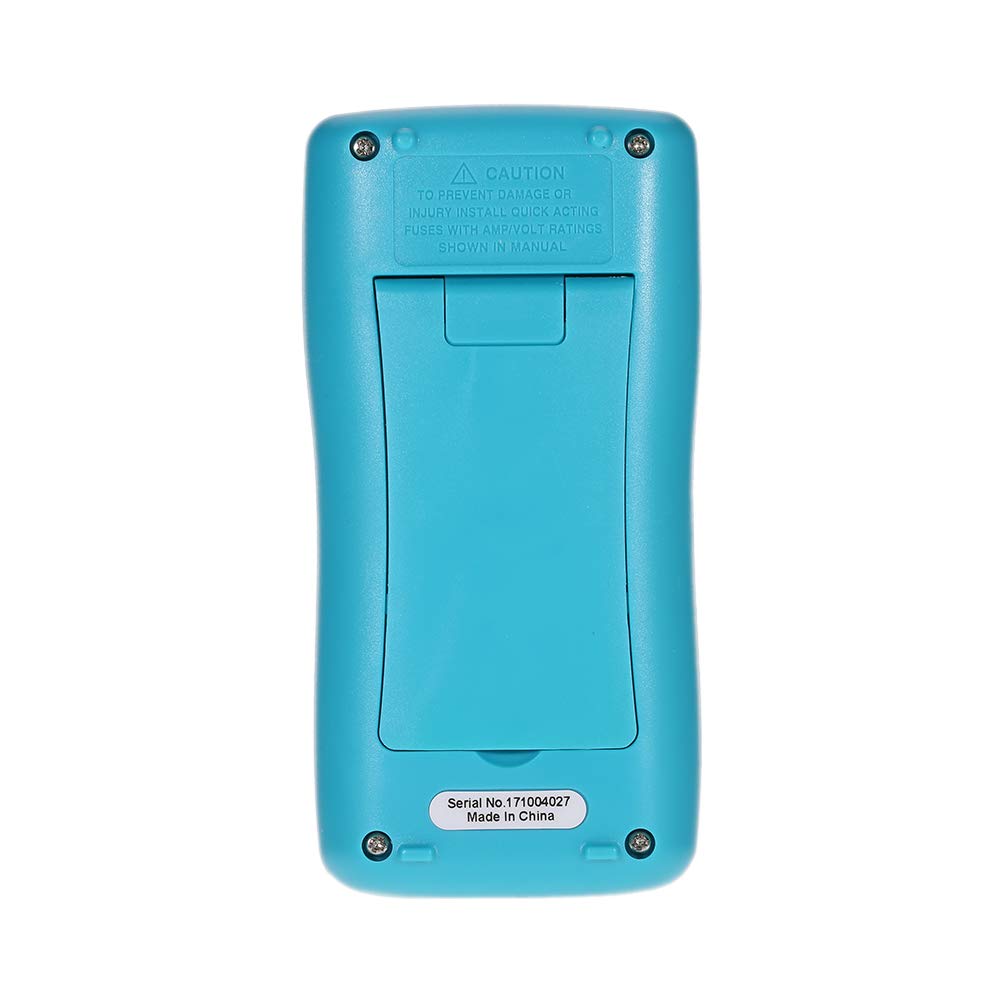
olusin 3: Ẹyìn view of the RM098 Multimeter, showing the battery compartment and safety warnings.

olusin 4: Apa view of the RM098 Multimeter, highlighting its slim profile.
3.2. Ifihan ati idari
- Ifihan LCD: 2000 counts with backlight for easy reading in various lighting conditions.
- Yiyi pada: A lo lati yan iṣẹ wiwọn ti a fẹ (Iwọn didun)tage, Current, Resistance, Diode, Continuity).
- Awọn bọtini iṣẹ: Includes a 'Backlight' button and an 'Auto Power Off' indicator.
- Awọn Jacks ti nwọle: Dedicated ports for connecting test leads for different measurements (VΩmA, COM, 10A).
4. Eto
4.1. Fifi sori batiri
- Rii daju pe multimeter ti wa ni pipa.
- Locate the battery compartment on the back of the device (refer to Figure 3).
- Lo screwdriver lati ṣii ideri iyẹwu batiri naa.
- Fi awọn batiri AAA 1.5V meji sii, ki o si kiyesi polarity ti o tọ (+/-) gẹgẹ bi a ti fihan ninu yara naa.
- Rọpo ideri kompaktimenti batiri ki o ni aabo pẹlu dabaru.
4.2. Nsopọ Awọn itọsọna Igbeyewo
- Connect the black test lead to the "COM" (common) input jack.
- Fún ọ̀pọ̀lọpọ̀ ìpeletage, resistance, diode, and continuity measurements, connect the red test lead to the "VΩmA" input jack.
- For current measurements (up to 200mA), connect the red test lead to the "VΩmA" input jack.
- For higher current measurements (up to 10A), connect the red test lead to the "10A" input jack.

Figure 5: The RM098 Multimeter with test leads properly connected to the input jacks.

olusin 6: A sunmọ-soke view of the test leads, showing the red and black probes.
5. Isẹ
This section details how to perform various measurements using the RICHMETERS RM098 multimeter.
5.1. Wiwọn DC Voltage (V–)
- Turn the rotary switch to the "V–" position.
- So okun idanwo dudu naa mọ jaketi "COM" ati okun idanwo pupa naa si jaketi "VΩmA".
- Connect the test probes across the DC voltage source to be measured, ensuring correct polarity.
- Ka voltage iye lori ifihan LCD.
5.2. Wiwọn AC Voltage (V∼)
- Turn the rotary switch to the "V∼" position.
- So okun idanwo dudu naa mọ jaketi "COM" ati okun idanwo pupa naa si jaketi "VΩmA".
- So awọn idanwo idanwo pọ mọ iyipo AC voltage orisun lati wa ni won.
- Ka voltage iye lori ifihan LCD.
5.3. Measuring DC Current (mA– / µA–)
- Turn the rotary switch to the "mA–" or "µA–" position, depending on the expected current range.
- Connect the black test lead to the "COM" jack.
- For currents up to 200mA, connect the red test lead to the "VΩmA" jack. For currents up to 10A, connect the red test lead to the "10A" jack.
- Open the circuit where current is to be measured and connect the multimeter in series with the load, observing polarity.
- Ka awọn ti isiyi iye lori LCD àpapọ.
5.4. Measuring AC Current (mA∼ / µA∼)
- Turn the rotary switch to the "mA∼" or "µA∼" position.
- Connect the black test lead to the "COM" jack.
- For currents up to 200mA, connect the red test lead to the "VΩmA" jack. For currents up to 10A, connect the red test lead to the "10A" jack.
- Open the circuit where current is to be measured and connect the multimeter in series with the load.
- Ka awọn ti isiyi iye lori LCD àpapọ.
5.5. Ìwọ̀n Àìdádúró (Ω)
- Yi iyipada iyipo pada si ipo "Ω".
- So okun idanwo dudu naa mọ jaketi "COM" ati okun idanwo pupa naa si jaketi "VΩmA".
- Ensure the circuit or component to be measured is de-energized.
- So awọn iwadii idanwo kọja paati naa.
- Ka iye resistance lori ifihan LCD.
5.6. Diode Test (→|←)
- Turn the rotary switch to the "→|←" position.
- So okun idanwo dudu naa mọ jaketi "COM" ati okun idanwo pupa naa si jaketi "VΩmA".
- So ohun elo pupa mọ anode ati ohun elo dudu mọ katode ti diode naa.
- Awọn àpapọ yoo fi awọn siwaju voltage drop. Reverse the probes; the display should show "OL" (Open Line) for a good diode.
5.7. Continuity Test (♫)
- Turn the rotary switch to the "♫" position.
- So okun idanwo dudu naa mọ jaketi "COM" ati okun idanwo pupa naa si jaketi "VΩmA".
- So àwọn ìwádìí ìdánwò pọ̀ mọ́ ara wọn ní gbogbo àyíká tàbí ẹ̀yà ara wọn.
- If the resistance is less than 60Ω, the built-in buzzer will sound, indicating continuity.
5.8. Imọlẹ ẹhin
Press the "BACKLIGHT" button to turn the display backlight on or off. This feature enhances readability in dimly lit environments.
5.9. Agbara Aifọwọyi
The multimeter automatically powers off after approximately 15 minutes of inactivity to conserve battery life. To reactivate, turn the rotary switch to OFF and then back to the desired function, or press any button.
6. Awọn pato
Technical specifications for the RICHMETERS RM098 Digital Multimeter:

Figure 7: Detailed specifications table for the RM098 Multimeter, including ranges, accuracy, and resolution for various measurements.
| Paramita | Sipesifikesonu |
|---|---|
| Awoṣe | RM098 |
| Ifihan | 2000 Counts, LCD with Backlight |
| Sample Oṣuwọn | Isunmọ. 3 igba / iṣẹju-aaya |
| Input Impedance | 10 MΩ |
| DC Voltage Ibiti | 200.0mV / 2.00V / 20.0V / 200.0V / 800.0V |
| AC Voltage Ibiti | 200.0mV / 2.00V / 20.0V / 200.0V / 600.0V |
| DC Lọwọlọwọ Range | 200.0µA / 2000µA / 20.00mA / 200.0mA |
| AC Lọwọlọwọ Range | 200.0µA / 2000µA / 20.0mA / 200.0mA |
| Resistance Range | 200.0Ω / 2.000kΩ / 20.0kΩ / 200.0kΩ / 2.000MΩ / 20.00MΩ |
| Diode Test Current | 1.0 ± 0.7mA |
| Tẹsiwaju Buzzer | Ohùn tí ó bá jẹ́ resistance < 60Ω |
| Awọn iwọn otutu ti nṣiṣẹ | 0-20°C, <70% RH |
| Ibi ipamọ otutu | -20-60°C, <80% RH (with battery removed) |
| Max Input Protection | 0.2A / 250V Fast Blow Ceramic Fuse |
| Ibi ti ina elekitiriki ti nwa | Batiri AAA 2 x 1.5V (kò sí nínú rẹ̀) |
| Iwọn Nkan | 112g / 3.94 iwon |
| Iwọn ọja | 12.5 x 6.5 x 3cm / 4.9 x 2.56 x 1.18ni |
7. Itọju
7.1. Gbogbogbo Itọju
- Jẹ́ kí multimeter náà mọ́ tónítóní kí ó sì gbẹ. Fi ìpolówó nu àpótí náàamp asọ ati ìwọnba detergent. Maṣe lo awọn abrasives tabi awọn nkan ti a nfo.
- Tọju ẹrọ naa ni itura, aye gbigbẹ kuro lati orun taara ati awọn iwọn otutu to gaju.
- If the multimeter is not used for an extended period, remove the batteries to prevent leakage.
7.2. Batiri Rirọpo
Tí àmì bá hàn lórí ìbòjú, yí àwọn bátìrì padà lẹ́sẹ̀kẹsẹ̀ láti rí i dájú pé wọ́n wọn dáadáa. Tẹ̀lé àwọn ìgbésẹ̀ fífi bátìrì sí ipò ní Apá 4.1.
7.3. Rirọpo fiusi
The multimeter is protected by a 0.2A / 250V fast blow ceramic fuse. If the current measurement function stops working, the fuse may need replacement. Fuse replacement should only be performed by qualified personnel. Ensure to use a fuse of the exact specified type and rating.
8. Laasigbotitusita
If you encounter issues with your RM098 multimeter, refer to the following common problems and solutions:
- Ko si Ifihan / Ifihan ti ko lagbara: Ṣayẹwo fifi sori batiri ati ipele idiyele. Rọpo awọn batiri ti o ba wulo.
- Awọn kika ti ko tọ: Ensure test leads are properly connected to the correct input jacks. Verify the rotary switch is set to the appropriate function and range. Check for damaged test leads.
- Ko si Iwọn Lọwọlọwọ: Check the fuse. Ensure the multimeter is connected in series with the circuit.
- "OL" (Àfikún) lórí Ìfihàn: The measured value exceeds the selected range. Switch to a higher range or ensure the circuit is within the device's capabilities.
9. Package Awọn akoonu
The RICHMETERS RM098 package includes the following items:

Figure 8: The RM098 Multimeter, test leads, and user manual as typically included in the package.
- 1 x RICHMETERS RM098 Digital Multimeter
- 1 x Méjì Àwọn Ìdánwò (Pupa àti Dúdú)
- 1 x Afowoyi olumulo Gẹẹsi
- 1 x Apo gbigbe
10. Atilẹyin ọja ati Support
Fun alaye atilẹyin ọja tabi atilẹyin imọ-ẹrọ, jọwọ tọka si iwe ti a pese ni akoko rira tabi kan si alagbata rẹ. Tọju iwe-ẹri rira rẹ bi ẹri rira.