
1. Ifihan
This manual provides comprehensive instructions for the SHARKOON Elite Shark CA300T Extended ATX PC Case. It covers the product's features, setup procedures, operational guidelines, maintenance tips, troubleshooting solutions, and detailed technical specifications. Please read this manual thoroughly before installation and use to ensure optimal performance and longevity of your PC case.
2. Key Awọn ẹya ara ẹrọ
- Apẹrẹ ọjọ iwaju: The CA300T features an expressive front panel with a geometric pattern, framed by brushed aluminum, giving it a distinctive and modern aesthetic.
- Advanced Airflow: Equipped with three pre-installed 120mm RGB LED fans at the front and one at the rear, ensuring consistent airflow. The front panel includes a mesh grille for optimal ventilation, and the top panel offers a perforated cover for additional fan/radiator mounting.
- Illuminated I/O Panel: The side-mounted I/O panel includes standard audio ports, USB 3.0 ports, and a USB-C port, all featuring their own RGB illumination.
- Àwọn Páńẹ́lì Gíláàsì Oníwọ̀n: Two tempered glass side panels provide a clear view of internal components. The right-side panel is partially tinted to conceal the power supply tunnel while highlighting SSDs or HDDs.
- Aláyè gbígbòòrò: Designed to accommodate large components, including graphics cards up to 42.5 cm, power supplies up to 24 cm, and CPU coolers up to 16.5 cm.
- Ìṣàkóso okun tó péye: Features a spacious, foldable cable compartment and a sliding cable cover to keep wiring organized and out of sight.
- Awọn aṣayan ipamọ: Supports up to seven 2.5-inch drives or four 3.5-inch drives.
3. Package Awọn akoonu
The SHARKOON Elite Shark CA300T PC Case package typically includes:
- SHARKOON Elite Shark CA300T PC Case (White)
- Pre-installed 120mm RGB LED Fans (3x Front, 1x Rear)
- Àpótí Ẹ̀rọ (àwọn skru, àwọn okùn okùn, àwọn ìdádúró, àti bẹ́ẹ̀ bẹ́ẹ̀ lọ)
- Afowoyi Olumulo (iwe-ipamọ yii)
Note: Specific contents may vary slightly. Please check the packaging for a complete list.
4. Awọn ilana iṣeto
Follow these steps to set up your SHARKOON Elite Shark CA300T PC case and install your components.
4.1. Ngbaradi Ọran naa
- Yọ Ẹran naa kuro: Fi ìṣọ́ra yọ àpótí PC náà kúrò nínú àpótí rẹ̀.
- Yọ Awọn Paneli ẹgbẹ kuro: Unscrew the thumbscrews on the rear of the case for both tempered glass side panels. Gently slide and lift the panels to remove them. Place them on a soft, flat surface to prevent scratches.
- Apoti Ẹya: Locate the accessory box inside the case, which contains all necessary screws and mounting hardware.
4.2. Modaboudu fifi sori
- Fi sori ẹrọ Awọn iduro: Ensure the correct standoffs are installed for your motherboard form factor (ATX, SSI EEB). The case typically has pre-installed standoffs for standard ATX.
- Fi I/O Shield sori ẹrọ: If your motherboard requires an external I/O shield, install it into the rear opening of the case before mounting the motherboard.
- Modaboudu Oke: Carefully place your motherboard onto the standoffs, aligning the screw holes. Secure the motherboard with the provided screws.
4.3. Agbara Ipese Unit (PSU) fifi sori
- Ipo PSU: The PSU mounts at the rear bottom of the case. Slide your PSU into the designated compartment from the rear.
- PSU ti o ni aabo: Align the PSU with the screw holes and secure it with the provided screws from the rear of the case.
- Iṣakoso USB: Route PSU cables through the cutouts to the back of the motherboard tray for organized cable management.
4.4. Fifi sori ẹrọ Awakọ Ibi ipamọ
The CA300T supports various drive configurations:
- Awọn awakọ 2.5-inch (SSD): Mount SSDs to the dedicated brackets behind the motherboard tray or within the PSU shroud.
- Awọn awakọ 3.5-inch (HDDs): Install HDDs into the drive cages located under the PSU shroud.
4.5. Fifi Kaadi Aworan ati Kaadi Imugboroosi sori ẹrọ
- Yọ Awọn ideri Iho kuro: Yọ awọn ideri aaye imugboroosi pataki kuro ni ẹhin apoti naa.
- Install Card: Fi kaadi eya aworan rẹ tabi awọn kaadi imugboroosi miiran sinu awọn iho PCIe ti o yẹ lori modaboudu.
- Kaadi to ni aabo: Secure the card with the provided screws.
4.6. Connecting Front Panel Cables
Connect the front panel cables (USB 3.0, USB-C, HD Audio, Power Switch, Reset Switch, Power LED, HDD LED) to their corresponding headers on your motherboard. Refer to your motherboard manual for exact pin layouts.
4.7. Apejọ ipari
- Iṣakoso USB: Use the cable ties and routing channels to organize all internal cables behind the motherboard tray.
- Tun awọn Paneli ẹgbẹ so pọ: Carefully reattach both tempered glass side panels and secure them with the thumbscrews.
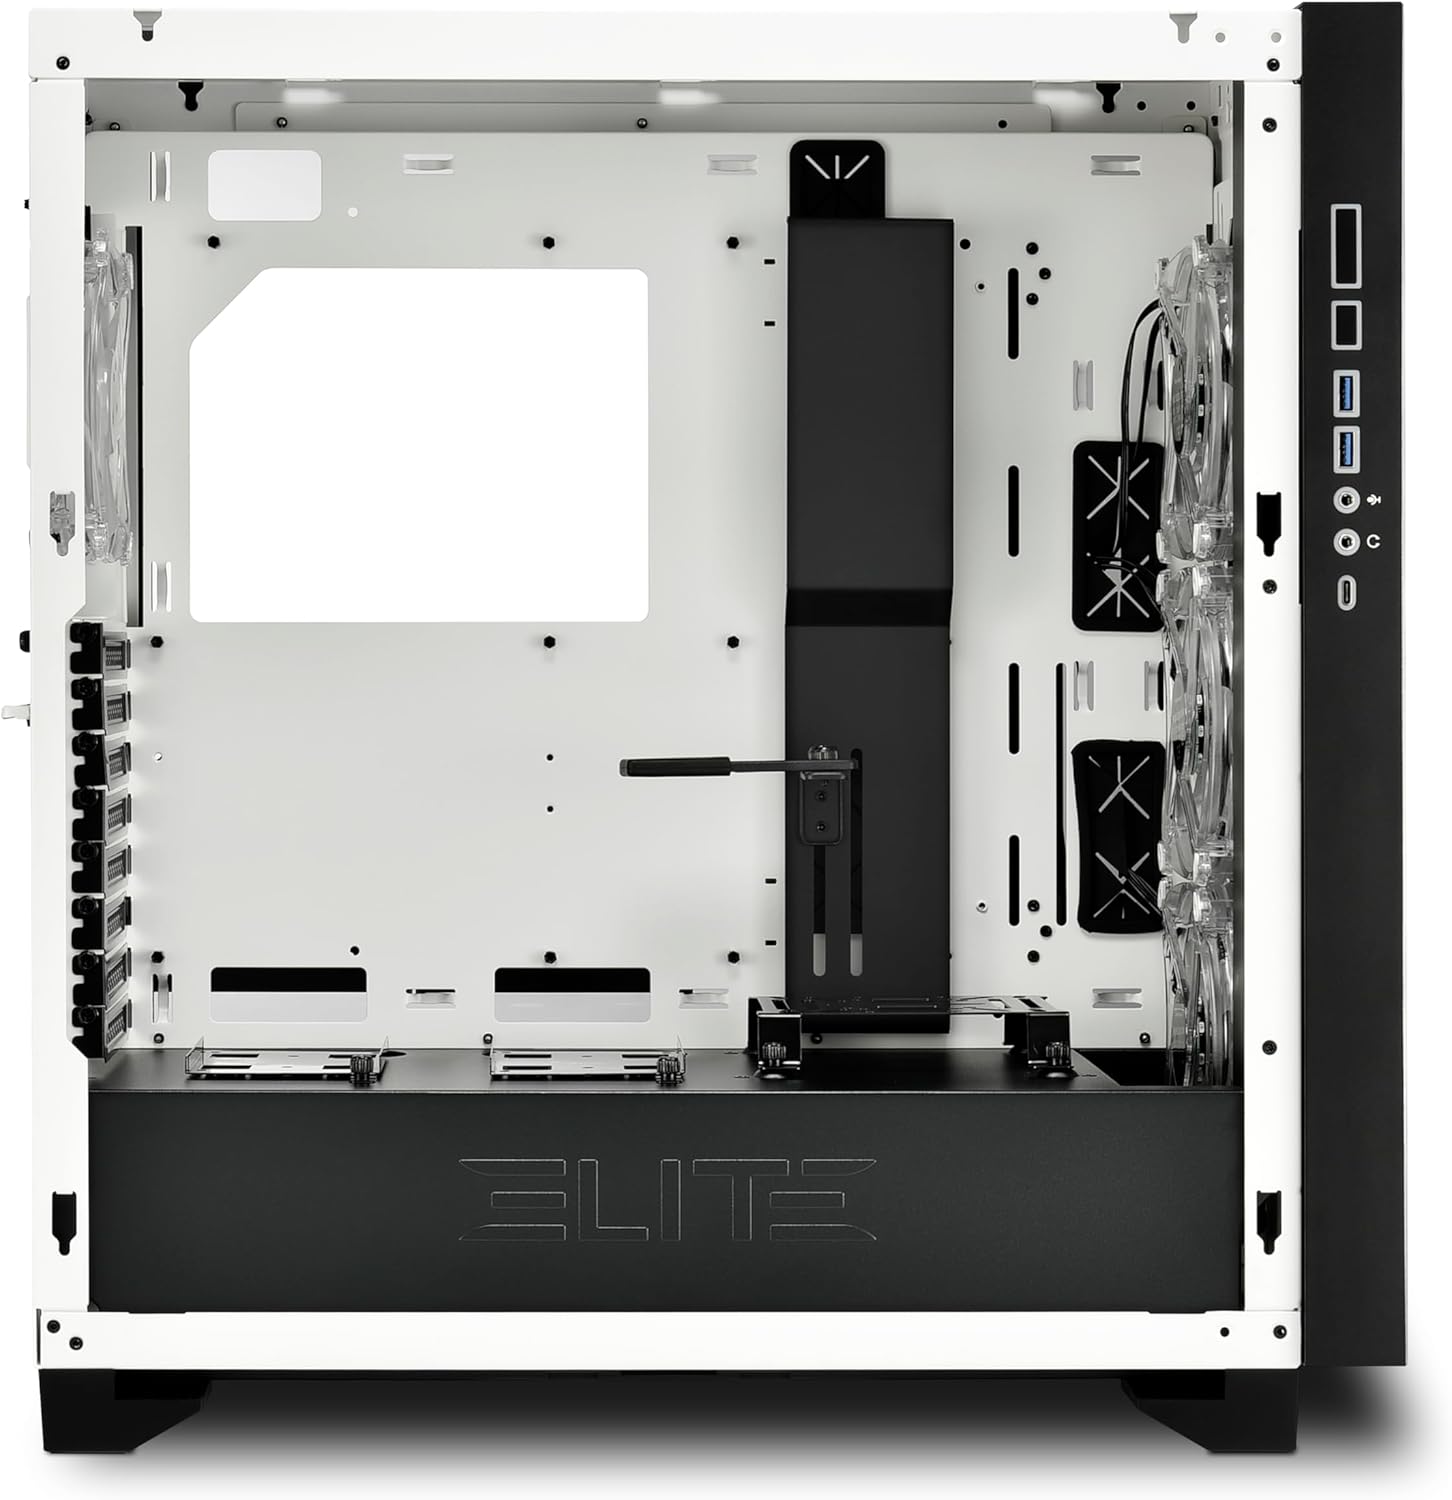
olusin 1: inu ilohunsoke view of the CA300T, highlighting component space.
5. Awọn ilana Iṣiṣẹ
5.1. Powering On Your System
After all components are installed and cables are connected, plug your power supply into a wall outlet and flip the PSU's power switch to the 'ON' position. Press the power button on the case's front I/O panel to start your computer.
5.2. RGB Lighting Iṣakoso
The pre-installed RGB fans and illuminated I/O panel can be controlled via your motherboard's RGB software (if compatible) or a dedicated RGB controller if included with your motherboard or purchased separately. Refer to your motherboard manual for specific RGB header locations and software instructions.
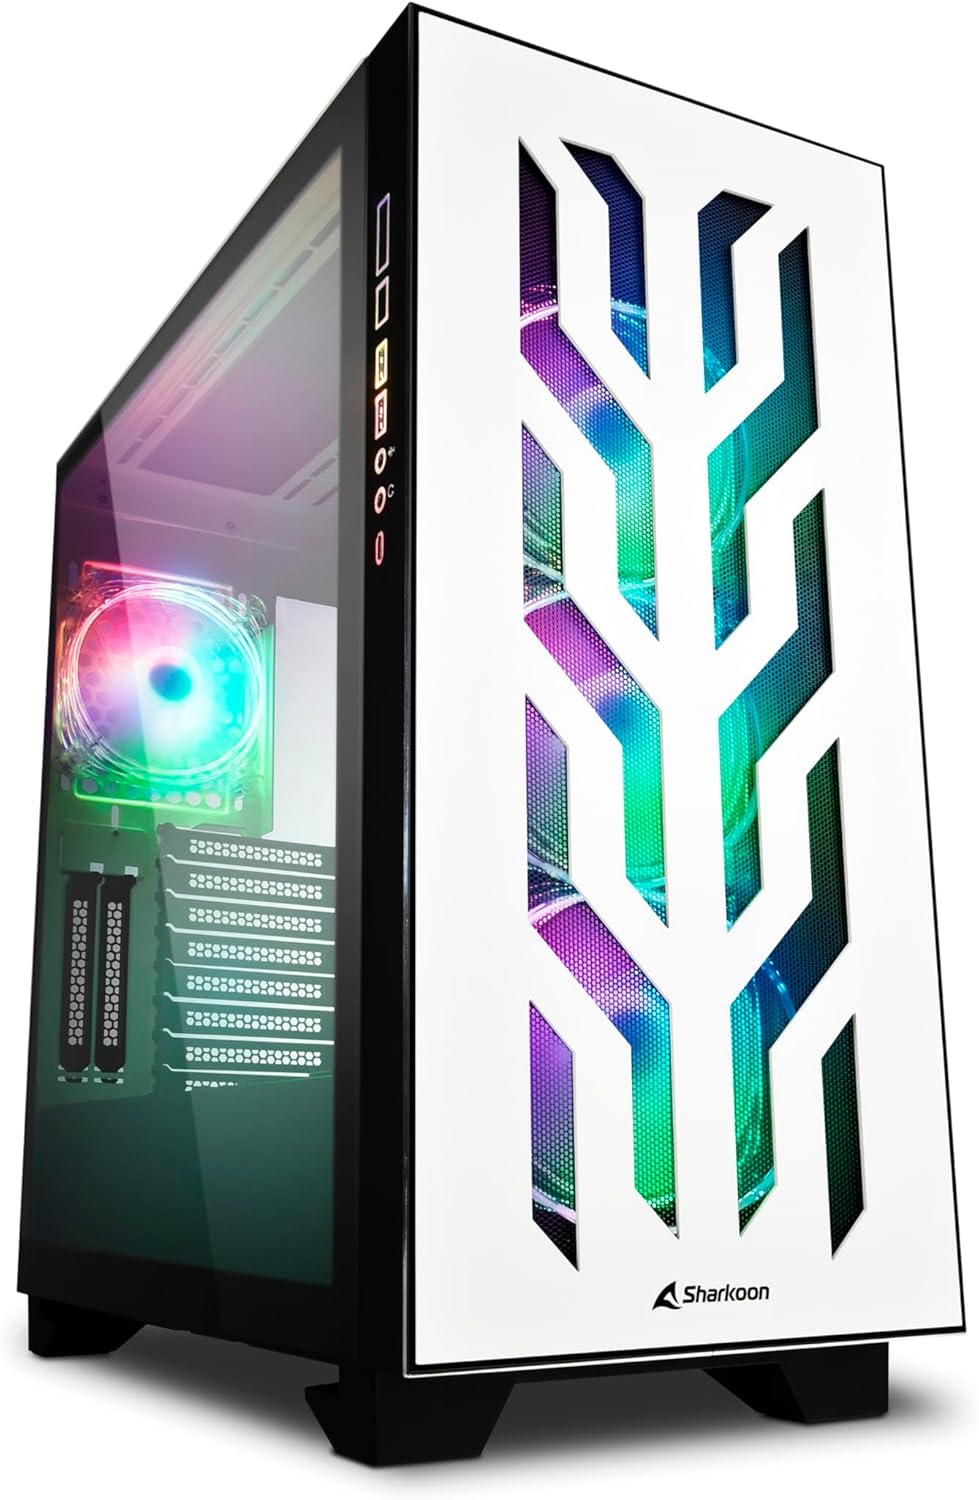
Figure 2: The CA300T with its illuminated RGB fans and distinctive front panel.
6. Itọju
Regular maintenance helps ensure optimal performance and extends the lifespan of your PC components.
6.1. Ìmọ́tótó Àlẹ̀mọ́ Eruku
The CA300T includes magnetic dust filters. It is recommended to clean these filters every 1-3 months, depending on your environment, to maintain optimal airflow and prevent dust buildup inside the case.
- Wa awọn Ajọ: Identify the dust filters on the top, front, and bottom of the case.
- Yọ Awọn Ajọ kuro: Gently pull or slide out the magnetic dust filters.
- Awọn Ajọ mimọ: Use a soft brush, vacuum cleaner, or rinse with water (ensure completely dry before reinstallation) to remove accumulated dust.
- Tun awọn Ajọ sori ẹrọ: Place the clean filters back into their respective positions.
6.2. Gbogbogbo Cleaning
Fun awọn oju ita, lo asọ, damp cloth to wipe down the case. Avoid abrasive cleaners or solvents that could damage the finish or tempered glass.

olusin 3: Top view of the CA300T, showing the perforated top panel.
7. Laasigbotitusita
Abala yii n ṣalaye awọn ọran ti o wọpọ ti o le ba pade lakoko iṣeto tabi iṣẹ.
7.1. System Ko Power On
- Check PSU: Ensure the power supply unit is properly connected to the wall outlet and the PSU's power switch is in the 'ON' position.
- Awọn isopọ Iwaju Panel: Verify that the power switch cable from the case's front panel is correctly connected to the motherboard's power header.
- Internal Power Cables: Confirm that all necessary power cables (24-pin ATX, CPU 8-pin, GPU PCIe) are securely connected to the motherboard and components.
7.2. Fans Not Spinning / RGB Not Lighting Up
- Awọn isopọ Olufẹ: Ensure all fan power cables are securely connected to the motherboard's fan headers or a fan controller.
- Àwọn ìsopọ̀ RGB: Verify that RGB cables are correctly connected to the motherboard's RGB headers or a dedicated RGB controller.
- Sọ́fítíwètì/Olùdarí: Check your motherboard's BIOS/UEFI settings or RGB software to ensure fans and RGB lighting are enabled and configured correctly.
7.3. Awọn ibudo USB Ko Ṣiṣẹ
- Awọn akọle USB inu: Confirm that the internal USB 3.0 and USB-C cables from the case's front panel are securely connected to the corresponding headers on your motherboard.
- Motherboard Drivers: Ensure all necessary motherboard chipset and USB drivers are installed.
8. Imọ ni pato
| Brand | Sharkoon |
| Orukọ awoṣe | CA300T |
| Àwọ̀ | Funfun |
| Iru Irú | Extended ATX Tower |
| Ohun elo | Irin, Gilasi Onígboná |
| Modaboudu Ibamu | ATX, SSI EEB |
| PSU iṣagbesori | Ru Oke |
| Ọna Itutu | Afẹfẹ |
| Awọn onijakidijagan ti a ti fi sii tẹlẹ | 4x 120mm RGB LED Fans (3x Front, 1x Rear) |
| Iwaju Awọn Ibudo I / O | USB 3.0 (x2), USB-C (x1), Audio In/Out |
| Max. GPU Length | 42.5 cm |
| O pọju. Sipiyu kula Giga | 16.5 cm |
| O pọju. PSU Ipari | 24 cm |
| Wakọ Bays | Up to 7x 2.5" or 4x 3.5" |
| Iṣeduro Lilo | Ere |
9. Atilẹyin ọja ati Support
9.1. Atilẹyin ọja
The SHARKOON Elite Shark CA300T PC Case comes with a 2-odun atilẹyin ọja on spare parts. This warranty covers defects in materials and workmanship under normal use. Please retain your proof of purchase for warranty claims.
9.2. Software imudojuiwọn
Software updates, if applicable for any integrated components or controllers, are guaranteed until Oṣu Kẹrin Ọjọ 13, Ọdun 2030.
9.3. Onibara Support
For technical assistance, warranty claims, or further inquiries, please contact Sharkoon customer support through their official website or the retailer where the product was purchased. Have your product model and proof of purchase ready when contacting support.