
1. Ifihan
Thank you for choosing the Sharkoon CA300T ATX PC Case. This full tower case is designed for high-performance gaming systems, offering extensive compatibility, efficient cooling, and advanced cable management features. This manual provides essential information for the proper setup, operation, and maintenance of your new PC case.
2. Alaye Aabo
- Always disconnect the power supply from the wall outlet before installing or removing any components inside the PC case.
- Handle components with care to avoid damage from electrostatic discharge. Consider using an anti-static wrist strap.
- Pa awọn ẹya kekere ati awọn ohun elo apoti kuro lọdọ awọn ọmọde.
- Avoid placing the PC case in direct sunlight, near heat sources, or in environments with high humidity.
- Do not attempt to modify the case structure, as this may void your warranty and cause damage.
3. Package Awọn akoonu
Jọwọ ṣayẹwo awọn akoonu package lati rii daju pe gbogbo awọn ohun kan wa:
- Sharkoon CA300T ATX PC Case
- Àpótí ẹ̀rọ ìbánisọ̀rọ̀ (àwọn skru, àwọn okùn okùn, àwọn ìdádúró, àti bẹ́ẹ̀ bẹ́ẹ̀ lọ)
- RGB lighting controller (if applicable)
- Ilana Afowoyi (iwe yii)
4. Ọja Ipariview ati Awọn ẹya ara ẹrọ
The Sharkoon CA300T is a premium full tower ATX PC case designed for enthusiasts. It features a modern design with robust construction, tempered glass panels, and advanced cooling options.
Awọn ẹya pataki:
- Full Tower Design: Ample space for high-end components and custom liquid cooling solutions.
- Àwọn Páńẹ́lì Gíláàsì Oníwọ̀n: Side panels made of tempered glass for a clear view ti abẹnu irinše.
- Imọlẹ RGB: Integrated RGB lighting for customizable aesthetics.
- Iṣafẹfẹ Afẹfẹ: Includes three 120mm fans and supports multiple radiators for superior cooling.
- Advanced Cable Management: Features an openable cable pocket/channel and ample routing options for a clean build.
- Awọn Ajọ Eruku: Three-layer top plate with a dust filter to maintain system cleanliness.
- Asopọmọra gbooro: Front panel includes 2x USB 3.0 ports and additional USB ports.
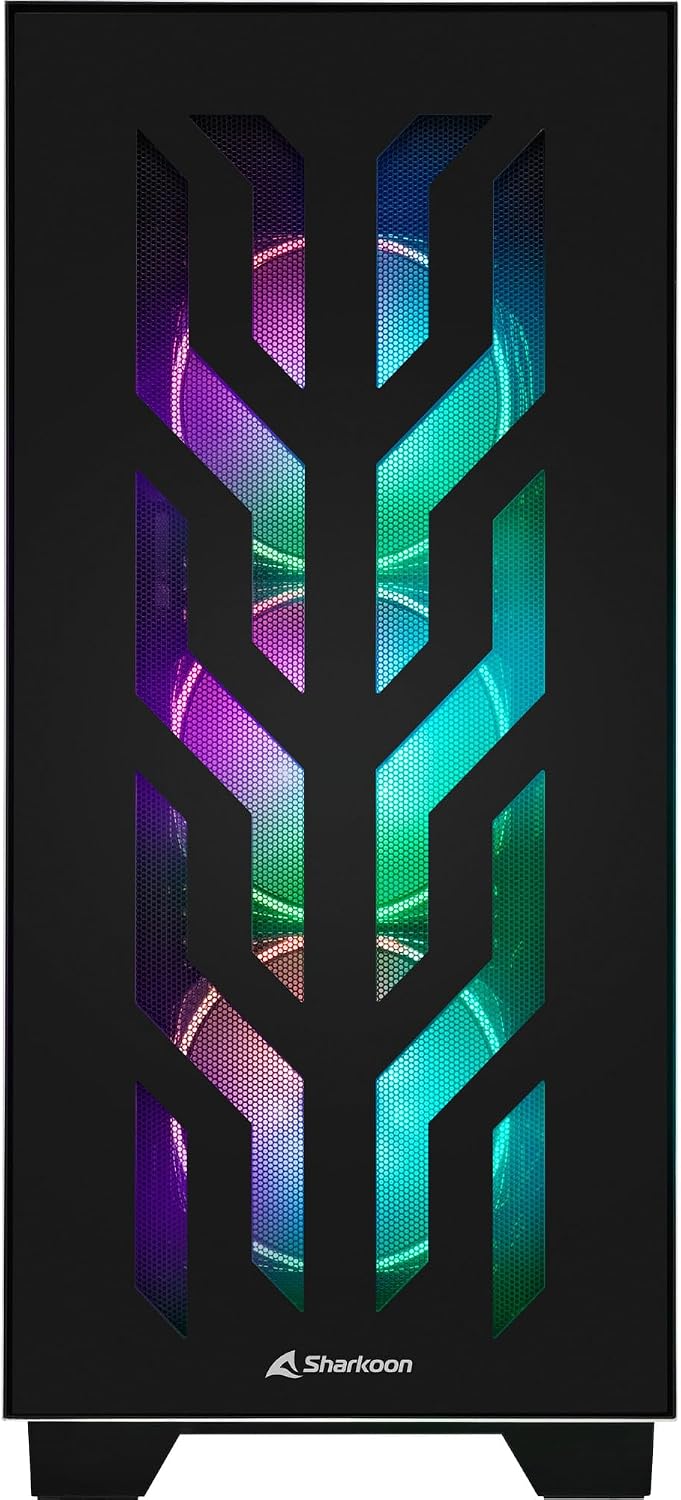
olusin 4.1: Iwaju view of the Sharkoon CA300T PC case, showcasing the illuminated RGB fans behind the mesh panel.
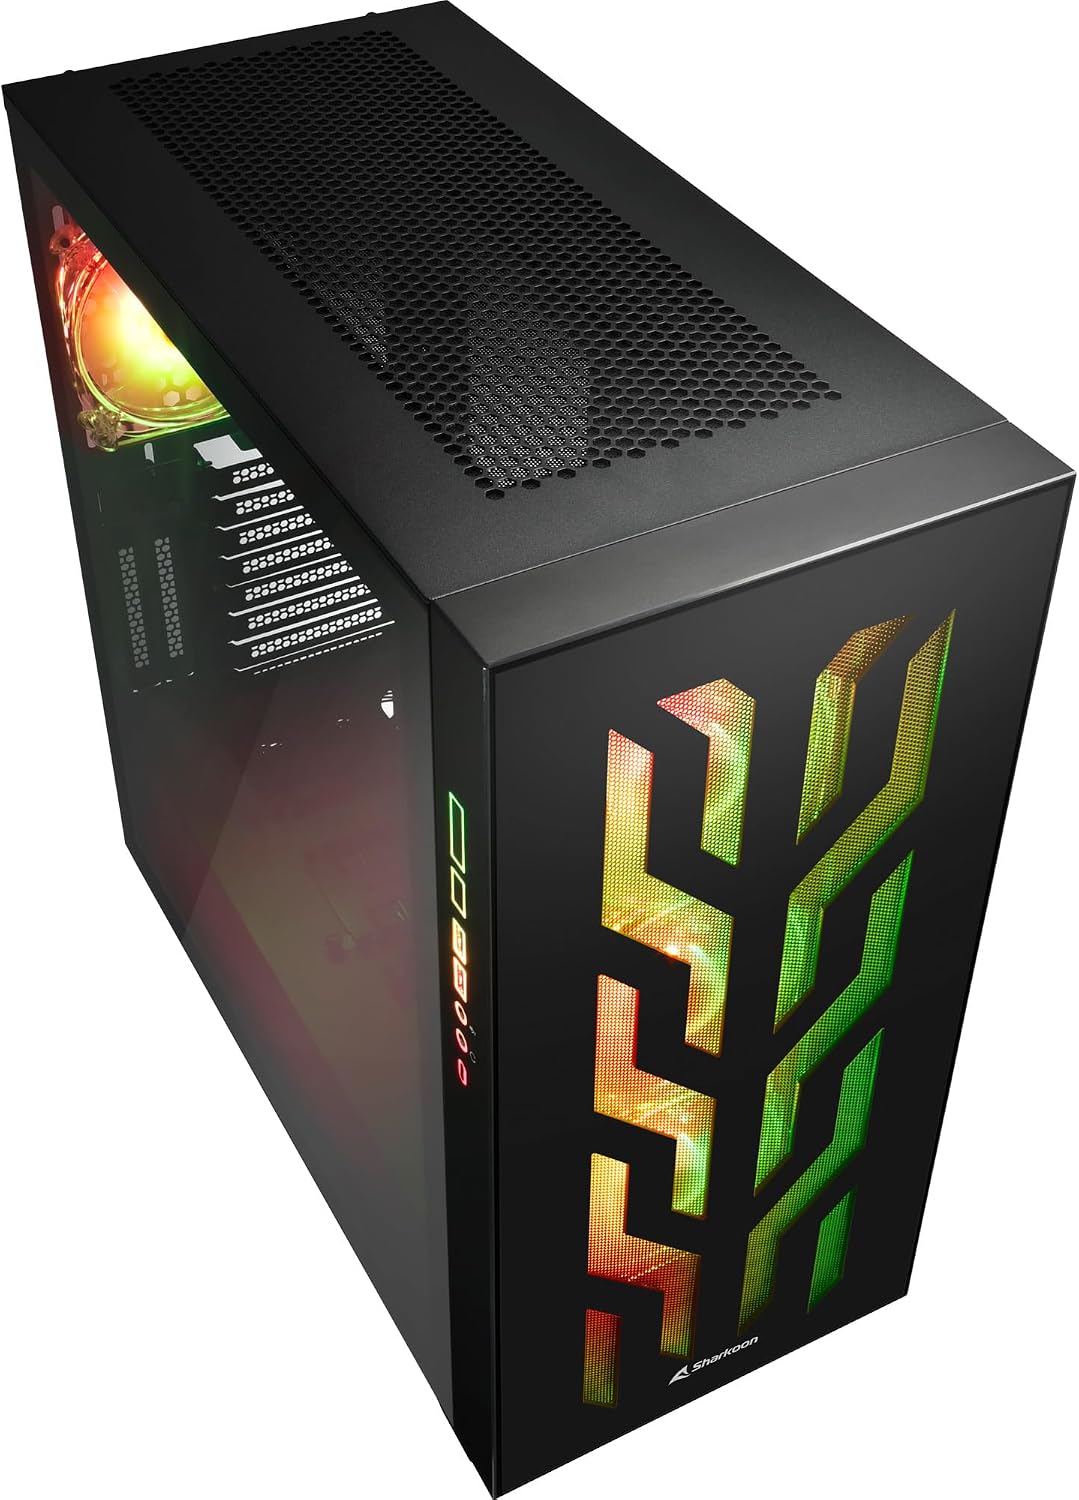
olusin 4.2: Angled view of the Sharkoon CA300T PC case, showing the tempered glass side panel and the vibrant RGB lighting from the interior.
5. Eto
5.1 Ṣiṣii silẹ
- Fi ìṣọ́ra yọ àpótí PC náà kúrò nínú àpótí rẹ̀.
- Inspect the case for any signs of damage during transit. Contact your retailer if any damage is found.
- Locate the accessory box inside the case, which contains screws and other installation hardware.
5.2 Removing Side Panels
The Sharkoon CA300T features tempered glass side panels for easy access to components.
- Locate the two screws on the rear of the case securing the side panel.
- Yọ awọn skru meji wọnyi kuro.
- Gently pull the panel upwards and away from the case to remove it. Repeat for the other side if necessary.

olusin 5.1: inu ilohunsoke view of the Sharkoon CA300T PC case, showing the main compartment with the left tempered glass panel removed, ready for component installation.

olusin 5.2: inu ilohunsoke view of the Sharkoon CA300T PC case with the left side panel completely removed, exposing the motherboard tray and various mounting points.
5.3 Fifi sori modaboudu
- Install the necessary standoffs onto the motherboard tray according to your ATX motherboard's screw holes.
- Carefully place your ATX motherboard onto the standoffs, aligning the screw holes.
- Ṣe aabo modaboudu pẹlu awọn skru ti a pese.
5.4 Power Ipese Unit (PSU) fifi sori
The CA300T supports bottom-mounted power supplies.
- Slide the PSU into its designated compartment at the bottom rear of the case.
- So PSU mọ apo naa pẹlu awọn skru lati ẹhin.
5.5 wakọ fifi sori
The case provides internal bays for 3.5-inch and 2.5-inch drives.
- Locate the drive cages or mounting points for your 3.5-inch or 2.5-inch drives.
- Mount your drives using the appropriate screws or tool-less mechanisms.
5.6 Fifi Kaadi Aworan ati Kaadi Imugboroosi sori ẹrọ
The case offers multiple expansion slots and supports vertical GPU mounting.
- Yọ awọn ideri aaye imugboroosi pataki kuro ni ẹhin apoti naa.
- Fi kaadi eya aworan rẹ tabi awọn kaadi imugboroosi miiran sinu awọn iho PCIe lori modaboudu rẹ.
- Secure the cards with screws. For vertical GPU mounting, an additional riser cable (not included) is required.
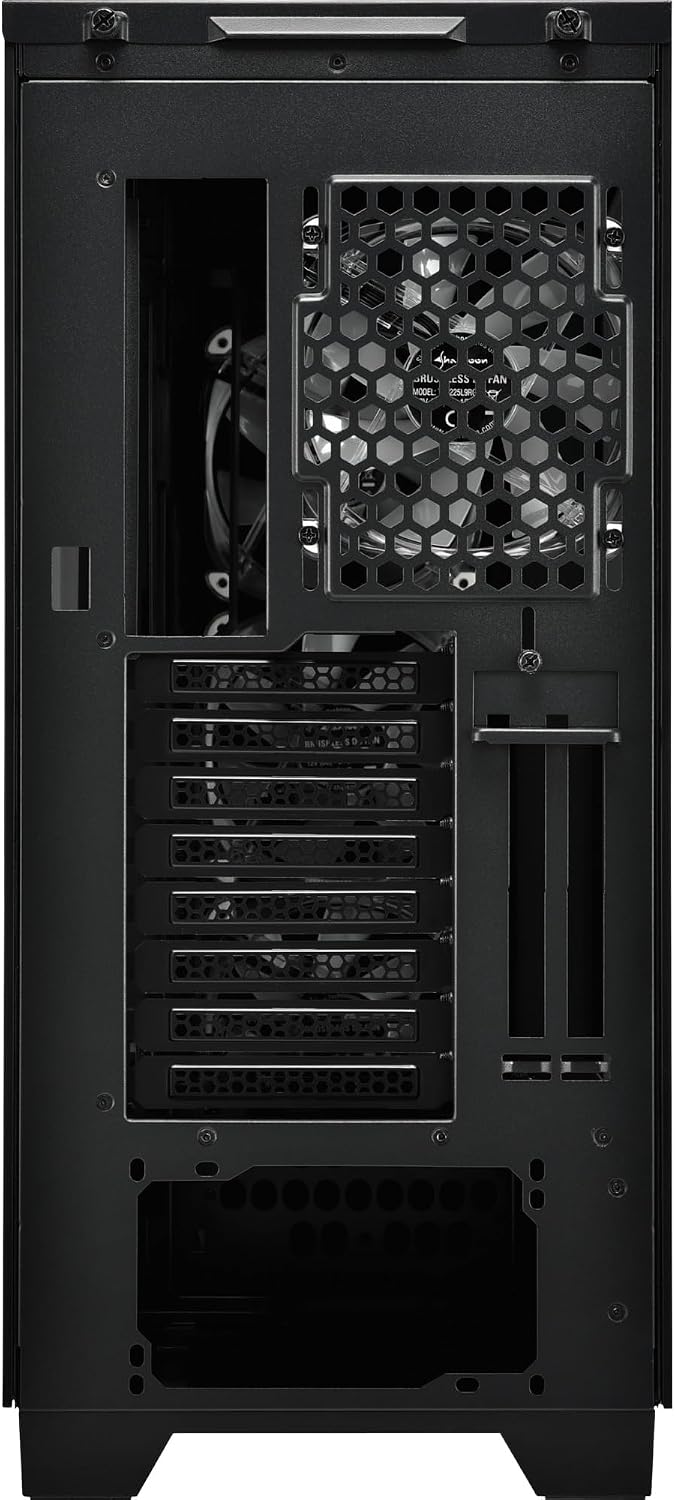
olusin 5.3: Ẹyìn view of the Sharkoon CA300T PC case, illustrating the expansion slots, rear fan mount, and PSU opening.
5.7 USB Management
Utilize the cable routing channels and tie-down points behind the motherboard tray to organize cables for improved airflow and aesthetics.

olusin 5.4: Ru inu ilohunsoke view of the Sharkoon CA300T PC case, highlighting the dedicated cable management area behind the motherboard tray.
6. Ṣiṣẹ
6.1 Agbara Tan / Pa
After all components are installed and cables are connected, press the power button on the front panel to turn on your system. Press it again to turn off, or use your operating system's shutdown function.
6.2 RGB ina Iṣakoso
The integrated RGB lighting can be controlled via the dedicated RGB controller (if included) or through compatible motherboard software, depending on how the RGB components are connected. Refer to your motherboard manual for software control options.
7. Itọju
7.1 Ninu eruku Ajọ
The Sharkoon CA300T features a three-layer top plate with a dust filter. Regularly clean all dust filters to maintain optimal airflow and cooling performance.
- Turn off and unplug your PC.
- Carefully remove the dust filters (e.g., from the top, front, and bottom).
- Clean the filters using compressed air or by gently washing them with water. Ensure they are completely dry before reinstallation.
7.2 Itọju Gbogbogbo
- Nu ita apoti naa pẹlu asọ rirọ, damp asọ. Yago fun abrasive ose.
- Ensure all cables are securely connected and not obstructing airflow.
8. Laasigbotitusita
Tí o bá ní ìṣòro pẹ̀lú ìkọ́lé PC rẹ, ronú nípa àwọn ìgbésẹ̀ tí ó wọ́pọ̀ láti yanjú ìṣòro wọ̀nyí:
- Ko si Agbara: Ensure the power supply is properly connected to the wall outlet and the motherboard. Check all power cables (24-pin, CPU, GPU).
- Awọn onijakidijagan Ko Yiyi: Verify that all fan headers are correctly connected to the motherboard or fan controller. Check BIOS settings for fan control.
- Ko si Ifihan: Confirm that your monitor is connected to the graphics card (not the motherboard's integrated graphics, unless intended). Reseat the graphics card and RAM modules.
- RGB Not Working: Check RGB cable connections to the motherboard or controller. Ensure any necessary software is installed and configured.
- Igbóná púpọ̀: Ensure all fans are spinning correctly and dust filters are clean. Verify proper thermal paste application on the CPU cooler.
For more complex issues, consult the manuals for your individual components (motherboard, GPU, PSU) or seek professional assistance.
9. Awọn pato
| Ẹya ara ẹrọ | Sipesifikesonu |
|---|---|
| Brand | Sharkoon |
| Orukọ awoṣe | CA300T |
| Iru Irú | Ile-iṣọ kikun |
| Modaboudu Ibamu | ATX |
| Iṣeduro Lilo | Ere |
| Àwọ̀ | Dudu |
| Ohun elo | Irin |
| Power Supply Mount Type | Isalẹ Oke |
| Ọna Itutu | Afẹfẹ |
| Fan Iwon | 120 mm |
| Nọmba ti Awọn onibakidijagan | 3 |
| Total Expansion Slots | 4 |
| Total USB 3.0 Ports | 2 |
| Lapapọ Awọn ibudo USB | 3 |
| Pataki Awọn ẹya ara ẹrọ | RGB Lighting, Openable Cable Pocket, Three-layer Top Plate with Dust Filter |
| HDD Bay Size | 3.5 inches |
| Number of Internal Bays | 4 |
| Awọn ẹrọ ibaramu | ATX Motherboards, 3.5-inch Hard Drives |
| Awọ Imọlẹ | RGB |
| Iwọn Nkan | 14.7 kilo |
10. Atilẹyin ọja
The Sharkoon CA300T PC Case comes with a 2-odun olupese ká atilẹyin ọja. Please retain your proof of purchase for warranty claims. The warranty covers defects in materials and workmanship under normal use. It does not cover damage caused by misuse, accidents, unauthorized modifications, or improper installation.
11. Atilẹyin
For technical support, warranty inquiries, or further assistance, please visit the official Sharkoon website or contact their customer service department. You may find contact information and FAQs on their support pages.
Osise Webojula: www.sharkoon.com