Ọrọ Iṣaaju
This manual provides detailed instructions for the setup, operation, and maintenance of your groov e Atlas Radio Alarm Clock with Wireless Charger. Please read this manual thoroughly before using the device to ensure proper function and to maximize your user experience. Keep this manual for future reference.
Package Awọn akoonu
Jẹrisi pe gbogbo awọn ohun kan wa ninu package:
- groov e Atlas Radio Alarm Clock
- Adapter agbara
- Itọsọna olumulo
Ọja Awọn ẹya ara ẹrọ
- Wireless Charging (5W): Conveniently charge compatible smartphones by placing them on the top surface.
- Redio FM: Tune into your favorite FM stations.
- Ifihan LED: Ifihan akoko oni-nọmba ti o han kedere.
- Agbara akọkọ: Reliable power supply for continuous operation.
- Ibusọ gbigba agbara USB: Additional USB port for charging other devices.
- Itaniji meji: Ṣeto awọn itaniji ominira meji fun awọn akoko ji-soke oriṣiriṣi.
- Ṣe afihan Dimmer: Ṣàtúnṣe ìmọ́lẹ̀ ìfihàn LED náà.
Ṣeto
- So agbara: Insert the power adapter into the 'DC IN' port on the back of the alarm clock, then plug the adapter into a wall outlet. The display will light up.
- Ṣeto Akoko:
- Press and hold the 'TIME SET' button located on the back of the unit.
- Use the 'TUN-' or 'TUN+' buttons on the top panel to adjust the hour.
- Press 'TIME SET' again to confirm the hour and move to minutes.
- Use 'TUN-' or 'TUN+' to adjust the minutes.
- Press 'TIME SET' once more to confirm and exit time setting.
- To switch between 12-hour and 24-hour format, press the '12/24H' button on the back.

Aworan: Ẹyin view of the groov e Atlas alarm clock, highlighting the DC IN power input and the USB charging port. The '12/24H TIME SET' and 'SLEEP' buttons are also visible.
Awọn ilana Iṣiṣẹ
Setting Alarms (ALM1 / ALM2)
- Press the 'ALM1' or 'ALM2' button to select the alarm you wish to set. The alarm icon will flash on the display.
- Use the 'TUN-' or 'TUN+' buttons to adjust the alarm hour.
- Press the 'ALM1' or 'ALM2' button again to confirm the hour and move to minutes.
- Use 'TUN-' or 'TUN+' to adjust the alarm minutes.
- Press the 'ALM1' or 'ALM2' button a third time to confirm the alarm time. The alarm icon will remain lit, indicating the alarm is active.
- To deactivate an alarm, press the corresponding 'ALM1' or 'ALM2' button until the alarm icon disappears from the display.
FM Radio isẹ
- Tan/Pa: Press the 'ON/OFF' button to turn the radio on or off.
- Ṣiṣayẹwo Aifọwọyi: Press the 'SCAN' button to automatically scan and save available FM stations.
- Itọsọna Afowoyi: Use the 'TUN-' or 'TUN+' buttons to manually adjust the frequency. Press and hold for faster tuning.
- Awọn ibudo tito tẹlẹ: Use 'MEM-' or 'MEM+' to cycle through saved preset stations.
- Ṣatunṣe Iwọn didun: Use the 'VOL-' or 'VOL+' buttons to control the radio volume.
Aworan: Oke view of the groov e Atlas alarm clock, illustrating the layout of the control buttons for volume, tuning, memory, scan, and power.
Ngba agbara Alailowaya
- Ensure your smartphone is compatible with 5W Qi wireless charging.
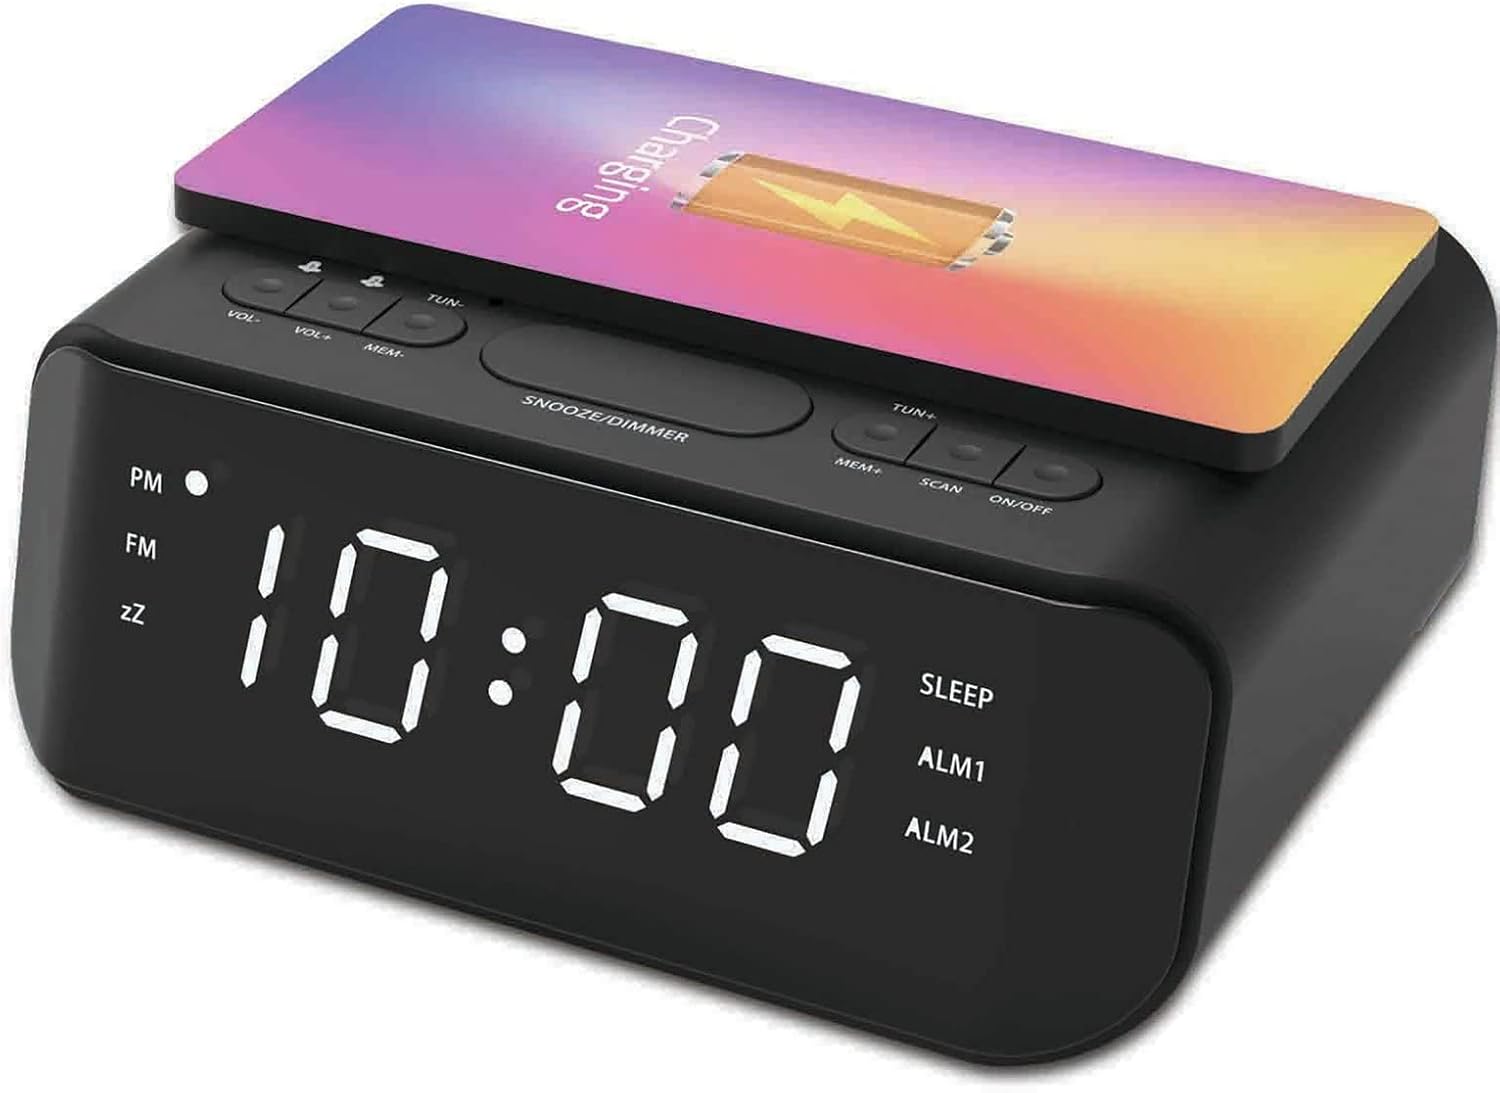
- Place your compatible smartphone centrally on the wireless charging pad located on the top surface of the alarm clock.
- The phone's display should indicate that charging has begun. If not, adjust the phone's position.

Image: A smartphone placed on the groov e Atlas alarm clock's top surface, showing the charging indicator on the phone's screen, confirming wireless charging is active.
Ngba agbara USB
- Connect a USB charging cable (not included) to the USB port on the back of the alarm clock.
- So opin miiran ti okun pọ si ẹrọ rẹ.
- Ẹrọ rẹ yoo bẹrẹ gbigba agbara.
Ifihan Dimmer
Press the 'SNOOZE/DIMMER' button to cycle through different brightness levels for the LED display. This allows you to adjust the display to your preferred visibility, especially in dark environments.
Itoju
- Ninu: Lo aṣọ rírọrùn tí ó gbẹ láti nu ojú aago ìdágìrì náà. Má ṣe lo àwọn ohun èlò ìfọmọ́ omi tàbí àwọn ohun èlò ìpara.
- Ibi ipamọ: Nigbati o ko ba wa ni lilo fun awọn akoko ti o gbooro sii, yọọ ẹrọ naa ki o tọju rẹ si ibi ti o tutu, ti o gbẹ.
- Aabo: Do not expose the device to water, high humidity, or extreme temperatures. Avoid dropping or subjecting the device to strong impacts.
Laasigbotitusita
| Isoro | Owun to le Fa | Ojutu |
|---|---|---|
| Ẹrọ naa ko ṣiṣẹ. | Ohun ti nmu badọgba agbara ko ti sopọ tabi aṣiṣe iṣan. | Ensure the power adapter is securely plugged into the device and a working wall outlet. Try a different outlet. |
| Gbigba agbara alailowaya ko ṣiṣẹ. | Phone not Qi-compatible or not positioned correctly. | Verify your phone supports Qi wireless charging. Reposition the phone centrally on the charging pad. Remove any thick phone cases. |
| Itaniji ko dun. | Itaniji ko muu ṣiṣẹ tabi iwọn didun kere ju. | Check if the alarm icon is lit on the display. Increase the alarm volume using the 'VOL+' button. |
| Gbigba redio ko dara. | Weak signal or antenna position. | Extend and adjust the position of the FM antenna wire on the back of the unit for better reception. |
Awọn pato
- Nọmba awoṣe: GVWC06BK
- Brand: groov e
- Àwọ̀: Dudu
- Iru ifihan: LED oni-nọmba
- Orisun Agbara: Mains Powered (AC Adapter included)
- Ijade gbigba agbara Alailowaya: 5W
- Ṣiṣejade Ngba agbara USB: 5V/1A
- Awọn ẹya ara ẹrọ itaniji: Dual Alarm, Snooze
- Redio: FM
- Ohun elo: Acrylonitrile Butadiene Styrene (ABS)
- Apẹrẹ: onigun merin
- Iru fifi sori: Table Mount
- Iru gbigbe: Kuotisi
- Awọn batiri: Not included (requires 1 battery for backup, type not specified in data)
Atilẹyin ọja ati Support
Your groov e Atlas Radio Alarm Clock GVWC06BK comes with a standard manufacturer's warranty. Please refer to the warranty card included in your package for specific terms and conditions, including the warranty period and coverage details.
For technical support, troubleshooting assistance, or warranty claims, please contact groov e customer service through their official webaaye tabi alaye olubasọrọ ti a pese lori kaadi atilẹyin ọja rẹ.
Jọwọ ṣe idaduro ẹri rira rẹ fun eyikeyi awọn ibeere ti o ni ibatan atilẹyin ọja.