1. Ifihan
This manual provides detailed instructions for the setup, operation, maintenance, and troubleshooting of your UF-TOOLS 7-Inch LCD Digital Microscope. Please read this manual thoroughly before using the device to ensure proper functionality and to maximize its lifespan.
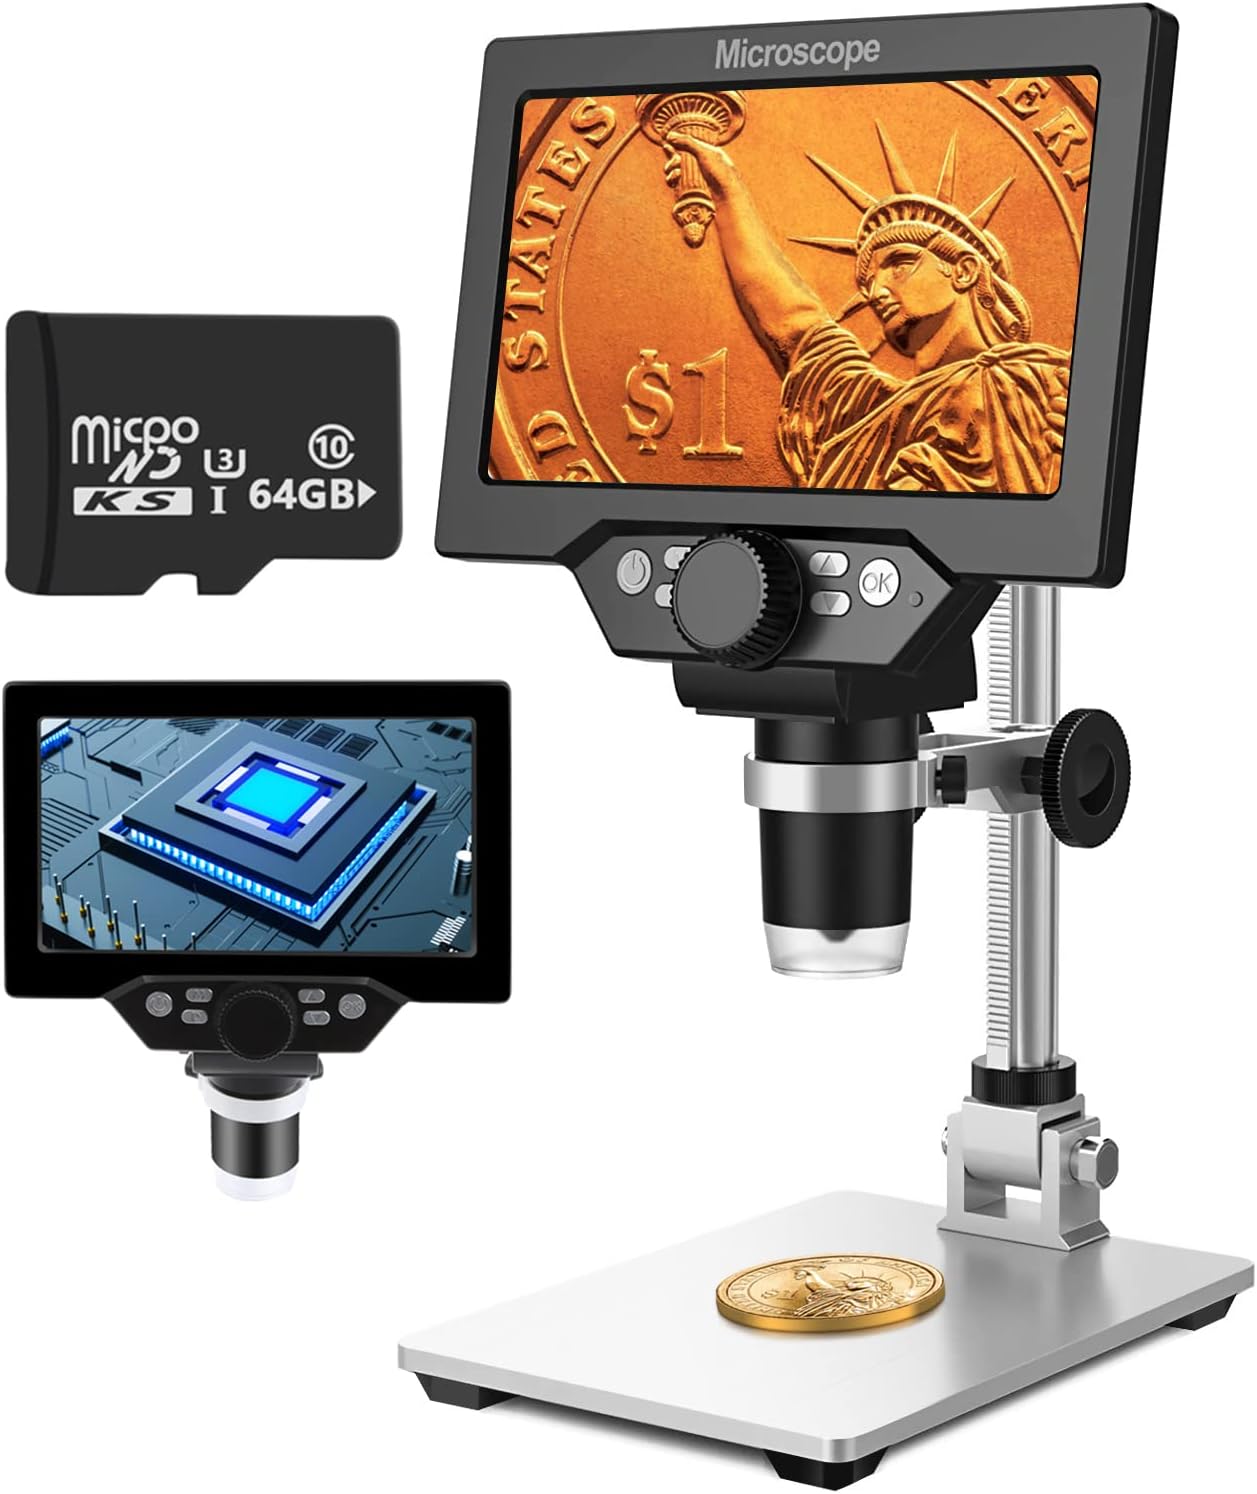
Image 1.1: UF-TOOLS 7-Inch LCD Digital Microscope with included 64GB TF card, showing the main unit and stand.
1.1 Key Awọn ẹya ara ẹrọ
- Iboju LCD 7-inch: Provides a clear, high-definition display for direct viewing without a computer.
- 10X-1200X Imudara: Continuous zoom capability for observing various objects.
- Kamẹra 12MP: Captures high-resolution images and 1080P video.
- Káàdì TF 64GB: Included for direct storage of photos and videos. Supports up to 128GB.
- Àwọn ìmọ́lẹ̀ LED 8 tí a lè ṣàtúnṣe: Ensures optimal illumination for detailed observation.
- Flexible Aluminum Alloy Stand: Allows for 90° angle adjustment and 2-10cm focus distance adjustment.
- Batiri 3000mAh ti a ṣe sinu: Offers portability with up to 6 hours of operation on a full charge.
- Asopọmọra PC: Compatible with Windows 7/8/10 for larger display and data transfer.
2. Package Awọn akoonu
Daju pe gbogbo awọn nkan ti a ṣe akojọ rẹ si isalẹ wa ninu package rẹ:
- UF-TOOLS 7-Inch LCD Digital Microscope Unit
- Adjustable Aluminum Alloy Stand
- 64GB kaadi Kaadi
- Okun USB
- Adaparọ Agbara (ti o ba wa pẹlu)
- Afowoyi Olumulo (iwe-ipamọ yii)

Image 2.1: The microscope package includes a 64GB TF card for storage.
3. Eto Itọsọna
3.1 Assembling the Microscope
- Ṣọra gbogbo awọn paati lati inu apoti naa.
- Attach the microscope unit to the adjustable aluminum alloy stand. Ensure it is securely fastened using the provided screws or locking mechanisms.
- Insert the 64GB TF card into the designated slot on the microscope unit.
- Place the assembled microscope on a stable, flat surface.

Image 3.1: Product dimensions and adjustable stand features, including 270° rotation and height adjustment.
3.2 Ngba agbara si Batiri naa
The microscope has a built-in 3000mAh rechargeable battery. Before first use, fully charge the device.
- Connect the USB cable to the microscope's charge port and the other end to a power adapter or a computer's USB port.
- Ina Atọka gbigba agbara yoo fi ipo gbigba agbara han.
- A full charge typically provides up to 6 hours of continuous use.

Image 3.2: The microscope features a long-lasting rechargeable battery, charged via USB.
4. Awọn ilana Iṣiṣẹ
4.1 Ẹrọ Ti pariview ati Awọn iṣakoso

Aworan 4.1: Pariview of the microscope's controls and ports, including charge port, MicroSD slot, light regulation, fixed knob, lifting adjusting bracket knob, and various function buttons.
- Titan/Apapa: Press and hold the Power button to turn the device on or off.
- Video/Camera Playback: Use dedicated buttons to switch between video recording, photo capture, and playback modes.
- System Key Programming: Access menu settings for various configurations.
- Object Distance Adjustment: Adjust the distance between the lens and the object.
- Oju-iwe Soke/Isalẹ: Navigate through menus or captured media.
- Confirm Key/Camera Button: Select options or capture photos/videos.
- Light Regulation: Adjust the brightness of the 8 LED lights.
- Fixed Knob: Secures the microscope unit to the stand.
- Lifting Adjusting Bracket Knob: Adjusts the height of the microscope unit on the stand.
4.2 Ṣíṣe àtúnṣe Ìmúga àti Ìfojúsùn
- Place the object you wish to observe on the base plate.
- Adjust the height of the microscope unit using the Lifting Adjusting Bracket Knob to get a rough focus.
- Use the focus wheel on the microscope lens to fine-tune the focus until the image on the 7-inch LCD screen is clear.
- The magnification range is 10X to 1200X. Adjust the distance between the lens and the object, along with the focus wheel, to achieve the desired magnification.

Image 4.2: The microscope features an adjustable screen, free length adjustment, and precise focus control.

Image 4.3: Digital magnification from 10X to 1200X, demonstrating the zoom capability on small objects.
4.3 Lilo awọn Imọlẹ LED
The microscope is equipped with 8 adjustable LED lights to illuminate your subject. Use the Light Regulation control to increase or decrease brightness as needed for optimal viewing.

Image 4.4: The 8 LED lights provide adequate illumination for observing objects in various lighting conditions.
4.4 Fífi Àwọn Fọ́tò àti Fídíò Sílẹ̀
With the included 64GB TF card, you can directly save images and videos.
- In photo mode, press the Confirm/Camera button to capture an image.
- In video mode, press the Confirm/Camera button to start recording, and press again to stop.
- Captured media can be reviewed using the playback function.
4.5 PC Asopọmọra
Si view observations on a larger screen or transfer files, connect the microscope to a Windows PC (Windows 7/8/10) using the provided USB cable.
- Connect the microscope to your PC via the USB cable.
- The microscope should be recognized as a storage device or a webcam, depending on the mode selected on the microscope.
- You can then access the stored images/videos or use the microscope as a live camera feed.

Image 4.5: Connect the microscope to a PC for a larger viewing experience and data management.
5. Itọju
5.1 Ninu
- Lẹnsi: Use a soft, lint-free cloth specifically designed for optical lenses. For stubborn smudges, a small amount of lens cleaning solution can be applied to the cloth, not directly to the lens.
- Iboju: Wipe the LCD screen gently with a microfiber cloth. Avoid harsh chemicals.
- Ara: Clean the microscope body and stand with a soft, dry cloth. Do not use abrasive cleaners or solvents.
5.2 Ibi ipamọ
- Store the microscope in a cool, dry place away from direct sunlight and extreme temperatures.
- Ti o ba wa ni ipamọ fun akoko ti o gbooro sii, rii daju pe batiri naa ti gba agbara kan (ni ayika 50%) lati pẹ ni igbesi aye rẹ.
- Keep the lens covered to prevent dust accumulation.
5.3 batiri Itọju
- Yago fun gbigba agbara si batiri ni kikun nigbagbogbo.
- Gba agbara si batiri nigbagbogbo, paapaa ti ko ba si ni lilo, lati ṣetọju ilera rẹ.
- Ma ṣe fi batiri han si awọn iwọn otutu giga.
6. Laasigbotitusita
- Ko si Agbara:
- Ensure the battery is charged. Connect the microscope to a power source and try again.
- Ṣayẹwo asopọ okun agbara.
- Aworan blurry:
- Adjust the focus wheel carefully.
- Adjust the height of the microscope unit on the stand.
- Ensure the object is properly illuminated by adjusting the LED lights.
- Clean the lens if smudges or dust are present.
- Cannot Capture Photos/Videos:
- Ensure a TF card is inserted and properly formatted.
- Check if the TF card has sufficient storage space.
- Verify the device is in the correct photo or video capture mode.
- PC Not Recognizing Device:
- Ensure the USB cable is securely connected to both the microscope and the PC.
- Gbiyanju ibudo USB ti o yatọ lori kọnputa rẹ.
- Restart both the microscope and the PC.
- Ensure your PC is running Windows 7/8/10.
7. Awọn pato
| Ẹya ara ẹrọ | Ẹ̀kúnrẹ́rẹ́ |
|---|---|
| Orukọ awoṣe | SUGON-Digital Microscope |
| Iwon iboju | 7 inch LCD |
| Igbega | 10X-1200X |
| Ipinnu kamẹra | 12MP |
| Ipinnu fidio | 1080P |
| Ibi ipamọ | 64GB TF Card (Max 128GB supported) |
| Itanna | 8 LED imọlẹ |
| Agbara Batiri | 3000mAh litiumu polima |
| Igbesi aye batiri | Titi di wakati 6 (isunmọ.) |
| PC Ibamu | Windows 7/8/10 |
| Ohun elo | Irin, Ṣiṣu |
| Iwọn Nkan | 2.44 poun (1.11 kg) |
| Package Mefa | 9.8 x 8.19 x 3.35 inches |
8. Atilẹyin ọja ati Support
UF-TOOLS provides the following warranty and support for this product:
- Àkókò Ìpadàbọ̀: 45 days limited product return period.
- Ilana paṣipaarọ: 18 months exchange for product defects.
For technical support or warranty claims, please contact UF-TOOLS customer service through the retailer where the product was purchased or visit the official UF-TOOLS webojula fun alaye olubasọrọ.
Note: Warranty terms may vary based on region and retailer. Please retain your proof of purchase.