
1. Ifihan
This manual provides detailed instructions for the safe installation, operation, and maintenance of your Millennium Lighting 4601-CH 2-Light Flushmount Ceiling Light. Please read all instructions carefully before beginning installation and retain this manual for future reference.
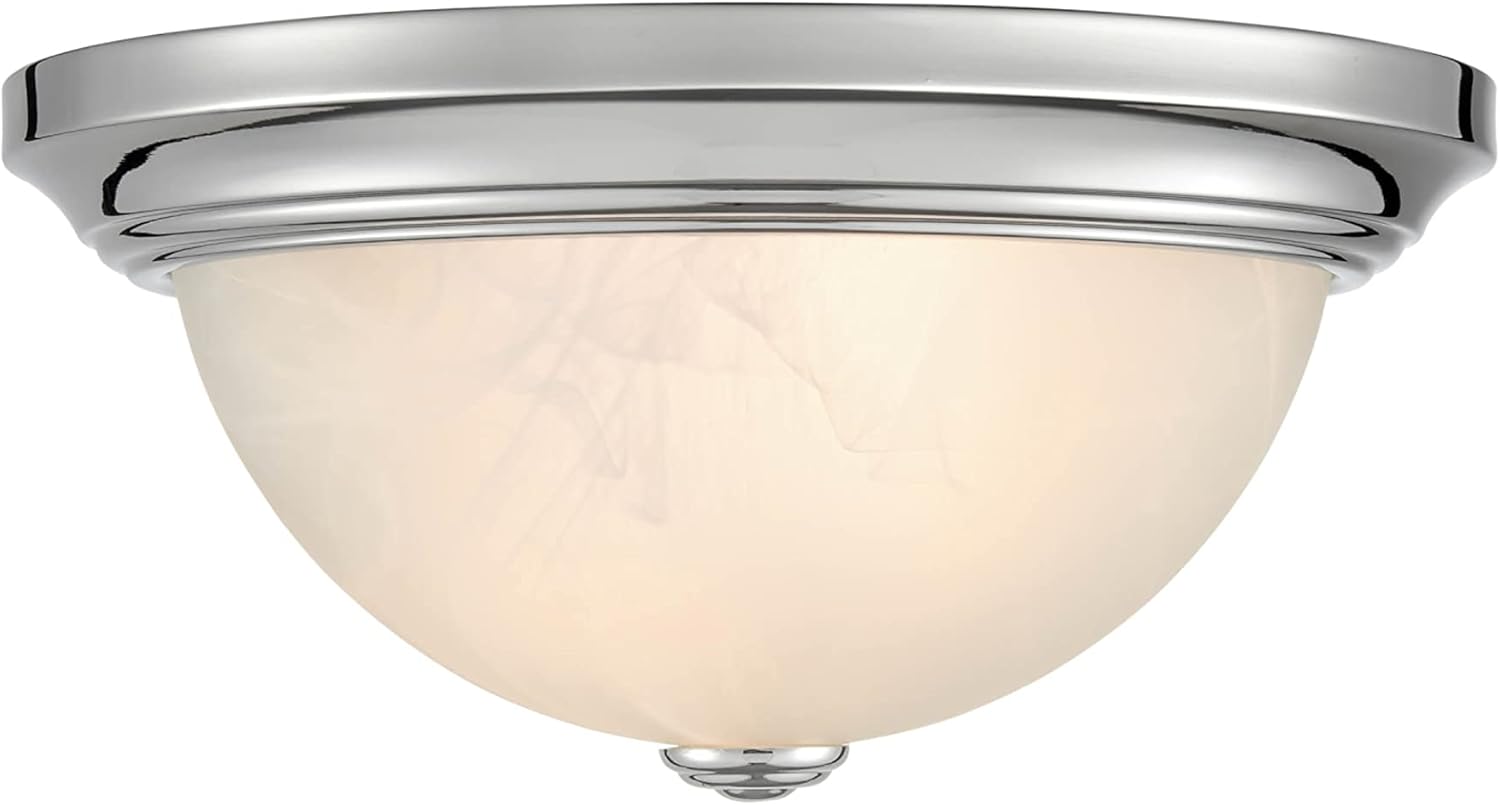
Image 1.1: Millennium Lighting 4601-CH 2-Light Flushmount Ceiling Light, Chrome finish.
2. Alaye Aabo pataki
WARNING: RISK OF ELECTRIC SHOCK. Disconnect power at the circuit breaker or fuse box before installation or servicing.
- Ka gbogbo awọn ilana ni pẹkipẹki ṣaaju fifi sori ẹrọ.
- Ọja yii gbọdọ wa ni fifi sori ẹrọ ni ibamu pẹlu koodu fifi sori ẹrọ ti o wulo nipasẹ eniyan ti o faramọ ikole ati iṣẹ ti ọja ati awọn eewu ti o kan.
- Kan si alagbawo ina mọnamọna ti o pe ti o ko ba ni idaniloju nipa ilana fifi sori ẹrọ.
- Rii daju pe gbogbo awọn asopọ itanna ṣe ni ibamu pẹlu awọn koodu agbegbe, awọn ilana, ati koodu ina mọnamọna ti Orilẹ-ede (NEC).
- This fixture is rated for damp locations. Do not install in areas where it will be directly exposed to water.
- Use only the specified wattage and type of bulbs.
- Maṣe kọja wat ti o pọjutage itọkasi lori imuduro.
- This item is UL listed and meets CSA standards, ensuring compliance with safety regulations.
3. Package Awọn akoonu
Verify that all components are present before beginning installation. If any parts are missing or damaged, do not attempt to assemble or install the fixture.
- Flushmount Ceiling Light Fixture (1)
- Ohun elo Ohun elo Iṣagbesori (1)
- Iboji gilasi (1)
- Ipari (1)
- Ilana itọnisọna (1)
Akiyesi: Awọn gilobu ina ko si ati pe o gbọdọ ra lọtọ.
4. Awọn alaye ọja
| Ẹya ara ẹrọ | Sipesifikesonu |
|---|---|
| Brand | Imọlẹ Millennium |
| Nọmba awoṣe | 4601-CH |
| Àwọ̀ | Chrome |
| Ohun elo | Irin |
| Ọja Mefa | 11"L x 11"W x 5.5"H |
| Voltage | 120 Volts |
| Max Wattage | 60 watts (per bulb, 2 bulbs total) |
| Iṣagbesori Iru | Oke Oke |
| inu ile / ita gbangba Lilo | inu ile (Damp A ṣe ìdíyelé ibi tí a wà) |
| Awọn iwe-ẹri | UL Listed, CSA Standards |
5. Itọsọna fifi sori ẹrọ
5.1 Awọn irinṣẹ ti a beere (Ko si)
- Phillips Head screwdriver
- Alapin Head Screwdriver
- Waya Strippers
- Itanna teepu
- Awọn gilaasi aabo
- Àkàbà
5.2 fifi sori Igbesẹ
- Pa Agbara: Kí o tó bẹ̀rẹ̀, rí i dájú pé agbára tí ó wà nínú àpótí ìsopọ̀ náà ti pa ní ibi tí ẹ̀rọ ìfọ́ tàbí àpótí fiusi wà.
- Múra Àwo Ìfipamọ́: Attach the mounting plate to the junction box using the screws provided in the hardware kit. Ensure it is securely fastened.
- Ṣe Awọn Isopọ Itanna:
- So wáyà dúdú ti ohun èlò náà mọ́ wáyà dúdú (gbóná) ti ilé náà.
- So wáyà funfun ti ohun èlò náà mọ́ wáyà funfun (tí kò ní ìdúró) ti ilé náà.
- Connect the fixture's ground wire to the house's ground wire (or to the mounting plate if no house ground is available).
- Fi gbogbo asopọ mọ pẹlu awọn eso waya ki o fi teepu ina mọnamọna di i fun aabo afikun.
- Mount Fixture Body: Carefully push the wired fixture body up to the mounting plate, aligning the screw holes. Secure the fixture body to the mounting plate using the provided screws.
- Fi Awọn Isusu Imọlẹ sori ẹrọ: Insert the appropriate light bulbs (not included) into the sockets. Do not exceed 60 watts per bulb.
- So iboji gilasi: Carefully place the glass shade onto the fixture. Secure it in place using the finial by screwing it onto the threaded rod at the bottom of the fixture. Do not overtighten.
- Pada Agbara pada: Once installation is complete and all components are secure, restore power at the circuit breaker or fuse box.
6. Isẹ
Once installed and power is restored, the Millennium Lighting 4601-CH flushmount ceiling light can be operated using a standard wall switch. This fixture is compatible with standard wall dimmers, allowing you to adjust the light output to your desired level (dimmer switch sold separately).
7. Itọju ati Itọju
To maintain the appearance and functionality of your light fixture, follow these guidelines:
- Ninu: Always disconnect power before cleaning. Wipe the fixture with a soft, dry cloth. Do not use abrasive cleaners, solvents, or polishes as they may damage the finish.
- Rirọpo Boolubu: Ensure power is off before replacing bulbs. Allow bulbs to cool completely before handling. Replace with bulbs of the same type and wattage, not exceeding the maximum specified.
- Ayewo: Lojoojumọ, ṣayẹwo gbogbo awọn asopọ ati awọn ohun elo fifi sori ẹrọ lati rii daju pe wọn wa ni aabo.
8. Laasigbotitusita
Ti o ba ni iriri awọn ọran pẹlu imuduro ina rẹ, tọka si awọn iṣoro ti o wọpọ ati awọn ojutu wọnyi:
| Isoro | Owun to le Fa | Ojutu |
|---|---|---|
| Imọlẹ ko tan | Ko si agbara si imuduro Loose waya awọn isopọ boolubu ti ko tọ | Ṣayẹwo Circuit fifọ / fiusi. Daju pe gbogbo awọn asopọ waya wa ni aabo (rii daju pe agbara wa ni pipa ni akọkọ). Rọpo boolubu (awọn). |
| Ina flickers | Loose waya awọn isopọ Iyipada dimmer ti ko ni ibamu boolubu ti ko tọ | Ṣàyẹ̀wò àwọn ìsopọ̀ wáyà (rí i dájú pé agbára ti pa ní àkọ́kọ́). Ensure dimmer switch is compatible with the bulb type. Rọpo boolubu (awọn). |
| Humming sound from fixture | Iyipada dimmer ti ko ni ibamu Awọn paati alaimuṣinṣin | Ensure dimmer switch is compatible with the bulb type. Check that all mounting hardware and the glass shade are securely fastened. |
If the problem persists after attempting these solutions, consult a qualified electrician.
9. Atilẹyin ọja ati Support
9.1 atilẹyin ọja Alaye
This Millennium Lighting fixture is covered by a 1-year limited manufacturer's warranty from the date of purchase. This warranty covers defects in materials and workmanship under normal use. It does not cover damage resulting from improper installation, accident, misuse, abuse, or normal wear and tear.
9.2 Onibara Support
For technical assistance, warranty claims, or to inquire about replacement parts, please contact Millennium Lighting customer service. Refer to your purchase documentation or the Millennium Lighting webAaye fun lọwọlọwọ alaye olubasọrọ.