
Ọrọ Iṣaaju
The Topeak HeadLux 100 is a compact and efficient USB rechargeable bike light designed to enhance visibility and safety during cycling. Featuring two super bright 0.5W white LEDs, it provides up to 100 lumens of illumination. Its versatile mounting system allows for easy attachment to various handlebar types, and the direct USB plug simplifies charging without the need for additional cables. Built with an engineering-grade polymer and an IPX6 waterproof rating, this light is designed for reliable performance in diverse weather conditions.
Ọja Pariview
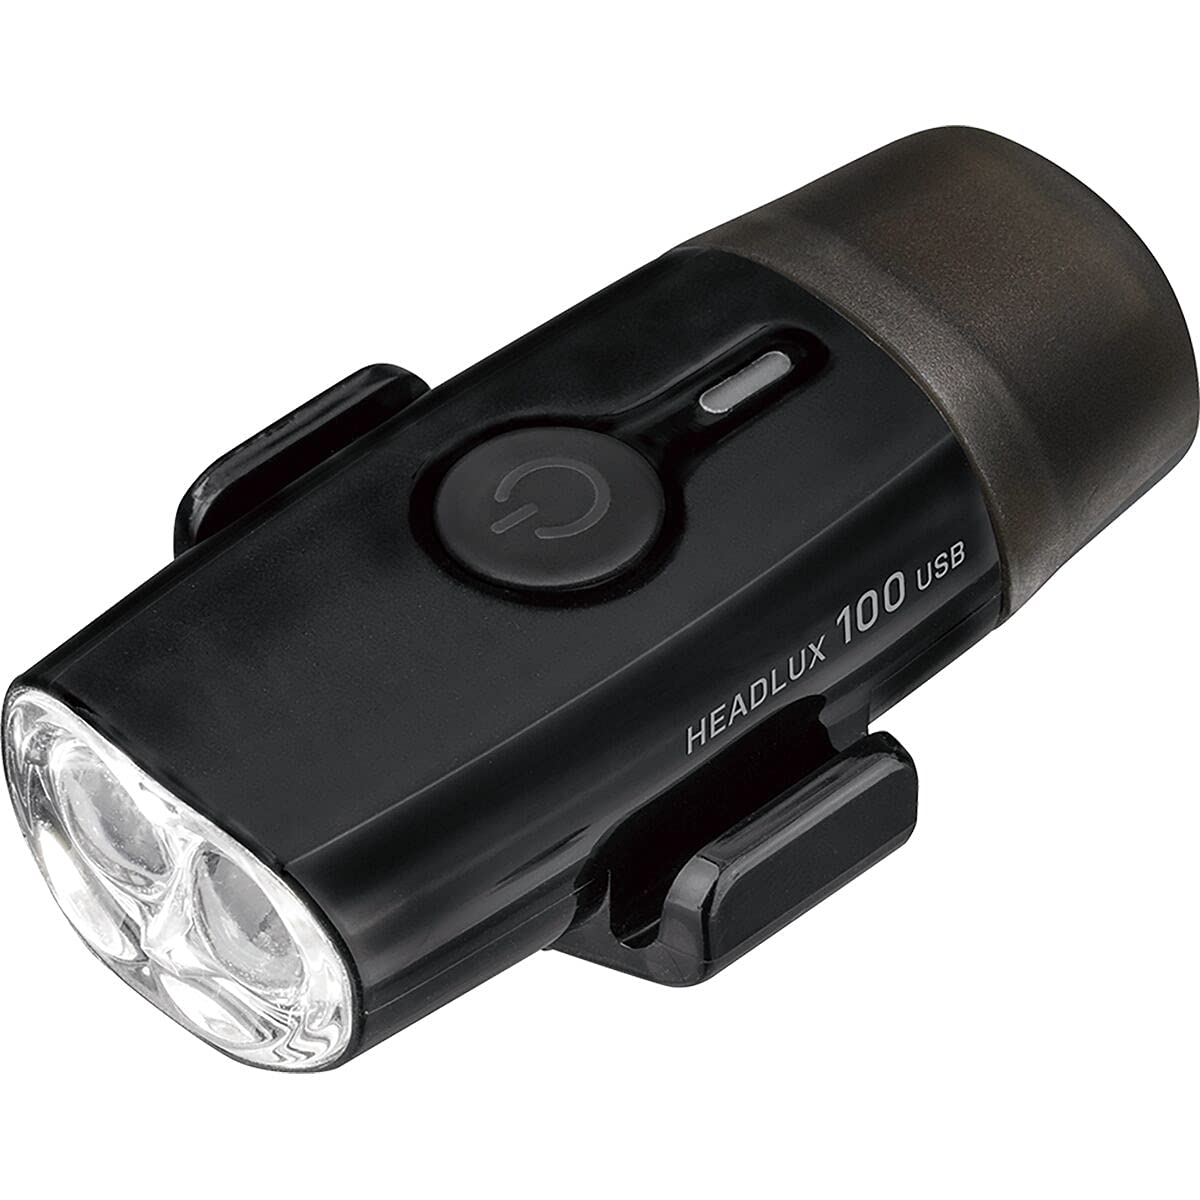
Aworan: Iwaju view of the Topeak HeadLux 100 USB Rechargeable Bike Light, showing the power button and dual LED lenses.
Awọn ẹya pataki:
- Gbigba agbara USB ti o rọrun: Direct USB port plug for easy, cable-free charging.
- High-Performance Lighting: Provides up to 100 lumens with two super bright 0.5W white LEDs.
- Awọn ọna Imọlẹ Ọpọ: Offers 3 modes: High (1.5 hr), Middle (3.3 hr), and Blinking (40 hr) for various riding conditions.
- Iṣagbesori pupọ: Silicone strap fits integrated bar/stem combos, and aero or round handlebars, allowing easy attachment and removal.
- Ti o tọ ati Mabomire: Made from engineering-grade polymer with an IPX6 waterproof rating for reliable performance in all weather conditions.
Eto ati fifi sori
The Topeak HeadLux 100 offers flexible mounting options for both handlebars and helmets.
Iṣagbesori lori Handlebars:

Aworan: The HeadLux 100 light shown with its flexible silicone mounting band.
- Identify the hooks and grooves on the light body.
- Take the included round silicone band and place a section into one of the grooves at the bottom of the light.
- Stretch and wrap the remaining part of the band over the light and fasten it with the side hooks.
- Wrap the band around your handlebar (aero or round) and ensure the band double stacks in the hooks for increased holding force.
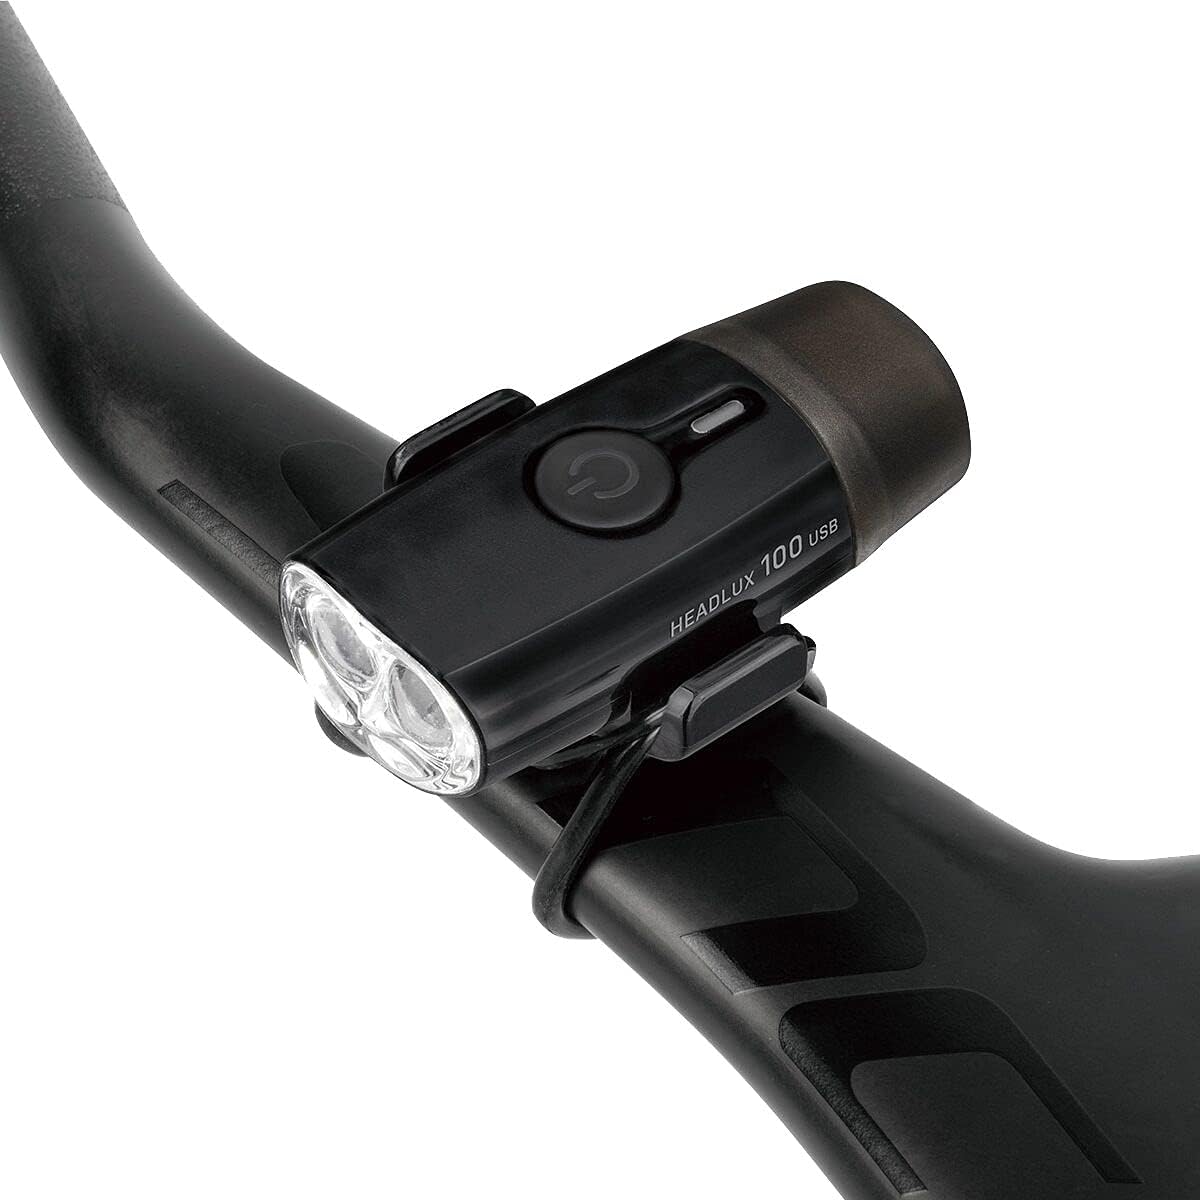
Aworan: The HeadLux 100 light securely mounted on a bicycle's aero handlebar.
Mounting on Helmet:
For helmet mounting, use the double-ring rubber strap provided.

Aworan: The HeadLux 100 light attached to the top of a bicycle helmet using the rubber strap.
- Attach one ring of the double-ring rubber strap to one of the hooks on the light.
- Run the strap through a suitable vent or opening on your helmet.
- Secure the other ring of the strap to the remaining hook on the light, ensuring a snug fit.
Fifi sori Fidio:
Fidio: Official Topeak guide demonstrating how to mount HeadLux lights on handlebars and helmets.
Isẹ
Titan/Apapa:
- Lati tan ina ON, press and hold the power button for approximately 1 second.
- Lati tan ina PAA, press and hold the power button for approximately 1 second.
Awọn ipo iyipada:
Once the light is on, short press the power button to cycle through the available lighting modes:
- High (1.5 hours runtime)
- Middle (3.3 hours runtime)
- Blinking (40 hours runtime)
Ngba agbara si Batiri naa:
The HeadLux 100 features a convenient direct USB plug for charging.

Aworan: The HeadLux 100 light with its protective cap removed, revealing the integrated USB charging plug.
- Remove the protective cap from the end of the light to expose the USB plug.
- Plug the light directly into any standard USB port (e.g., computer, wall adapter, power bank).
- An indicator light will show the charging status (e.g., red for charging, green for fully charged).
- Once fully charged, remove the light from the USB port and replace the protective cap to maintain its waterproof integrity.
Itoju
- Ninu: Wipe the light body with a soft, damp cloth. Avoid using harsh chemicals or abrasive cleaners, as these can damage the casing tabi lẹnsi.
- Gbigba agbara: For optimal battery life, charge the light regularly, especially after extended use or if it has been stored for a long period.
- Ibi ipamọ: Store the light in a cool, dry place away from direct sunlight when not in use. Ensure the protective USB cap is securely in place.
- Ayẹwo okun: Periodically check the silicone mounting strap for any signs of wear, cracks, or damage. Replace if necessary to ensure secure attachment.
Laasigbotitusita
- Imọlẹ ko tan: Ensure the battery is charged. Connect to a USB power source and check the charging indicator. If the light still does not turn on after charging, contact customer support.
- Ina ko gba agbara: Verify the USB port is functional. Try a different USB port or power source. Ensure the light is fully inserted into the USB port. If the issue persists, the battery or charging circuit may be faulty; contact customer support.
- Fífẹ́ẹ́ tàbí dídín díẹ̀: This usually indicates a low battery. Recharge the light immediately.
- Light falling off during ride: Ensure the silicone mounting strap is correctly installed and double-stacked in the hooks for maximum grip. Check the strap for damage and replace if worn.
Awọn pato
| Ẹya ara ẹrọ | Ẹ̀kúnrẹ́rẹ́ |
|---|---|
| Nọmba awoṣe | 65002096 |
| Ijade ina | 100 Lumens |
| Orisun Imọlẹ | 2 x 0.5W Awọn LED funfun |
| Batiri | Gbigba agbara nipasẹ USB |
| Àkókò Ìṣiṣẹ́ (Gíga) | wakati meji 1.5 |
| Run Time (Middle) | wakati meji 3.3 |
| Run Time (Blinking) | wakati meji 40 |
| Ohun elo | Engineering-grade Polymer |
| Omi Resistance | IPX6 |
| Iṣagbesori Iru | Handlebar Mount (Silicone Strap) |
| Iwọn | 32 giramu |
| Àwọ̀ | Dudu |
Atilẹyin ọja ati Support
The Topeak HeadLux 100 USB Rechargeable Bike Light comes with a 1-odun olupese ká atilẹyin ọja lati ọjọ ti o ra. Atilẹyin ọja yi ni wiwa awọn abawọn ninu awọn ohun elo ati iṣẹ ṣiṣe labẹ lilo deede.
For warranty claims, technical support, or any questions regarding your product, please contact Topeak customer service through their official webaaye tabi alagbata ti o ti ra ọja naa. Jọwọ ṣe idaduro ẹri rira rẹ fun ijẹrisi atilẹyin ọja.