
1. Ifihan
This manual provides detailed instructions for the installation, operation, and maintenance of the VIVOTEK ND9323P H.265 8-Channel Embedded PoE Network Video Recorder (NVR). Please read this manual thoroughly before using the product to ensure proper and safe operation. Keep this manual for future reference.
2. Alaye Aabo
Observe the following safety precautions to prevent damage to the NVR and to ensure user safety:
- Ibi ti ina elekitiriki ti nwa: Use only the power adapter supplied with the NVR. Ensure the power source matches the NVR's voltage ibeere.
- Afẹfẹ: Do not block any ventilation openings. Install the NVR in a well-ventilated area to prevent overheating.
- Ayika: Avoid exposing the NVR to water, moisture, extreme temperatures, or direct sunlight. Do not place heavy objects on the NVR.
- Ṣiṣẹ: Maṣe gbiyanju lati ṣiṣẹ ọja yi funrararẹ. Tọkasi gbogbo iṣẹ si oṣiṣẹ oṣiṣẹ ti o peye.
- Mimu: Handle the NVR with care. Avoid dropping or subjecting it to strong impacts.
3. Package Awọn akoonu
Carefully unpack the box and ensure all items are present and in good condition. If any items are missing or damaged, contact your vendor immediately.
- VIVOTEK ND9323P NVR Unit
- Adapter agbara
- Asin USB
- Awọn ọna fifi sori Itọsọna
- Accessory Pack (Screws for HDD installation, Ethernet cable)
- Case (referring to the NVR enclosure itself)
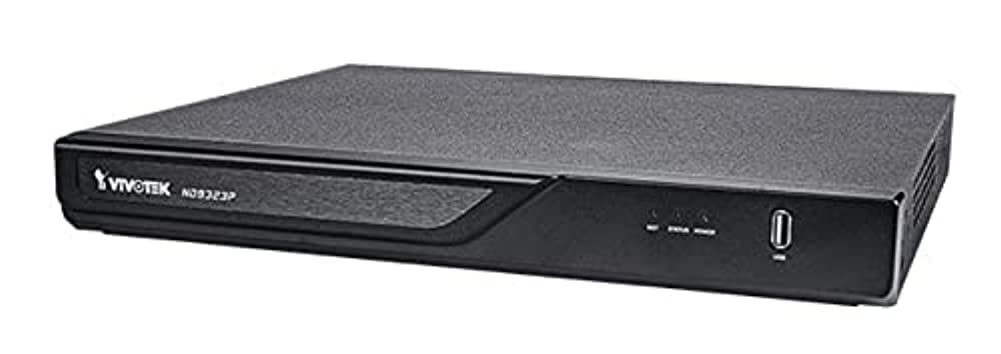
Figure 3.1: VIVOTEK ND9323P NVR unit. This image shows the front panel of the NVR, typically featuring status indicators and USB ports.
4. Ọja Ipariview
The VIVOTEK ND9323P is an 8-channel embedded Network Video Recorder designed for IP surveillance systems. It supports H.265 video compression for efficient storage and bandwidth usage. With its integrated Power over Ethernet (PoE) ports, it simplifies camera installation by providing both power and data connectivity through a single Ethernet cable.
4.1 Key Awọn ẹya ara ẹrọ
- 8-Channel Video Input
- H.265/H.264 Video Compression
- 8 x 802.3at/af PoE Ports
- Local Display Output (HDMI/VGA)
- Remote Access via VIVOTEK VIVOCloud App or VMS
- Supports up to 16TB HDD storage (HDD not included)
4.2 Iwaju ati ru Panels
Refer to the Quick Installation Guide for detailed diagrams of the front and rear panels, indicating ports and indicators.
- Igbimo iwaju: Power LED, HDD LED, Network LED, USB ports.
- Iṣakoso yii: Power input, LAN port, PoE ports (1-8), HDMI output, VGA output, Audio I/O, USB ports.
5. Eto
5.1 Fifi sori Dirafu lile (Aṣayan)
The NVR does not typically include a pre-installed hard drive. Follow these steps to install a 3.5-inch SATA hard drive:
- Unscrew and remove the NVR's top cover.
- So data SATA ati awọn okun agbara lati NVR pọ mọ dirafu lile naa.
- So dirafu lile naa mọ ẹnjini NVR nipa lilo awọn skru ti a pese.
- Rọpo ideri oke ki o ni aabo pẹlu awọn skru.
Akiyesi: Ensure the NVR is powered off and unplugged before installing or removing a hard drive.
5.2 Ti ara Awọn isopọ
- Sopọ Awọn kamẹra: Connect your IP cameras to the NVR's PoE ports (1-8) using Ethernet cables. The NVR will provide power and network connectivity to the cameras.
- Sopọ si Nẹtiwọọki: Connect the NVR's LAN port to your local network router or switch using an Ethernet cable.
- Asopọmọra Ifihan: So atẹle kan pọ si NVR's HDMI tabi ibudo o wu VGA.
- So Asin: So asin USB pọ mọ ọkan ninu awọn ibudo USB ti NVR.
- Agbara Tan: So ohun ti nmu badọgba agbara pọ si titẹ agbara NVR ati lẹhinna pulọọgi sinu iṣan agbara kan. NVR yoo ṣiṣẹ laifọwọyi.
5.3 Iṣeto ni ibẹrẹ
Upon first boot, the NVR will guide you through a setup wizard on the connected monitor:
- Aṣayan ede: Yan ede ti o fẹ julọ.
- Eto Ọrọigbaniwọle: Create a strong password for the administrator account. This is crucial for security.
- Eto nẹtiwọki: Configure network settings (DHCP or Static IP). DHCP is recommended for most home users.
- Akoko ati Ọjọ: Set the correct time zone, date, and time.
- Ibẹrẹ Dirafu lile: If you installed a new hard drive, the NVR will prompt you to format it. Confirm to proceed. Ikilọ: Formatting will erase all data on the drive.
- Wa kamẹra ati Fikun-un: The NVR will automatically search for connected VIVOTEK cameras. Select and add them to the NVR.
- Pari: Complete the wizard to access the NVR's live view.
6. Ṣiṣẹ NVR
6.1 Accessing the NVR
You can access and manage the NVR through various methods:
- Ifihan agbegbe: Directly via the connected monitor and USB mouse.
- Web Aṣàwákiri: Enter the NVR's IP address into a web kiri lori kọmputa kan ti a ti sopọ si kanna nẹtiwọki.
- VIVOTEK VIVOCloud App: Download the mobile app for remote viewing ati isakoso.
- VIVOTEK VAST 2 VMS: For advanced management and multi-NVR systems.
6.2 Live View
Awọn laaye view displays real-time video feeds from all connected cameras. You can switch between single-camera view, àkójọpọ̀ kámẹ́rà púpọ̀ view, and customize the display layout.
6.3 Gbigbasilẹ Eto
Ṣe atunto awọn iṣeto gbigbasilẹ ati awọn ipo fun kamẹra kọọkan:
- Igbasilẹ Gbigbawọle: Awọn igbasilẹ 24/7.
- Gbigba Iwari išipopada: Awọn igbasilẹ nikan nigbati a ba rii išipopada.
- Gbigbasilẹ Eto: Awọn igbasilẹ lakoko awọn akoko kan pato.
- Gbigbasilẹ iṣẹlẹ: Records based on external triggers or alarms.
Access these settings through the NVR's main menu: Configuration > Recording > Schedule.
6.4 Sisisẹsẹhin
Lati tunview foo ti o ti gbasilẹtage:
- Lati akojọ aṣayan akọkọ, yan Sisisẹsẹhin.
- Choose the camera(s) and the date/time range you wish to review.
- Use the timeline and playback controls (play, pause, fast forward, rewind) to navigate through the footage.
6.5 Event Management and Notifications
Configure the NVR to respond to events such as motion detection, camera tampering, or network disconnection. The NVR can send email notifications, trigger alarms, or start recording.
Access these settings via: Iṣeto > Iṣẹlẹ.
7. Itọju
7.1 famuwia imudojuiwọn
Regularly check for and install firmware updates to ensure optimal performance, security, and access to new features. Firmware can be updated via the NVR's web interface or local display menu: Configuration > System > Firmware Upgrade.
Iṣọra: Do not power off the NVR during a firmware upgrade. This can cause permanent damage.
7.2 Lile wakọ Management
Monitor the health of your hard drive(s) and ensure sufficient storage space. The NVR will automatically overwrite the oldest recordings when the disk is full, based on your settings.
Access HDD status and settings via: Configuration > Storage > HDD Management.
7.3 Ninu
Keep the NVR unit clean and free from dust. Use a soft, dry cloth for cleaning. Do not use liquid cleaners or aerosols.
8. Laasigbotitusita
This section addresses common issues you might encounter with your VIVOTEK ND9323P NVR.
8.1 No Video Display on Monitor
- Ṣayẹwo Awọn okun: Rii daju pe okun HDMI/VGA ti sopọ ni aabo si mejeeji NVR ati atẹle naa.
- Atẹle igbewọle: Verify the monitor is set to the correct input source (HDMI/VGA).
- Agbara NVR: Confirm the NVR is powered on and its power LED is illuminated.
8.2 Cameras Not Showing Up / No Image
- Asopọmọra PoE: Ensure cameras are properly connected to the NVR's PoE ports. Check if the PoE port LEDs on the NVR are active.
- Agbara kamẹra: If not using PoE, ensure cameras are receiving power from their own power adapters.
- Asopọmọra nẹtiwọki: Verify the NVR and cameras are on the same network segment if not directly connected via PoE.
- Ipo kamẹra: Check the camera's own status indicators.
- NVR Camera Management: Lọ si Configuration > Camera > Camera Management to ensure cameras are added and enabled. Try rescanning for cameras.
8.3 Cannot Access NVR via Web Aṣàwákiri
- Adirẹsi IP: Confirm the NVR's IP address is correct and that your computer is on the same network.
- Cable Nẹtiwọki: Ensure the NVR's LAN port is connected to your network.
- Ogiriina: Temporarily disable your computer's firewall to check if it's blocking access.
- Ibamu ẹrọ aṣawakiri: Use a recommended web ẹrọ aṣawakiri (fun apẹẹrẹ, Chrome, Firefox).
8.4 Igbagbe Ọrọigbaniwọle
If you forget the administrator password, you may need to perform a factory reset. Refer to the VIVOTEK support website or contact technical support for the specific procedure for your model, as this often involves a physical reset button or a specific utility.
9. Awọn pato
The following table lists the key specifications for the VIVOTEK ND9323P NVR:
| Ẹya ara ẹrọ | Sipesifikesonu |
|---|---|
| Nọmba awoṣe | ND9323P |
| Brand | VIVOTEK |
| Nọmba ti awọn ikanni | 8 |
| Asopọmọra Technology | Àjọlò |
| Awọn ẹrọ ibaramu | Camera, Mobile Device |
| Fidio funmorawon | H.265, H.264 |
| Poe Ports | 8 x 802.3at/af |
| Ọja Mefa | 19.69 x 19.69 x 11.02 inches |
| Iwọn Nkan | 0.01 iwon |
| Olupese | Vivotek |
10. Atilẹyin ọja ati Support
VIVOTEK products are covered by a limited warranty. For detailed warranty terms and conditions, please refer to the warranty card included with your product or visit the official VIVOTEK webojula.
For technical support, product registration, or to download the latest firmware and software, please visit the VIVOTEK support portal:
VIVOTEK Official Support Webojula
When contacting support, please have your NVR's model number (ND9323P) and serial number ready.


