
1. Ifihan
Thank you for choosing the Vancer Gretxa Wireless Ultralight Gaming Mouse. This manual provides essential information for setting up, operating, and maintaining your new gaming mouse. Please read it thoroughly to ensure optimal performance and longevity of your device.
Package Awọn akoonu
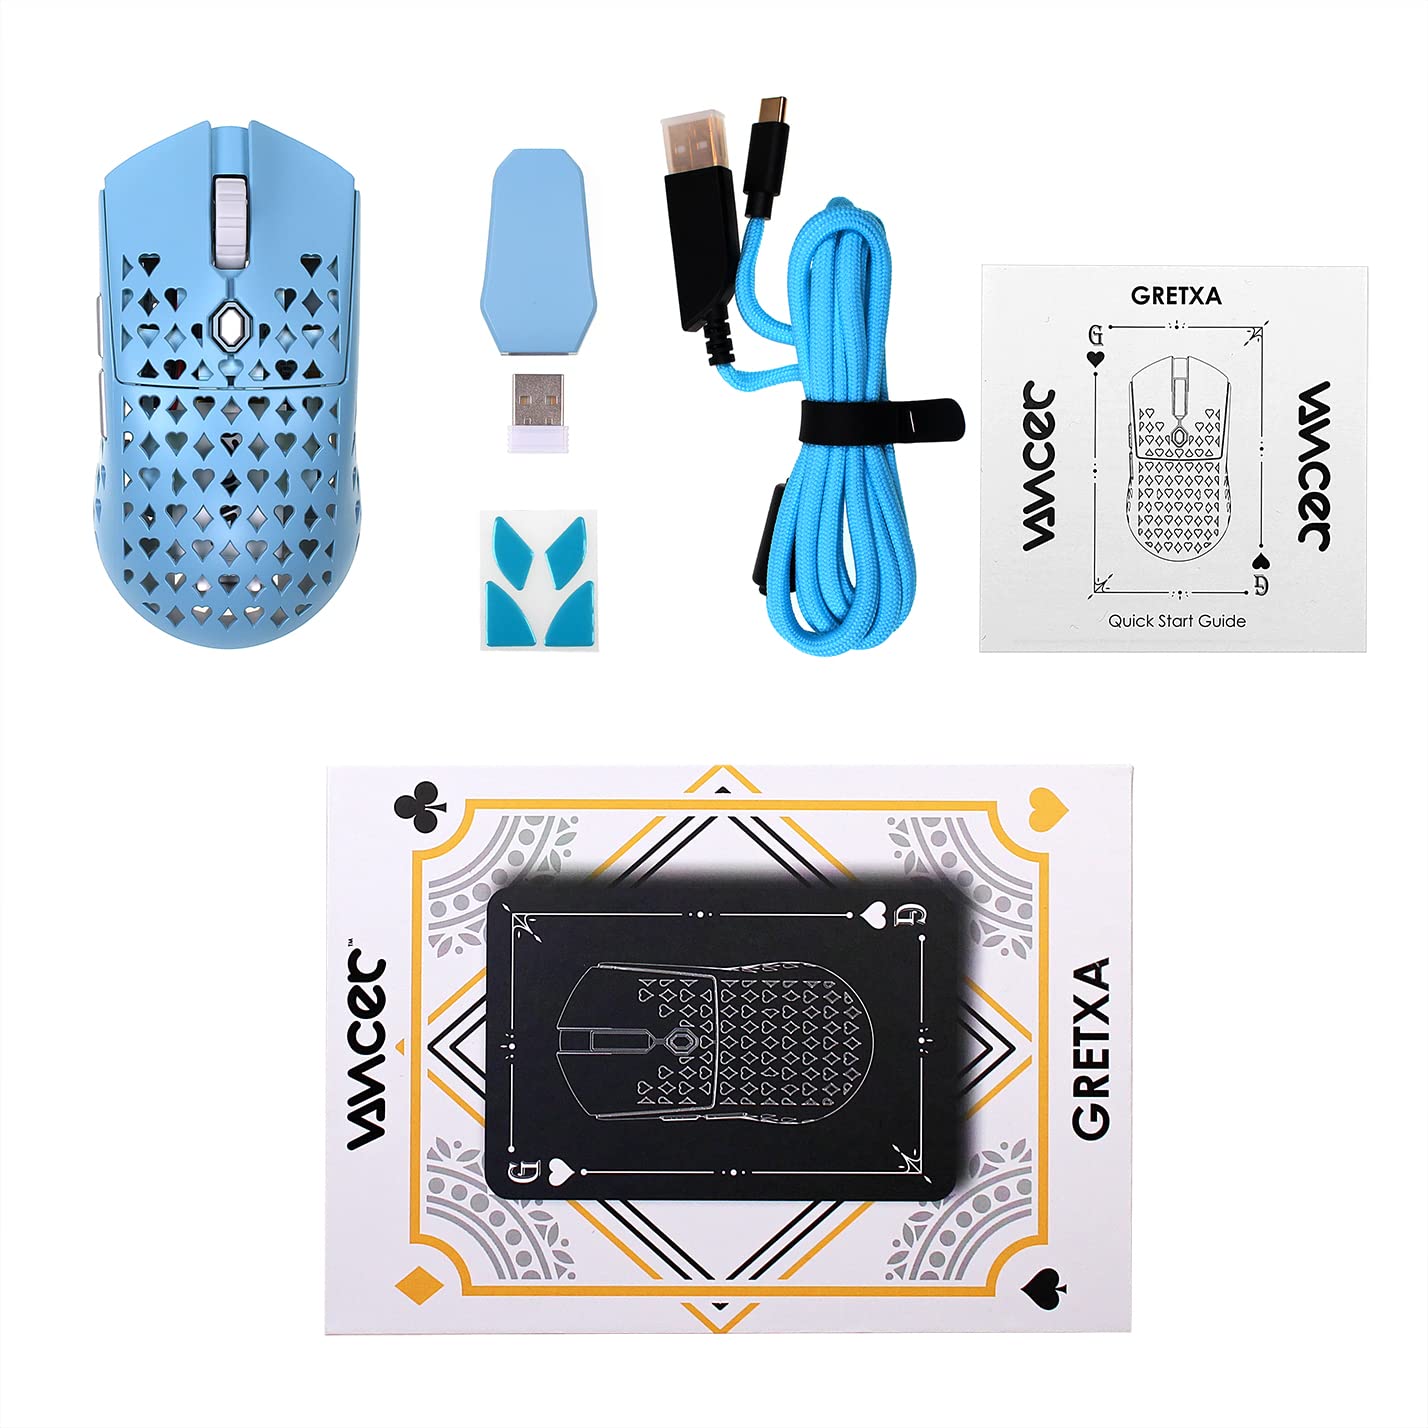
The Vancer Gretxa Wireless Ultralight Gaming Mouse package includes the following items:
- Vancer Gretxa Wireless Gaming Mouse
- USB-C to USB-A Charging Cable (Red)
- USB Extension Dongle
- Alailowaya olugba Dongle
- Extra Set of PTFE Skates
- Quick Bẹrẹ Itọsọna
2. Eto
2.1 Connecting the Wireless Receiver
- Locate the wireless receiver dongle.
- Plug the receiver dongle into an available USB-A port on your computer. For optimal signal strength, use the provided USB extension dongle to place the receiver closer to the mouse.
- Turn on the mouse using the power switch located on the underside of the mouse.
- Your computer should automatically detect the mouse. No additional drivers are typically required for basic functionality on Windows 10.
2.2 Gbigba agbara si Asin
The Vancer Gretxa mouse is equipped with a rechargeable Lithium Ion battery.
- Connect the USB-C end of the charging cable to the front port of the mouse.
- Connect the USB-A end of the charging cable to an available USB-A port on your computer or a USB wall adapter.
- A le lo Asin ni ipo waya nigba ti o ba n gba agbara.
- A full charge typically takes a few hours. The LED indicator on the mouse will change to indicate charging status (refer to the Quick Start Guide for specific LED behaviors).

2.3 Optional Software Installation
For advanced customization, such as remapping buttons, adjusting DPI steps, or configuring macros, Vancer may provide optional software. Please visit the official Vancer website for the latest software downloads and installation instructions. Note that some features like RGB lighting may be tied to DPI settings.
3. Awọn ilana Iṣiṣẹ
3.1 Àwọn Iṣẹ́ Àkọ́kọ́ Asin
- Tẹ osi: Bọtini igbese akọkọ.
- Tẹ-ọtun: Bọ́tìnì ìgbésẹ̀ kejì, nígbà míìrán fún àwọn àkójọ àṣàyàn.
- Yi lọ Kẹkẹ: Ó ń yí àkóónú padà ní ìdúró. Ó tún lè tẹ̀ ẹ́ fún iṣẹ́ títẹ̀ àárín.
- Awọn bọtini ẹgbẹ: A maa n lo o fun lilọ kiri siwaju/sẹhin ninu web browsers or customizable functions in games/software.
- Bọtini DPI: Àwọn ìyípo nípasẹ̀ àwọn ìpele ìfàmọ́ra DPI tí a ti ṣètò tẹ́lẹ̀.

3.2 DPI Atunṣe
The Vancer Gretxa mouse features a dedicated DPI button, usually located behind the scroll wheel or on the underside, to cycle through different sensitivity settings. The default DPI steps are 400, 800, 1800, 3200, 4800, and 6400. Each step may correspond to a different LED color for visual indication. Press the DPI button to switch between these settings to find your preferred sensitivity.
3.3 Idibo Oṣuwọn Atunse
The polling rate determines how often the mouse reports its position to the computer. The Gretxa mouse supports polling rates of 125Hz (8ms), 500Hz (2ms), and 1000Hz (1ms). Higher polling rates generally provide smoother tracking and lower latency. Adjustment of the polling rate is typically done via the optional Vancer software.
3.4 Ti firanṣẹ Ipo
When the USB-C charging cable is connected to the mouse and your computer, the mouse will automatically switch to wired mode. This allows for continuous use even if the battery is depleted, and can be preferred for competitive gaming to eliminate any potential wireless interference.
4. Itọju
4.1 Nmu Asin Rẹ
Wíwẹ̀ déédéé ń ran lọ́wọ́ láti máa ṣiṣẹ́ dáadáa àti láti mọ́ tónítóní.
- Òde: Lo asọ rirọ, ti ko ni lint ni sere dampened pẹlu omi tabi kan ìwọnba ninu ojutu. Yago fun awọn kẹmika lile.
- Sensọ: Gently clean the optical sensor on the underside of the mouse with a cotton swab or compressed air to remove dust and debris.
- Yi lọ Kẹkẹ: Use compressed air to clear any dust or particles that may accumulate around the scroll wheel mechanism.
4.2 Replacing PTFE Skates
The Vancer Gretxa mouse comes with high-quality PTFE skates for smooth gliding. Over time, these may wear down. An extra set of PTFE skates is included in your package for replacement.
- Carefully peel off the old PTFE skates using a thin, non-abrasive tool.
- Ensure the surface where the skates were is clean and free of adhesive residue.
- Peel the backing from the new PTFE skates and carefully align them with the recesses on the mouse's underside.
- Tẹ ṣinṣin lati rii daju ifaramọ to dara.

4.3 batiri Itọju
- Yago fun gbigba agbara si batiri ni kikun nigbagbogbo.
- Tọju Asin ni itura, aye gbigbẹ nigbati o ko ba lo fun awọn akoko ti o gbooro sii.
- Use only the provided charging cable or a certified USB-C cable to prevent damage.
5. Laasigbotitusita
If you encounter issues with your Vancer Gretxa mouse, please refer to the following common solutions:
| Isoro | Owun to le Solusan |
|---|---|
| Asin ko dahun |
|
| Gbigbe kọsọ jẹ aiṣiṣẹ tabi fo |
|
| Awọn bọtini tabi kẹkẹ yi lọ ko ṣiṣẹ |
|
| Aye batiri ti ko dara |
|
6. Awọn pato
Below are the technical specifications for the Vancer Gretxa Wireless Ultralight Gaming Mouse:
| Ẹya ara ẹrọ | Ẹ̀kúnrẹ́rẹ́ |
|---|---|
| Awoṣe | Gretxa |
| Asopọmọra | 2.4GHz Wireless, USB-C (Wired) |
| Sensọ | Pixart 3370 sensọ opitika |
| Iwọn | O fẹrẹ to 69g |
| Awọn iwọn (L x W x H) | 123 x 62 x 37mm |
| Awọn Eto DPI | 400 / 800 / 1800 / 3200 / 4800 / 6400 (Adjustable) |
| Idibo Oṣuwọn | 125Hz / 500Hz / 1000Hz |
| LOD (Ijina gbigbe) | 2mm (default), 1mm (adjustable via software) |
| Yipada | TTC Gold Switches (V2 improvement) |
| Skates | PTFE |
| Batiri Iru | Lithium ion (1 pẹlu) |
| Eto isesise | Windows 10 (and compatible with other modern OS) |
| Awọn ẹrọ ibaramu | Kọmputa ti ara ẹni |
7. Atilẹyin ọja ati Support
7.1 atilẹyin ọja Alaye
For the most current and detailed warranty information regarding your Vancer Gretxa Wireless Ultralight Gaming Mouse, please refer to the official Vancer website or the warranty card included with your product. Warranty terms and conditions, including duration and coverage, may vary by region and are subject to change by the manufacturer.
7.2 Onibara Support
If you require further assistance, have questions not covered in this manual, or need technical support, please visit the official Vancer webO le ri awọn ibeere ti a beere nigbagbogbo, awọn igbasilẹ awakọ, ati alaye olubasọrọ fun iṣẹ alabara nibẹ.
