
Roxicosly CR1018
Ìwé Ìtọ́sọ́nà Olùlò Aago Aago Aago Roxicosly Digital
Awoṣe: CR1018
1. Ifihan
Thank you for choosing the Roxicosly Digital Alarm Clock. This device is designed to provide accurate timekeeping, reliable alarm functions, and convenient charging capabilities for your mobile devices. Featuring a large LED display and user-friendly controls, this manual will guide you through the setup, operation, and maintenance of your new alarm clock.
2. Awọn ẹya Ọja
- 8.7" LED Display with 7-Level Dimmer: Large digits for clear visibility from a distance, with adjustable brightness to suit day and night viewing.
- Aago Itaniji meji: Set two separate alarms for different schedules.
- 2 Awọn ibudo gbigba agbara USB: Conveniently charge two mobile devices simultaneously.
- 7-Level Adjustable Volume: Customize alarm volume from 92-110dB.
- Large Snooze Button: Ó fúnni ní oorun tó pọ̀ sí i fún ìṣẹ́jú mẹ́sàn-án.
- Agbara AC pẹlu Afẹyinti Batiri: Requires AC power for operation, with a CR2032 coin cell battery (included) to retain time and alarm settings during power outages.
- 12/24H & DST Support: Switch between 12-hour and 24-hour time formats, and enable/disable Daylight Saving Time.
3. Package Awọn akoonu
- Roxicosly Digital Alarm Clock (Model: CR1018)
- CR2032 Coin Cell Battery (pre-installed)
- Ngba agbara USB
- Adapter agbara
- Itọsọna olumulo
4. Eto Itọsọna
4.1 Asopọ agbara
Connect the provided charging cable to the DC IN 5V port on the back of the alarm clock. Plug the power adapter into a standard AC outlet (100-240V). The display will light up, indicating the clock is powered on.
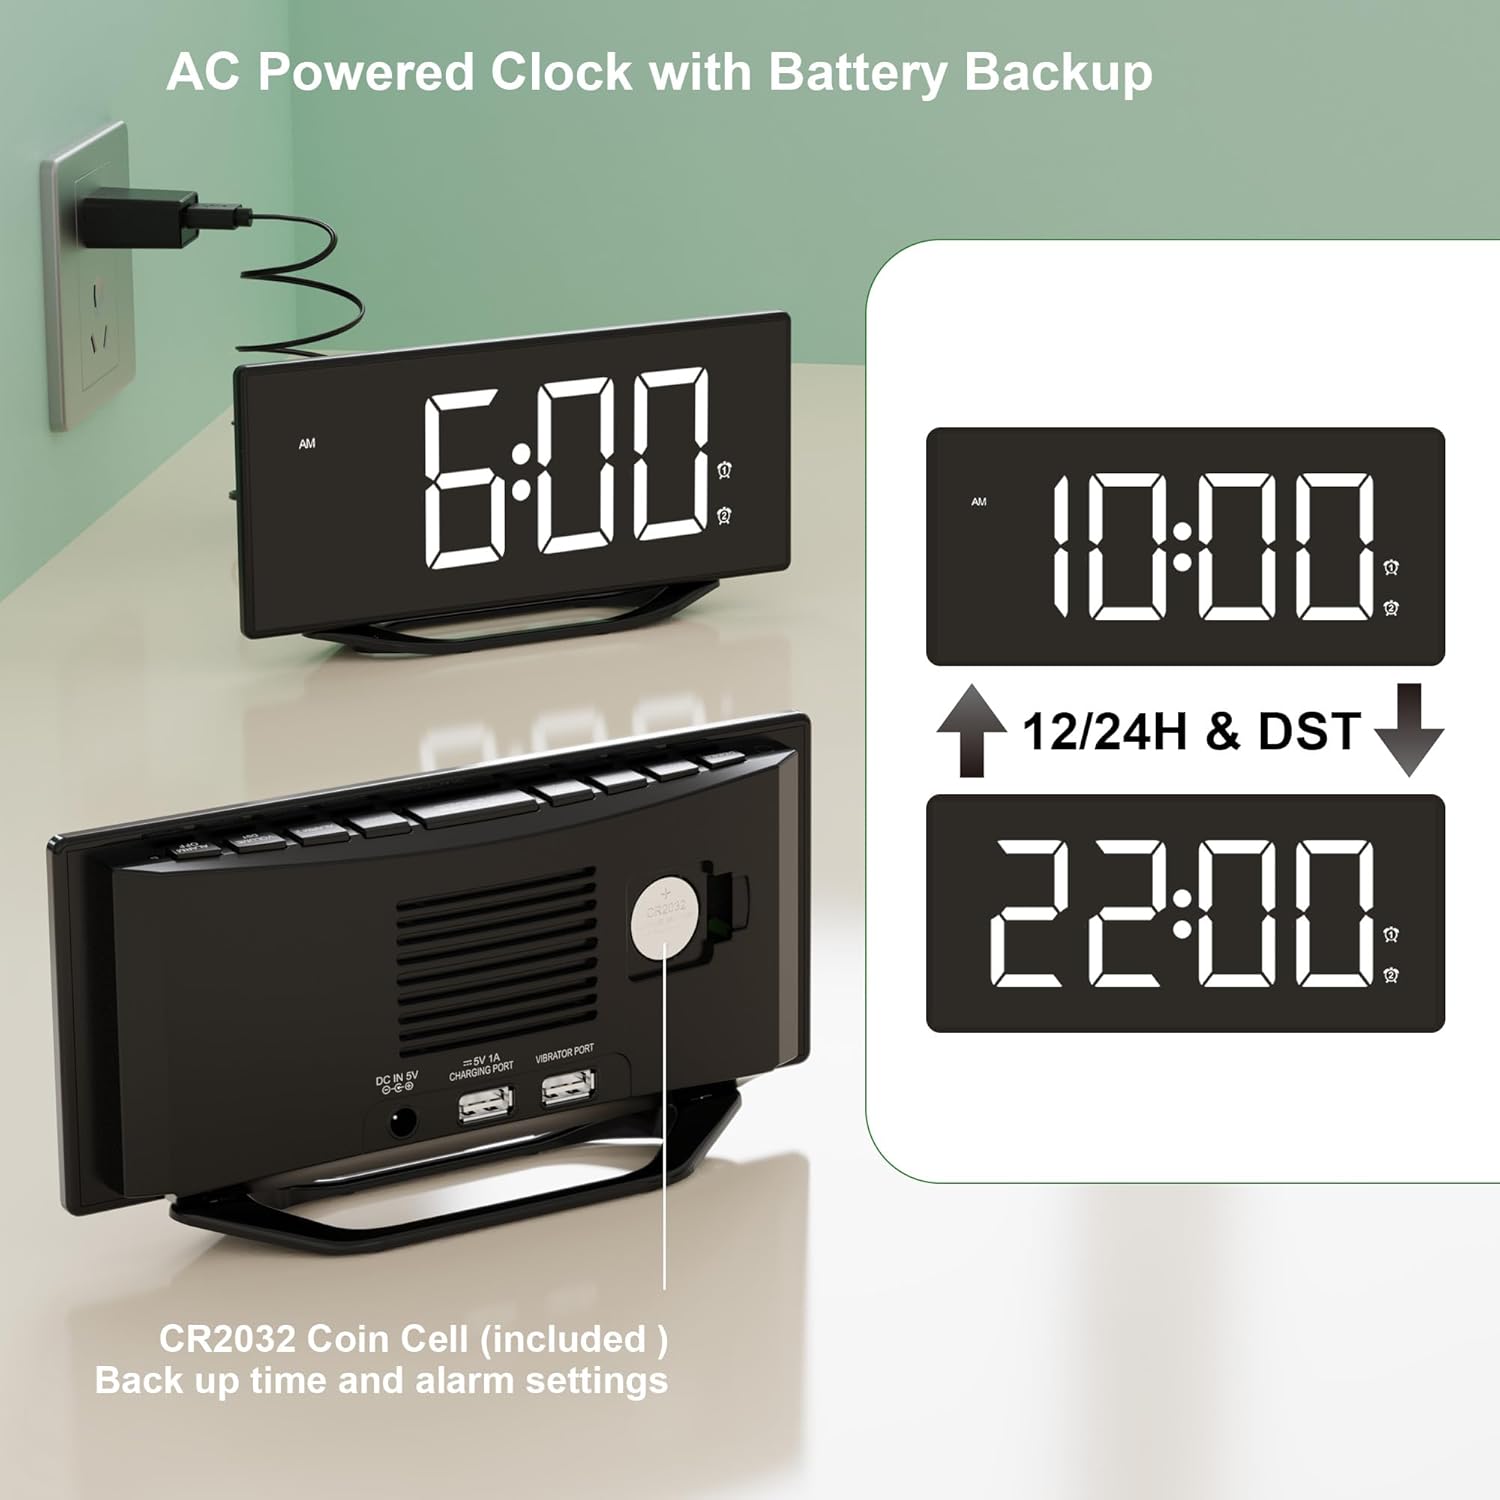
Image: The alarm clock connected to a wall outlet via its power adapter, illustrating the AC power connection.
4.2 Battery Backup
A CR2032 coin cell battery is pre-installed to provide backup power. This battery ensures that time and alarm settings are retained during a power outage. The clock will not display time or function without AC power, but settings will be saved.

Aworan: Ẹyin view of the clock highlighting the CR2032 battery compartment, indicating its role in backing up settings.
5. Awọn ilana Iṣiṣẹ
5.1 Ṣiṣeto Aago naa
- Tẹ awọn Akoko SET button once. The hour digits will begin to flash.
- Lo awọn WAKATI bọtini lati ṣatunṣe wakati naa.
- Tẹ awọn ISEJU bọtini lati ṣatunṣe iṣẹju.
- Tẹ Akoko SET lẹẹkansi lati jẹrisi ati ipo eto akoko jade.
5.2 Ṣíṣeto Awọn Itaniji (Alarm 1 & Itaniji 2)
This clock features two independent alarms.
- Tẹ awọn OOGUN 1 or OOGUN 2 button once. The corresponding alarm time will flash.
- Lo awọn WAKATI bọtini lati ṣeto aago itaniji ti o fẹ.
- Lo awọn ISEJU bọtini lati ṣeto iṣẹju itaniji ti o fẹ.
- Tẹ OOGUN 1 or OOGUN 2 again to confirm the alarm time. The alarm icon (1 or 2) will appear on the display, indicating the alarm is active.
- To turn off an alarm, press the corresponding OOGUN 1 or OOGUN 2 bọtini titi aami itaniji yoo parẹ lati ifihan.

Image: Illustration of the dual alarm functionality, allowing for two distinct alarm settings.
5.3 Siṣàtúnṣe Ifihan Imọlẹ
The display has 7 levels of brightness. Press the DIMMER button repeatedly to cycle through the brightness levels from brightest to dimmest. Select the level that is most comfortable for your environment.

Image: Visual representation of the 7-level display brightness settings.
5.4 Ṣíṣe àtúnṣe iwọn didun itaniji
The alarm volume can be adjusted to 7 levels. When an alarm is sounding, or while setting an alarm, press the Iwọn didun button to cycle through the volume levels. Choose a volume suitable for your needs.

Image: Detail of the volume control button on the clock's interface.
5.5 Iṣiṣẹ Snooze
Tí ìró ìró bá dún, tẹ ìró ńlá náà ṢEGBE button located on top of the clock. The alarm will pause for 9 minutes and then sound again. You can repeat this process until you press the corresponding ALARM PA button to fully deactivate the alarm.

Image: A user activating the snooze function by pressing the large button on top of the clock.
5.6 Awọn ibudo Ngba agbara USB
The clock is equipped with two USB output ports (5V/1A) on the back, allowing you to charge your smartphones, tablets, or other USB-powered devices. Simply connect your device's USB charging cable to one of the ports.

Image: The alarm clock actively charging two mobile devices via its integrated USB ports.
5.7 12/24H Format & DST
Láti yípadà láàrín àwọn ọ̀nà ìgbà wákàtí méjìlá sí wákàtí mẹ́rìnlélógún, tẹ ẹ̀rọ náà 12/24H button. When in 12-hour format, 'AM' or 'PM' indicators will be displayed. To enable or disable Daylight Saving Time (DST), press the DST button. When DST is active, the time will adjust by one hour, and the 'DST' indicator will appear on the display.

Image: Comparison of the clock display in 12-hour and 24-hour formats.
6. Itọju
To ensure the longevity and optimal performance of your alarm clock, follow these maintenance guidelines:
- Ninu: Wipe the clock with a soft, dry cloth. Do not use abrasive cleaners, waxes, or solvents as they may damage the finish.
- Ibi: Gbé aago náà sí orí ilẹ̀ tí ó dúró ṣinṣin, tí ó jìnnà sí oòrùn tààrà, ooru púpọ̀, tàbí ọ̀rinrin.
- Rirọpo Batiri: If the CR2032 backup battery needs replacement, carefully open the battery compartment on the back of the unit and insert a new CR2032 battery, observing polarity.
7. Laasigbotitusita
| Isoro | Owun to le Fa | Ojutu |
|---|---|---|
| Ifihan ti ṣofo tabi ko tan ina. | No AC power; Power adapter faulty; Dimmer set to lowest level. | Ensure power adapter is securely plugged into the clock and a working outlet. Check the power outlet. Press the DIMMER button to increase brightness. |
| Itaniji ko dun. | Alarm not set or deactivated; Volume set too low. | Verify alarm icon (1 or 2) is visible on the display. Re-set the alarm if necessary. Increase alarm volume using the VOLUME button. |
| Gbigba agbara USB ko ṣiṣẹ. | Device not properly connected; Cable faulty; Device requires more power than 1A. | Ensure USB cable is firmly connected to both the clock and the device. Try a different USB cable. Note that the ports provide 5V/1A, which may not be sufficient for all devices (e.g., some tablets). |
| Atunse akoko/eto lẹhin agbara outage. | CR2032 backup battery is dead or missing. | Replace the CR2032 coin cell battery. Ensure it is inserted with correct polarity. |
8. Awọn pato
- Brand: Roxicosly
- Nọmba awoṣe: CR1018
- Àwọ̀: Black (non-mirror Surface)
- Awọn iwọn ọja: 19.79 x 10.21 x 4.42 cm
- Ìwọ̀n Nkan: 300 g
- Ohun elo: Ṣiṣu
- Iru ifihan: LED
- Orisun Agbara: AC (100-240V)
- Batiri Afẹyinti: 1 x CR2032 Coin Cell (included)
- Ijade USB: 2 x 5V/1A ports
- Awọn ẹya pataki: 7-level Dimmer, Dual Alarm, Dual USB Charging Ports, Snooze, 12/24H & DST
9. Atilẹyin ọja ati Support
For warranty information or technical support, please refer to the purchase documentation or contact the seller/manufacturer directly. Keep your proof of purchase for any warranty claims.
Ask a question about this manual
Ask about setup, troubleshooting, compatibility, parts, safety, or missing instructions. Manuals+ will review the question and use this page’s manual context to help answer it.