
1. Ifihan
Thank you for choosing the Vandlion V15 64GB Voice Recorder. This compact and versatile device is designed for high-quality audio recording in various settings, including meetings, lectures, and interviews. This manual provides comprehensive instructions to help you set up, operate, and maintain your device effectively.
The Vandlion V15 features a large 64GB storage capacity, capable of storing up to 750 hours of recordings, and offers up to 50 hours of continuous recording on a single charge. It incorporates advanced PCM noise reduction technology and a 360° stereo microphone for clear audio capture.

Image: A man using the compact Vandlion V15 voice recorder while working on a laptop, highlighting its portability and ease of use in professional and study environments.
2. Ọja Ipariview
2.1. Package Awọn akoonu
Upon unboxing your Vandlion V15 Voice Recorder, please ensure all items are present:
- Vandlion V15 Voice Recorder
- Awọn agbekọri
- Ngba agbara USB/Okun data
- OTG Adapter (for Android phone connection)
- User Manual (digital copy on device)
- Lanyard

Image: The Vandlion V15 Voice Recorder box, displaying the device, earphones, USB cable, and adapters, illustrating the complete package contents.
2.2. Ifilelẹ ẹrọ ati Awọn ẹya ara ẹrọ
The V15 recorder is designed for simplicity and portability. It is ultra-miniature, thin, and lightweight (approximately 21g), making it easy to carry in a pocket or wallet.

Aworan: A sunmọ-soke view of the sleek, blue-black Vandlion V15 Voice Recorder, showcasing its compact design and minimalist controls.
- ON/PA Yipada: Located on the side for quick recording activation.
- Gbohungbohun: Integrated 360° stereo microphone for high-quality audio capture.
- Ibudo USB: For charging and connecting to a computer or Android phone.
- Jack agbekọri (3.5mm): For private playback of recordings.
- Imọlẹ Atọka: Provides status feedback (e.g., recording, charging).

Image: The Vandlion V15 Voice Recorder held between two fingers, emphasizing its extremely thin profile (only 6mm) and small dimensions (6*32*54 mm).

Image: An illustration highlighting the 3-in-1 functionality of the Vandlion V15: Voice Recorder, U-Disk (USB storage), and MP3 Player.
2.3. Key Awọn ẹya ara ẹrọ
- Iranti inu 64GB: Stores up to 750 hours of recording files.
- 50 Hours Battery Life: Built-in 200mAh battery provides extended recording time after a 2.5-hour full charge. Supports recording while charging.
- PCM Noise Reduction: Equipped with a 10-core noise reduction chip and 360° stereo microphone for HQ sound quality up to 384 kbps.
- Gbigbasilẹ Ohun ti a Mu Ṣiṣẹ (VOR): Automatically starts recording when sound is detected and pauses when silent, saving power and storage space. (Default: OFF)
- Isẹ-Kọtini Kan: Yiyi ifaworanhan ti o rọrun fun gbigbasilẹ lẹsẹkẹsẹ ati fifipamọ.
- Automatic Data Protection: Automatically saves recordings when the battery is low.

Image: A visual summary of the Vandlion V15's core features: 64GB internal memory with voice activation, 750 hours recording capacity, and 40-50 hours of battery life.
3. Eto
3.1. Ikọju akọkọ
Before first use, fully charge the device. Connect the recorder to a USB power source (e.g., computer USB port, wall adapter) using the provided USB cable. The indicator light will show charging status.
3.2. Time Synchronization and Advanced Settings (RECSET.txt)
The device's time and advanced recording parameters can be configured by modifying the RECSET.txt file located on the recorder when connected to a computer. Ensure the recorder is switched to PAA before connecting to a computer.
Lati wọle ati tun awọn eto pada:
- Switch the recorder to the PAA ipo.
- Connect the recorder to your computer using the USB cable. It will appear as a removable disk (e.g., "USB DISK").
- Open the "USB DISK" drive and locate the
RECSET.txtfile. - Ṣii
RECSET.txtwith a plain text editor (e.g., Notepad on Windows, TextEdit on Mac). - Modify the desired parameters as described below.
- Fipamọ awọn
RECSET.txtfile and safely eject the recorder from your computer.
Parameters in RECSET.txt:
- Time:YYYYMMDDHHMMSS
This sets the device's internal clock. Modify the numbers to match your current date and time. For example,Time:20231027143000for October 27, 2023, 2:30 PM. - Gain:X (Adjust recording sensitivity 0-7, Advice:5)
Adjusts microphone sensitivity. A higher number (up to 7) increases sensitivity, capturing quieter sounds but potentially more background noise. A lower number reduces sensitivity. A setting of 5 is recommended for general use to balance sound capture and ambient noise reduction. - Vor:X (0 means voice activated mode is off, 1-10 means is on, Advice:0)
Controls Voice Activated Recording (VOR). 0 disables VOR. Numbers 1-10 enable VOR, with lower numbers requiring less sound to activate recording. For example, 1 is very sensitive, 10 is less sensitive. A setting of 1 or 2 is recommended if VOR is desired. - Bit:X (0-32kbps, 1-64kbps, 2-128kbps, 3-192kbps, 4-384kbps, Advice:3)
Sets the recording bitrate (audio quality). Higher bitrates result in clearer sound but larger file sizes and shorter battery life. Lower bitrates save space and battery but reduce audio quality. 3 (192kbps) is generally recommended for good balance. - PART:X (Recording file division, Adjustment 0-240 minutes, 0 meaning 8 hours, Advice:0)
Divides recordings into segments. 0 means recordings are saved in 8-hour segments. A number from 1-240 sets the segment duration in minutes. For example,PART:60saves recordings in 60-minute segments. No change is recommended for continuous recording.
3.3. Synchronizing Time (Windows Only)
For Windows users, a dedicated tool is provided to synchronize the recorder's time with your computer's time automatically.
- Ensure the recorder is switched to PAA and connected to your computer.
- Open the "USB DISK" drive and navigate to the
Settimefolda. - Ṣiṣe awọn
SetDigitRecorderTm.exeohun elo. - Click the "Settime" button in the application to synchronize the time.
Video: This video demonstrates the unboxing of the Vandlion V15 Voice Recorder, its basic operation (ON/OFF switch, headphone jack), and how to connect it to a computer to adjust settings via the RECSET.txt file for both Windows and Mac operating systems. It also shows how to use the provided accessories like earphones and the lanyard.
4. Ipilẹ isẹ
4.1. One-Key Recording
The Vandlion V15 features a simple one-key operation for recording:
- To start recording, slide the ON/OFF switch to the ON position. The indicator light will flash briefly, then turn off, indicating recording has begun.
- To save the recording and stop, slide the ON/OFF switch to the PAA position. The indicator light will flash, and the file yoo wa ni fipamọ laifọwọyi.

Image: A hand demonstrating the simple one-key operation of the Vandlion V15 Voice Recorder, highlighting the ON/OFF switch for quick recording and saving.
4.2. Playback with Earphones
To listen to your recordings directly from the device:
- Ensure the recorder is in the PAA ipo.
- Connect the provided earphones to the 3.5mm headphone jack.
- Slide the ON/OFF switch to the ON position. The device will automatically begin playing the last recorded file.
- Use the inline remote control on the earphone cable to adjust volume, skip tracks, or pause playback.
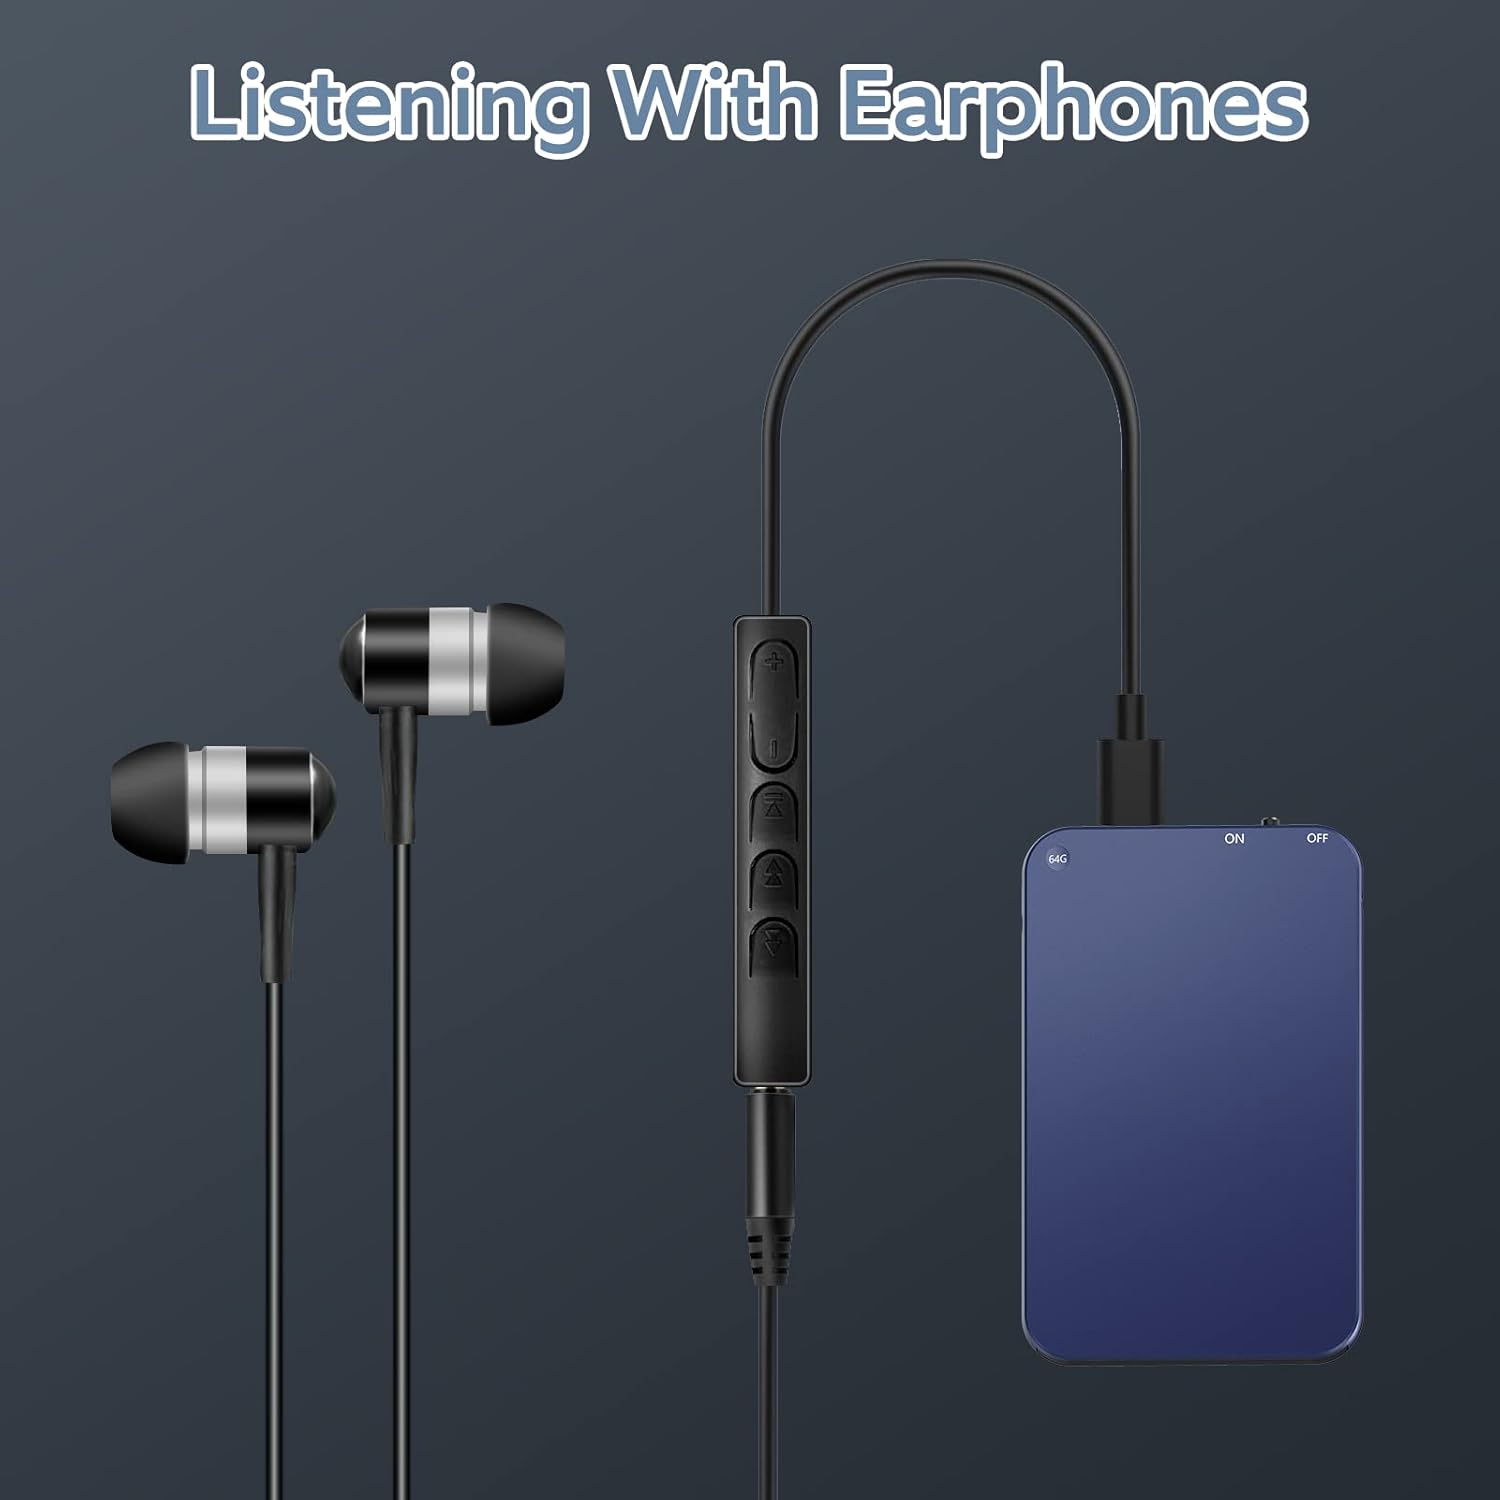
Image: The Vandlion V15 Voice Recorder connected to earphones, illustrating the direct playback feature for reviewing recordings privately.
5. Awọn ẹya ara ẹrọ ti ilọsiwaju
Advanced settings such as Voice Activated Recording (VOR) sensitivity, recording quality (bitrate), and segment recording duration can be adjusted via the RECSET.txt file bi apejuwe ninu Ṣeto section. Remember to save changes to RECSET.txt and safely eject the device after modification.
5.1. Voice Activated Recording (VOR)
When VOR is enabled (Vor:1-10 in RECSET.txt), the recorder will automatically start recording when it detects sound above a certain decibel level and pause when there is no sound. This feature helps conserve battery life and storage space by eliminating silent periods in your recordings.
5.2. Recording Quality (Bitrate)
Siṣàtúnṣe awọn Bit paramita ni RECSET.txt allows you to choose between different audio quality levels. A higher bitrate (e.g., 384kbps) provides superior sound clarity but consumes more storage and battery. A lower bitrate (e.g., 32kbps) is suitable for longer recordings where absolute fidelity is not critical.
5.3. Segment Recording
Awọn PART paramita ni RECSET.txt allows you to divide long recordings into smaller, more manageable files. This can be useful for organizing recordings or for platforms that have file size limits. Setting PART:0 will save recordings in 8-hour segments, while setting a value like PART:60 will create new files every 60 minutes.
6. Connecting to PC/Phone
The Vandlion V15 can be connected to a computer (Windows/Mac) or an Android phone to manage your recorded files.
6.1. Connecting to a Computer (Windows/Mac)
- Ensure the recorder is switched to the PAA ipo.
- Connect the recorder to your computer using the provided USB cable.
- The device will be recognized as a removable disk (e.g., "USB DISK").
- Open the drive to access your recorded files, which are typically in
.WAVformat, located in theRECORDfolda. - You can copy, move, delete, or rename files bi o ti nilo.
- After managing files, safely eject the "USB DISK" before disconnecting the recorder.
6.2. Connecting to an Android Phone
To connect to an Android phone, use the provided OTG adapter:
- Ensure the recorder is switched to the PAA ipo.
- Connect the recorder to the OTG adapter, then connect the adapter to your Android phone.
- Your phone should recognize the recorder as an external USB device. You may need to enable OTG functionality in your phone's settings if it doesn't automatically detect it.
- Use your phone's file manager to access and manage the recorded files.

Image: An illustration demonstrating the connectivity options for the Vandlion V15 Voice Recorder, showing it connected to both a laptop via USB and an Android phone via an OTG adapter.
7. Itọju
7.1. Itọju batiri
- Charge the device fully before extended periods of non-use.
- Má ṣe jẹ́ kí batiri náà máa gbẹ pátápátá nígbà gbogbo kí ó lè pẹ́ sí i.
- The device supports recording while charging, which can be useful for very long sessions.
- In case of low battery during recording, the device will automatically save the current file before powering off to prevent data loss.

Image: An illustration depicting the low battery protection feature of the Vandlion V15, showing the device automatically saving files when battery power is critically low.
7.2. Ibi ipamọ Management
With 64GB of storage, the device can hold a significant amount of audio. Regularly transfer important files to your computer or cloud storage to prevent data loss and free up space for new recordings.
7.3. Ninu
Wipe the device with a soft, dry cloth. Avoid using liquid cleaners or abrasive materials that could damage the device.
8. Laasigbotitusita
- Ẹrọ ti ko tan: Rii daju pe batiri ti gba agbara. Sopọ si orisun agbara ati gbiyanju lẹẹkansi.
- Didara gbigbasilẹ ti ko dara: Ṣayẹwo awọn
GainatiBiteto niRECSET.txt. AlekunGainfor quieter environments or decrease for noisy ones. IncreaseBitfor higher quality. Ensure the microphone is not obstructed. - Voice Activated Recording not working as expected: Ṣayẹwo awọn
Voreto niRECSET.txt. Adjust the sensitivity (1-10) to suit your environment. - Ko le ri files on computer/phone: Ensure the recorder is switched to PAA before connecting. For Windows, ensure your default media player supports WAV files (Windows Media Player is recommended over Groove Music). For Android, ensure OTG is enabled in your phone's settings.
- Time is incorrect on recordings: Follow the time synchronization steps in the Ṣeto apakan.
If you encounter persistent issues, please refer to the official Vandlion support resources or contact customer service.
9. Awọn pato
| Ẹya ara ẹrọ | Sipesifikesonu |
|---|---|
| Brand | Vandlion |
| Nọmba awoṣe | V15 |
| Agbara iranti | 64 GB |
| Gbigbasilẹ kika | WAV |
| gbohungbohun Technology | Stereo, Integrated |
| Batiri Iru | Litiọmu-íọ́nù (200mAh) |
| Igbesi aye batiri (Gbigbasilẹ) | Isunmọ. 40-50 wakati |
| Akoko gbigba agbara | Isunmọ. wakati meji 2.5 |
| Awọn isopọ | USB, Jack agbekọri 3.5mm |
| Awọn ẹrọ ibaramu | Android / Windows / Mac |
| Iwọn | 21 giramu |
10. Atilẹyin ọja ati Support
10.1. Atilẹyin ọja olupese
The Vandlion V15 Voice Recorder comes with a 1-year manufacturer's warranty. Please retain your proof of purchase for any warranty claims.
10.2. Onibara Support
For any questions, technical assistance, or issues not covered in this manual, please contact Vandlion customer support through your retailer's platform or the official Vandlion website. Our team is dedicated to providing prompt and helpful solutions.