
1. Ifihan
This manual provides detailed instructions for the installation, operation, and troubleshooting of your PEMP Ultra-Thin 12.3-inch Display Head Unit. Please read this manual thoroughly before installation and use to ensure proper functionality and safety.
2. Alaye Aabo
- Agbara Pa: Ensure the vehicle's power is completely off before beginning any installation or wiring procedures.
- Fifi sori Ọjọgbọn: If you are unsure about any part of the installation process, it is recommended to seek professional assistance.
- Iṣakoso USB: Secure all cables to prevent interference with vehicle operation or damage.
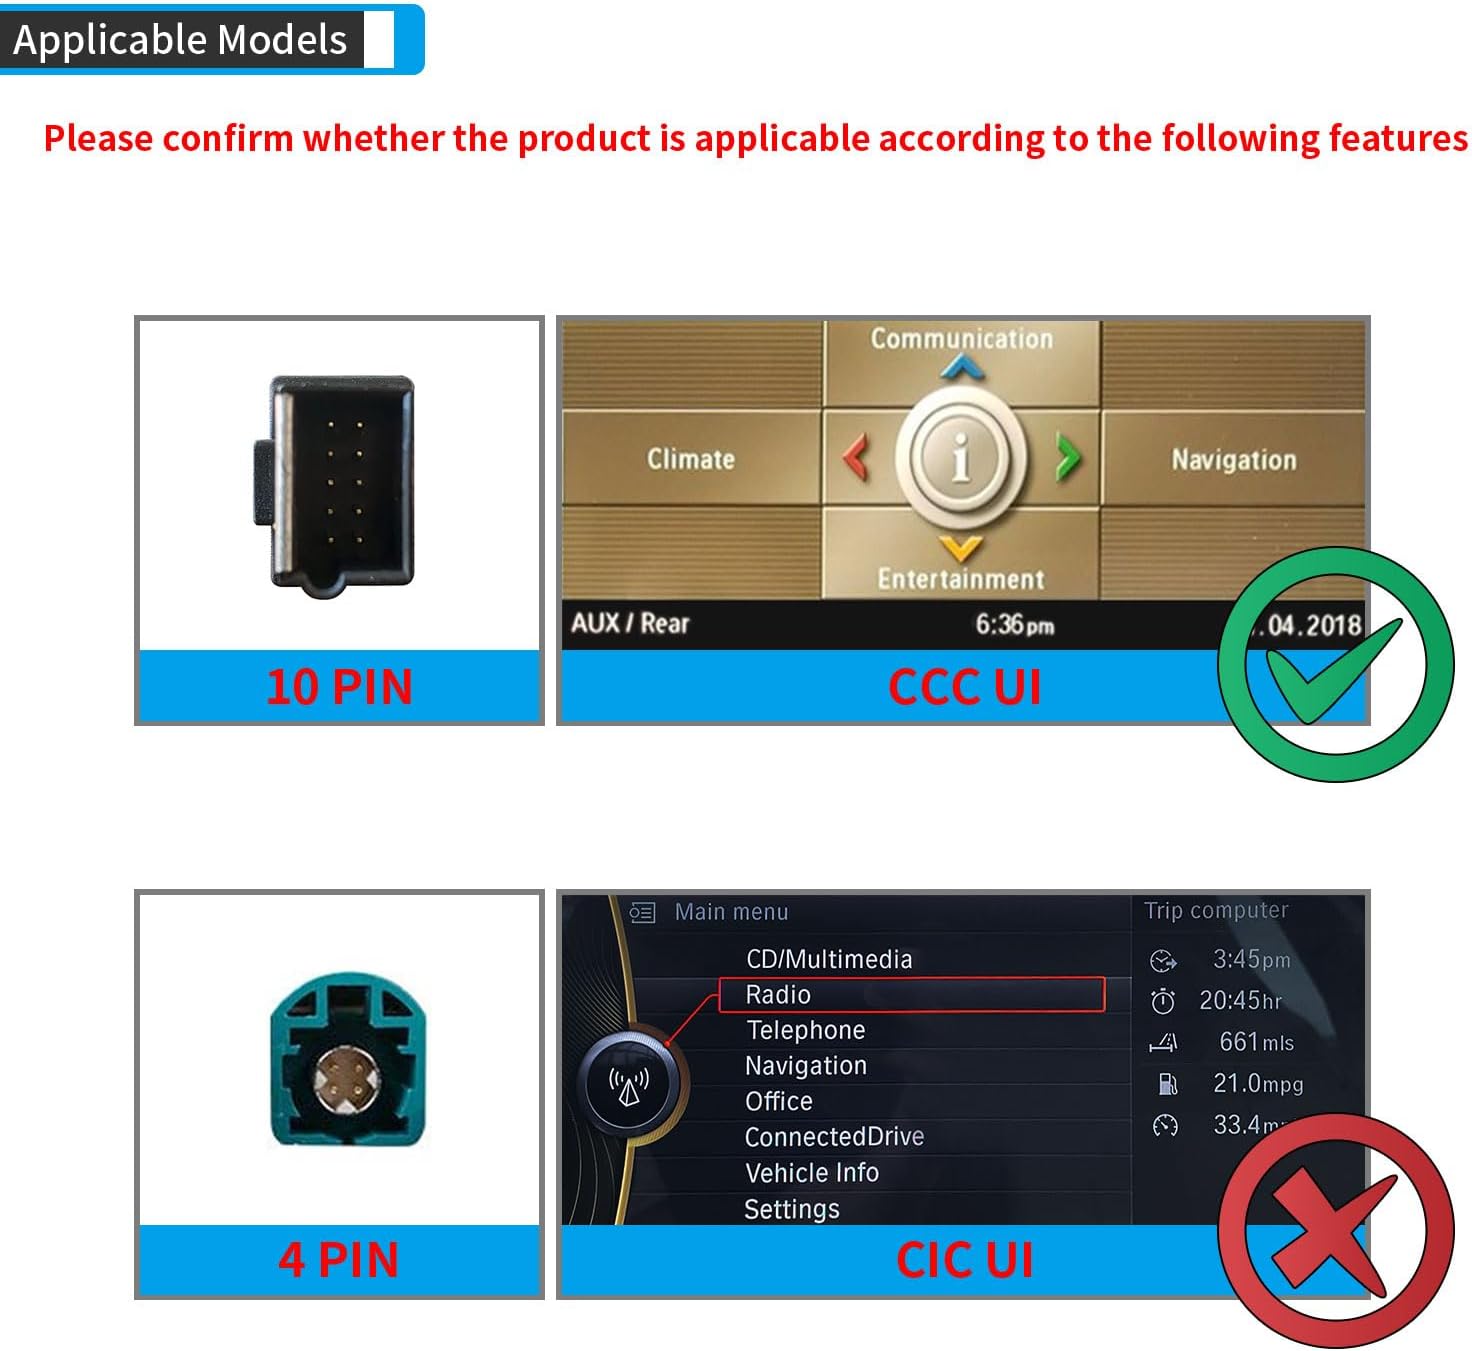
- Ibamu: This unit is specifically designed for BMW 2005-2010 E60 3 Series vehicles with the CCC Original 10 PIN LVDS system. Verify your vehicle's compatibility before installation.
3. Ibamu
This PEMP Ultra-Thin 12.3-inch Display Head Unit is compatible with:
- Awọn awoṣe Ọkọ: BMW 5 Series E60 (2005-2010)
- Original System: CCC Original 10 PIN LVDS system.
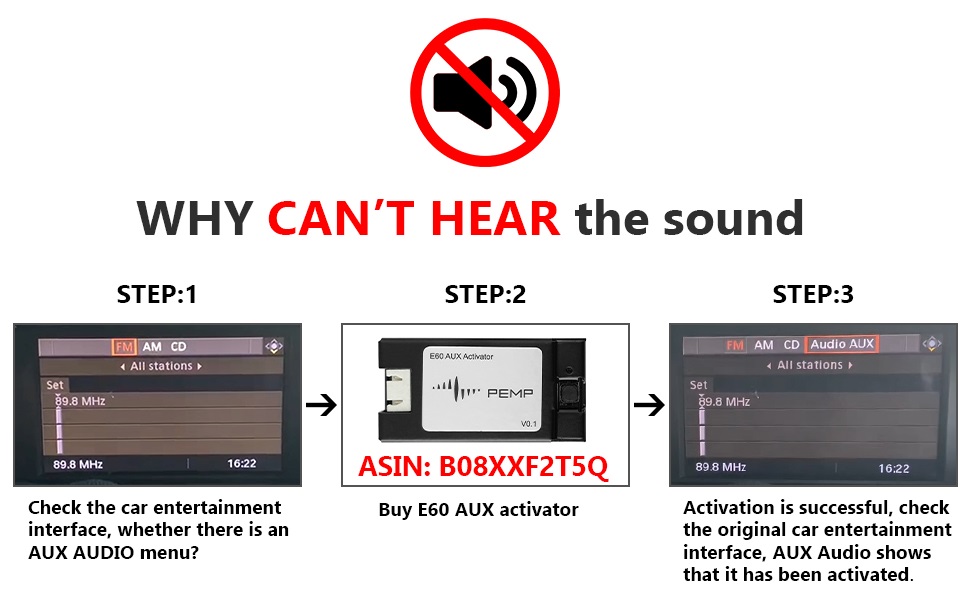
Pataki: Please confirm your OEM display has the Aux Audio Menu. If not, an activator (ASIN: B08XXF2T5Q) may be required to activate Aux Audio first.
4. Awọn ẹya Ọja
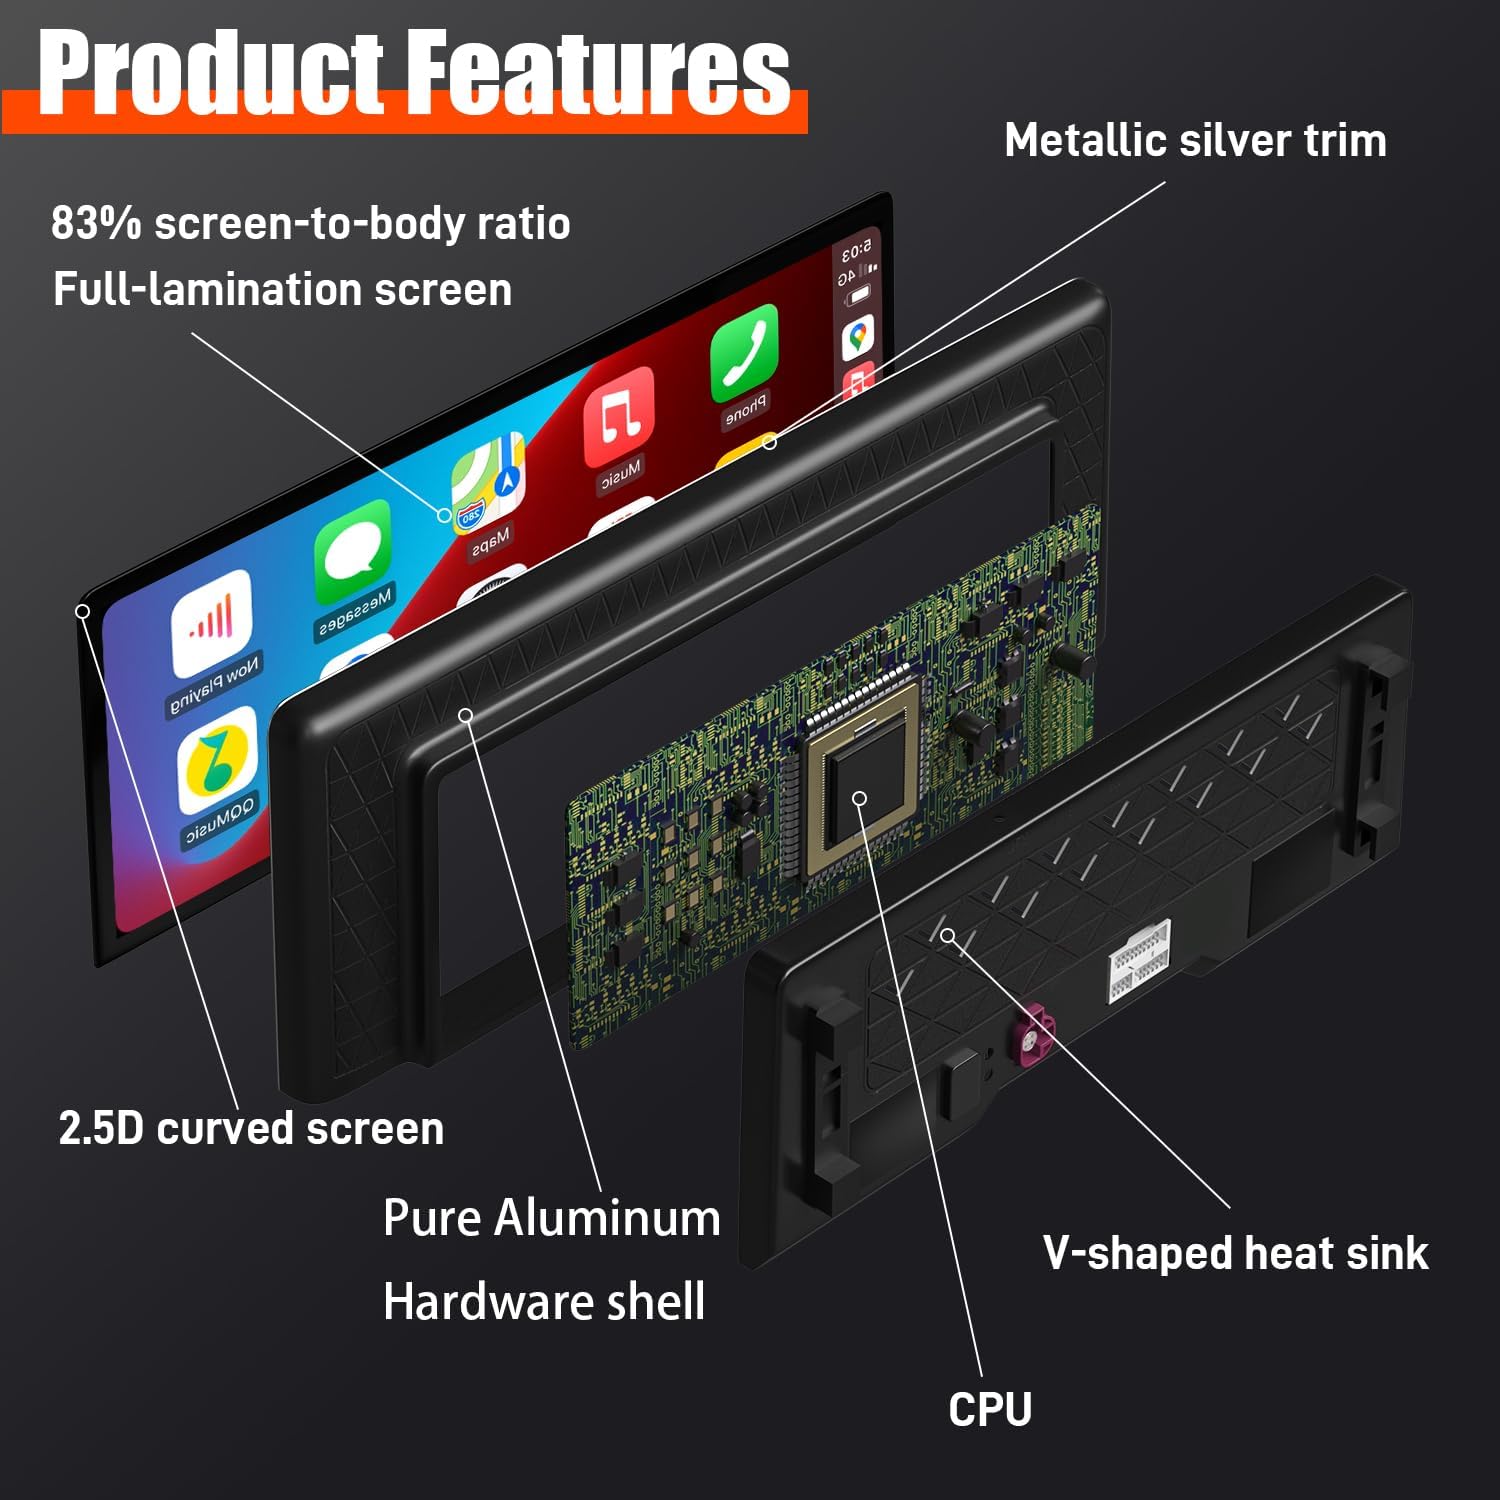
- Apẹrẹ Tinrin: 12.3-inch large display with an 82.3% screen-to-body ratio, metal material shell, and Non-Airgap process for realistic picture quality.
- Asopọmọra: Supports Wired and Wireless CarPlay and Android Auto.
- Eto isesise: Linux System for quick boot-up and fast access to CarPlay/Android Auto interface.
- OEM Integration: Supports factory monitor information display. Long press the Menu button to switch between the factory OEM interface and the CarPlay interface.
- Awọn iṣakoso: Supports steering wheel button functions.
- Àpapọ Didara: Multi-Point Capacitive Touch Screen, 12.3-inch HD IPS Display Screen with a resolution of 1920 x 720.
- Atilẹyin kamẹra: Supports the car's reversing camera and radar information display. Compatible with OEM cameras and aftermarket cameras (720P or less). Provides clear reversing picture.


5. Eto ati fifi sori Itọsọna
Aabo Lakọkọ: Ensure your car is completely powered off before starting installation.
5.1. Fifi sori ẹrọ gbogbogbo loriview


5.2. Fiber Optic Cable Connection
If your OEM ISO harness includes a fiber optic cable, it must be adapted to the PEMP ISO harness for proper functionality.

5.3. Wired CarPlay and Android Auto Connection
For wired CarPlay and Android Auto, ensure your device is connected to USB IN 1.

6. Awọn ilana Iṣiṣẹ
6.1. Switching Between OEM and New System
You can easily switch between your original BMW interface and the PEMP display's interface by long-pressing the Menu button on your iDrive controller.
6.2. Eto kamẹra
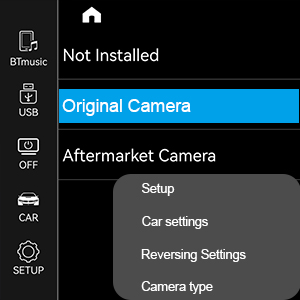
The unit supports both OEM and aftermarket front and rear view cameras. You can select the camera type in the settings menu.
- Lọ si Ṣeto.
- Yan Awọn eto ọkọ ayọkẹlẹ.
- Yan Reversing Settings.
- Yan Iru kamẹra (Original Camera or Aftermarket Camera).

7. Laasigbotitusita
7.1. No Sound Issue
If you experience no sound from the display, follow these steps:
- Check OEM Audio: Press the FM/AM button on your original radio to confirm if the OEM radio has sound.
- Ge asopọ Bluetooth: If the OEM radio has sound, go to Eto> Eto on the PEMP unit. Turn off "Use Car's BT Channel". Then, disconnect the original Bluetooth from your phone's settings.
- AUX Feature: After disconnecting Bluetooth, go to the car's settings and select "Auto Switch to AUX" feature off.
- Ṣatunṣe Iwọn didun: Go back to the original car interface, select AUX Front. If there is still no sound, adjust the volume knob on your car's radio.
- AUX Harness: If there is still no sound, you may need to connect the AUX harness. This involves connecting the provided AUX cable from the PEMP unit to your car's AUX-IN port, usually found in the center console.
- ISO Harness Check: Ensure the ISO harness is securely plugged in. If it feels loose, unplug and re-plug it firmly.
- Power/LVDS Cables: Check that the power cable and LVDS cables on the back of the PEMP machine are not loose. Re-plug them if necessary.

7.2. Splash Screen / OEM Resolution Issues
If your screen displays a splash screen or distorted image, adjust the resolution:
- Lọ si Settings > Car Settings.
- Yan Ìpinnu Ibojú Ọkọ̀ Ayọ́kẹ́lẹ́ Àtilẹ̀wá.
- Slide through the options to find your car's suitable resolution.
- Select the correct resolution and return to the original car interface. The display should now be normal.

8. Awọn pato
| Ẹya ara ẹrọ | Sipesifikesonu |
|---|---|
| Nọmba awoṣe | PP-5823-11 |
| Iwọn Ifihan | 12.3 inches |
| Ipinnu Ifihan | 1920x720 |
| Eto isesise | Lainos |
| Asopọmọra Technology | Bluetooth |
| Pataki Awọn ẹya ara ẹrọ | Bluetooth, Touchscreen, Built-in CarPlay and Android Auto |
| Ipo Ijade Ohun | AUX |
| Iwọn Nkan | 7.33 iwon |
| Ọja Mefa | 12.99 x 5.12 x 1.06 inches |
9. Atilẹyin ọja ati Support
For warranty information, technical support, or any inquiries regarding your PEMP product, please refer to the contact information provided with your purchase or visit the official PEMP webojula. Tọju iwe-ẹri rira rẹ bi ẹri rira fun awọn iṣeduro atilẹyin ọja.
O tun le ṣàbẹwò awọn PEMP Store on Amazon fun afikun alaye ọja ati awọn orisun atilẹyin.