Ọrọ Iṣaaju
This manual provides detailed instructions for the installation, operation, and maintenance of your Everycom EC-901 80mm Thermal POS Receipt Printer. Please read this manual thoroughly before using the printer to ensure proper functionality and to prevent damage.
Alaye Aabo
- Rii daju pe itẹwe ti wa ni asopọ si orisun agbara pẹlu vol ti o tọtage.
- Do not expose the printer to water or high humidity.
- Yago fun gbigbe itẹwe si orun taara tabi sunmọ awọn orisun ooru.
- Use only specified thermal paper for optimal performance and to prevent damage to the print head.
- Má ṣe gbìyànjú láti tú tàbí tún ẹ̀rọ ìtẹ̀wé náà ṣe fúnra rẹ. Kan sí àwọn òṣìṣẹ́ iṣẹ́ tó mọ̀ nípa rẹ̀.
Package Awọn akoonu
Jẹrisi pe gbogbo awọn ohun kan wa ninu package:
- Everycom EC-901 Thermal POS Receipt Printer
- Roll paper × 1 Roll (for initial testing)
- CD-ROM (containing Drivers, Utility Software, Manuals)
- Itọsọna iwe
- Paper Bearing
- Okun USB
- Ohun ti nmu badọgba Agbara
Ọja Pariview
The Everycom EC-901 is a compact 80mm (3-inch) thermal POS receipt printer designed for efficient and reliable printing. It features a USB and LAN interface for versatile connectivity.

olusin 1: Iwaju view of the Everycom EC-901 Thermal POS Receipt Printer.
Awọn ẹya pataki:
- Iyara Titẹ sita: Up to 160mm per second for quick receipt output.
- Gbigba iwe Rọrun: Drop-in paper loading mechanism for quick and easy media changes.
- Apẹrẹ Iwapọ: Low space requirement with an integrated power supply.
- Variable Paper Width: Supports 80mm paper width.
- Asopọmọra: USB and LAN interface options.
- Ipinnu giga: 203 x 203 DPI for clear print quality.
- Awọn ipele Ariwo Kekere: Operates quietly, suitable for various work environments.

Figure 2: Top-open design for easy paper roll installation.
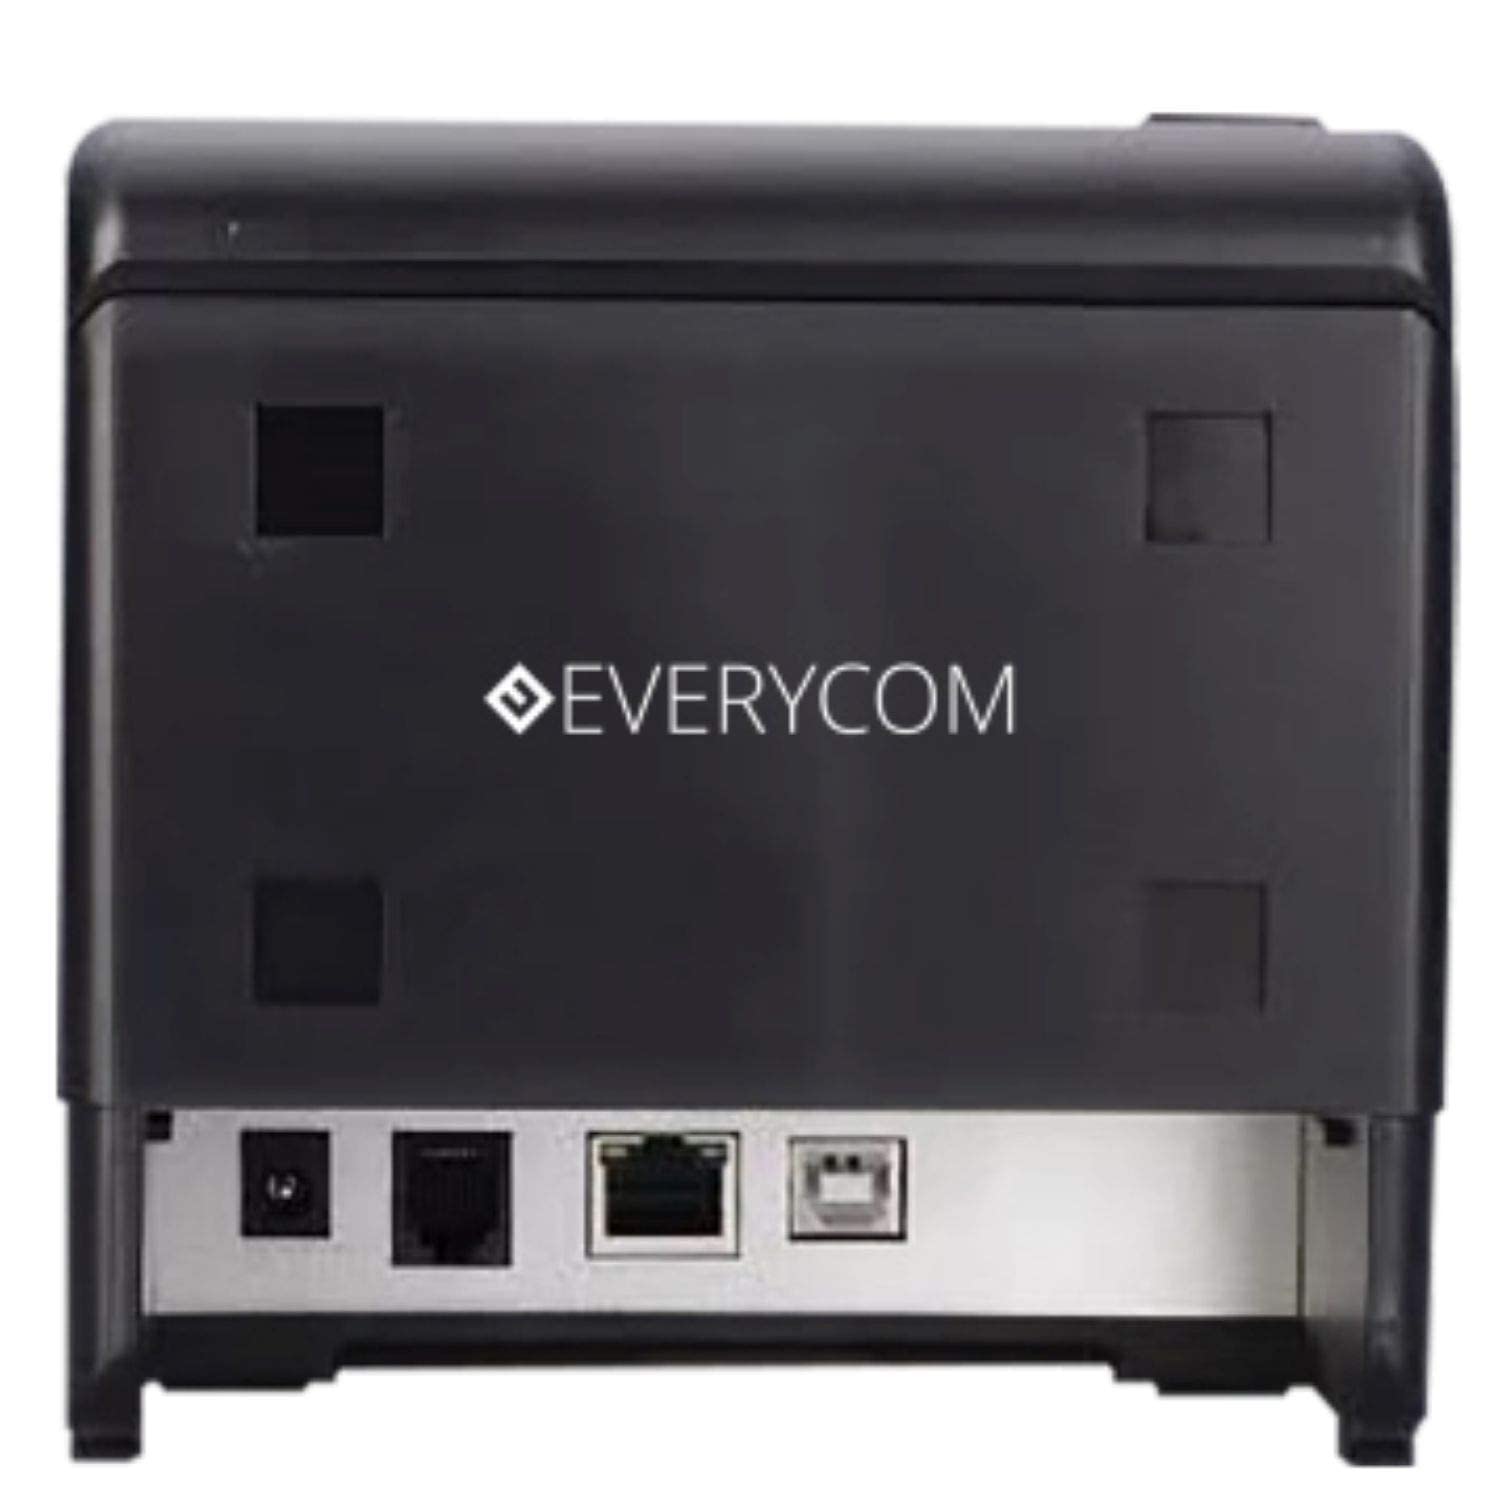
olusin 3: Ẹyìn view showing USB and LAN connectivity ports.

Figure 4: The EC-901 printer is designed for low noise operation.

Figure 5: The EC-901 printer features an easy-to-use design for paper installation.
Ṣeto
1. Nsopọ itẹwe
- Connect the power adapter cable to the printer's power port and then plug it into a suitable electrical outlet.
- For USB connection: Connect one end of the USB cable to the printer's USB port and the other end to your computer.
- For LAN connection: Connect an Ethernet cable to the printer's LAN port and the other end to your network router or switch.
- Turn on the printer using the power switch located on the front or side of the device.
2. Installing the Paper Roll
- Open the printer cover by pressing the release button or lifting the cover.
- Insert the thermal paper roll into the compartment with the paper feeding from the bottom and exiting towards the front.
- Fa iwe kekere kan jade kọja ohun elo gé.
- Close the printer cover firmly until it clicks into place.
3. Fifi sori awakọ
Insert the provided CD-ROM into your computer's CD/DVD drive. Follow the on-screen instructions to install the printer drivers and utility software. Drivers are typically compatible with Windows operating systems, including Windows 10.
Awọn ilana Iṣiṣẹ
Awọn imọlẹ Atọka:
- AGBARA: Ó fi hàn pé ẹ̀rọ ìtẹ̀wé náà ti ṣiṣẹ́.
- Asise: Lights up or flashes to indicate an error (e.g., print head overheating, cover open).
- IWE: Indicates low paper or no paper.
Ìtẹ̀wé Pàtàkì:
Once the printer is connected and drivers are installed, you can print receipts from your POS software or any application that supports printing. Ensure the Everycom EC-901 is selected as the default printer or the desired printer in your application's print settings.
Itoju
Ninu ẹrọ itẹwe:
- Turn off the printer and disconnect the power cable before cleaning.
- Lo asọ rirọ, ti ko ni lint dampened with isopropyl alcohol to gently clean the thermal print head. Allow it to dry completely before use.
- Wipe the exterior of the printer with a soft, dry cloth. Do not use abrasive cleaners.
Replacing Paper:
When the PAPER indicator lights up or printing becomes faint, replace the paper roll following the steps outlined in the "Installing the Paper Roll" section.
Laasigbotitusita
| Isoro | Owun to le Fa | Ojutu |
|---|---|---|
| Ẹ̀rọ ìtẹ̀wé kò ṣiṣẹ́. | Power cable disconnected or power outlet issue. | Ṣàyẹ̀wò àwọn ìsopọ̀ okùn agbára. Rí i dájú pé ibi tí agbára agbára náà wà ṣiṣẹ́. |
| No printing or blank output. | No paper, paper loaded incorrectly, or print head issue. | Check paper roll and ensure it's loaded correctly. Clean the print head if necessary. Verify printer drivers are installed. |
| PAPER indicator is on. | Paper roll is empty or low. | Ropo iwe eerun. |
| ERROR indicator is on. | Printer cover open, print head overheating, or other internal error. | Ensure the printer cover is closed properly. Turn off the printer, wait a few minutes for it to cool down, then restart. If the issue persists, contact support. |
| Itẹwe ko da nipa kọmputa. | Driver not installed or USB/LAN cable issue. | Reinstall printer drivers. Check USB/LAN cable connections. Try a different port or cable. |
Awọn pato
| Ẹya ara ẹrọ | Ẹ̀kúnrẹ́rẹ́ |
|---|---|
| Orukọ awoṣe | EC-901 |
| Imọ-ẹrọ titẹ sita | Gbona |
| Media Print | Paper (plain thermal) |
| O pọju Media Iwon | 3 inches (80mm) |
| O pọju Print Speed | 160 mm / iṣẹju-aaya |
| Ipinnu | 203 x 203 DPI |
| Asopọmọra Technology | USB, LAN Interface |
| Ijade itẹwe | Monochrome |
| Eto isesise | Windows 10 (ati ibaramu pẹlu awọn ẹya Windows miiran) |
| Awọn iwọn Ọja (LxWxH) | 19.8 x 14.8 x 14.8 cm |
| Iwọn Nkan | 1.8 kg |
| Pataki Ẹya | Without Auto cutter |
Atilẹyin ọja ati Support
For technical assistance, warranty claims, or any product-related inquiries, please contact Everycom customer support.
- Nọmba Ọfẹ: 1800 121 4480
- Awọn wakati iṣẹ: Monday - Saturday, 10:00 AM - 6:30 PM (Except on Public Holidays)