
1. Ifihan
This manual provides detailed instructions for the proper use and maintenance of your CAMMHD D1 Body Camera. Please read this manual thoroughly before operating the device to ensure correct functionality and to prevent damage.
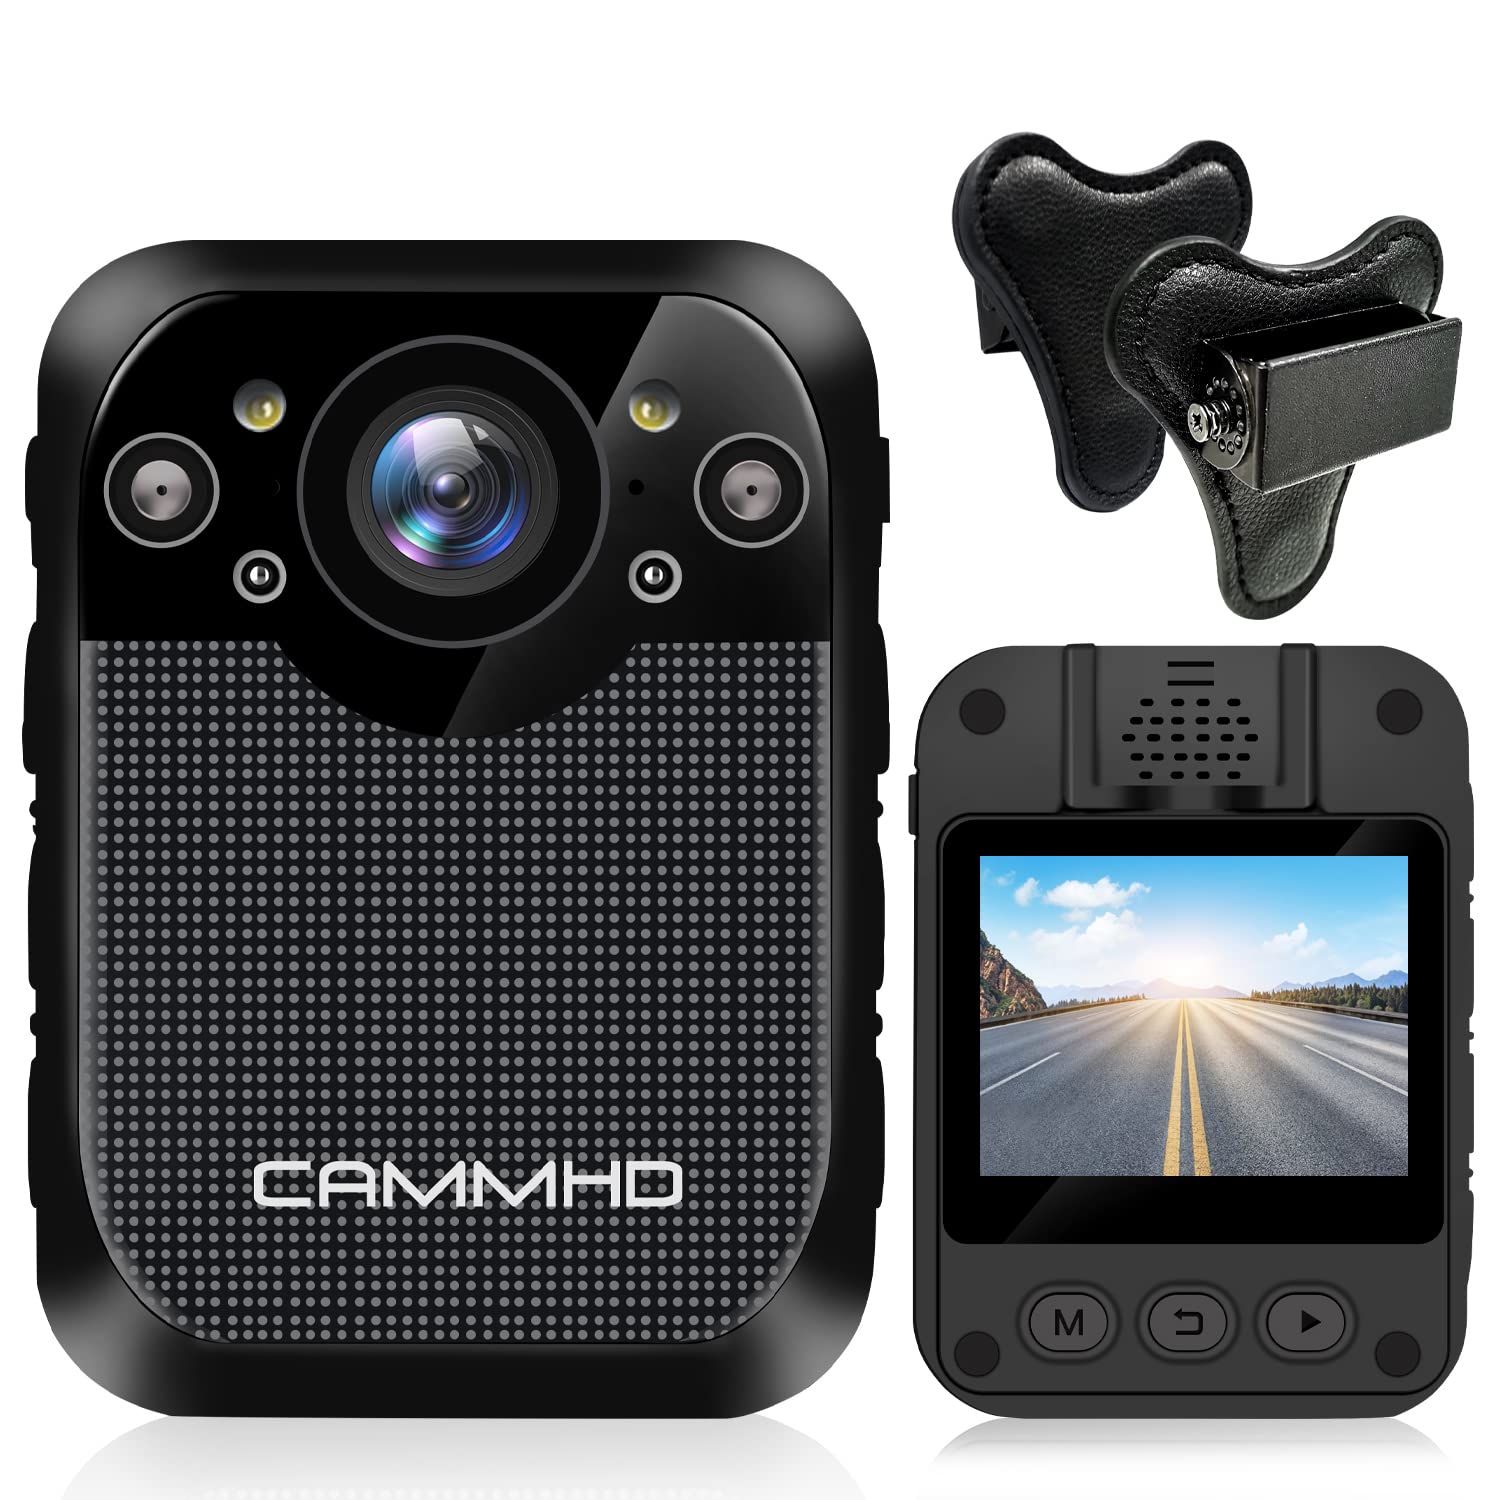
Aworan: Iwaju view of the CAMMHD D1 Body Camera.
2. Package Awọn akoonu
Daju pe gbogbo awọn ohun ti a ṣe akojọ rẹ si isalẹ wa ninu package rẹ. Ti awọn ohun kan ba nsọnu tabi bajẹ, jọwọ kan si atilẹyin alabara.
- CAMMHD D1 Body Camera
- Oofa Mount
- Ṣaja USB
- Okun USB
- 360° Rotating Shoulder Clip
- Itọsọna olumulo

Image: All components included in the CAMMHD D1 Body Camera package.
3. Ọja Ipariview
Familiarize yourself with the camera's buttons and ports.

Image: Labeled diagram of the CAMMHD D1 Body Camera's external features and controls.
- Bọtini Itaniji
- Pupa ati Blue Flash
- Bọtini fidio
- Night Vision Indicator
- Imọlẹ LED
- USB Interface
- Bọtini Fọto
- Bọtini Ohun
- Bọtini Titan / Paa
4. Eto
4.1 Ngba agbara si Batiri naa
Before first use, fully charge the camera's built-in 3000mAh lithium battery. Connect the camera to the USB charger using the provided USB cable. A full charge typically takes approximately 3 hours. The camera can record for up to 8 hours (at 1080p resolution) on a full charge.

Image: Visual representation of the camera's 3000mAh battery, 8-hour recording capability, and 3-hour charging time.
4.2 Iṣagbesori Kamẹra
The CAMMHD D1 Body Camera comes with a magnet mount and a 360° rotating shoulder clip for secure attachment.
Using the Magnet Mount:
The magnet mount allows for flexible positioning and angle adjustment.
Image: The adjustable 45-degree angle clips for the body camera mount.
Attaching with the Shoulder Clip:
Follow these steps to attach the camera using the shoulder clip:
- Separate the two parts of the clip.
- Insert the body camera into the 'outside' clip.
- Place the 'inside' clip under your clothing.
- Adjust the screw to set the desired recording angle.

Image: Step-by-step instructions for attaching the body camera with the shoulder clip.
5. Awọn ilana Iṣiṣẹ
5.1 Agbara Tan / Pa
- Agbara Tan: Press and hold the Power On/Off button (9) until the screen illuminates.
- Agbara Pa: Press and hold the Power On/Off button (9) until the device shuts down.
5.2 Gbigbasilẹ fidio
The camera supports 1296P HD video resolution with a 160° wide-angle lens.
- Bẹrẹ Gbigbasilẹ: Press the Video button (3) once to begin video recording. A red indicator light will typically flash.
- Duro Gbigbasilẹ: Tẹ bọtini fidio (3) lẹẹkansi lati da gbigbasilẹ duro.

Image: The camera's display indicating 1296P Full HD video recording capability.
5.3 Fọ́tò Fọ́tò
- Ya Fọto: Press the Photo button (7) once to capture a still image.
5.4 Gbigbasilẹ Ohun
- Start Audio Recording: Press the Audio button (8) once to begin audio-only recording.
- Stop Audio Recording: Press the Audio button (8) again to stop audio recording.
5.5 Night Vision
The camera features automatic infrared night vision with 4 infrared lamps, capable of capturing clear footage up to 10 meters (32 feet) in low-light conditions.
- Ṣiṣẹ Aifọwọyi: Night vision activates automatically in low light.
- Muu ṣiṣẹ pẹlu ọwọ: You can also press the Night Vision button (4) to manually toggle infrared night vision.

Image: Demonstration of the camera's automatic infrared night vision capability.
5.6 Loop Gbigbasilẹ
The camera includes 32GB of internal memory. When the memory capacity is reached, the camera automatically overwrites the oldest files lati tesiwaju gbigbasilẹ.

Image: Explanation of loop recording and the camera's 32GB internal storage.
5.7 Sisisẹsẹhin ati File Gbigbe
- On-Device Playback: Use the camera's 2-inch display and navigation buttons to review awọn fidio ati awọn fọto ti o gbasilẹ.
- Computer Playback/Transfer: Connect the camera to a computer using the USB cable. The camera will appear as a removable disk, allowing you to transfer files.
6. Itọju
- Ninu: Use a soft, dry cloth to clean the camera body. For the lens, use a specialized lens cleaning cloth. Do not use harsh chemicals or abrasive materials.
- Ibi ipamọ: Tọju kamẹra naa ni itura, aye gbigbẹ kuro lati orun taara ati awọn iwọn otutu to gaju.
- Itọju Batiri: Láti mú kí batiri pẹ́ sí i, má ṣe jẹ́ kí batiri náà máa jáde nígbà gbogbo. Gba agbára kámẹ́rà náà déédéé, kódà bí a kò bá lò ó fún ìgbà pípẹ́.
7. Laasigbotitusita
| Isoro | Owun to le Fa | Ojutu |
|---|---|---|
| Kamẹra ko ṣiṣẹ. | Low battery or faulty battery. | Charge the camera for at least 3 hours. If the issue persists, contact support. |
| Cannot record video/photo. | Memory full or recording error. | Ensure loop recording is enabled or transfer files to free up space. Restart the camera. |
| Dídára fídíò ní alẹ́ kò dára. | Night vision not active or insufficient ambient light for IR. | Ensure night vision is enabled (auto or manual). Ensure no obstructions block the IR lamps. |
| Kamẹra ko dahun. | Aṣiṣe sọfitiwia. | Press and hold the Power On/Off button for 10-15 seconds to force a restart. |
8. Awọn pato
| Ẹya ara ẹrọ | Ẹ̀kúnrẹ́rẹ́ |
|---|---|
| Awoṣe | D1 |
| Ipinnu Yaworan fidio | 1296p, 1080p, 720p |
| Fọto Pixel | 34 Milionu awọn piksẹli |
| Wide Angle lẹnsi | 160° |
| Agbara Batiri | 3000mAh Litiumu batiri |
| Akoko Gbigbasilẹ | Up to 8 hours (1080p) |
| Akoko gbigba agbara | Isunmọ. wakati meji 3 |
| Ti abẹnu Memory | 32GB (ti a ṣe sinu) |
| Ibiti Iran Night | Titi de 10m (32ft) |
| Iwon iboju | 2 inches |
| Omi Resistance Ipele | Mabomire |
| Pataki Awọn ẹya ara ẹrọ | Motion Detection, Night Vision, Portable |
| Asopọmọra Technology | Ailokun |
| Iduroṣinṣin Aworan | Ìmúdàgba |
| Idojukọ Iru | Idojukọ Afowoyi |
9. Atilẹyin ọja ati Support
For warranty information or technical support, please refer to the contact details provided with your purchase documentation or visit the official CAMMHD webojula. Jọwọ ṣe idaduro ẹri rira rẹ fun awọn iṣeduro atilẹyin ọja.