
Alarm.com V724X
Alarm.com ADC-V724X Iwe Itọsọna Olumulo Kamẹra Wi-Fi Ita gbangba ADC-V724X
Àwòṣe: V724X
Ọrọ Iṣaaju
The Alarm.com ADC-V724X is an advanced outdoor Wi-Fi camera designed to enhance the security of your property. It features High Dynamic Range (HDR) for clear imaging, two-way audio for communication, 1080p resolution, and a wide 117-degree field of view. Equipped with Video Analytics and IR Night Vision, it provides intelligent detection and monitoring capabilities. The camera also includes a MicroSD card slot for local storage and boasts an IP66 ingress protection rating, ensuring durability in various outdoor conditions.
Alaye Aabo
- Ensure the camera is installed by a qualified professional or with proper safety precautions.
- Use only the specified 12VDC power supply.
- Má ṣe fi kámẹ́rà náà hàn sí iwọ̀n otútù tó le koko ju bó ṣe yẹ lọ níta ibi tí ó ti lè ṣiṣẹ́.
- Avoid direct exposure of the lens to strong light sources for extended periods.
- Ge asopọ agbara ṣaaju ṣiṣe eyikeyi itọju tabi mimọ.
- Jeki kuro ni arọwọto awọn ọmọde.
Package Awọn akoonu
Jẹrisi pe gbogbo awọn ohun kan wa ninu package:
- Alarm.com ADC-V724X Outdoor Wi-Fi Camera
- Ohun elo iṣagbesori (awọn skru, awọn ìdákọró)
- Fifi sori Itọsọna
- Power Adapter (12VDC)
Ṣeto
1. Fifi sori ti ara
The ADC-V724X camera is designed for outdoor wall mounting. Choose a location that provides the desired field of view and is within range of your Wi-Fi network.
- Mura Ilẹ Iṣagbesori: Use the included mounting template (if provided) or the camera base to mark drill holes.
- Awọn iho iho: Drill pilot holes for the mounting screws. Insert wall anchors if mounting into drywall or masonry.
- Ṣe aabo Oke naa: Attach the camera's mounting base securely to the surface using the provided screws.
- So Kamẹra naa: Connect the camera body to the mounted base. Adjust the camera angle for optimal coverage.

olusin 1: Iwaju view of the ADC-V724X camera, highlighting its compact design and lens.
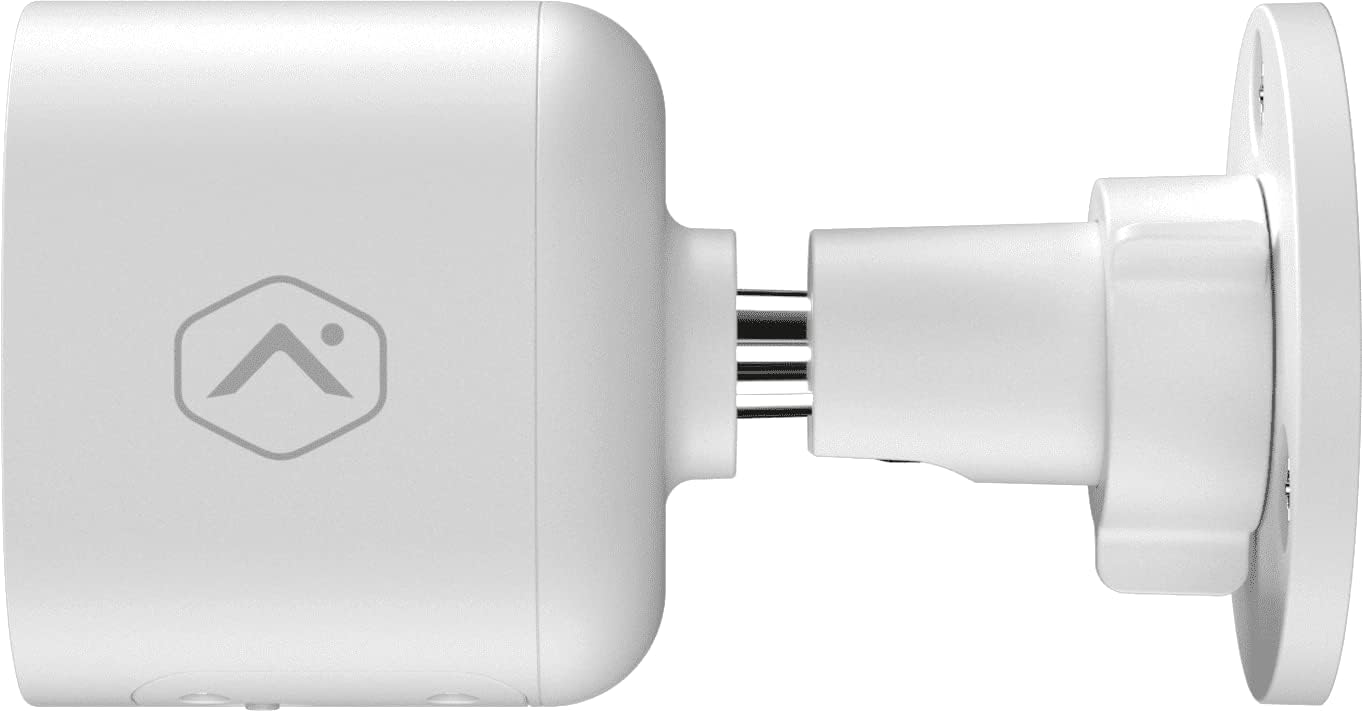
olusin 2: Ẹgbẹ profile of the camera, illustrating how it connects to the wall mount.

olusin 3: Angled view of the camera, demonstrating its adjustable mounting capabilities.
2. Asopọ agbara
Connect the provided 12VDC power adapter to the camera's power input. Ensure the connection is secure and protected from weather elements if applicable.
3. Asopọ nẹtiwọki (Wi-Fi)
The ADC-V724X connects to your network via Wi-Fi (2.4 or 5 GHz). Integration with your Alarm.com system typically requires activation through your Alarm.com service provider.
- Agbara Tan: Plug in the camera. The LED indicator will show its status (refer to LED status guide in your Alarm.com app or provider's documentation).
- Add to System: Contact your Alarm.com service provider to add the camera to your existing security system. They will guide you through the process, which often involves scanning a QR code on the camera or entering its MAC address.
- Ṣe atunto Wi-Fi: Your service provider will assist in connecting the camera to your home Wi-Fi network through the Alarm.com app or webojula.

olusin 4: Pada view of the camera, displaying the QR code and product information essential for system integration.
Ṣiṣẹ kamẹra
Once installed and connected, the ADC-V724X camera operates primarily through the Alarm.com Customer Webojula ati Mobile App.
Gbe View ati Gbigbasilẹ
- Wiwọle Ifunni Live: Open the Alarm.com app or website, navigate to the camera section, and select the ADC-V724X to view awọn oniwe-ifiwe kikọ sii.
- Onboard Recording (Smart View): The camera supports local recording to a MicroSD card (sold separately, up to 512 GB). This allows for continuous, encrypted recordings that can be viewed from anywhere via the Alarm.com platform.
- Awọsanma Gbigbasilẹ: Depending on your Alarm.com service plan, video clips triggered by events (e.g., motion) will be uploaded to the cloud for secure storage and access.
Ona Meji Audio
Kámẹ́rà náà ní gbohùngbohùn àti agbọ́hùnsọ tí a ṣe sínú rẹ̀, èyí tí ó ń jẹ́ kí ìbánisọ̀rọ̀ ọ̀nà méjì ṣeé ṣe.
- Bẹ̀rẹ̀ Ìbánisọ̀rọ̀: Lati igbesi aye view in the Alarm.com app, tap the microphone icon to speak through the camera's speaker. Release the icon to listen.
- Audio in Recorded Clips: Audio is included in recorded video clips, providing additional context for events.
Video Analytics and Alerts
Configure Video Analytics rules through your Alarm.com account to receive smarter, more relevant alerts.
- Awọn agbegbe Iwari: Ṣàlàyé àwọn agbègbè pàtó kan láàárín pápá kámẹ́rà náà view fun erin išipopada.
- Object Classification: The camera can differentiate between people, animals, and vehicles, reducing false alerts.
- Eto Itaniji: Customize notifications (e.g., push notifications, email) for specific events detected by Video Analytics.
Iran Alẹ (IR)
The camera automatically switches to infrared (IR) night vision in low-light conditions, providing clear black-and-white video.
- Ṣiṣẹ Aifọwọyi: The camera's built-in light sensor detects ambient light levels and activates IR LEDs as needed.
- Iṣe Ti o dara julọ: Ensure no obstructions are blocking the IR illuminators on the camera's front.
Itoju
Ninu Kamẹra
- Lẹnsi: Gently wipe the camera lens with a soft, clean, lint-free cloth. If necessary, use a small amount of lens cleaning solution. Avoid abrasive cleaners.
- Ara: Pa ara kamẹra nu pẹlu ipolowoamp asọ. Maṣe lo awọn kẹmika ti o lewu tabi awọn olomi.
- Igbohunsafẹfẹ: Clean the camera periodically, especially if installed in dusty or high-traffic areas, to ensure optimal image quality.
MicroSD Card Management
The camera supports a MicroSD card for local storage. The slot is located on the bottom of the camera, protected by a cover.
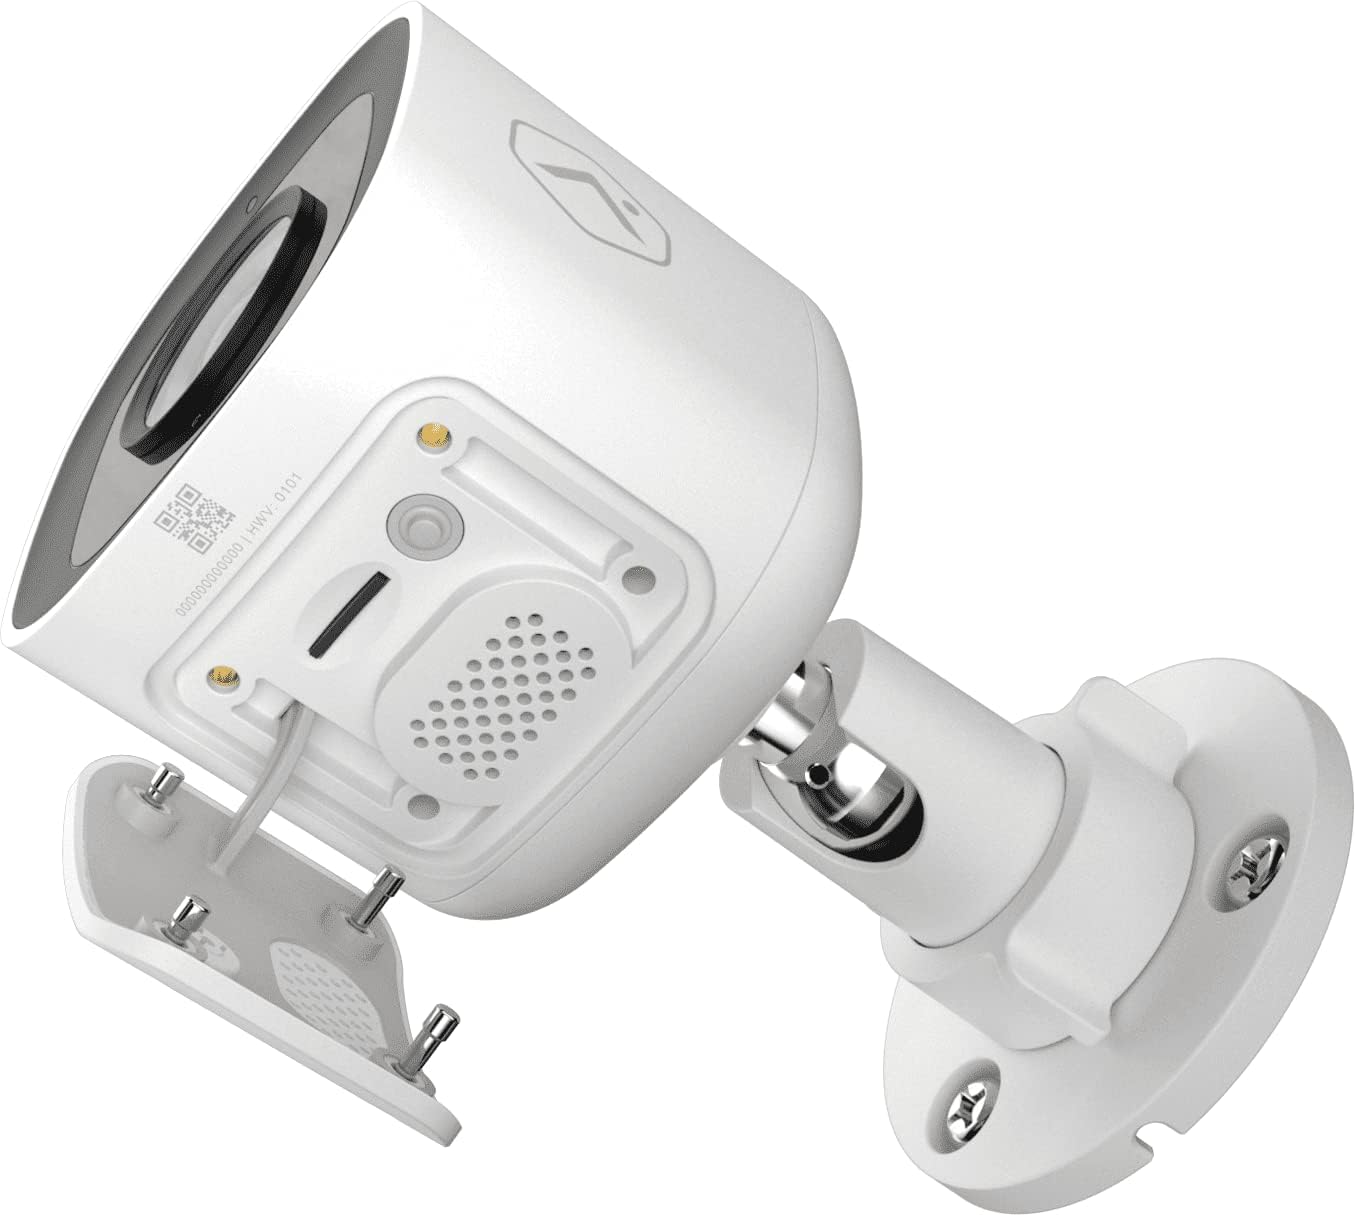
olusin 5: Isalẹ view of the camera showing the access panel for the MicroSD card slot.
- Fifi sori: Carefully insert a compatible MicroSD card (up to 512 GB) into the slot until it clicks into place. Ensure the camera is powered off before insertion or removal.
- Iṣeto: The Alarm.com system may prompt you to format the card upon first use.
- Rọpo: If the card becomes full or corrupted, replace it with a new one. Data on the card can be managed through the Alarm.com platform.
Laasigbotitusita
| Isoro | Owun to le Fa | Ojutu |
|---|---|---|
| Kamẹra ko ṣiṣẹ | Ko si agbara, ohun ti nmu badọgba ti ko tọ, asopọ alaimuṣinṣin. | Check power outlet, ensure adapter is securely connected to camera and power source. |
| Ko le sopọ si Wi-Fi | Incorrect Wi-Fi password, camera too far from router, network interference. | Verify Wi-Fi password. Move camera closer to router or use a Wi-Fi extender. Reduce interference from other devices. Contact your Alarm.com provider for assistance with network setup. |
| Didara aworan ti ko dara | Dirty lens, low light, network bandwidth issues. | Clean the camera lens. Ensure adequate lighting or check night vision settings. Verify stable internet connection. |
| Ohun afetigbọ ọna meji ko ṣiṣẹ | Microphone/speaker blocked, volume too low, app settings. | Ensure nothing is obstructing the microphone or speaker. Check volume settings in the Alarm.com app. |
| No local recording | No MicroSD card, incompatible card, card full/corrupted. | Insert a compatible MicroSD card. Format the card via the Alarm.com app. Replace the card if corrupted. |
For further assistance, please contact your Alarm.com service provider.
Awọn pato
| Ẹya ara ẹrọ | Ẹ̀kúnrẹ́rẹ́ |
|---|---|
| Nọmba awoṣe | V724X |
| Ipinnu Kamẹra ti o munadoko | 2MP |
| O ga Video ga | 1920 x 1080 (1080p HD ni kikun) |
| Aaye ti View (FOV) | 117-ìyí |
| Ohun | 2-Way Audio (Microphone and Speaker) |
| Night Iran Iru | IR (Infurarẹẹdi) |
| Asopọmọra | Wi-Fi (2.4 or 5 GHz) |
| Ibi ipamọ agbegbe | MicroSD Card Slot (up to 512 GB, sold separately) |
| Ingress Idaabobo Rating | IP66 |
| Ibi ti ina elekitiriki ti nwa | 12VDC |
| Awọn iwọn (L x W x H) | 2.5 x 2.5 x 4.5 inches |
| Iwọn | 1.46 iwon (0.66 kilo) |
| Pataki Awọn ẹya ara ẹrọ | HDR, Video Analytics, Motion Sensor |
Atilẹyin ọja ati Support
For warranty information and technical support, please refer to the documentation provided by your Alarm.com service provider or visit the official Alarm.com website. Support for the ADC-V724X camera is typically handled through your authorized Alarm.com dealer or installer.
Awọn orisun Ayelujara:
Ask a question about this manual
Ask about setup, troubleshooting, compatibility, parts, safety, or missing instructions. Manuals+ will review the question and use this page’s manual context to help answer it.