
1. Ifihan
Thank you for choosing the COUGAR MX360 RGB Mid Tower Case. This manual provides essential information for the proper installation, operation, and maintenance of your new PC case. The MX360 RGB combines a sleek design with ARGB LED strips on the front panel, offering excellent cooling performance and support for a wide range of components, including up to a 360mm radiator, 315mm graphics cards, and 170mm CPU coolers. Its compact layout and full-length PSU shroud contribute to a clean and organized build.
2. Alaye Aabo
- Nigbagbogbo ge asopọ ipese agbara lati inu iṣan ogiri ṣaaju fifi sori ẹrọ tabi yiyọ awọn paati eyikeyi kuro.
- Handle components with care to avoid damage from static electricity. Consider using an anti-static wrist strap.
- Pa awọn ẹya kekere ati awọn skru kuro lati ọdọ awọn ọmọde.
- Rí i dájú pé afẹ́fẹ́ tó yẹ wà ní àyíká àpótí náà kí ó má baà gbóná jù.
- Do not attempt to modify the case or its components, as this may void your warranty and pose safety risks.
3. Package Awọn akoonu
Jọwọ rii daju pe gbogbo awọn nkan wọnyi wa ninu package rẹ:
- COUGAR MX360 RGB Mid Tower Case
- Àpótí Ẹ̀rọ (tí ó ní àwọn skru, àwọn ìdádúró, àwọn okùn okùn, àti bẹ́ẹ̀ bẹ́ẹ̀ lọ)
- Afowoyi Olumulo (iwe-ipamọ yii)
4. Ọja Ipariview
The COUGAR MX360 RGB case features a minimalist design with integrated ARGB lighting and a tempered glass side panel for showcasing your build.

olusin 4.1: Iwaju-ẹgbẹ view of the COUGAR MX360 RGB case, showing the interior and active RGB lighting.
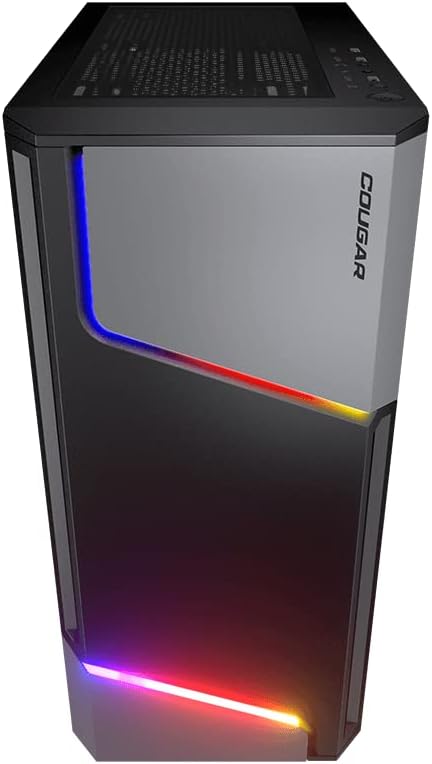
olusin 4.2: Iwaju view of the COUGAR MX360 RGB case, highlighting the integrated ARGB LED strips.
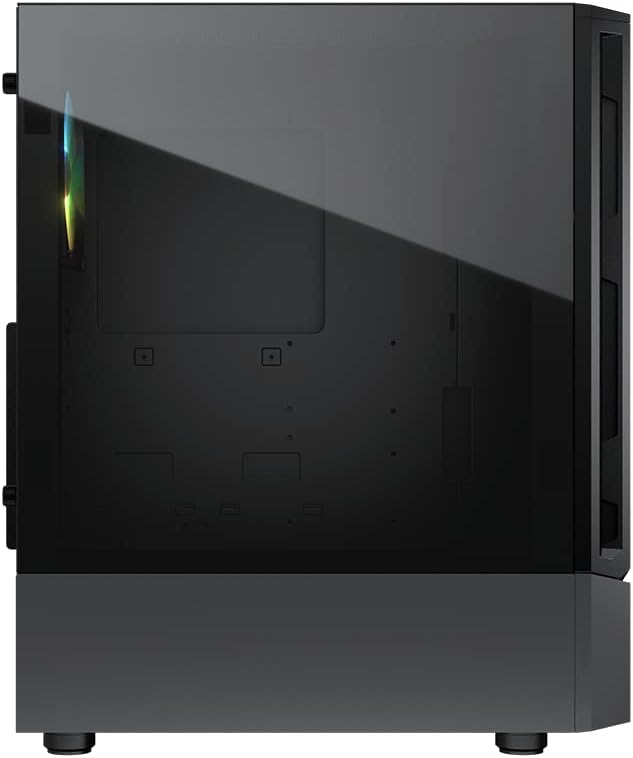
olusin 4.3: Apa view of the COUGAR MX360 RGB case, featuring the tempered glass panel.

olusin 4.4: Angled iwaju view of the COUGAR MX360 RGB case, showcasing its design and ARGB elements.
5. Eto ati fifi sori
Follow these steps to install your components into the COUGAR MX360 RGB case.
5.1 Ngbaradi Ọran naa
- Gbe ọran naa sori alapin, dada iduroṣinṣin.
- Remove the tempered glass side panel by unscrewing the thumb screws at the rear of the case and carefully sliding the panel off.
- Remove the opposite metal side panel by unscrewing the thumb screws and sliding it off.
5.2 Fifi sori modaboudu
- Install the I/O shield (if not pre-installed on your motherboard) into the rear opening of the case.
- Ensure the correct standoffs are installed for your motherboard form factor (ATX, Micro-ATX, Mini-ITX). Adjust or add standoffs as needed.
- Fi pẹ̀lẹ́pẹ̀lẹ́ gbé mótábódì rẹ sí orí àwọn ibi tí wọ́n ti ń dì í, kí o sì ṣe àtúnṣe àwọn ihò skru náà.
- Ṣe aabo modaboudu pẹlu awọn skru ti a pese.
5.3 Power Ipese Unit (PSU) fifi sori
- Locate the PSU shroud at the bottom of the case.
- Slide your PSU into the designated compartment from the rear of the case.
- Ṣe aabo PSU pẹlu awọn skru lati ẹhin ọran naa.
- Route necessary cables through the cutouts in the PSU shroud for cable management.
5.4 Ibi ipamọ wakọ sori
The MX360 RGB supports various storage configurations.
- Awọn HDD 3.5": Install into the drive cage located under the PSU shroud.
- 2.5" SSDs/HDDs: Mount onto the dedicated trays or mounting points behind the motherboard tray.
5.5 Graphics Card (GPU) fifi sori
- Yọ awọn ideri PCIe pataki ti o yẹ lati ẹhin ọran naa.
- Fi kaadi eya rẹ sinu aaye PCIe ti o yẹ lori modaboudu.
- Secure the graphics card with screws. The case supports graphics cards up to 315mm in length.
5.6 Fifi sori ẹrọ Eto Itutu (Awọn Afẹfẹ/Awọn Radiator)
The case supports up to six fans and a 360mm water cooling radiator.
- Iwaju: Supports up to 3 x 120mm or 2 x 140mm fans, or a 240/280/360mm radiator.
- Oke: Supports up to 2 x 120mm or 2 x 140mm fans, or a 240/280mm radiator.
- Ẹyìn: Ṣe atilẹyin fun 1 x 120mm àìpẹ.
Install fans or radiators using the provided screws, ensuring proper airflow direction.
5.7 Iwaju Panel Awọn isopọ
Connect the front panel cables (USB, Audio, Power, Reset, LED) to their corresponding headers on your motherboard. Refer to your motherboard manual for exact header locations.
5.8 ARGB Lighting Connection
The integrated ARGB LED strips on the front panel connect via a 5V/3Pin ARGB connector. Connect this cable to a compatible 5V/3Pin ARGB header on your motherboard to synchronize lighting effects with your system.
6. Ṣiṣẹ́ Ọkọ̀ náà
Once all components are installed and connected, replace the side panels. Power on your system using the power button on the top I/O panel. The ARGB lighting will illuminate, controlled by your motherboard's software or a dedicated ARGB controller if you have one installed.
7. Itọju
Itọju deedee n ṣe iranlọwọ lati rii daju pe iṣẹ ṣiṣe to dara julọ ati igba pipẹ ti awọn paati PC rẹ.
- Awọn Ajọ Eruku: The MX360 RGB includes removable dust filters (e.g., top, bottom). Periodically remove and clean these filters with compressed air or water (ensure they are completely dry before reinstallation).
- Ninu inu: Use compressed air to remove dust from internal components like fans, heatsinks, and the motherboard.
- Ode Ninu: Mu ese ita gbangba pẹlu asọ, damp asọ. Yago fun abrasive ose.
8. Laasigbotitusita
Ti o ba pade awọn ọran, tọka si awọn igbesẹ laasigbotitusita ti o wọpọ wọnyi:
- Ko si Agbara: Ensure all power cables (24-pin ATX, 8-pin CPU, GPU power) are securely connected. Check the PSU switch is in the 'ON' position. Verify front panel power button connection to the motherboard.
- Ina ARGB ko ṣiṣẹ: Confirm the 5V/3Pin ARGB connector is correctly plugged into a compatible motherboard header. Check your motherboard's RGB software for control settings.
- Igbóná púpọ̀: Ensure all case fans are spinning and oriented correctly for optimal airflow. Check for dust buildup on filters and components. Verify CPU cooler and GPU cooler are properly installed.
- Awọn isopọ alaimuṣinṣin: Re-seat all components (RAM, GPU, storage drives) and check all power and data cables.
9. Awọn pato
| Ẹya ara ẹrọ | Sipesifikesonu |
|---|---|
| Brand | COUGAR |
| Orukọ awoṣe | MX360 RGB |
| Nọmba Awoṣe Nkan | CGR-5CC6G-RGB |
| Iru Irú | Ile-iṣọ Mid |
| Awọn iwọn (LxWxH) | 14.88 x 8.27 x 18.11 inches (378 x 210 x 460 mm) |
| Iwọn Nkan | 10.56 iwon (4.8 kilo) |
| Ohun elo | Tempered Glass, Fine Metal |
| Àwọ̀ | Dudu |
| Modaboudu Support | Mini ITX / Micro ATX / ATX |
| O pọju. Graphics Kaadi Ipari | 315 mm |
| O pọju. Sipiyu kula Giga | 170 mm |
| PSU Atilẹyin | Standard ATX PS2 |
| Ọna Itutu | Afẹfẹ / Omi |
| Radiator Support | Front: 360mm / 280mm / 240mm / 140mm / 120mm Top: 280mm / 240mm / 140mm / 120mm Igbẹhin: 120mm |
| Fan Support | Iwaju: 3 x 120mm / 2 x 140mm Oke: 2 x 120mm / 2 x 140mm Igbẹhin: 1 x 120mm |
| Wakọ Bays | 3.5" HDD: 2 2.5" SSD: 2+2 (converted from 3.5" drive bays) |
| I/O igbimo | USB 3.0 x 2, USB 2.0 x 1, Mic x 1, Audio x 1, RGB Button |
| Pataki Ẹya | ARGB LED Strips, Full-length PSU Cover for Cable Hiding and Improved Airflow |
10. Atilẹyin ọja ati Support
COUGAR products are designed and manufactured to the highest quality standards. For warranty information, please refer to the warranty card included with your product or visit the official COUGAR webojula. Jeki ẹri rira rẹ fun awọn iṣeduro atilẹyin ọja.
For technical support or further assistance, please visit the official COUGAR website or contact their customer service department. You can find more information and resources on the COUGAR Store on Amazon.