
1. Ifihan
This instruction manual provides essential information for the safe and efficient installation, operation, and maintenance of your EVURU XTM024 3 Phase 4 Wire Digital Energy Meter. Please read this manual thoroughly before installation and keep it for future reference. This device is designed to accurately measure active energy consumption in three-phase four-wire AC power networks.
2. Alaye Aabo
- Installation and maintenance must be performed by qualified electricians only.
- Ensure the power supply is completely disconnected before any installation, wiring, or maintenance procedures.
- Rii daju pe voltage and current ratings of the meter match the electrical system specifications.
- Do not operate the meter in environments exceeding its specified operating temperature and humidity ranges.
- Avoid exposing the meter to direct sunlight, rain, or excessive dust.
- Do not disassemble or modify the meter. Doing so will void the warranty and may lead to electric shock or fire.
3. Ọja Ipariview
The EVURU XTM024 is a digital energy meter designed for precise measurement of electrical energy. It features a clear LCD display and is suitable for DIN rail mounting.

Nọmba 3.1: Lapapọ view of the EVURU XTM024 Digital Energy Meter, showing both the front display and the side profile with the DIN rail mounting mechanism.
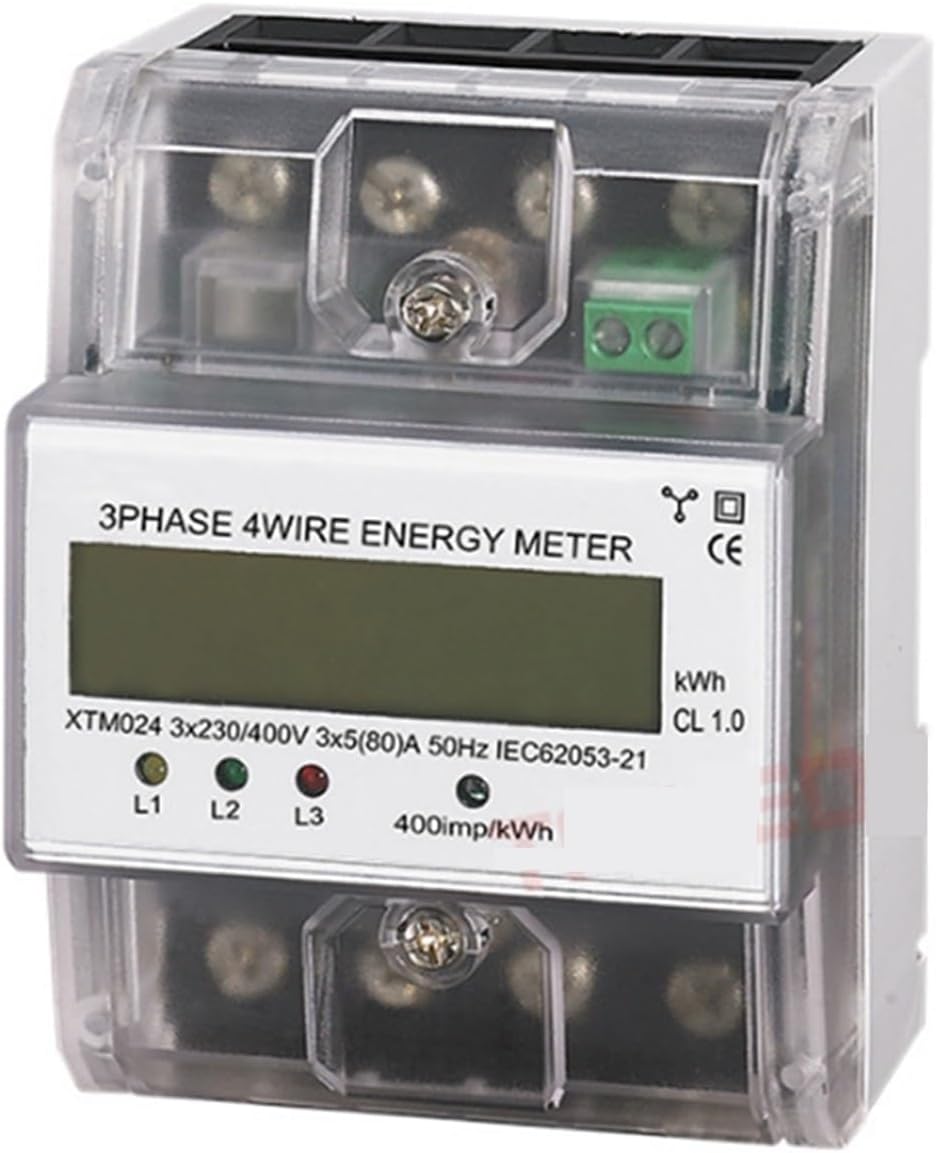
Nọmba 3.2: Close-up of the meter's front panel, highlighting the LCD display, phase indicators (L1, L2, L3), and pulse output LED (400imp/kWh).
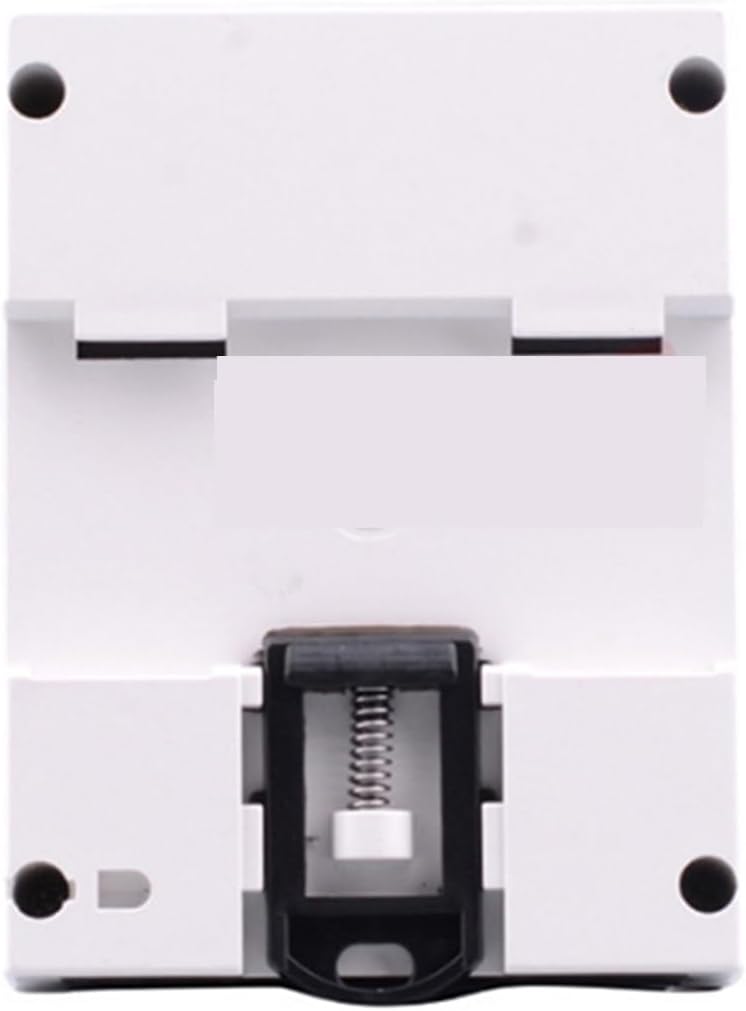
Nọmba 3.3: Ẹyìn view of the EVURU XTM024 Digital Energy Meter, illustrating the integrated clip for secure DIN rail mounting.
Awọn ẹya pataki:
- Three-phase four-wire measurement.
- LCD 6+2 digit display for energy consumption.
- DIN rail installation.
- High accuracy level (Class 1.0).
- Pulse output for remote monitoring (400imp/kWh).
4. fifi sori
The EVURU XTM024 meter is designed for DIN rail mounting. Ensure all safety precautions are followed before proceeding with installation.
4.1 Iṣagbesori
- Turn off the main power supply to the installation area.
- Locate a standard 35mm DIN rail within an appropriate electrical enclosure.
- Align the meter's DIN rail clip with the rail and press firmly until it clicks into place.
- Ensure the meter is securely fastened and cannot move freely.
4.2 Wiring (3 Phase 4 Wire)
Refer to the wiring diagram typically found on the meter's terminal cover or in accompanying documentation. The following is a general guide:
- Connect the three phase lines (L1, L2, L3) to their respective input terminals.
- Connect the neutral line (N) to its input terminal.
- Connect the load's three phase lines (L1, L2, L3) to their respective output terminals.
- Connect the load's neutral line (N) to its output terminal.
- Rí i dájú pé gbogbo àwọn ìsopọ̀ náà wà ní ìdúróṣinṣin àti ní ààbò láti dènà kí àwọn ìsopọ̀ náà má baà bàjẹ́ tàbí kí ó gbóná jù.
- If applicable, connect the pulse output terminals to a compatible data acquisition system.
Akiyesi: Incorrect wiring can cause damage to the meter, electrical system, or pose a safety hazard. Always consult a qualified electrician for installation.
5. Isẹ
5.1 Agbara Lori
Once correctly installed and wired, restore power to the circuit. The meter's LCD display should illuminate, and the phase indicator LEDs (L1, L2, L3) will light up if the corresponding phases are active.
5.2 Kíkà Ìfihàn
- The LCD displays the total active energy consumption in kilowatt-hours (kWh). The format is typically 6 digits for integer kWh and 2 digits for decimal kWh (e.g., 000000.00 kWh).
- The pulse indicator LED (often labeled 400imp/kWh) will flash proportionally to the energy being consumed. A faster flash rate indicates higher power consumption.
- The L1, L2, L3 LEDs indicate the presence of voltage on each respective phase.
6. Itọju
- Ninu: Jẹ́ kí mita náà mọ́ tónítóní kí ó sì wà ní àìní eruku. Lo aṣọ rírọ̀ tí ó gbẹ fún fífọ mọ́. Má ṣe lo àwọn ohun ìfọṣọ tàbí àwọn ohun èlò ìfọṣọ.
- Ayewo: Periodically inspect the wiring connections for tightness and signs of wear or damage. Ensure the meter is securely mounted.
- Ayika: Ensure the operating environment remains within the specified temperature and humidity ranges to prolong the meter's lifespan.
No user-serviceable parts are inside the meter. For any internal issues, contact qualified service personnel.
7. Laasigbotitusita
| Isoro | Owun to le Fa | Ojutu |
|---|---|---|
| No display / Meter not powering on | No power supply; incorrect wiring; internal fault. | Ṣàyẹ̀wò ìpèsè agbára àkọ́kọ́. Ṣàyẹ̀wò àwọn ìsopọ̀ wáyà. Tí ìṣòro náà bá ń bá a lọ, kan sí olùrànlọ́wọ́. |
| Incorrect energy reading | Incorrect wiring; meter fault; external interference. | Re-check wiring against diagram. Ensure meter is correctly rated for the circuit. Contact support if readings are consistently inaccurate. |
| Pulse LED not flashing | No load connected; very low power consumption; LED fault. | Ensure there is an active load. Check if the main display is accumulating energy. |
8. Awọn pato
| Paramita | Iye |
|---|---|
| Awoṣe | XTM024 |
| Iru | Three Phase Four Wire Electronic Type |
| Itọkasi Voltage | 3 X 220/380V AC, 3 X 230/400V AC |
| Oṣuwọn Voltage | AC220V/400V |
| Reference Current (Base/Max) | 3 X 5(80A), 3 X 1.5(6A), 3 X 30(100A) |
| Yiye Ipele | 1.0 (IEC62053-21) |
| Ti won won Igbohunsafẹfẹ | 50Hz |
| Ìṣọpọ̀ Àìdákẹ́jẹ́ẹ́ | 400imp / kWh |
| Ifihan | LCD 6 + 2 digits |
| Agbara agbara | 2W, 10VA |
| Bibẹrẹ Lọwọlọwọ | 0.004Ib |
| Awọn iwọn otutu ti nṣiṣẹ | -20°C ~ 55°C |
| Ibi ipamọ otutu | -25°C ~ 70°C |
| Awọn ọna Voltage | 0.9-1.1 Ìwọ̀n Tí A Gbé Kalẹ̀tage |
| Ìwọ̀n Púpọ̀tage | 0.8-1.15 Ìwọ̀n Tí A Gbé Kalẹ̀tage |
| Average Humidity Value of Year | 75% |
| Ibiti ọriniinitutu | 20-80% |
| Ọna fifi sori ẹrọ | DIN Rail |
| Awọn iwọn | Approx. 10.1 X 7.6 X 6.5cm / 3.97 X 2.99 X 2.55in |
| Iwọn | Isunmọ. 500g |
9. Atilẹyin ọja ati Support
For warranty information or technical support, please refer to the documentation provided with your purchase or contact your retailer/manufacturer directly. Keep your purchase receipt as proof of purchase.