1. Ifihan
This manual provides essential information for setting up, operating, and maintaining your GOODTEL G2 10-inch Android 13 Tablet. Please read it thoroughly to ensure proper usage and to maximize your device's performance.
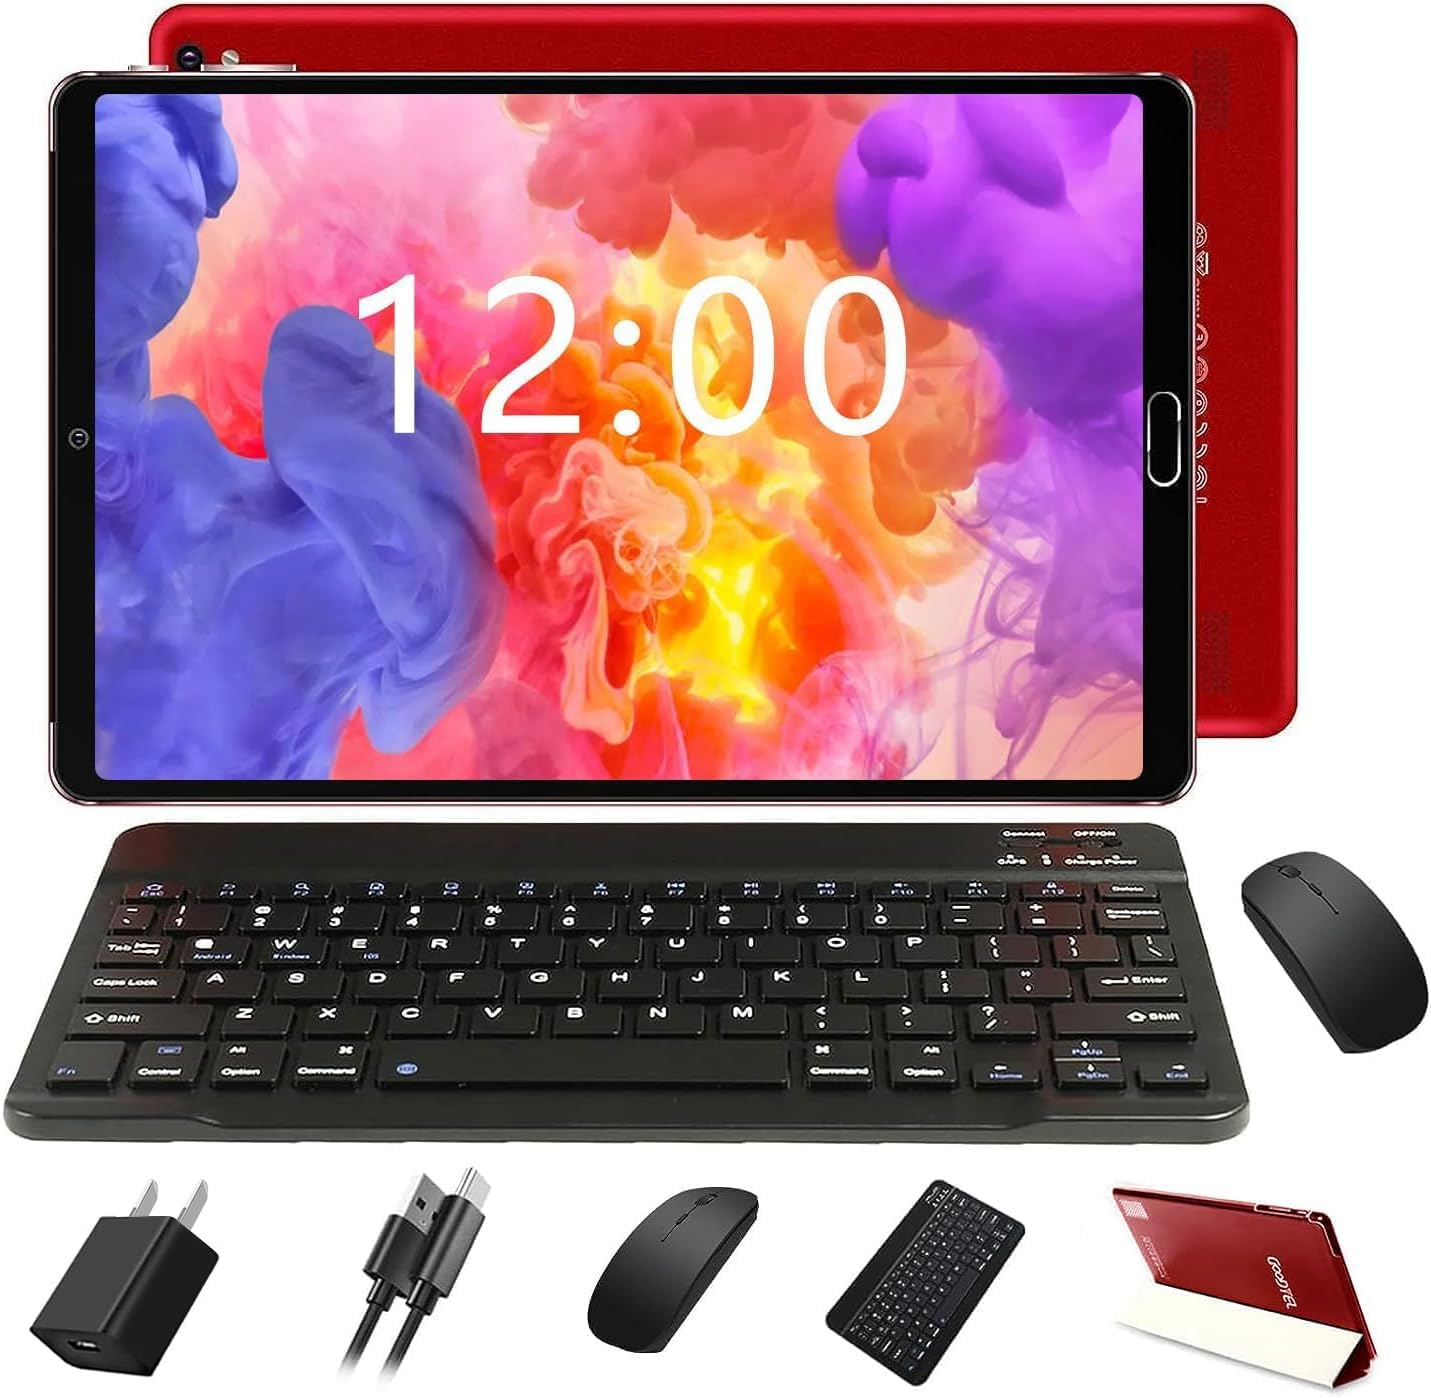
Figure 1: GOODTEL G2 Tablet with included accessories.
2. Ohun ti o wa ninu Apoti
The GOODTEL G2 Tablet package includes the following items:
- GOODTEL G2 10-inch Android 13 Tablet
- Tablet Case
- Keyboard Bluetooth
- Asin Alailowaya
- OTG Adapter
- Charging Device (Adapter and USB-C Cable)
- Screen Protective Film (pre-applied and an extra one)
- Stylus Pen
- Itọsọna olumulo
Video 1: Unboxing the GOODTEL G2 Tablet and its accessories.
3. Ọja Ipariview
Familiarize yourself with the physical components of your GOODTEL G2 Tablet.

olusin 2: Ẹyìn view of the GOODTEL G2 Tablet highlighting key features.
3.1 Awọn ohun elo ti ara
- Two Speakers: Located on the top edge (when held horizontally).
- Filaṣi kamẹra: Next to the rear camera module.
- Kamẹra 8 MP: Kamẹra ti nkọju si ẹhin.
- Iwọn didun - / Iwọn didun +: Buttons to adjust audio volume.
- Bọtini agbara: Used to turn the device on/off or wake/sleep the screen.
- Jack agbekọri 3.5 mm: Fun sisopọ awọn agbekọri onirin.
- Micro SD Kaadi Iho: Supports expandable memory from 4GB to 1TB.
- Charging Port and OTG Data (Type-C): For charging and connecting OTG devices.
- Front Camera (5 MP): Located on the front bezel.
4. Eto
4.1 Gbigba agbara si tabulẹti
Before first use, fully charge your tablet using the provided charging adapter and USB-C cable. Connect the USB-C cable to the tablet's charging port and the adapter to a power outlet. The battery indicator on the screen will show charging status.
4.2 Inserting a MicroSD/TF Card
To expand storage, locate the Micro SD card slot on the side of the tablet. Gently insert a compatible MicroSD/TF card (up to 1TB) into the slot until it clicks into place. Ensure the tablet is powered off before inserting or removing the card.
4.3 Titan / Pa a
- Lati Fi agbara: Press and hold the Power Button until the GOODTEL logo appears.
- Lati Paarẹ: Press and hold the Power Button until a menu appears, then select "Power off".
- Lati Sun/Ji: Briefly press the Power Button.
4.4 Ni ibẹrẹ Oṣo
Ni igba akọkọ ti agbara, tẹle awọn itọnisọna loju iboju lati:
- Yan ede rẹ.
- Sopọ si nẹtiwọki Wi-Fi kan.
- Wọle pẹlu akọọlẹ Google rẹ tabi ṣẹda tuntun kan.
- Set up date, time, and other preferences.
4.5 Connecting the Wireless Mouse
The tablet supports a wireless mouse for enhanced navigation.
- Open the battery compartment of the mouse and insert the required batteries (not always included, check packaging).
- Wa dongle USB inu yara batiri Asin naa.
- Connect the USB dongle to the provided OTG adapter.
- Plug the OTG adapter into the tablet's USB-C port. The tablet should automatically detect the mouse.
Video 2: Demonstrating the installation of the mouse and connecting it to the tablet.
4.6 Nsopọ Bluetooth Keyboard
The included keyboard connects via Bluetooth.
- Tan-an keyboard nipa lilo agbara yipada.
- Press the "Connect" button on the keyboard to enter pairing mode.
- Lórí tablet rẹ, lọ sí Eto > Awọn ẹrọ ti a ti sopọ > Bluetooth.
- Rii daju pe Bluetooth ti ṣiṣẹ.
- Tap "Pair new device" and select the keyboard from the list of available devices (e.g., "3.0 keyboard").
- Jẹrisi koodu sisopọ ti o ba ṣetan.
Video 3: Guide on connecting the Bluetooth keyboard to the tablet.
4.7 Using the Stylus Pen
The stylus pen can be used for precise input, drawing, or navigating the touchscreen. Simply touch the pen to the screen as you would with your finger.
5. Ṣiṣẹ tabulẹti
5.1 Lilọ kiri Iboju ifọwọkan
The tablet features a responsive IPS touchscreen. Use standard Android gestures:
- Fọwọ ba: Yan ohun kan tabi ṣii ohun elo kan.
- Fọwọkan & Mu: Wọle si awọn akojọ aṣayan ọrọ-ọrọ tabi gbe awọn ohun kan.
- Ra: Yi lọ nipasẹ awọn oju-iwe tabi akoonu.
- Fun pọ-si- Sun-un: Sun-un sinu tabi jade lori awọn aworan ati web awọn oju-iwe.

Figure 3: The tablet's IPS screen provides clear visuals.
5.2 Iboju Ile
The Home screen provides access to your apps, widgets, and notifications. You can customize it by adding or removing app icons and widgets.
5.3 Awọn iwifunni ati Awọn eto Yara
Rọ lati oke iboju naa lati wọle si awọn iwifunni ati awọn eto iyara (Wi-Fi, Bluetooth, imọlẹ, ati bẹbẹ lọ).
5.4 Awọn ohun elo
- Awọn ohun elo fifi sori ẹrọ: Use the Google Play Store to download and install applications.
- Awọn ohun elo yiyọ kuro: Touch and hold an app icon, then drag it to the "Uninstall" option, or go to Eto> Awọn ohun elo.
- Awọn ohun elo Ṣiṣakoso: In Eto> Awọn ohun elo, you can manage permissions, storage, and data usage for each app.
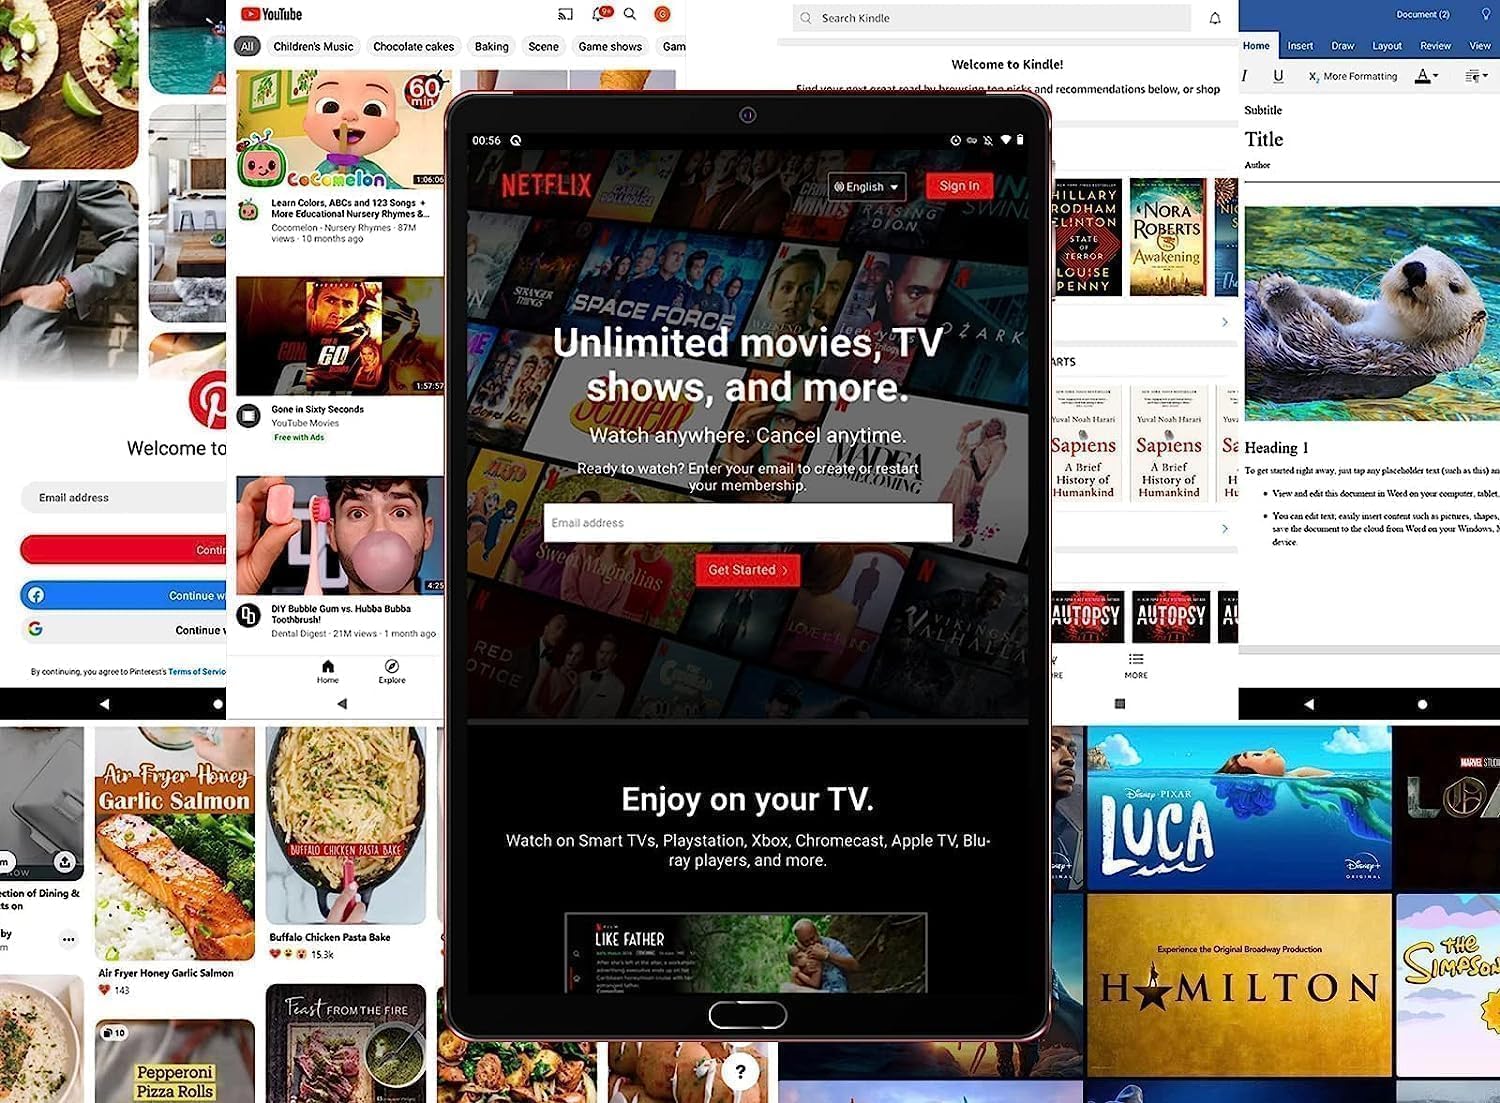
Figure 4: The tablet is suitable for various applications, including streaming services.
5.5 Internet Asopọmọra
- Wi-Fi: Lọ si Eto> Nẹtiwọọki & intanẹẹti> Wi-Fi to connect to available networks. The tablet supports 5G/2.4G Wi-Fi.
- Aaye Gbona: You can use the tablet as a Wi-Fi hotspot if your service provider supports it.
5.6 Bluetooth Asopọmọra
Connect Bluetooth devices like headphones, speakers, or other peripherals via Eto > Awọn ẹrọ ti a ti sopọ > Bluetooth.
5.7 kamẹra Lilo
The tablet features an 8MP rear camera and a 5MP front camera. Open the Camera app to take photos or record videos. Adjust settings like flash, timer, and mode within the app.
5.8 OTG Iṣẹ
The tablet supports On-The-Go (OTG) functionality, allowing you to connect USB devices like flash drives, external hard drives, or other peripherals using the provided OTG adapter.
6. Itọju
6.1 batiri Itọju
- Yago fun awọn iwọn otutu to gaju.
- Ma ṣe jẹ ki batiri naa ṣan patapata nigbagbogbo.
- Lo ṣaja ti a pese nikan.
6.2 Ninu tabulẹti
Lo asọ ti ko ni lint lati nu iboju ati ara tabulẹti naa. Yago fun lilo awọn kẹmika lile tabi awọn ohun elo abrasive.
6.3 Software imudojuiwọn
Ṣayẹwo nigbagbogbo fun awọn imudojuiwọn eto ni Eto> Eto> Imudojuiwọn eto to ensure your tablet has the latest features and security patches.
6.4 Ibi Management
Monitor your storage usage in Eto > Ibi ipamọ. Paarẹ ti ko wulo files or apps, or move media to a MicroSD card to free up space.
7. Laasigbotitusita
Ti o ba pade awọn ọran pẹlu tabulẹti rẹ, tọka si awọn solusan ti o wọpọ wọnyi:
| Isoro | Ojutu |
|---|---|
| Tabulẹti kii yoo tan | Rii daju pe batiri ti gba agbara. Sopọ si ṣaja fun o kere iṣẹju 30, lẹhinna gbiyanju agbara lori. |
| Iboju ko dahun | Restart the tablet. If unresponsive, force restart by holding the Power button for 10-15 seconds. |
| Awọn oran asopọ Wi-Fi | Check router, restart tablet, forget and reconnect to the network in Settings. |
| Ẹrọ Bluetooth kii yoo so pọ | Ensure the device is in pairing mode and within range. Restart Bluetooth on both devices. |
| Awọn ohun elo kọlu tabi didi | Clear app cache/data (Settings > Apps), update the app, or uninstall and reinstall. |
8. Awọn pato
| Ẹya ara ẹrọ | Ẹ̀kúnrẹ́rẹ́ |
|---|---|
| Orukọ awoṣe | G2 |
| Eto isesise | Android 13 |
| Iwon iboju | 10 inches |
| Ifihan Iru | IPS LCD |
| Ipinnu Ifihan | 1280x800 awọn piksẹli |
| Àgbo | 10GB (4GB physical + 6GB expanded) |
| ROM (Ibi ipamọ inu) | 64GB |
| Expandable Memory | Up to 1TB via MicroSD/TF card |
| Iyara isise | 2 GHz |
| isise Apejuwe | ARM Cortex Octa-Core |
| Asopọmọra | Wi-Fi 5G/2.4G, Bluetooth 5.0, Hotspot, AGPS, OTG |
| Kamẹra ẹhin | 8 MP |
| Kamẹra iwaju | 5 MP |
| Agbara Batiri | 6000 mAh Litiumu Batiri |
| Batiri Apapọ Life | Titi di awọn wakati 9 |
| Ohun | Built-in dual channel stereo speakers, Built-in microphone |
9. Atilẹyin ọja ati Support
The GOODTEL G2 Tablet comes with a manufacturer's warranty. For specific warranty terms, conditions, and duration, please refer to the warranty card included in your product packaging or contact GOODTEL customer support directly.
For further assistance, technical support, or service inquiries, please visit the official GOODTEL webojula tabi kan si wọn onibara iṣẹ awọn ikanni.