
Ọrọ Iṣaaju
This manual provides detailed instructions for the setup, operation, and maintenance of your infactory FWS-100 Radio-Controlled Weather Station. Please read this manual thoroughly before using the device to ensure proper function and longevity.
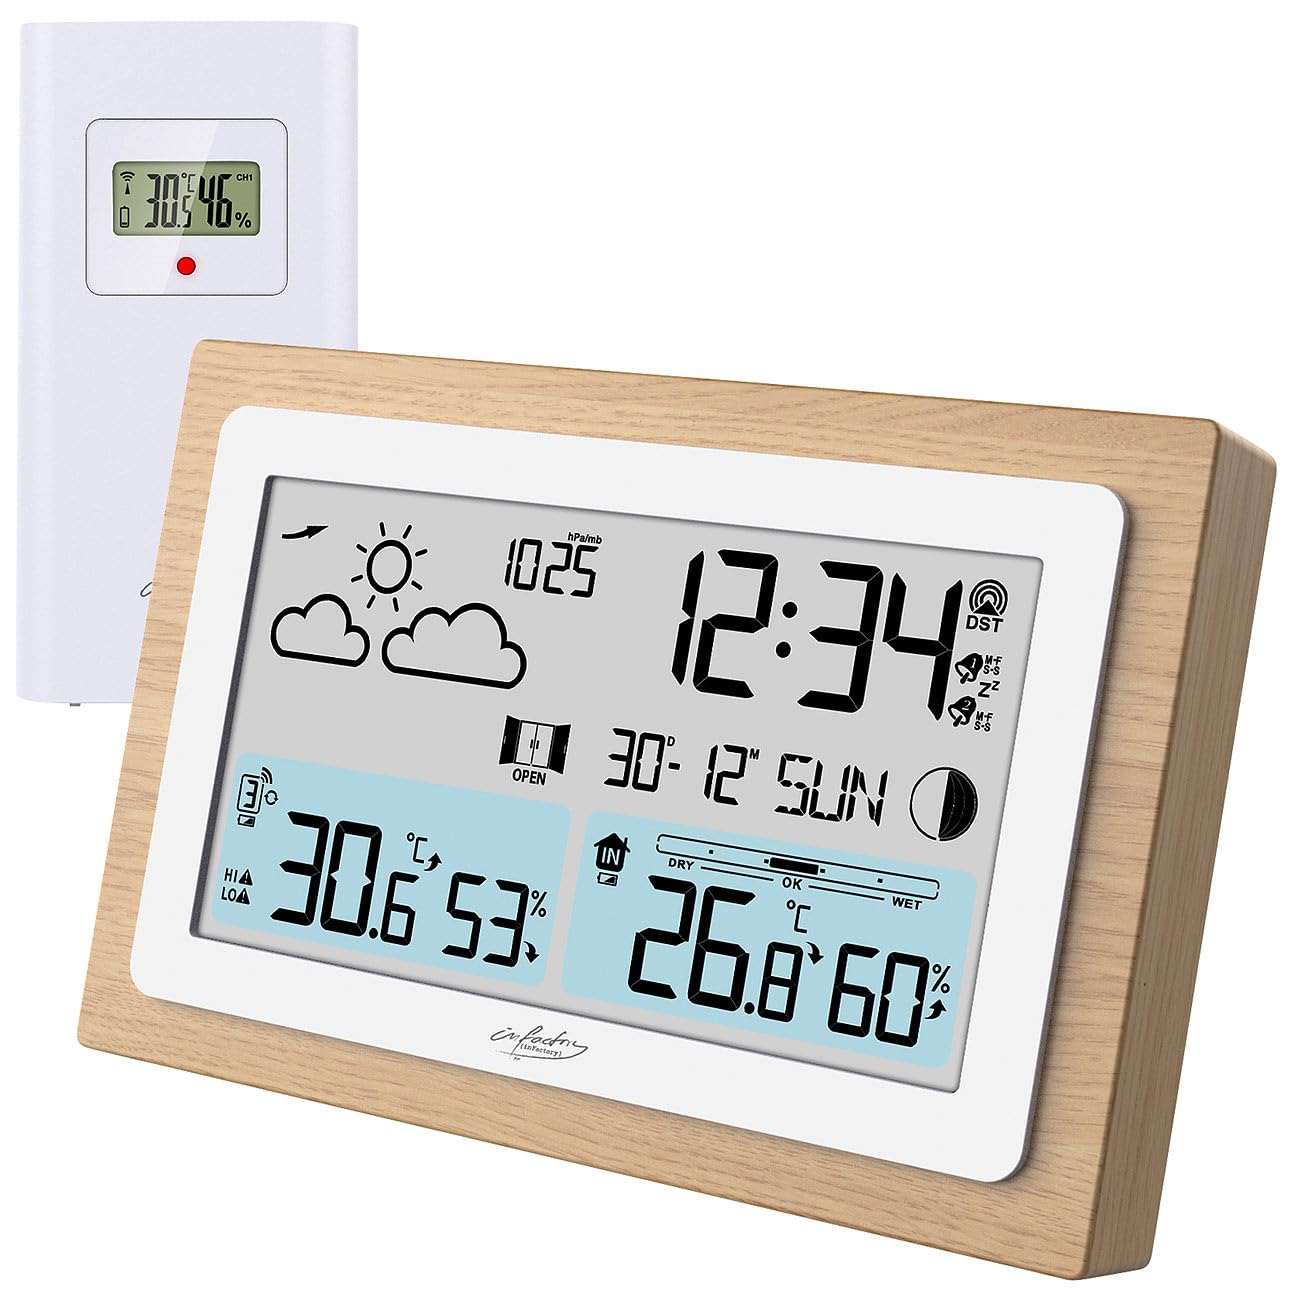
Image: The infactory FWS-100 weather station with its main unit featuring a wooden frame and a separate white outdoor sensor.
Package Awọn akoonu
- 1x infactory FWS-100 Radio-Controlled Weather Station (main unit)
- 1x Wireless Outdoor Sensor (IP44 splash-proof)
- 1x User Manual (refer to this translated version for English)
Akiyesi: Batteries (2x AAA for main unit, 2x AAA for outdoor sensor) and a DC power adapter are not included and must be purchased separately.
Key Awọn ẹya ara ẹrọ
- LCD display (11.2 x 6.2 cm) with backlight
- Simultaneous display of indoor and outdoor temperature and humidity
- Weather trend forecast
- Radio-controlled time (DCF signal) with manual setting option
- 12/24 hour format selection
- Date and moon phase display
- Alarm clock with up to two adjustable alarms and snooze function
- Real wood frame design
- Wireless outdoor sensor with up to 60m transmission range (open area)
- Expandable with up to 2 additional outdoor sensors (sold separately)
- Temperature range: Indoor -9.9°C to 50°C; Outdoor -40°C to 70°C
- Power supply: 2x AAA batteries or DC power adapter (not included) for main unit; 2x AAA batteries (not included) for outdoor sensor.
Ṣeto
1. Fifi sori batiri
Ẹka akọkọ:
- Ṣii ideri iyẹwu batiri ni ẹhin ẹyọ akọkọ.
- Insert 2x AAA batteries, observing the correct polarity (+/-).
- Pa ideri iyẹwu batiri naa.
- Alternatively, connect a DC 5V power adapter (not included) to the DC jack for continuous power and backlight.
Sensọ ita gbangba:
- Ṣii ideri iyẹwu batiri ni ẹhin sensọ ita ita.
- Insert 2x AAA batteries, observing the correct polarity (+/-).
- Pa ideri iyẹwu batiri naa.

Aworan: Ẹyin view of the main weather station unit, showing the battery compartment and control buttons.
2. Ibi sensọ
Place the outdoor sensor in a shaded, dry location, protected from direct sunlight and rain. Ensure it is within the 60-meter transmission range of the main unit. Avoid placing it near large metal objects or electronic devices that may interfere with the wireless signal. The sensor is splash-proof (IP44) but not fully waterproof.
3. Amuṣiṣẹpọ akọkọ
After inserting batteries into both units, the main unit will automatically attempt to connect with the outdoor sensor and receive the DCF radio signal for time synchronization. This process may take several minutes. Ensure both units are close to each other during initial setup.
Video: This video demonstrates the general features and setup of a wireless weather station, including sensor placement and display functions.
Awọn ilana Iṣiṣẹ
1. Ifihan Loriview
The LCD display shows various information simultaneously:
- Oke Osi: Weather forecast icons (sunny, cloudy, rainy, etc.)
- Apa ọtun oke: Time, DCF signal indicator, alarm indicators (Zz for snooze, bell for alarm)
- Aarin: Date and day of the week, moon phase
- Isalẹ Osi: Outdoor temperature and humidity, signal strength for outdoor sensor
- Ọtun Isalẹ: Indoor temperature and humidity, comfort level indicator (DRY, OK, WET)

Aworan: A alaye view of the weather station's LCD display, showing indoor/outdoor temperatures, humidity, time, date, and weather forecast icons.
2. Time and Date Settings
The station automatically sets the time via the DCF radio signal. If the signal is not received or you wish to set it manually:
- Tẹ mọlẹ "ṢẸ̀TẸ̀" button (or similar, refer to button layout on back) to enter time setting mode.
- Lo awọn "+" ati "-" awọn bọtini lati ṣatunṣe iye.
- Tẹ "ṢẸ̀TẸ̀" lẹẹkansi lati jẹrisi ati gbe lọ si eto atẹle (fun apẹẹrẹ, ọna kika wakati 12/24, wakati, iṣẹju, ọdun, oṣu, ọjọ).
3. Awọn iṣẹ itaniji
The station supports up to two alarms.
- Tẹ awọn "ÌDÁMÙ" button (or similar) to view awọn akoko itaniji.
- Tẹ mọlẹ "ÌDÁMÙ" lati tẹ ipo eto itaniji sii.
- Lo "+" ati "-" lati ṣatunṣe akoko itaniji.
- Tẹ "ÌDÁMÙ" to confirm and switch between Alarm 1 and Alarm 2 settings.
- Lati mu itaniji ṣiṣẹ/mu maṣiṣẹ, tẹ awọn "ÌDÁMÙ" button repeatedly until the alarm icon appears/disappears.
- When an alarm sounds, press any button (except snooze) to stop it, or press the "DÁNÚ" button for a temporary delay.
4. Aṣayan Aṣayan iwọn otutu
Láti yípadà láàrin Celsius (°C) àti Fahrenheit (°F), tẹ "C/F" button (or similar, often combined with another button). This usually affects both indoor and outdoor temperature displays.
5. Adding Additional Sensors
The weather station can connect to up to two additional outdoor sensors (not included). To add a new sensor:
- Install batteries in the new sensor.
- On the main unit, press the "CH" (Channel) button to cycle through channels.
- Tẹ mọlẹ "CH" button to initiate a search for new sensors. The main unit will display the new sensor's data once connected.
Itoju
- Ninu: Wipe the main unit and sensor with a soft, dry cloth. Do not use abrasive cleaners or solvents.
- Rirọpo Batiri: Replace batteries in both units when the low battery indicator appears on the display. Ensure correct polarity.
- Ibi ipamọ: Tí o bá ń tọ́jú ẹ̀rọ náà fún ìgbà pípẹ́, yọ gbogbo bátìrì kúrò kí ó má baà jò.
Laasigbotitusita
| Isoro | Owun to le Fa | Ojutu |
|---|---|---|
| Ko si ifihan lori ẹrọ akọkọ | Dead batteries or incorrect polarity. No power adapter connected. | Replace batteries or check polarity. Connect DC power adapter. |
| A ko fihan iwọn otutu/ọrinrin ita gbangba | Sensor out of range, dead sensor batteries, or interference. | Move sensor closer to main unit. Replace sensor batteries. Re-synchronize sensor (see Setup). Avoid interference sources. |
| Ifihan akoko ti ko tọ | Weak DCF signal or manual setting required. | Move unit to a location with better signal reception. Manually set the time (see Operating Instructions). |
| Inaccurate outdoor temperature | Sensọ fara si imọlẹ orun taara tabi orisun ooru. | Relocate the outdoor sensor to a shaded area, away from heat sources. |
Awọn pato
- Brand: infactory
- Awoṣe: FWS-100 (ZX7450)
- Iru ifihan: LCD
- Iwọn iboju LCD: 11.2 x 6.2 cm
- Iwọn otutu inu ile: -9.9°C si 50°C (14.2°F si 122°F)
- Iwọn otutu ita gbangba: -40°C si 70°C (-40°F si 158°F)
- Yiye iwọn otutu: ±0.1°C
- Ibiti Gbigbe Alailowaya: Titi di mita 60 (agbegbe ṣiṣi)
- Idaabobo Sensọ Ita gbangba: IP44 (majẹri asesejade)
- Power Supply (Main Unit): 2x AAA batteries (not included) or DC 5V power adapter (not included)
- Power Supply (Outdoor Sensor): Awọn batiri 2x AAA (kii ṣe pẹlu)
- Awọn iwọn (Ẹka akọkọ): 14.8 x 9.8 x 2.6 cm
- Dimensions (Outdoor Sensor): 9.7 x 5 x 3.2 cm
- Ìwọ̀n (Ẹ̀ka pàtàkì): 256 g
- Asopọmọra: Ailokun
- Awọn ẹya pataki: Radio-controlled clock, dual alarms, snooze, moon phase, weather forecast, comfort indicator.
Atilẹyin ọja ati Support
Warranty information is typically provided with your purchase. Please refer to the documentation included in your product packaging or contact your retailer for details regarding warranty coverage and customer support. For technical assistance, please contact infactory customer service.