1. Ọja Ipariview
The Retro-Bit Origin 8 is a 2.4 GHz wireless controller designed to provide a classic gaming experience with modern enhancements. It offers multi-compatibility across various platforms, including original NES consoles, PC/Windows, MacOS, other USB-enabled devices, and Nintendo Switch Online.

Iwaju view of the Retro-Bit Origin 8 Wireless Controller, showcasing the D-pad, A and B buttons, and Select/Start buttons.
Key features include additional ZL and ZR shoulder buttons, Home and Screenshot buttons for enhanced functionality, and built-in Turbo switches for rapid-fire inputs on both A and B buttons. The controller is powered by a built-in 500 mAh rechargeable battery and utilizes a USB-C fast charging port.

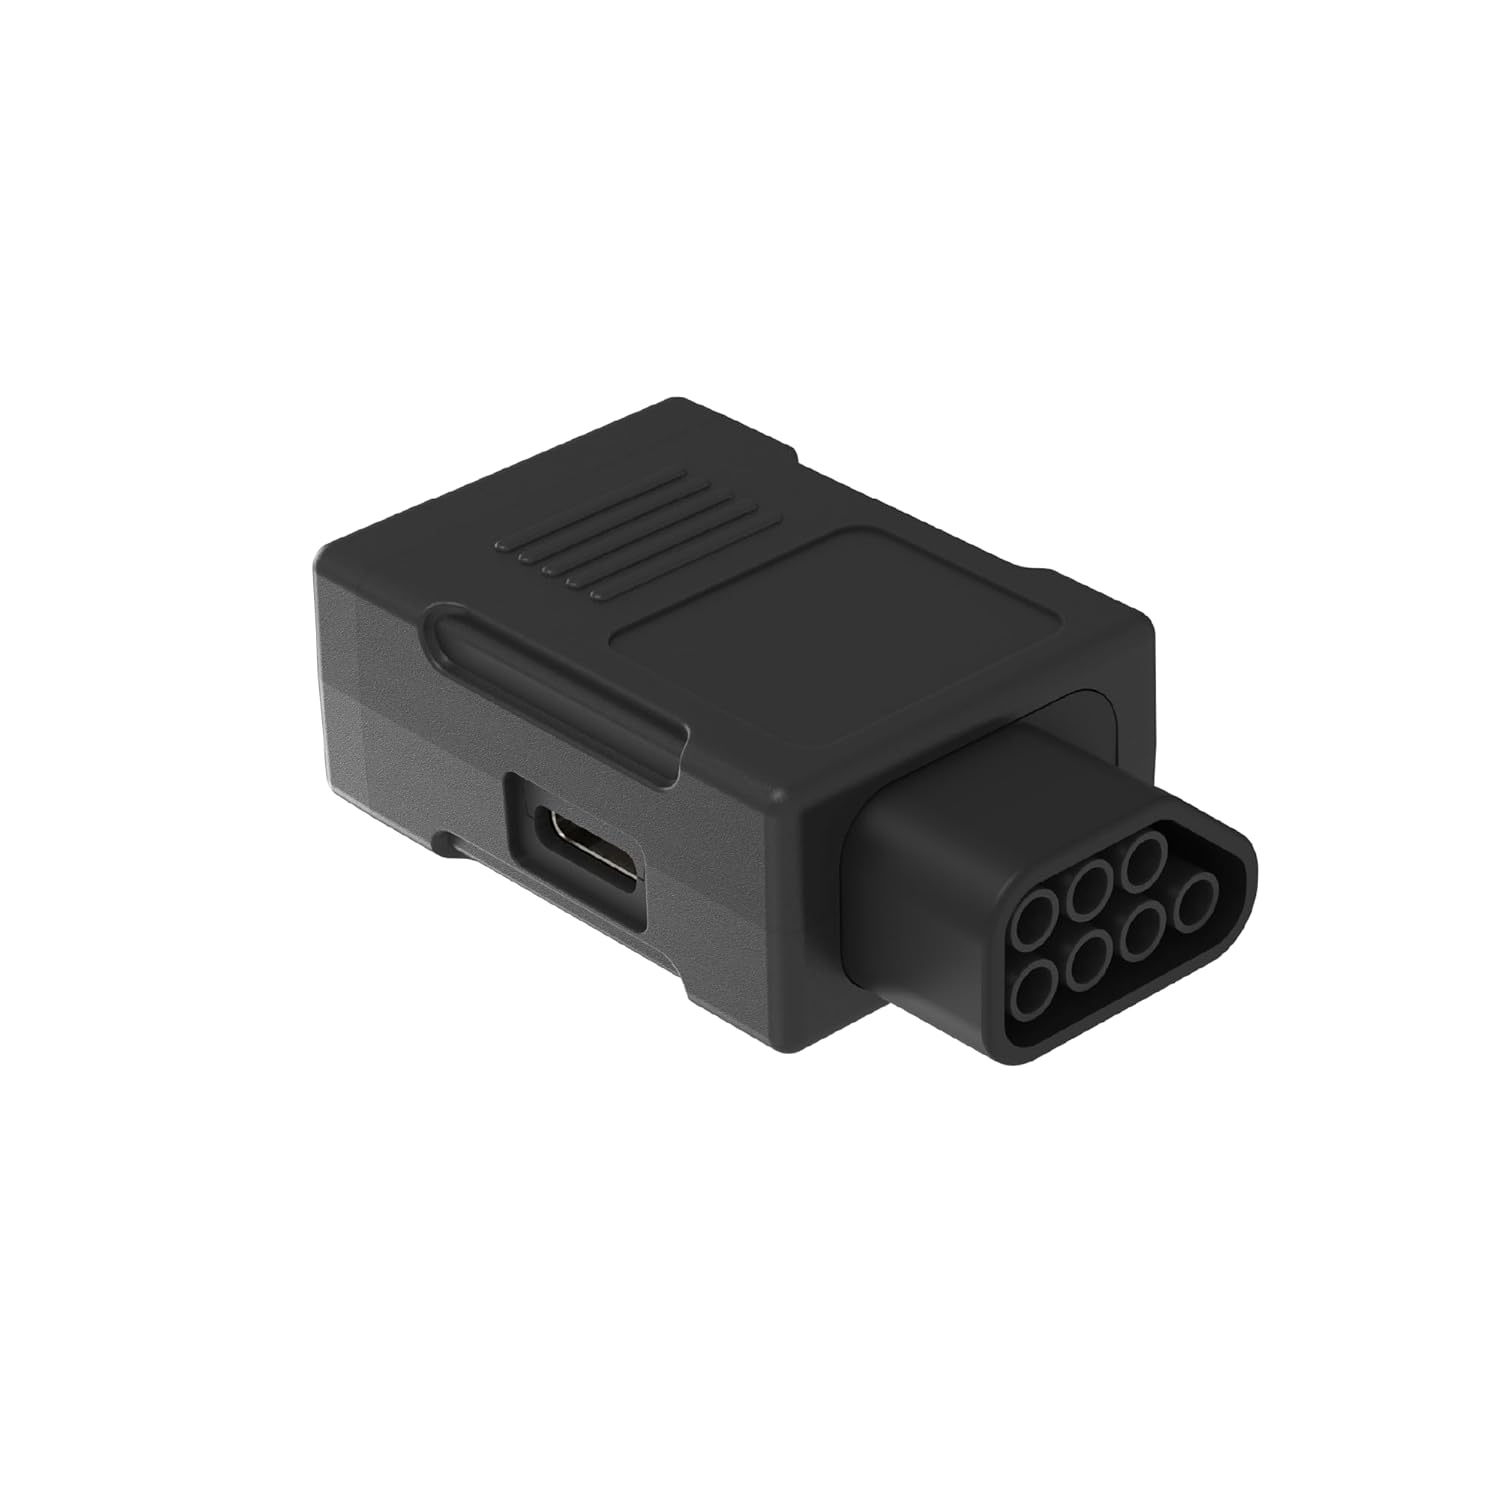
Apa view of the Retro-Bit Origin 8 Wireless Controller, highlighting the ZL, ZR shoulder buttons, and the USB-C charging port.
2. Eto ati Asopọ
2.1 Gbigba agbara Adarí
Before initial use, fully charge the controller using the included 3ft/1m USB-C to USB charge cable. Connect the USB-C end to the controller and the USB-A end to a compatible power source (e.g., computer USB port, USB wall adapter).
2.2 Connecting to Original NES Console
- Insert the NES wireless receiver into an available controller port on your original NES console. Ensure it is firmly seated.
- Power on your NES console.
- Turn on the Retro-Bit Origin 8 controller. The controller should automatically pair with the receiver. The LED indicator on the receiver will show a stable light once connected.
The NES wireless receiver, designed to plug into the original NES console controller port.
2.3 Connecting to PC/MacOS/USB Devices
- Insert the USB wireless receiver into an available USB port on your PC, MacOS device, or other compatible USB device.
- Turn on the Retro-Bit Origin 8 controller. The controller should automatically pair with the receiver. The LED indicator on the receiver will show a stable light once connected.
- For PC gaming, the controller may need to be switched to X-input mode for optimal compatibility with certain games or emulators. To activate X-input mode, press and hold the Bẹrẹ + B awọn bọtini ni nigbakannaa fun bii awọn aaya meji.

The USB wireless receiver, compatible with PC, MacOS, and other USB-enabled devices.
2.4 Connecting to Nintendo Switch Online
- Ensure your Nintendo Switch console is powered on and updated to the latest firmware.
- Navigate to the 'Controllers' menu on your Switch and select 'Change Grip/Order'.
- Turn on the Retro-Bit Origin 8 controller. The controller should appear as an available device. Follow the on-screen prompts to complete the pairing process.
- For optimal play with NES games on Switch Online, you may need to remap the A and B buttons within the game's settings to match the classic NES layout (e.g., A for Jump, B for Run/Shoot).
3. Awọn ilana Iṣiṣẹ
3.1 Ipilẹ idari
- D-Pad: Ìtẹ̀síwájú ìtọ́sọ́nà fún ìṣíkiri àti ìlọ kiri àkójọ.
- Bọtini kan: Primary action button (e.g., jump, confirm).
- B Bọtini: Secondary action button (e.g., attack, cancel).
- Yan Bọtini: Used for various in-game functions, often pausing or selecting options.
- Bọtini Ibẹrẹ: Used for pausing games or initiating gameplay.
3.2 To ti ni ilọsiwaju Awọn ẹya ara ẹrọ
- ZL & ZR Shoulder Buttons: Additional buttons for modern game compatibility and enhanced control.
- Bọtini Ile: Returns to the system's home menu (primarily for Nintendo Switch).
- Bọtini Sikirinifoto: Captures screenshots (primarily for Nintendo Switch).
- Turbo Switches (A & B): Activate rapid-fire functionality for the A and B buttons. Press the respective Turbo switch once to enable, and again to disable. This feature is available when using either the NES or USB receiver.
3.3 Iṣakoso agbara
- The controller features an auto-shutoff function after a few minutes of inactivity to conserve battery life.
- To manually power off the controller or shut it down sooner, disconnect the USB or NES dongle from the console/device.
4. Itọju
- Ninu: Lo aṣọ rírọrùn tí ó gbẹ láti nu ojú olùdarí náà. Yẹra fún lílo àwọn kẹ́míkà líle tàbí àwọn ohun èlò ìpalára.
- Ibi ipamọ: Tọju olutọju naa ni itura, aye gbigbẹ kuro lati orun taara ati awọn iwọn otutu to gaju.
- Itọju Batiri: For optimal battery longevity, avoid fully discharging the battery frequently. Recharge the controller when the battery indicator is low.
5. Laasigbotitusita
- Alakoso Ko Sopọ:
- Ensure the correct receiver (NES or USB) is properly inserted into the console/device. For NES, ensure a snug fit.
- Verify the controller is charged.
- Confirm the controller is powered on.
- Try re-pairing the controller by turning it off and on, and re-inserting the receiver.
- Incorrect Button Response on PC:
- Switch the controller to X-input mode by holding Bẹrẹ + B fun 5 aaya.
- Button Mapping Issues on Nintendo Switch:
- Access the in-game controller settings and remap the A and B buttons to your preferred classic layout.
- Note that the controller lacks X and Y buttons, which may limit functionality in some modern Switch games or menu navigation (e.g., closing applications).
- NES Receiver Loose Fit:
- Some users have reported a loose fit with the NES dongle. Ensure it is pushed in firmly and carefully to establish a stable connection.
- Android TV Compatibility:
- The controller was not originally designed for Android TV, and compatibility may be limited. Refer to the Retro-Bit support website for any potential firmware updates or workarounds.
6. Awọn pato
| Ẹya ara ẹrọ | Ẹ̀kúnrẹ́rẹ́ |
|---|---|
| Orukọ Brand | Retiro-Bit |
| Orukọ awoṣe | rb-uni-82 |
| Asopọmọra Technology | Wireless Controller (2.4 GHz) |
| Awọn ẹrọ ibaramu | Original NES, PC/Windows, MacOS, USB Devices, Nintendo Switch |
| Adarí Iru | Nintendo Yipada Alaṣẹ Alailowaya |
| Bọtini opoiye | 12 |
| Orisun agbara | Battery Powered (Built-In 500 mAh) |
| Gbigba agbara Port | USB-C |
| Iwọn Nkan | 0.15 kilo |
| Awọn iwọn Nkan | 1.34 x 4.09 x 5.63 inches |
| UPC | 849172014985 |
7. Atilẹyin ọja ati Support
For detailed warranty information, technical support, and the latest firmware updates, please visit the official Retro-Bit website. Product support and warranty terms are subject to the manufacturer's policies.