
Ọrọ Iṣaaju
This manual provides essential information for the proper installation, operation, and maintenance of your RecPro RV Single Pole Double Throw (SPDT) Rocker Switch, Model RP-1956. This switch is designed for controlling interior lighting and various appliances in recreational vehicles, rated for 20 Amps ni 14 Volts DC.
Alaye Aabo
- Always disconnect power to the circuit before installing or servicing the switch to prevent electrical shock.
- Ensure wiring connections are secure and comply with all applicable electrical codes and standards.
- Do not exceed the specified electrical ratings (20A, 14V DC) to avoid damage to the switch or connected devices.
- If you are unsure about any part of the installation process, consult a qualified electrician or RV technician.
Awọn pato
| Ẹya ara ẹrọ | Ẹ̀kúnrẹ́rẹ́ |
|---|---|
| Nọmba awoṣe | RP-1956 |
| Ipo Isẹ | ON-ON (SPDT) |
| Ti isiyi Rating | 20 Amps |
| Awọn ọna Voltage | 14 Volts DC |
| Olubasọrọ Iru | Ṣii ni deede |
| Asopọmọra Iru | Sopọ kiakia |
| Ebute Iru | SPDT |
| Iṣagbesori Iru | Panel Oke |
| Ohun elo olubasọrọ | Idẹ |
| Awọn awọ ti o wa | Dudu, Funfun |
Eto ati fifi sori
The RecPro RV Rocker Switch is designed for easy panel mounting. Follow these steps for proper installation:
- Mura Ibi Iṣagbesori: Choose a suitable panel location in your RV. Ensure there is enough space behind the panel for wiring connections.
- Ge Ṣii silẹ: Create a rectangular opening in the panel that matches the dimensions of the switch body. Refer to the dimensions image below for precise measurements. The switch is designed for a snug, self-locking fit.
- Awọn isopọ onirin: Identify the terminals on the back of the switch. This is an SPDT (Single Pole Double Throw) switch, meaning it has three terminals for switching a single input between two outputs (or On/On functionality).
- Typically, the common terminal (often marked '2' or 'COM') connects to the power source.
- The other two terminals (often marked '1' and '3' or 'A' and 'B') connect to the two different circuits or functions you wish to switch between.
- Use appropriate gauge wires with quick connect terminals for secure connections.
- Insert the Switch: Carefully push the switch into the prepared opening until it clicks securely into place. The self-locking mechanism will hold it firmly.
- Iṣe idanwo: Once installed and wired, restore power to the circuit and test the switch to ensure it operates correctly.

Aworan: Dimensions of the RecPro RV Single Pole Double Throw Rocker Switch (Model RP-1956). The image shows the front view with a width of 11/16" and height of 1 1/4", and a side view with a depth of 1 1/4" and a width of 1". Terminal numbers 1, 2, and 3 are visible on the side.
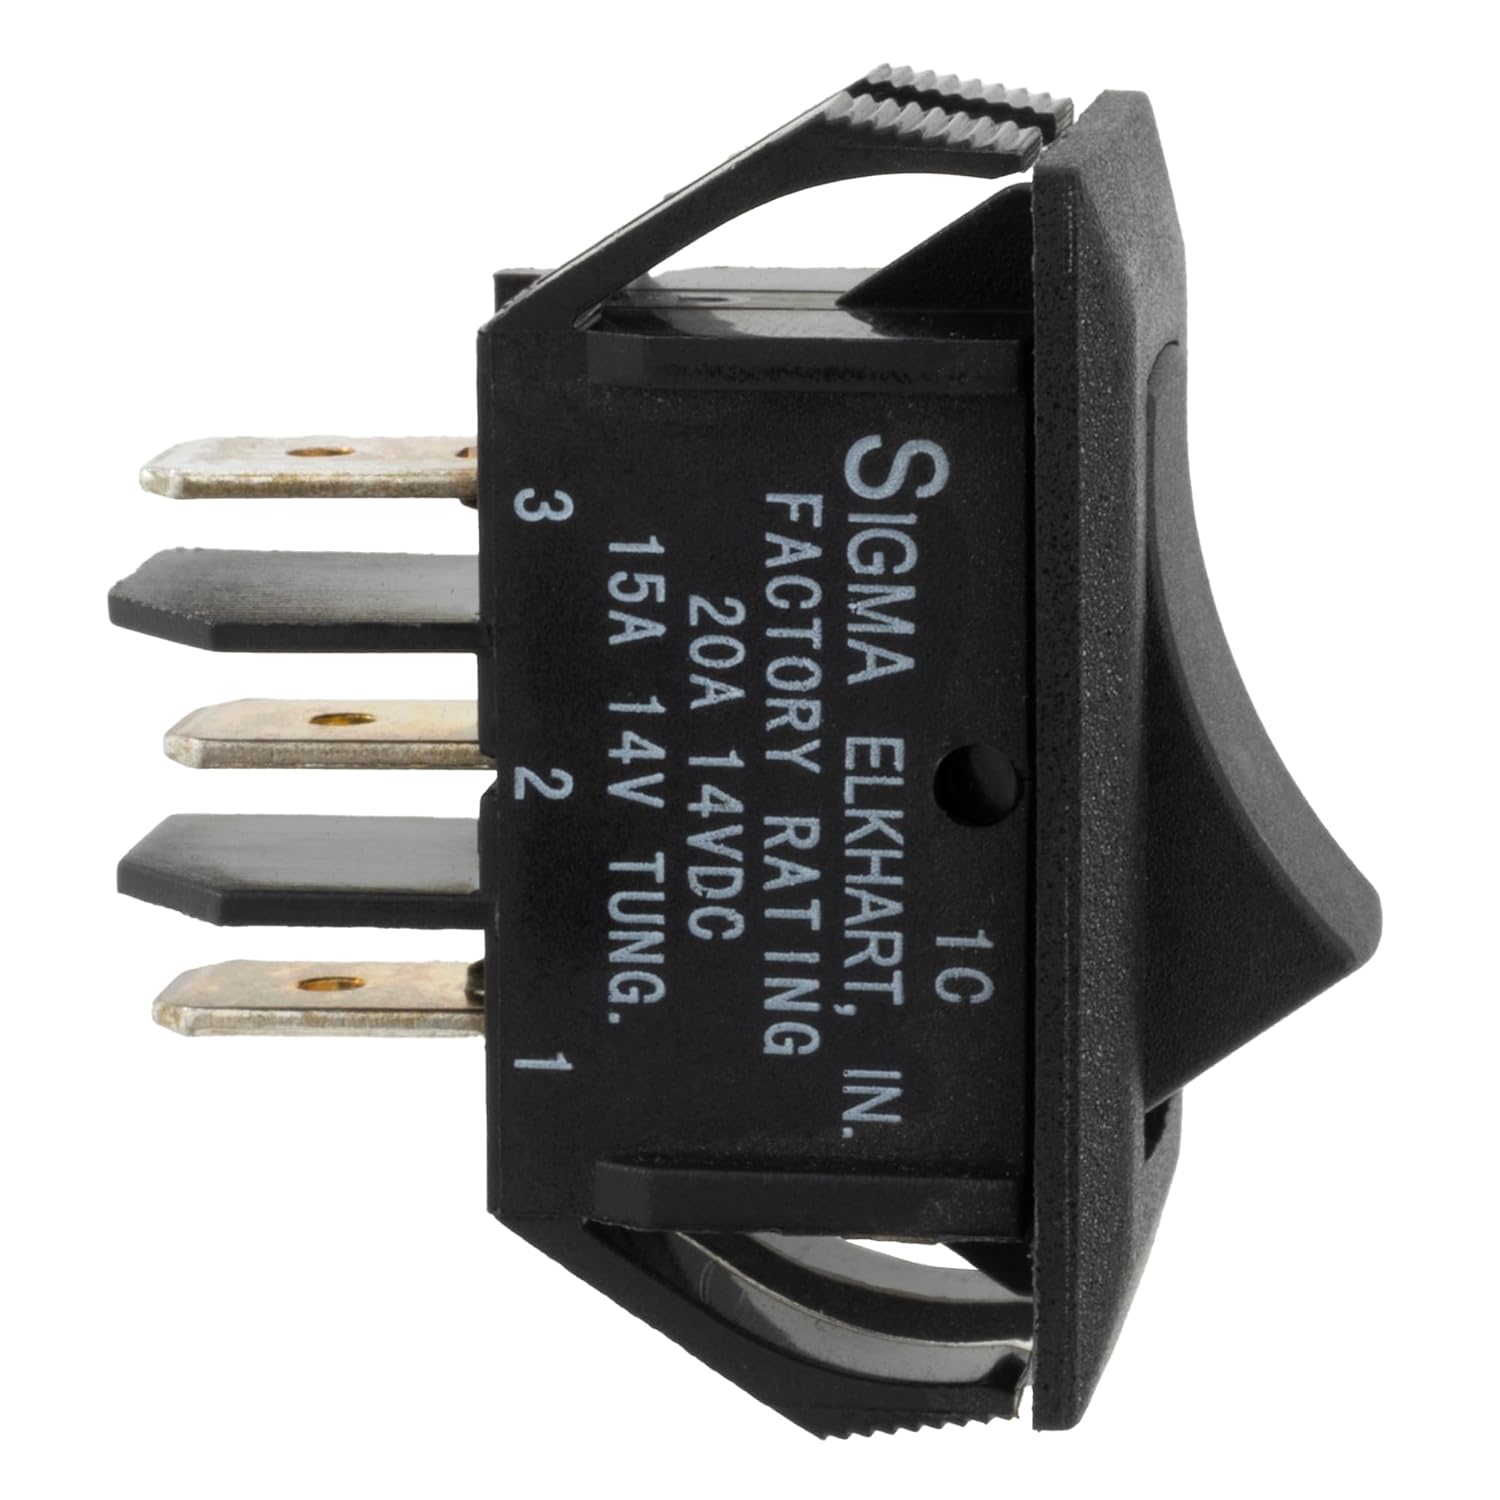
Aworan: Apa view of the RecPro RV Rocker Switch, highlighting the three quick-connect terminals labeled 1, 2, and 3. The switch body also shows "FACTORY RATING 20A 14VDC 15A 14V TUNG."
Awọn ilana Iṣiṣẹ
The RecPro RV Rocker Switch is an On/On SPDT type, meaning it has two stable "ON" positions. It does not have an "OFF" position in the traditional sense, but rather switches between two different circuits or states.
- To activate the first circuit/state, press one side of the rocker switch.
- To activate the second circuit/state, press the opposite side of the rocker switch.
- The switch will remain in the last selected position until manually changed.

Aworan: A black RecPro RV Rocker Switch, showing its simple, rectangular design. This image illustrates the general appearance of the switch.
Itoju
The RecPro RV Rocker Switch is designed for durability and minimal maintenance.
- Self-Cleaning Contacts: The switch features self-cleaning contacts, which help to maintain optimal electrical conductivity and extend the lifespan of the switch.
- Ninu: If the switch surface becomes dirty, wipe it gently with a soft, dry cloth. Avoid using abrasive cleaners or solvents, as these can damage the plastic.
- Ayewo: Periodically inspect the switch and its wiring for any signs of wear, damage, or loose connections. Address any issues promptly.

Aworan: Diagram highlighting key features of the RecPro RV Rocker Switch, including self-cleaning contacts for prolonged lifespan, rigid self-locking panel mount for easy installation, and suitability for interior lighting and appliances.
Laasigbotitusita
If you encounter issues with your RecPro RV Rocker Switch, consider the following common troubleshooting steps:
- Yipada Ko Dahun:
- Ṣàyẹ̀wò bóyá a ti pèsè agbára sí ẹ̀rọ náà.
- Rii daju pe gbogbo awọn asopọ onirin wa ni aabo ati pe o ti pari ni pipe.
- Inspect for any blown fuses or tripped circuit breakers in the RV's electrical system.
- Iṣiṣẹ Laarin:
- Ensure connections are tight and free from corrosion.
- Confirm the switch is securely seated in its panel mount.
- Igbóná púpọ̀:
- If the switch feels hot to the touch, immediately disconnect power. This may indicate an overload or a short circuit.
- Ensure the connected load does not exceed the switch's 20 Amp igbelewọn.
If problems persist after performing these checks, it is recommended to contact RecPro customer support or a qualified RV technician.
Atilẹyin ọja ati Support
For warranty information or technical support regarding your RecPro RV Single Pole Double Throw Rocker Switch, please refer to the official RecPro webojula tabi kan si wọn onibara iṣẹ Eka taara. Tọju iwe-ẹri rira rẹ fun awọn ẹtọ atilẹyin ọja.
RecPro Contact Information: (Please refer to your product packaging or the official RecPro website for the most current contact details.)