CRLED 3256802861262657
Instruction Manual for Samsung Washing Machine Control Board Replacement
Awoṣe: 3256802861262657
1. Ifihan
This manual provides essential information for the installation, operation, and maintenance of the CRLED replacement control board for Samsung washing machines. This part is designed to replace specific Samsung washing machine control boards, including models WD12J8420GX /SC, DC92-01725A, DC92-01726A, and DC92-1724A. Please read this manual thoroughly before attempting any installation or repair.
2. Alaye Aabo
IKILO: Electrical shock hazard. Always disconnect power to the washing machine before servicing. Failure to do so can result in serious injury or death.
- Ensure the washing machine is unplugged from the power outlet before beginning any work.
- If you are not experienced with electrical repairs or appliance servicing, it is highly recommended to seek assistance from a qualified technician.
- Wọ àwọn ohun èlò ààbò ara ẹni tó yẹ, bíi àwọn ibọ̀wọ́ tí a fi ààbò pamọ́ sí, tí ó bá pọndandan.
- Handle the control board by its edges to avoid damaging electronic components or static discharge.
- Verify that the replacement part number matches the original part number before installation.
3. Ọja Ipariview
The replacement control board is a critical electronic component responsible for managing various functions of your Samsung washing machine. It integrates the main processing unit, power supply circuits, and connectors for various sensors, motors, and user interface components.
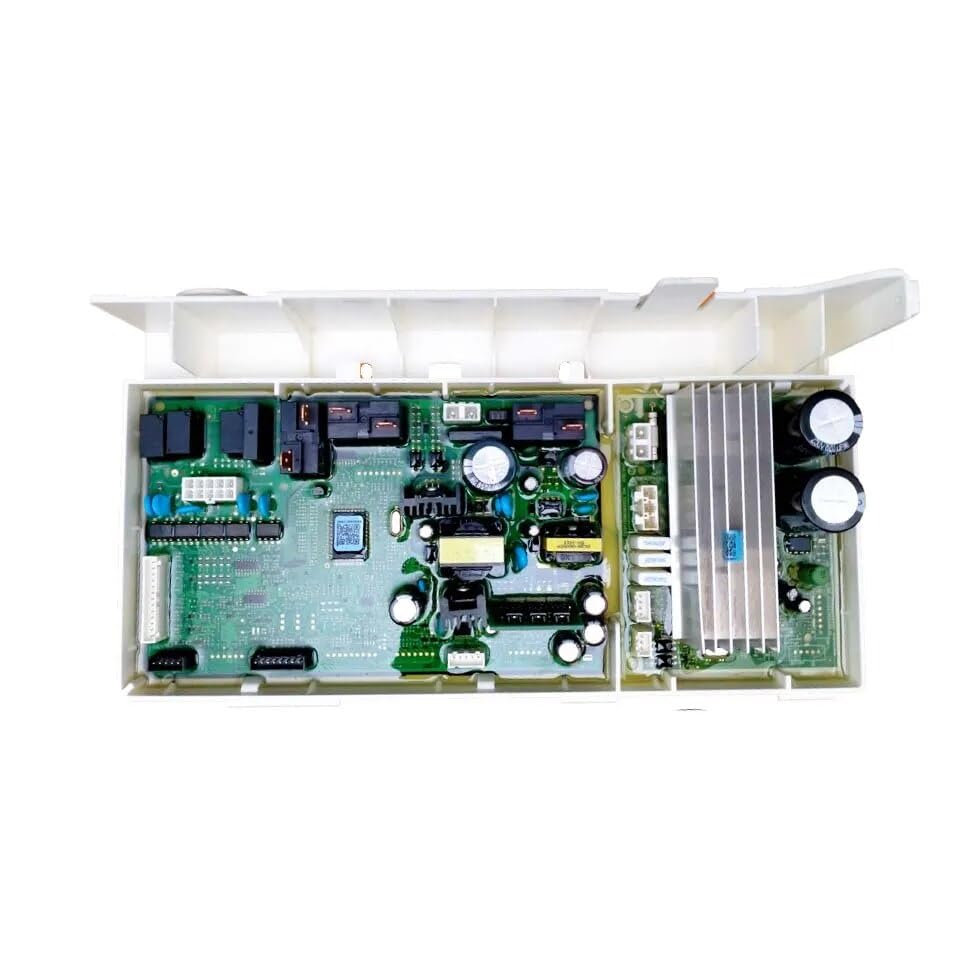
olusin 3.1: An loke view of the replacement washing machine control board, showing its various electronic components, circuits, and connectors.
4. Eto ati fifi sori
Installation of this replacement part requires technical knowledge and should only be performed by individuals familiar with appliance repair and electrical safety procedures.
- Ge Agbara: Yọ ẹ̀rọ fifọ kuro ninu ihò ogiri.
- Wọle si Igbimọ Iṣakoso: Depending on your washing machine model, you may need to remove the top panel, back panel, or front panel to access the existing control board. Refer to your washing machine's service manual for specific access instructions.
- Awọn isopọ iwe: Before disconnecting any wires, take clear photos or make detailed diagrams of all wire connections to the old control board. This is crucial for correct reassembly.
- Yọ Igbimọ atijọ kuro: Carefully disconnect all wire harnesses and mounting screws securing the old control board. Remove the old board.
- Fi sori ẹrọ Igbimọ Tuntun: Position the new replacement control board in the same location as the old one. Secure it with the appropriate mounting screws.
- Tun awọn onirin pọ: Using your documented photos/diagrams, carefully reconnect all wire harnesses to the new control board. Ensure all connections are secure and correctly seated.
- Tunṣe Ohun elo: Reattach any panels or covers that were removed to access the board.
- Iṣe idanwo: Plug the washing machine back into the power outlet. Perform a test cycle to ensure the new control board is functioning correctly and all washing machine operations are normal.
5. Awọn ilana Iṣiṣẹ
Once the replacement control board is successfully installed, the washing machine should operate according to its original manufacturer's specifications. No special operating procedures are required for the control board itself. Refer to your washing machine's user manual for specific operating instructions for your appliance model.
- After installation, run a short test cycle (e.g., Rinse & Spin) to confirm proper functionality.
- Check for any error codes displayed on the washing machine's panel.
- Ensure all washing cycles and functions (water fill, agitation, drain, spin) operate as expected.
6. Itọju
The control board itself requires minimal maintenance. To ensure its longevity and proper function:
- Jeki Gbẹgbẹ: Ensure the area around the control board remains dry and free from moisture, which can cause short circuits and damage.
- Mimọ: Periodically, if accessible and with power disconnected, gently remove any dust or debris that may accumulate on the board using a soft brush or compressed air.
- Yago fun Bibajẹ Ti ara: Protect the board from impacts or excessive vibrations.
7. Laasigbotitusita
If you encounter issues after replacing the control board, consider the following troubleshooting steps:
- Ko si Agbara/Ko si Iṣẹ:
- Ṣàyẹ̀wò bóyá ẹ̀rọ fifọ náà ti so mọ́ ihò ìtajà tí ó ń ṣiṣẹ́ dáadáa.
- Rí i dájú pé ẹ̀rọ fifọ ẹ̀rọ náà kò tíì yípadà.
- Ensure all wire harnesses are securely connected to the new control board.
- Awọn koodu aṣiṣe:
- Consult your washing machine's user manual or service manual for the meaning of specific error codes.
- Some error codes may indicate issues with other components, not necessarily the control board itself.
- Incorrect Operation:
- Double-check all wire connections against your documented diagrams to ensure they are correctly matched.
- Ensure the replacement board is the correct model for your washing machine.
- Awọn oran ti o duro: If problems persist after checking connections and verifying the correct part, it is advisable to contact a qualified appliance repair technician for diagnosis and repair.
8. Awọn pato
| Brand | CRLED |
| Nọmba awoṣe | 3256802861262657 |
| Part Numbers Replaced | WD12J8420GX /SC, DC92-01725A, DC92-01726A, DC92-1724A |
| Olupese | CRLED |
| ASIN | B0CM275KLH |
| Ọjọ Akọkọ Wa | Oṣu Kẹwa Ọjọ 29, Ọdun 2023 |
9. Atilẹyin ọja ati Support
Warranty information for this replacement part is typically provided by the seller or manufacturer at the time of purchase. Please refer to your purchase documentation or contact the seller directly for details regarding warranty coverage, returns, and technical support.
For further assistance or professional repair, please contact a certified appliance technician.
Ask a question about this manual
Ask about setup, troubleshooting, compatibility, parts, safety, or missing instructions. Manuals+ will review the question and use this page’s manual context to help answer it.